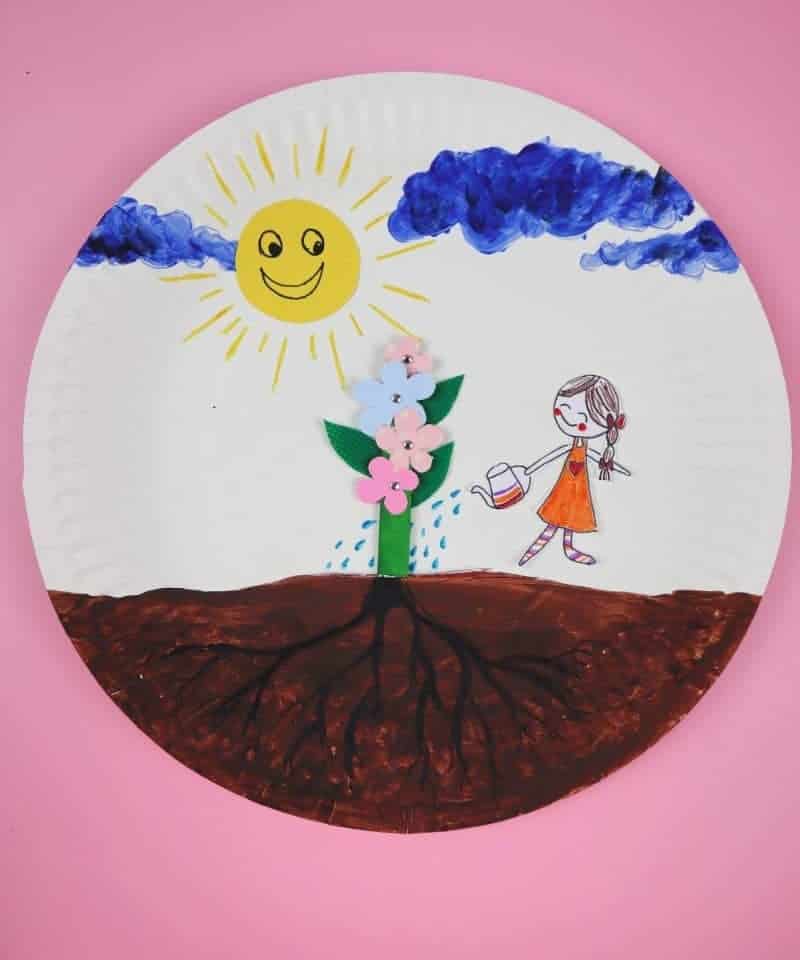
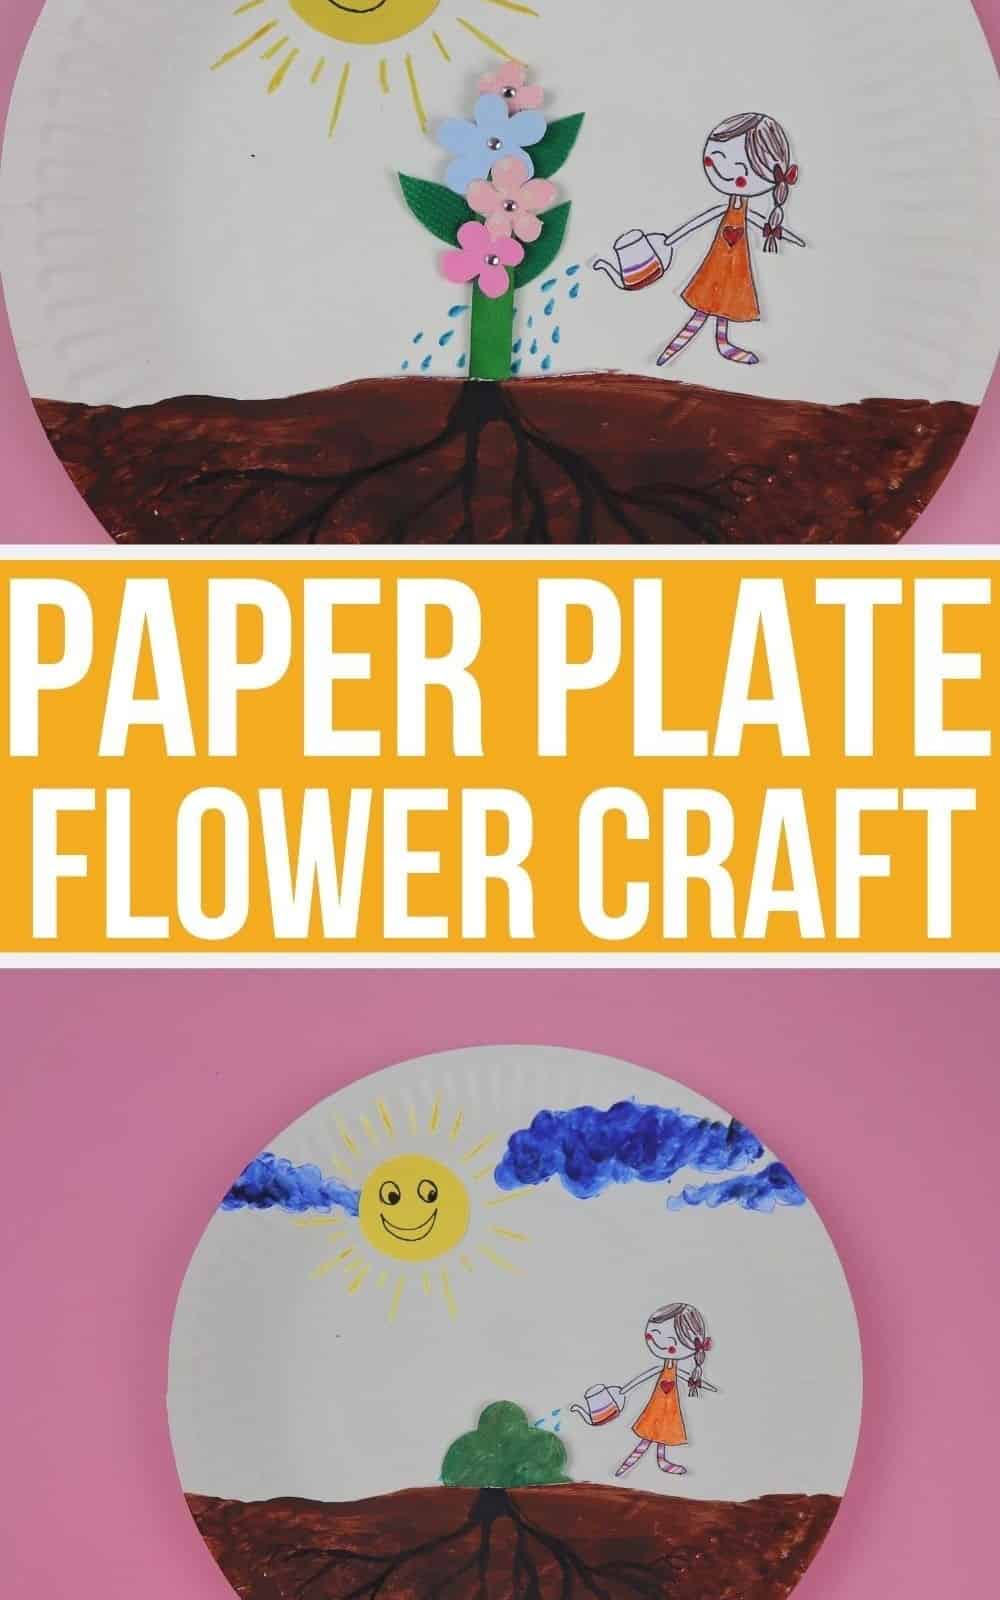
Imagine a fun-filled weekend activity that’s both easy on the wallet and delightful for the little ones. Paper plates are often overlooked as a creative medium, but this DIY project will change your mind. By combining 2D summertime scenes with 3D flowers, you can create a one-of-a-kind wall decoration that kids will adore.
Whether you’re a parent looking for a special bonding experience or a preschool teacher seeking an engaging activity to fill the classroom with joy, this project has got you covered. The best part? All the necessary supplies are readily available in most homes and classrooms, making it accessible to everyone. Simply gather your materials, pull up a chair with the kids, and let their creativity shine!
What You’ll Need
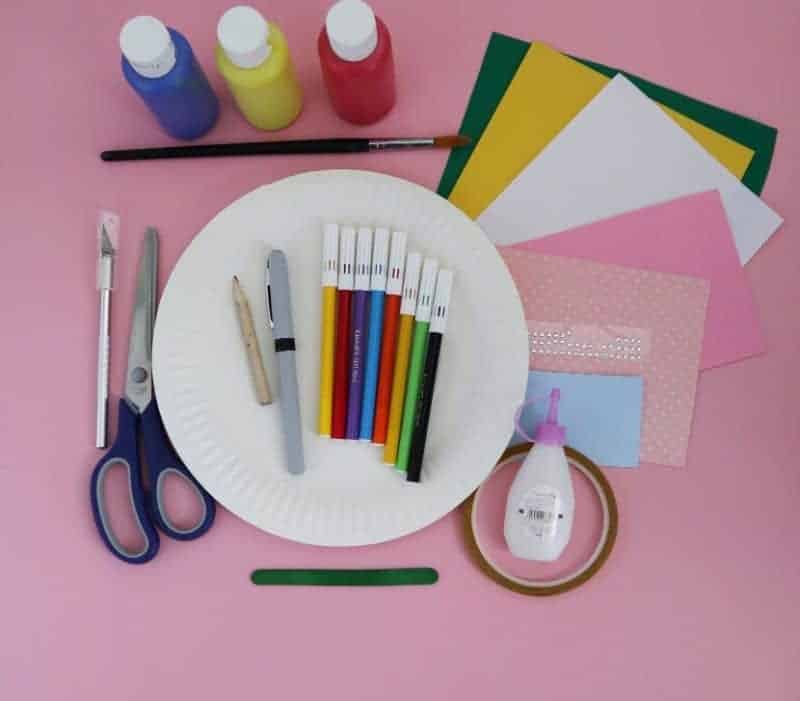
To get creative, you’ll need the following materials: a humble paper plate, a green craft stick (or its colorful counterpart, the dyed lolly stick), a trusty glue, some vibrant construction paper, and a palette of acrylic paint. For added flair, bring along markers, a pencil, and pen to add details and personal touches. Don’t forget the essentials: scissors for trimming, a brush for blending colors, and a safety cutter for precise cuts.
How to Make This Paper Plate Flower Craft
To unlock the full potential of paper plates, follow this easy-to-follow guide and discover innovative ways to elevate their use.
Step 1
When it comes to unleashing your child’s creativity, having the right tools is essential. Fortunately, you have a lot of flexibility when it comes to choosing mediums. Consider letting your kids decide which tool they want to use – whether it’s markers, paper, or even paints. As I did with my own children, feel free to switch between different materials to keep things fresh and exciting.
Step 2
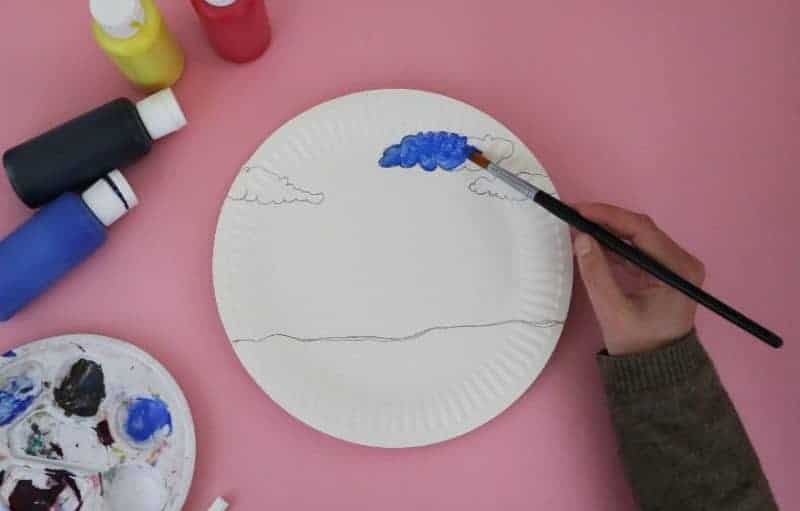
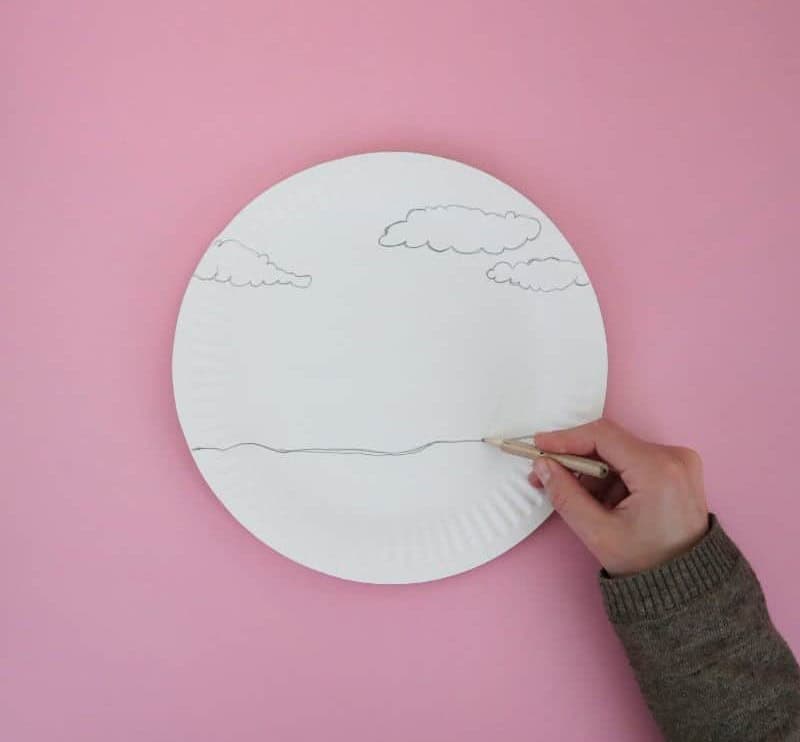
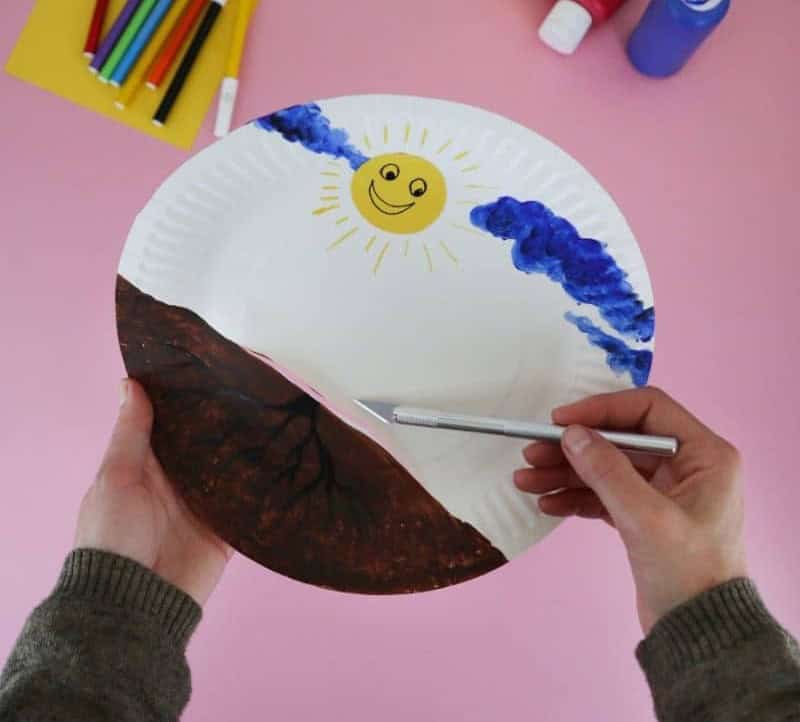
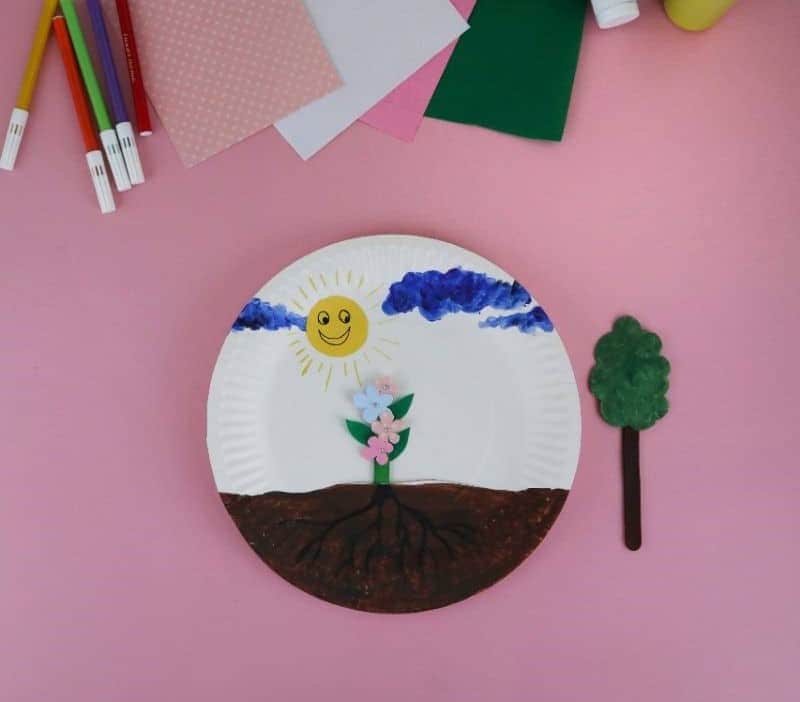
Begin by roughing out the cloud formations and landscape on a large sheet of paper or cardboard. Use the curved shape of the paper plate as inspiration to add depth and dimensionality to the ground. If you’re working with young children, consider taking charge of this step to set the stage for their coloring adventure. This initial sketch will serve as the foundation for your creative masterpiece.
Step 3
Bring the scene to vibrant life by unleashing your creativity! Break out the paints, markers, or paper and let your imagination run wild. Inspire your little ones to explore different mediums and techniques, and watch as they transform the clouds into a kaleidoscope of colors and textures.
Step 4
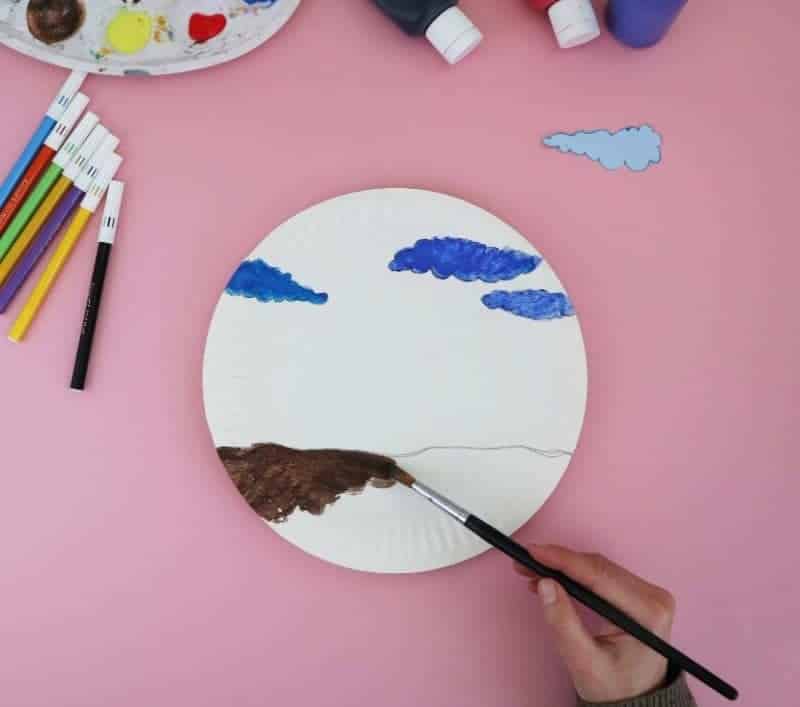
As you set out to bring your intergalactic landscape to life, don’t forget to give its foundation a splash of creativity. Grab a brush or marker and let your child’s imagination run wild with the terrain. The earthy hue I opted for was brown soil, but feel free to get creative – why not envision plants sprouting forth from the ground on an otherworldly planet? It’s all about embracing the possibilities in this imaginative exercise!
Step 5

As we embark on this creative journey, let’s bring in the warmth and energy of the Sun. To achieve this, I opted for a simple yet effective approach – using yellow construction paper as the base, and then adding textured rays with a vibrant yellow marker to give our diorama a 2D/3D dimension, expertly blurring the lines between depth and flatness.
Step 6
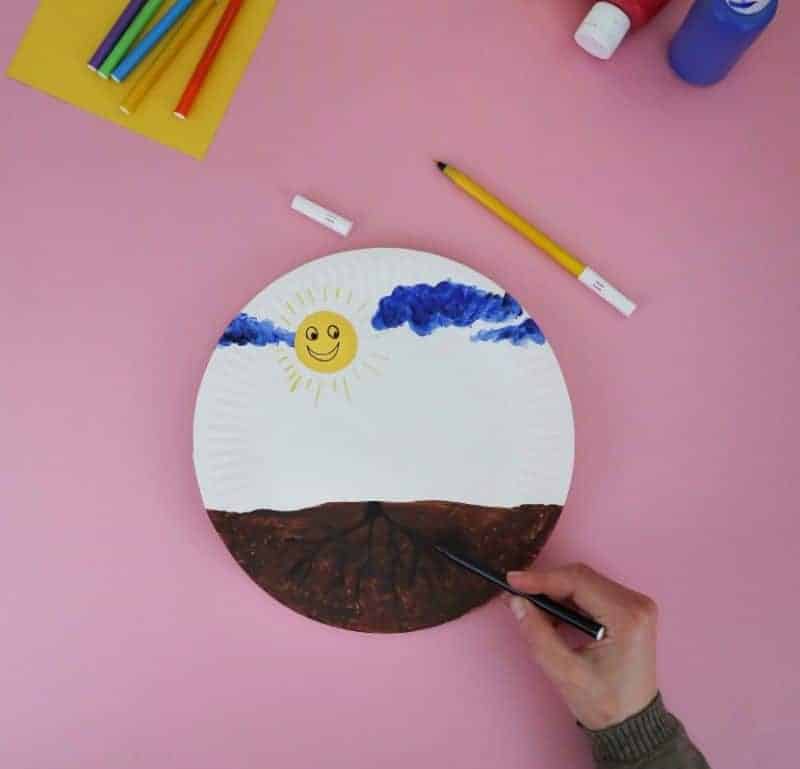
As you begin to bring your flower arrangement to life, take this opportunity to introduce your child to the fascinating world of plant biology. Encourage them to identify where the stem meets the soil and gently guide their drawing skills as they create a root system that descends into the earth. This simple exercise not only helps develop fine motor skills but also fosters an appreciation for the intricate workings of plants, setting the stage for further exploration and discovery.
Step 7
Now, things start to get really interesting. Take out your craft knife and carefully make an incision in the paper plate at the point where the plant’s roots meet the soil surface. Ensure that the notch is broad enough for the flowers or stems to fit comfortably within it.
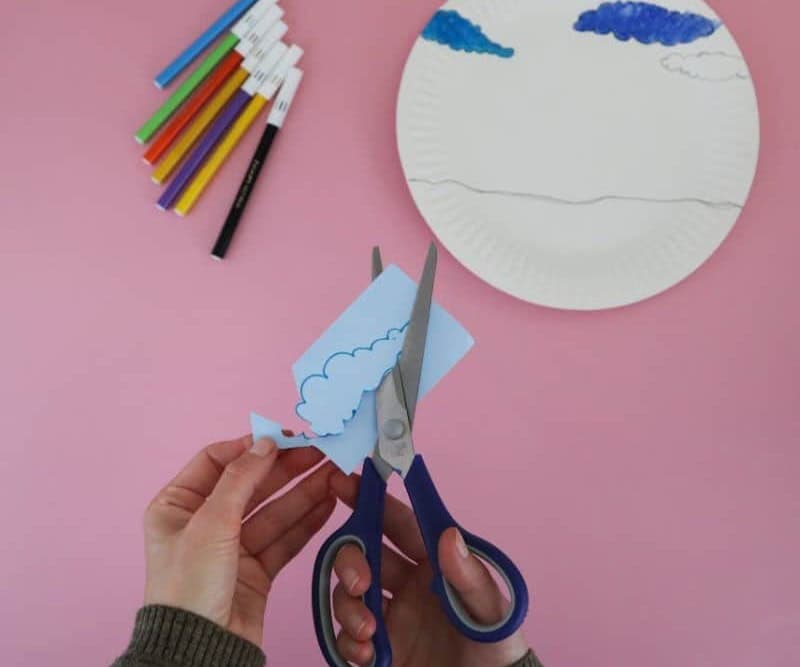
Step 8
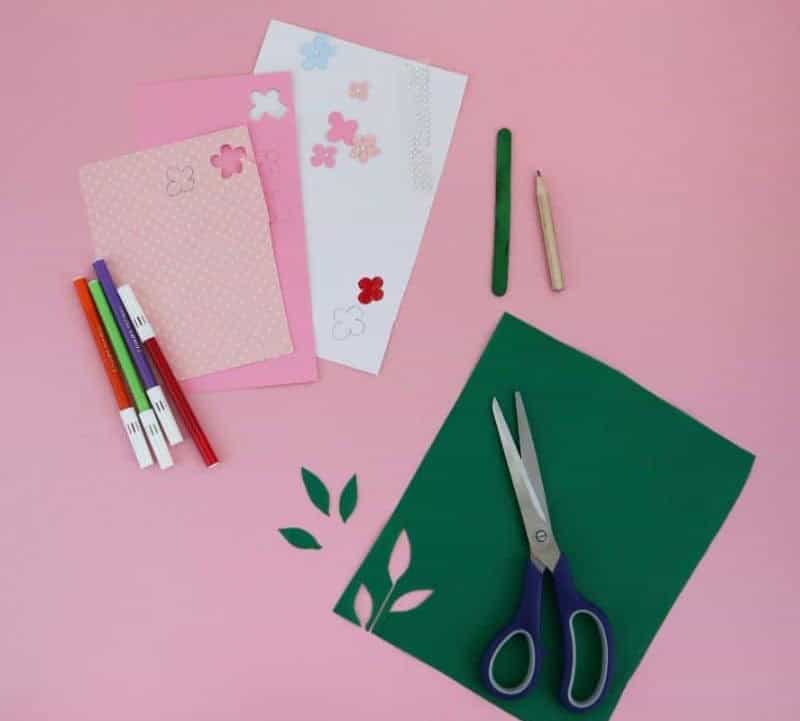
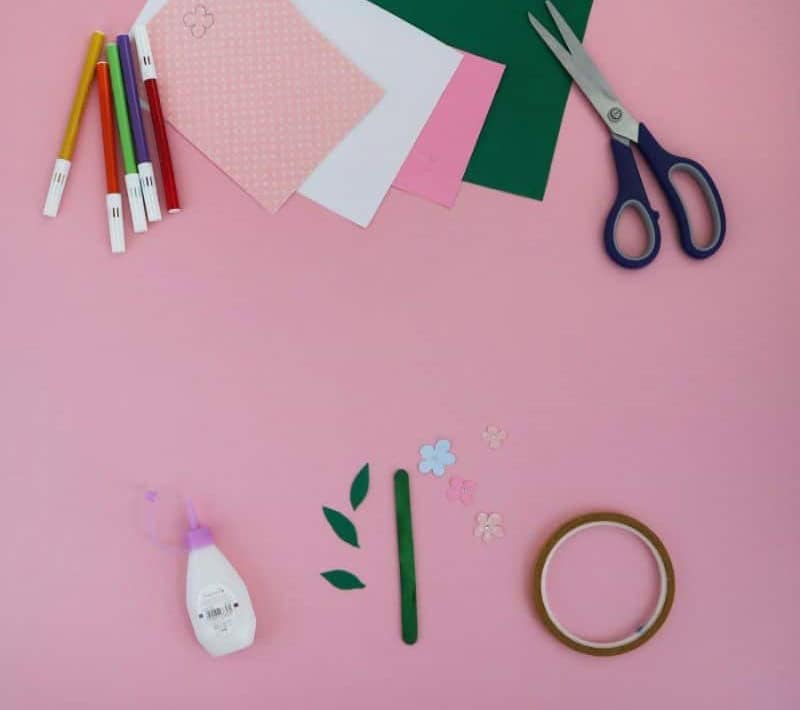
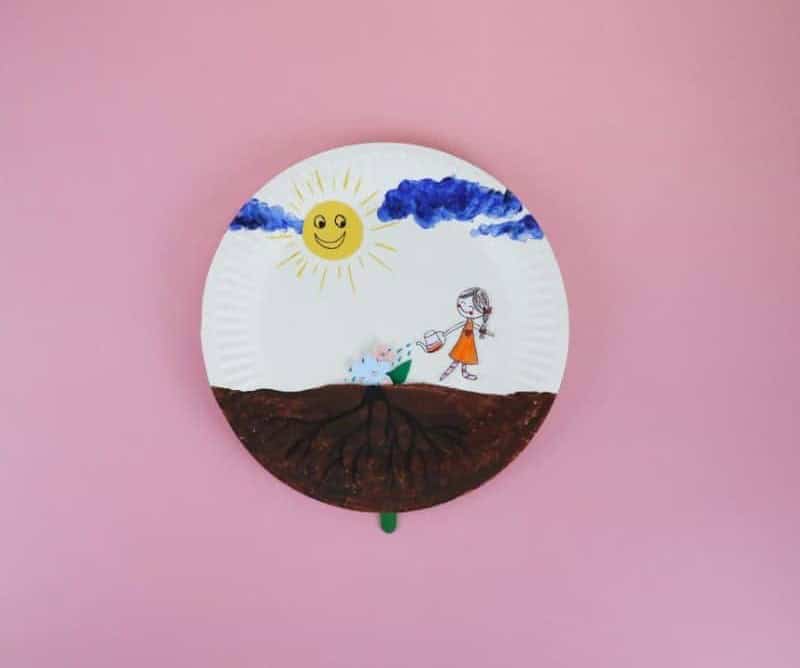
Create stunning floral arrangements using everyday materials! For this DIY project, your foundation will be a humble popsicle stick, serving as the ‘stem’ of our artificial blooms. To craft the leaves and flowers, you can either cut them out from colorful paper scraps or use a white paper marker to draw and then cut out intricate designs.
Step 9
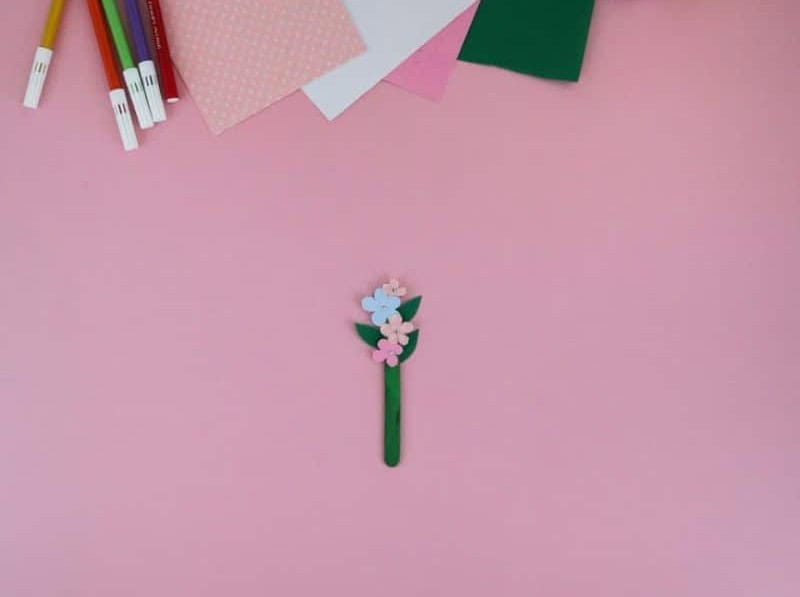

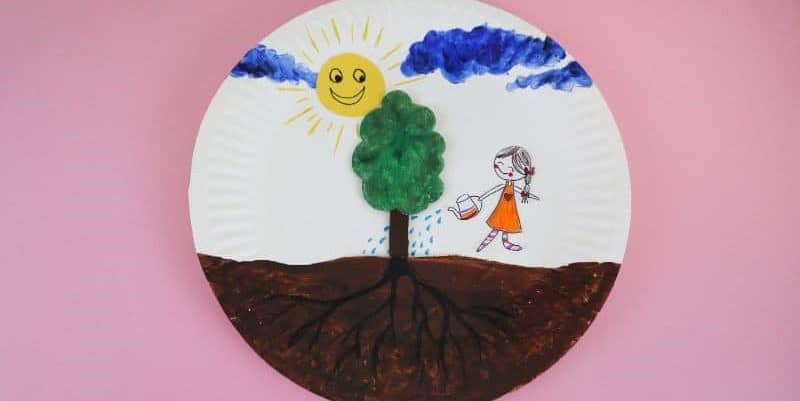
To bring your DIY flower stems to life, have your child attach the various components to the stem and secure them with glue. Layering the elements is key to achieving the best visual effect, so feel free to experiment and find a combination that works for you! If flowers aren’t their cup of tea, suggest they try creating other types of vegetation, such as trees, vegetables, or even a lush forest.
This open-ended project allows kids to tap into their creativity and imagination, making it a fun and engaging experience.
Step 10
After the adhesive has fully set, assist your little one in carefully guiding the flower or tree stem through the small opening on the paper plate. Be mindful not to secure it permanently, as this will be important for the next step.
Step 11
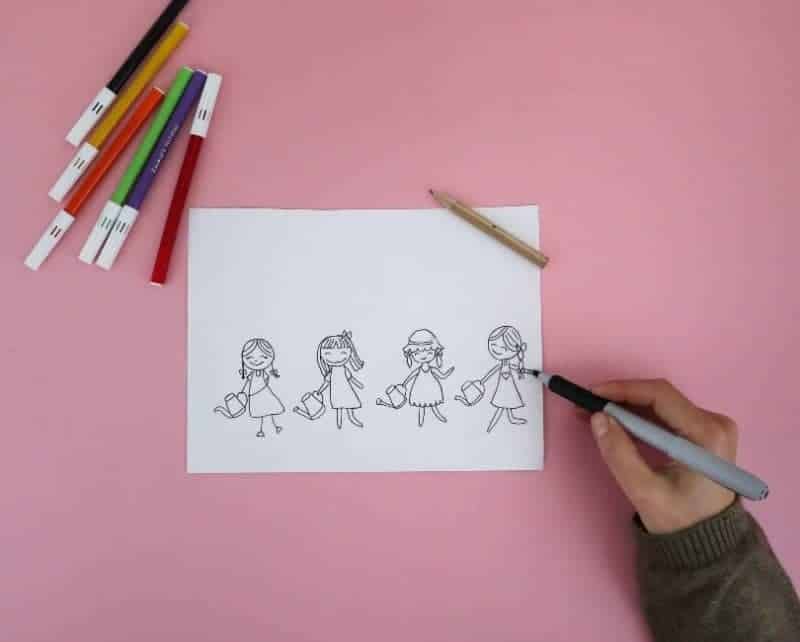
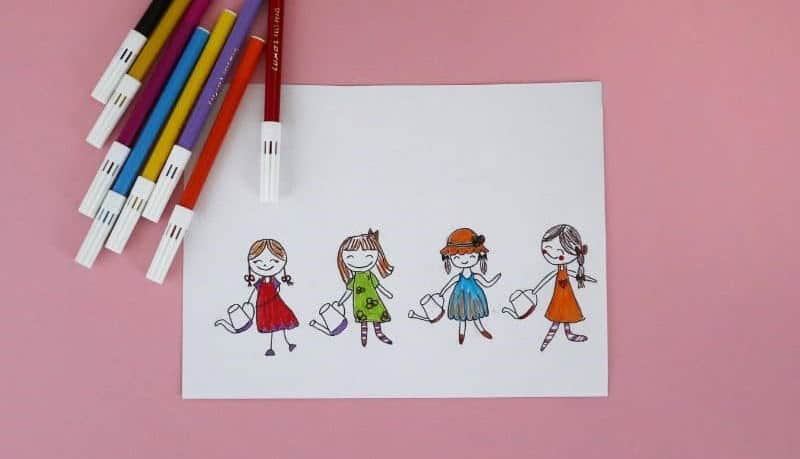
Now it’s time for your child to become an integral part of the illustration! Encourage them to draw themselves into the scene, carefully placing a watering can in their hand, mirroring the direction of the plant. You can use the examples I provided above as inspiration or let your child’s creativity shine through by coming up with something entirely new. The possibilities are endless!
Step 12
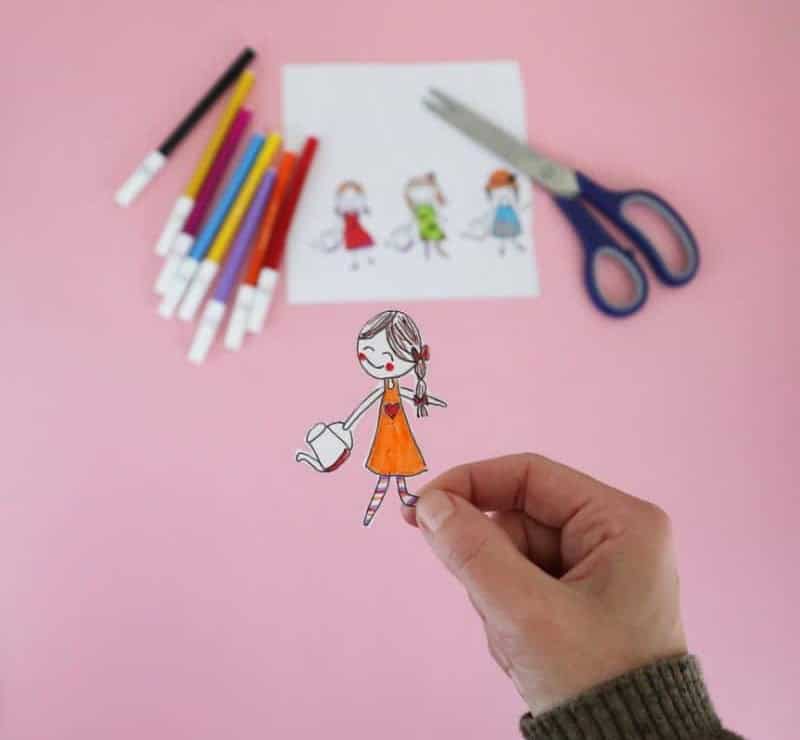
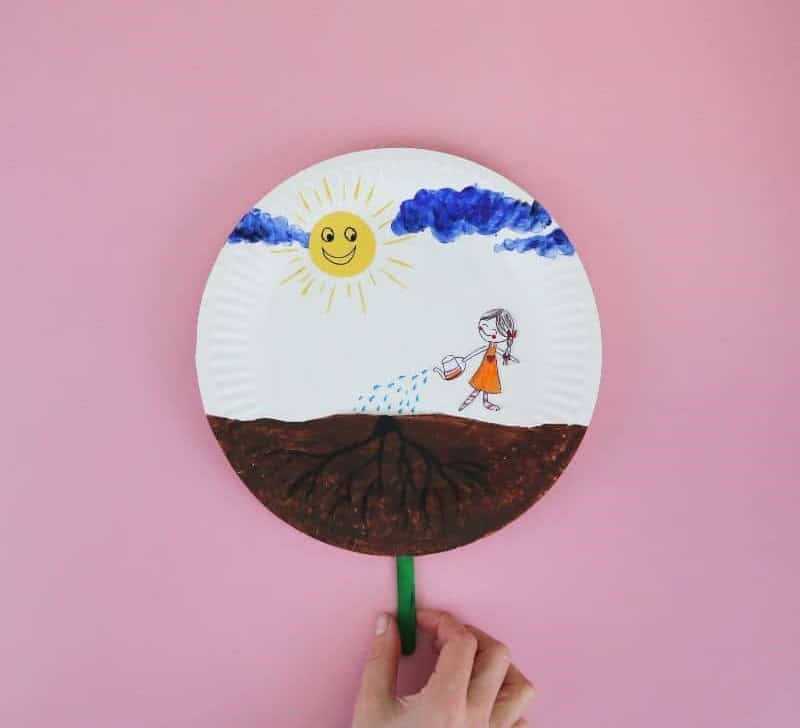
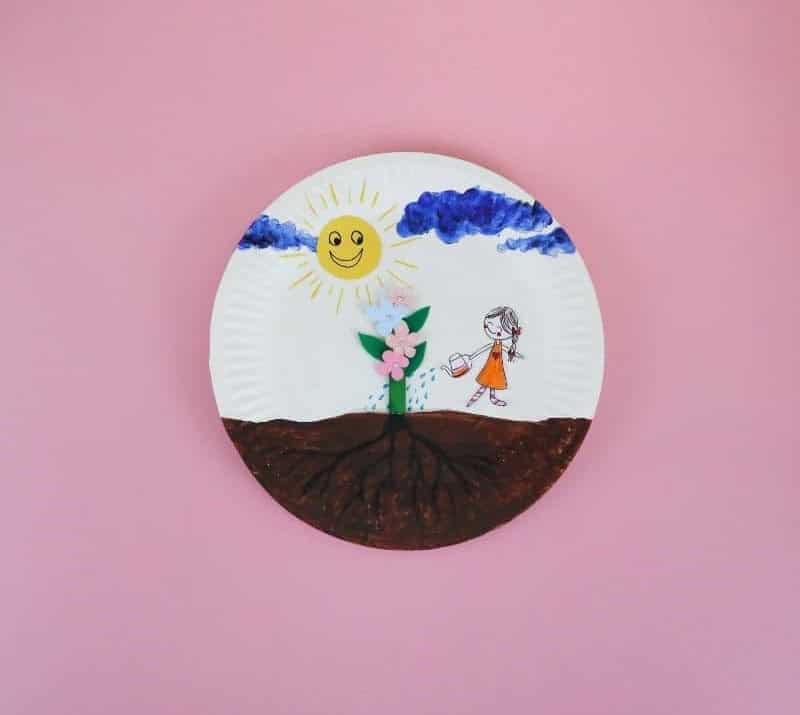
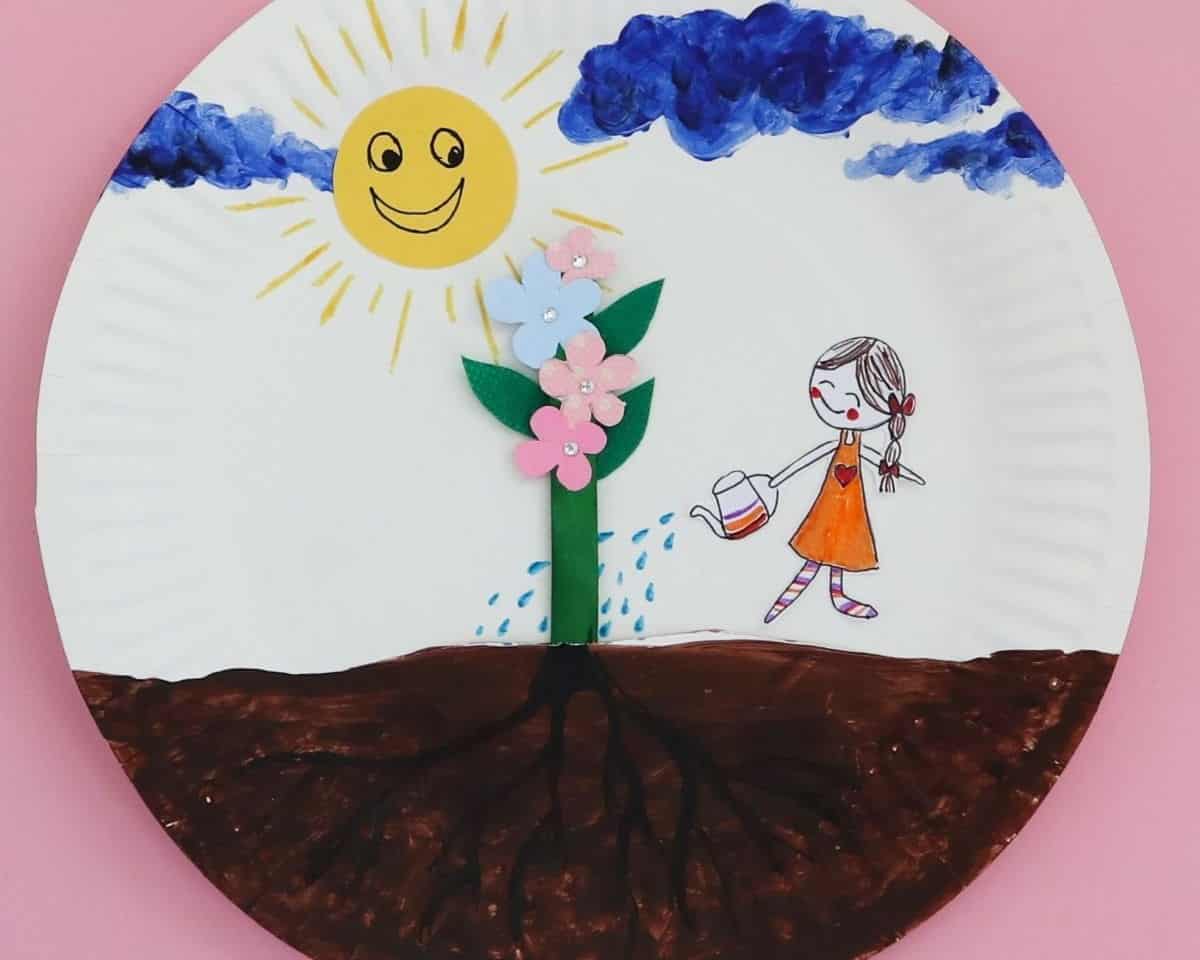
To complete the scene, carefully remove the drawing from its backing, apply a thin layer of adhesive to the reverse, and secure it to the paper plate. Add some blue droplets emanating from the watering can to add a touch of realism. This unusual arrangement serves a purpose, however – it’s part of a kid-friendly craft project that doubles as an educational tool.
By manipulating the popsicle stick through the notch in the paper plate, your child can create the illusion of nurturing their very own plant. This interactive exercise provides a unique opportunity to teach youngsters about the fundamental needs plants require to thrive: nourishment from the soil, hydration from freshwater, and illumination from sunlight. It’s an engaging way to introduce the concept of photosynthesis and plant growth.
Other Crafts for Kids
If you’re looking for more ideas to get kids crafting, CraftsyHacks has a wealth of inspiration. We’ve compiled a selection of our most popular kid-friendly craft projects that are sure to spark their creativity and keep them engaged. From DIY paper wallets and popsicle stick creations to picture frames and upcycled masterpieces, we have it all covered.
Check out some of our top picks: DIY Paper Wallets for Kids to Make, 20 Popsicle Stick Crafts Kids Will Love, 20 Fun Crafts for Kids That Will Keep Them Busy, DIY Picture Frames, 20 Paper Crafts, and more. Whether you’re a parent looking for ways to keep your little ones occupied or an educator seeking engaging activities for the classroom, we’ve got you covered.
Paper Plate Flower Craft
This DIY paper plate craft serves as both an educational tool and a fun activity for kids to enjoy. With just 5 minutes of preparation, you can create a unique and engaging experience that will keep young minds stimulated. The active crafting time is approximately 50 minutes, making the total project duration around 55 minutes. This versatile craft can be used to serve one child or a group, offering endless possibilities for creativity and learning.
Equipment
To avoid losing your train of thought, it’s crucial to prevent your screen from dimming unexpectedly. To achieve this, simply ensure that your device settings are configured to maintain a certain level of brightness or adjust the auto-lock timer to prolong the screen’s illuminated state.
Materials 1x2x3x
To get started with this creative project, you’ll need a few basic supplies. First, gather a plain paper plate that can be used as the base for your design. In addition to the plate, you’ll also need a green craft stick or dyed lolly stick, which will serve as the stem of your leaf. For the leaves themselves, you’ll require some construction paper in various shades of green. To add some color and personality to your final product, you’ll need acrylic paint and markers.
Instructions
To bring your scene to life, start by gathering all the necessary art supplies from your stash. Begin by sketching out the clouds and land, then fill them in with paint or your preferred medium. Next, create a Sun for your scene using paper and a marker for the rays, or choose your own method. For the plant, begin by cutting a notch into the paper plate that’s wide enough to fit the plant through.
You can either cut out flower and leaf shapes from colored paper or draw them on white paper before cutting them out. Assemble the leaves and blooms onto a prepared popsicle stick, and you can create anything from a tree to a vegetable garden. Gently insert the completed plant through the notch. Finally, have your child sketch and color themselves in, holding a watering can if desired. Cut out their figure and glue it next to the 3D vegetation.
With this finished project, you’ll have a great opportunity to explain how plants grow to your child.