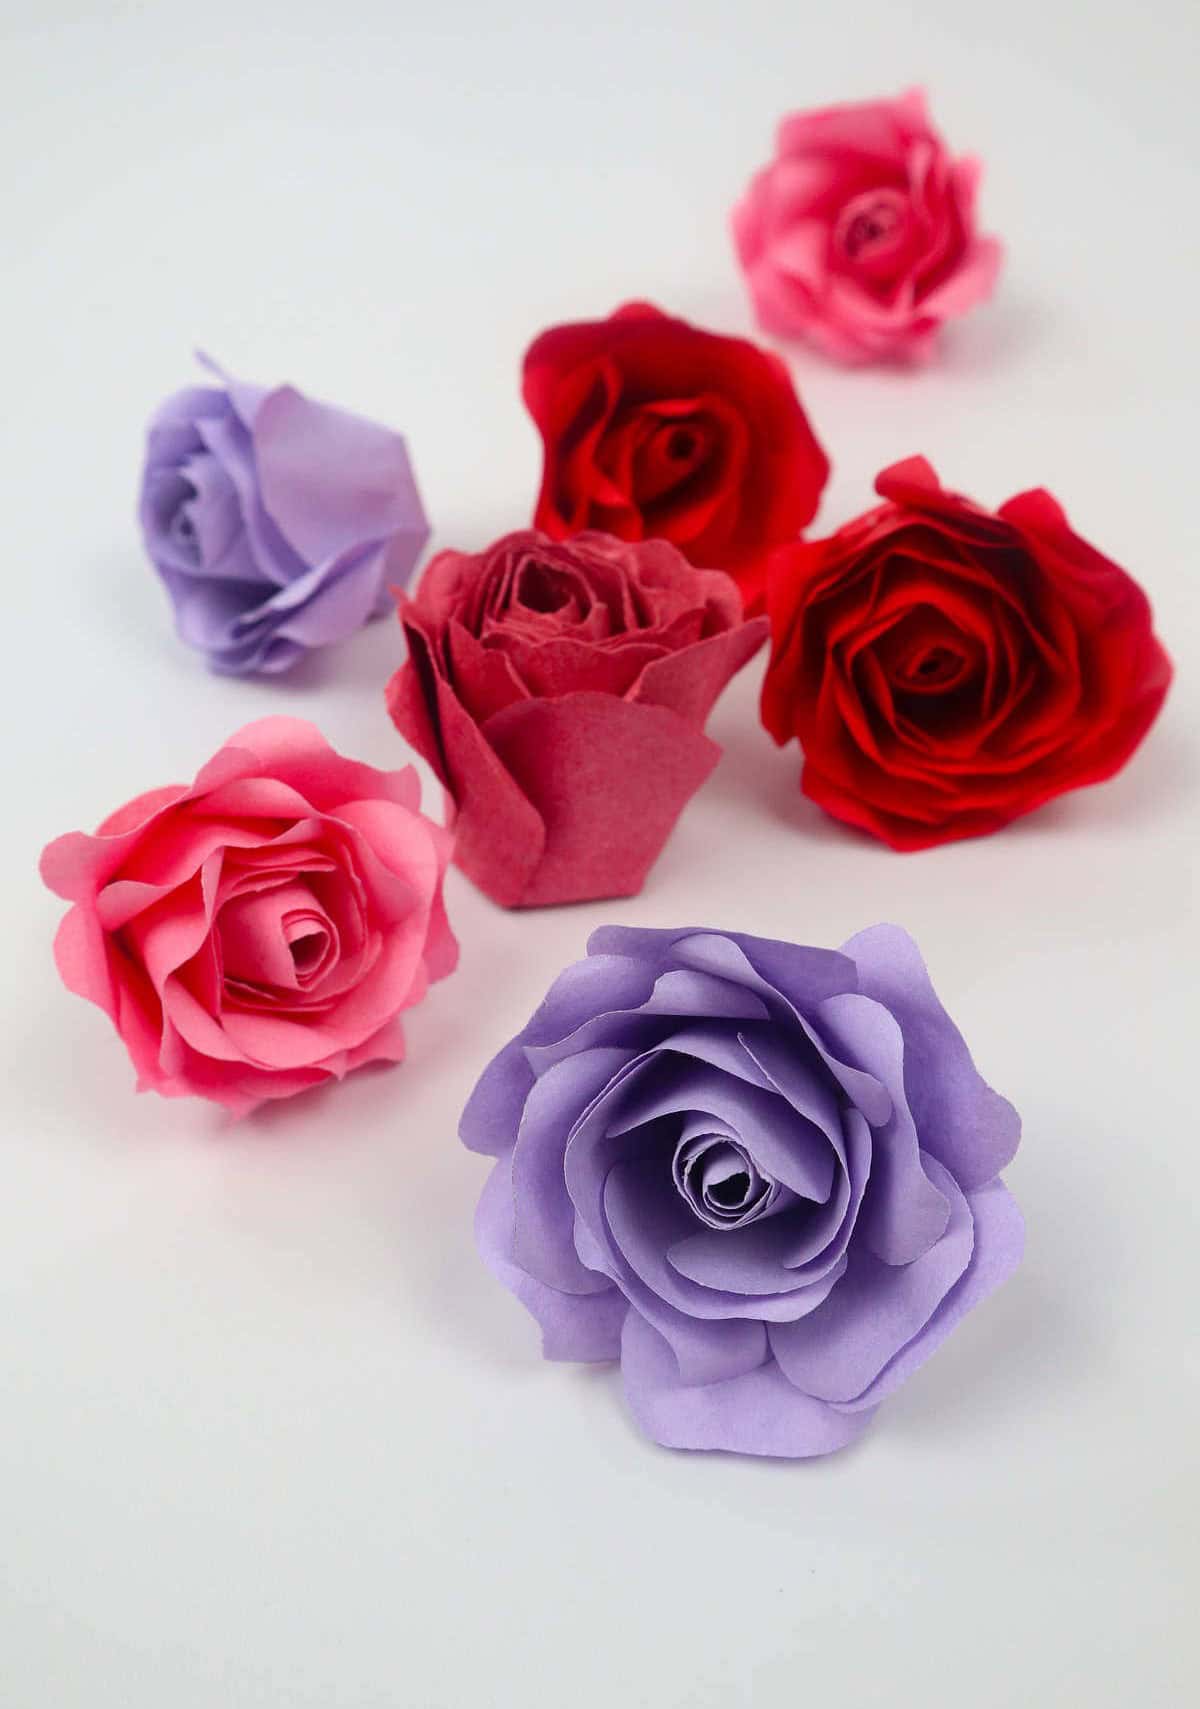
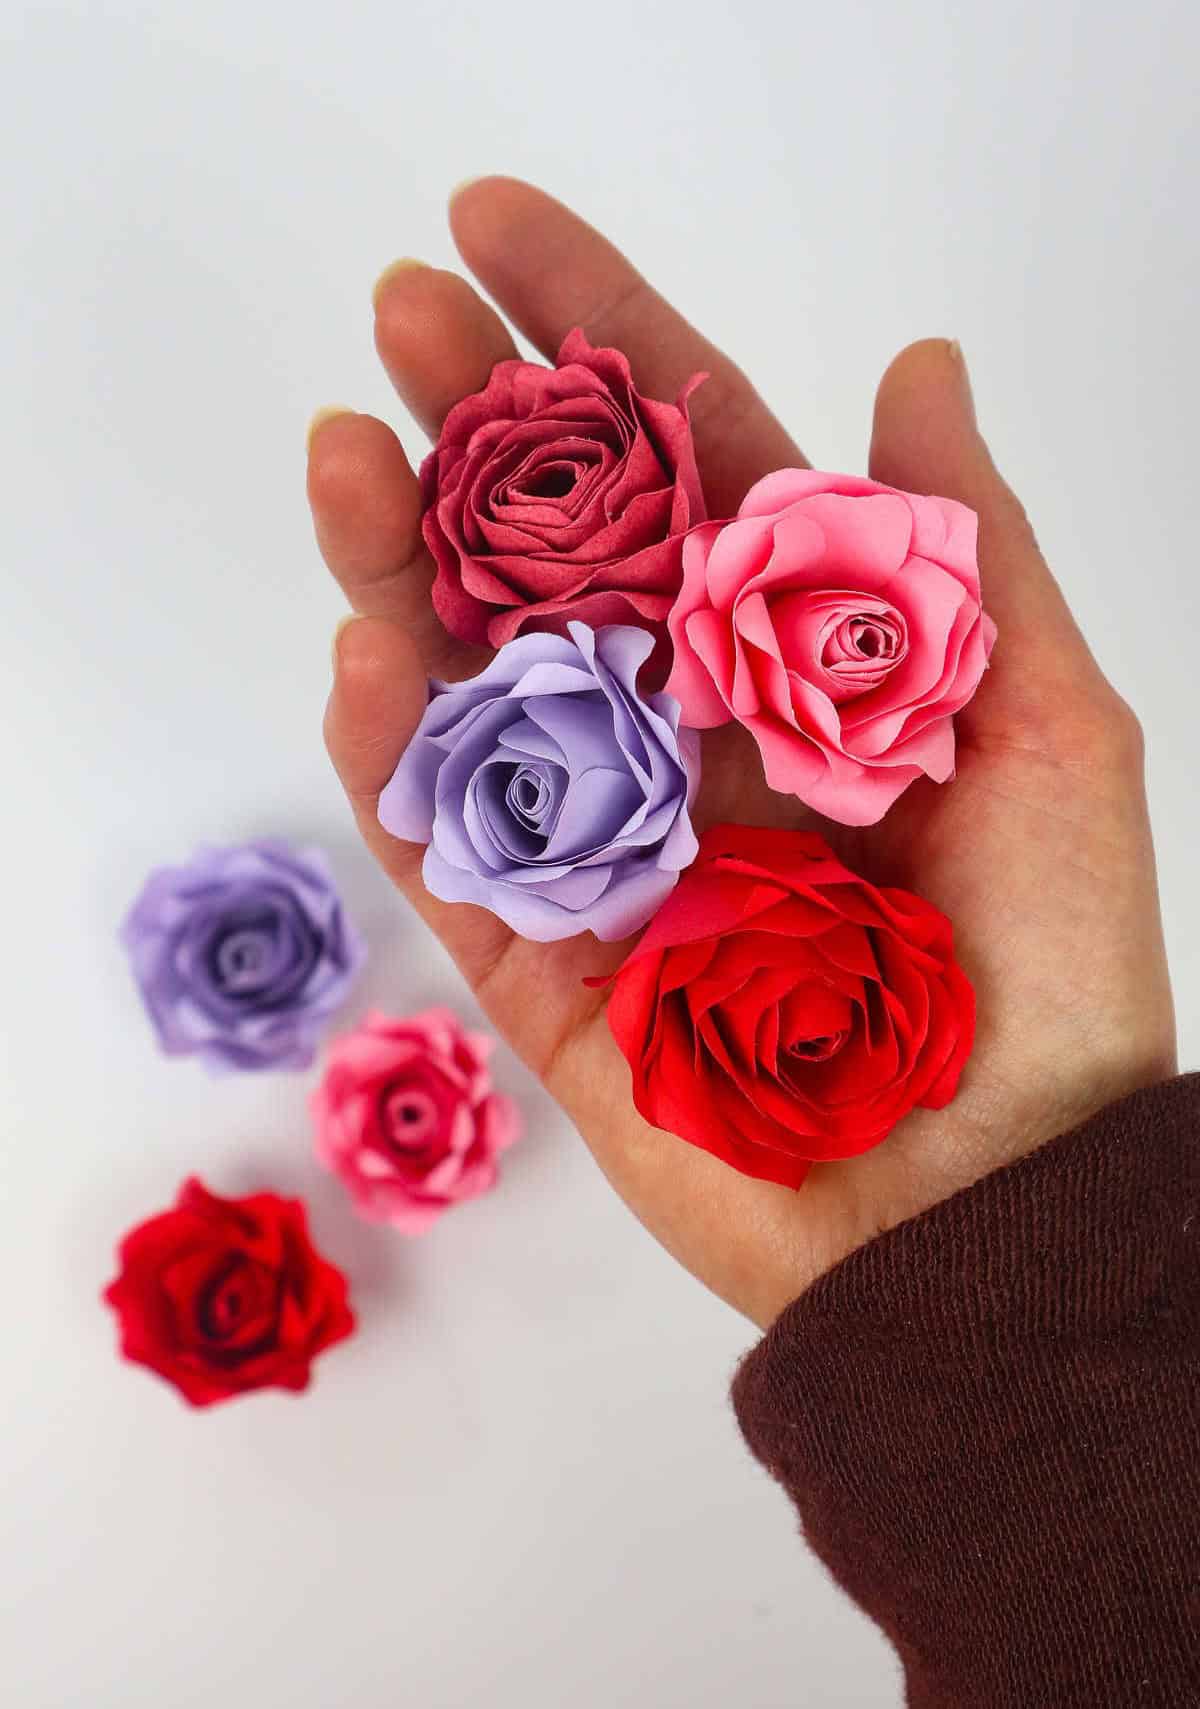
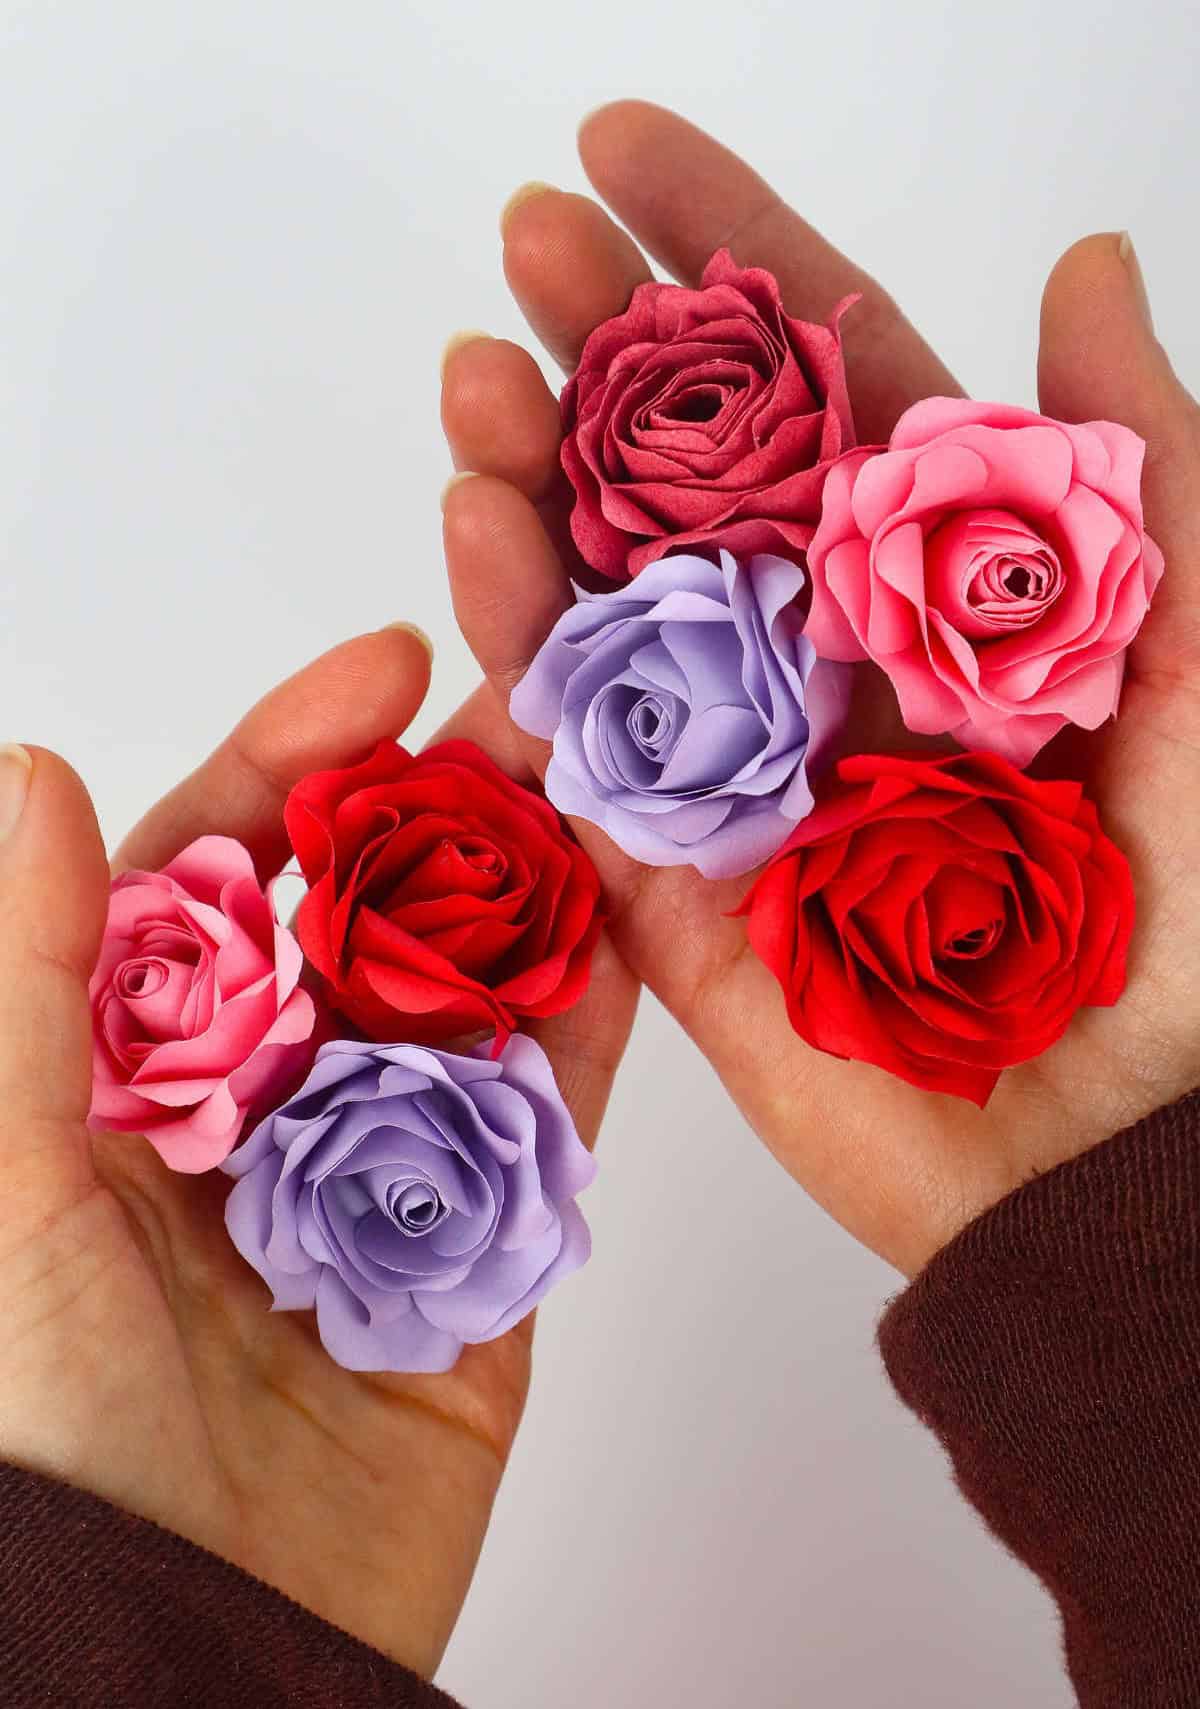
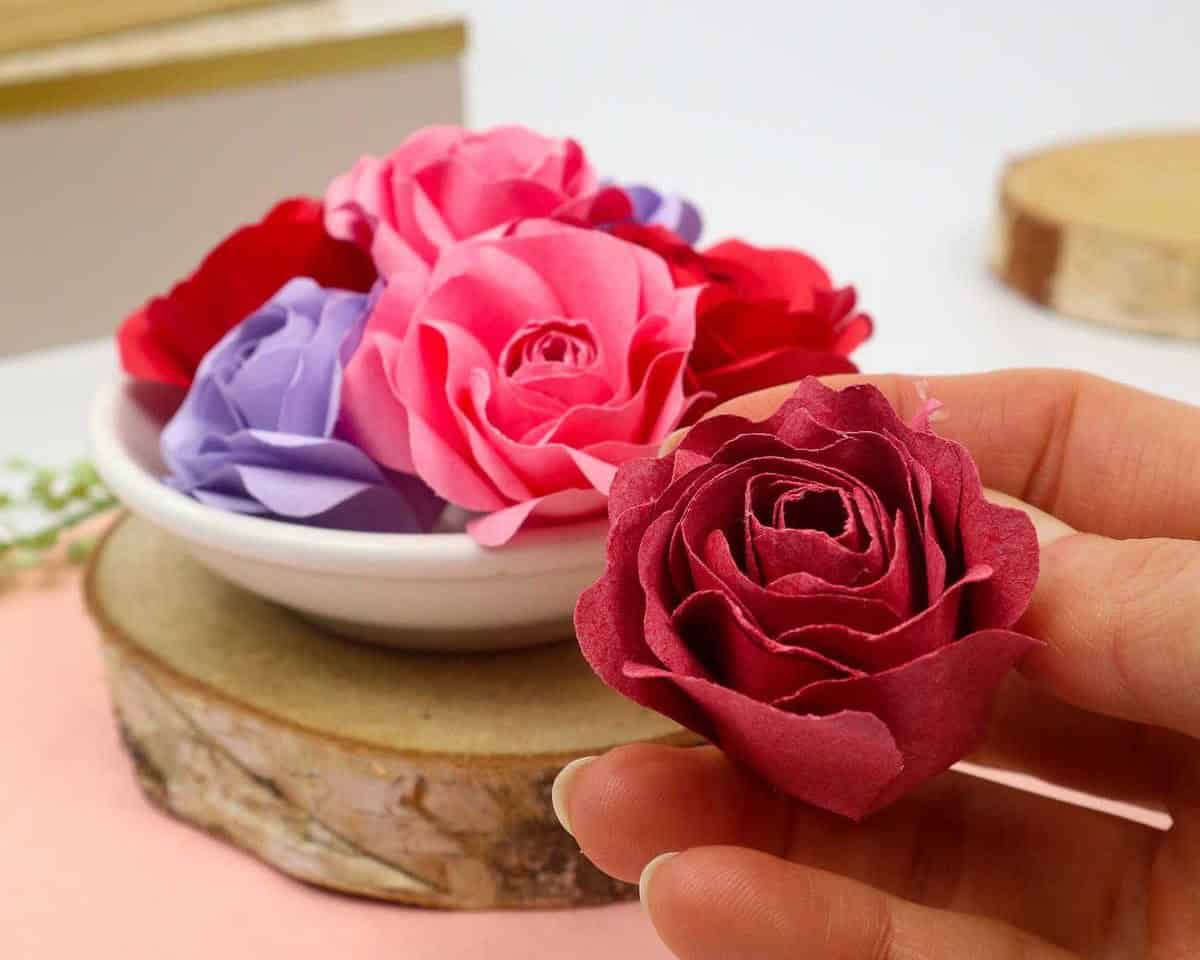
Paper roses are a delightful way to add a touch of elegance to any project or setting. With just a few simple materials, you can create your own beautiful blooms that will last long after the fresh flowers have wilted. In fact, making paper roses is so enjoyable and rewarding that you may find yourself making dozens at a time!
As you work through this step-by-step tutorial, you’ll discover how easy it is to transform plain paper into stunning works of art that can be used to adorn gifts, decorate rooms, or even create unique jewelry. And the best part? You can customize your roses with any color or design you like, making them a truly personal and creative expression.
Supplies and Tools You’ll Need
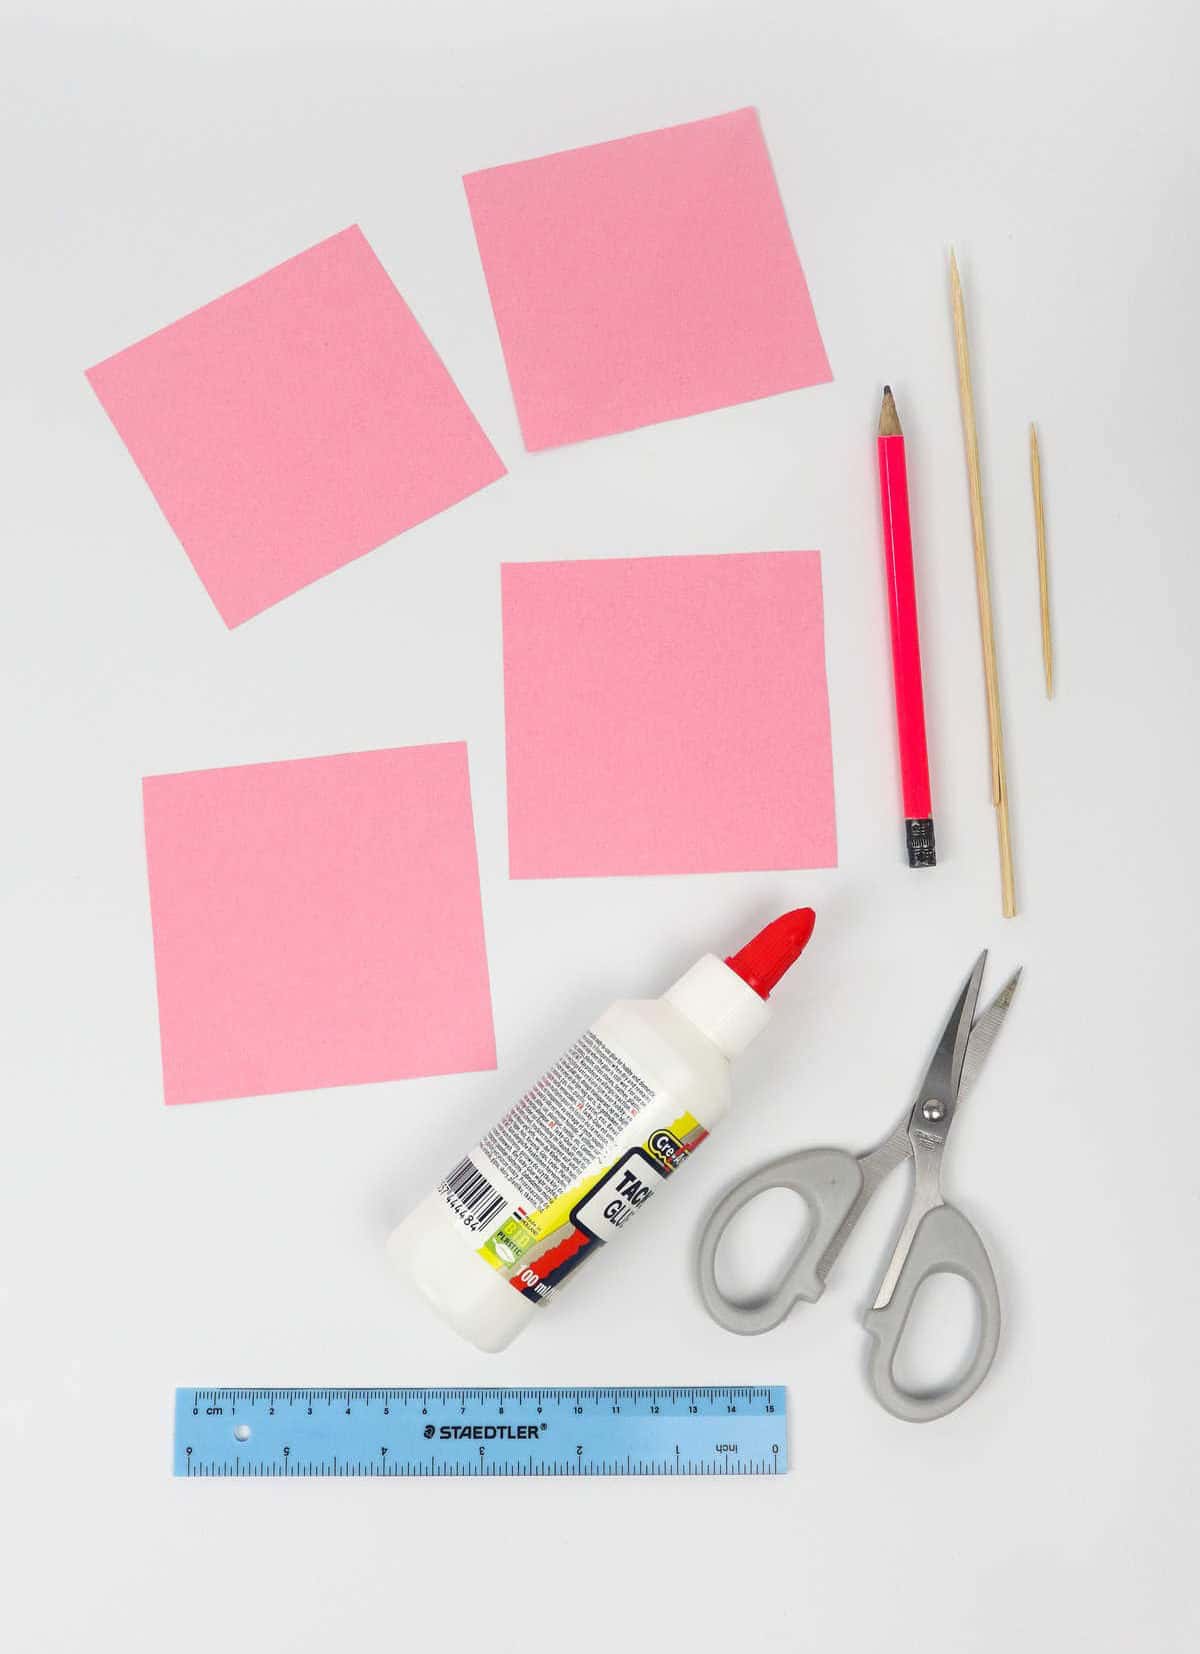
To create your DIY craft, you will need a few basic supplies. These include four square sheets of paper, each measuring 3.5 inches by 3.5 inches. Additionally, you’ll require a pencil for drawing and writing, scissors to cut out shapes or trim edges, paper glue to bond materials together, a toothpick for precise manipulation, a wooden skewer for creating unique textures, and a ruler to ensure straight lines.
How to Make Paper Roses
To begin, it’s essential to select the right paper for your project, as the type and color of paper can significantly impact the final appearance of your paper flowers. This is because different papers have unique textures, weights, and colors that will affect how your roses turn out. For instance, a heavier paper with a more rustic texture might produce a more dramatic, lifelike bloom, while a lighter, smoother paper could yield a more delicate, ethereal look.
So take the time to browse through your paper options and choose the one that best fits the vision you have for your finished flowers.
Step 1
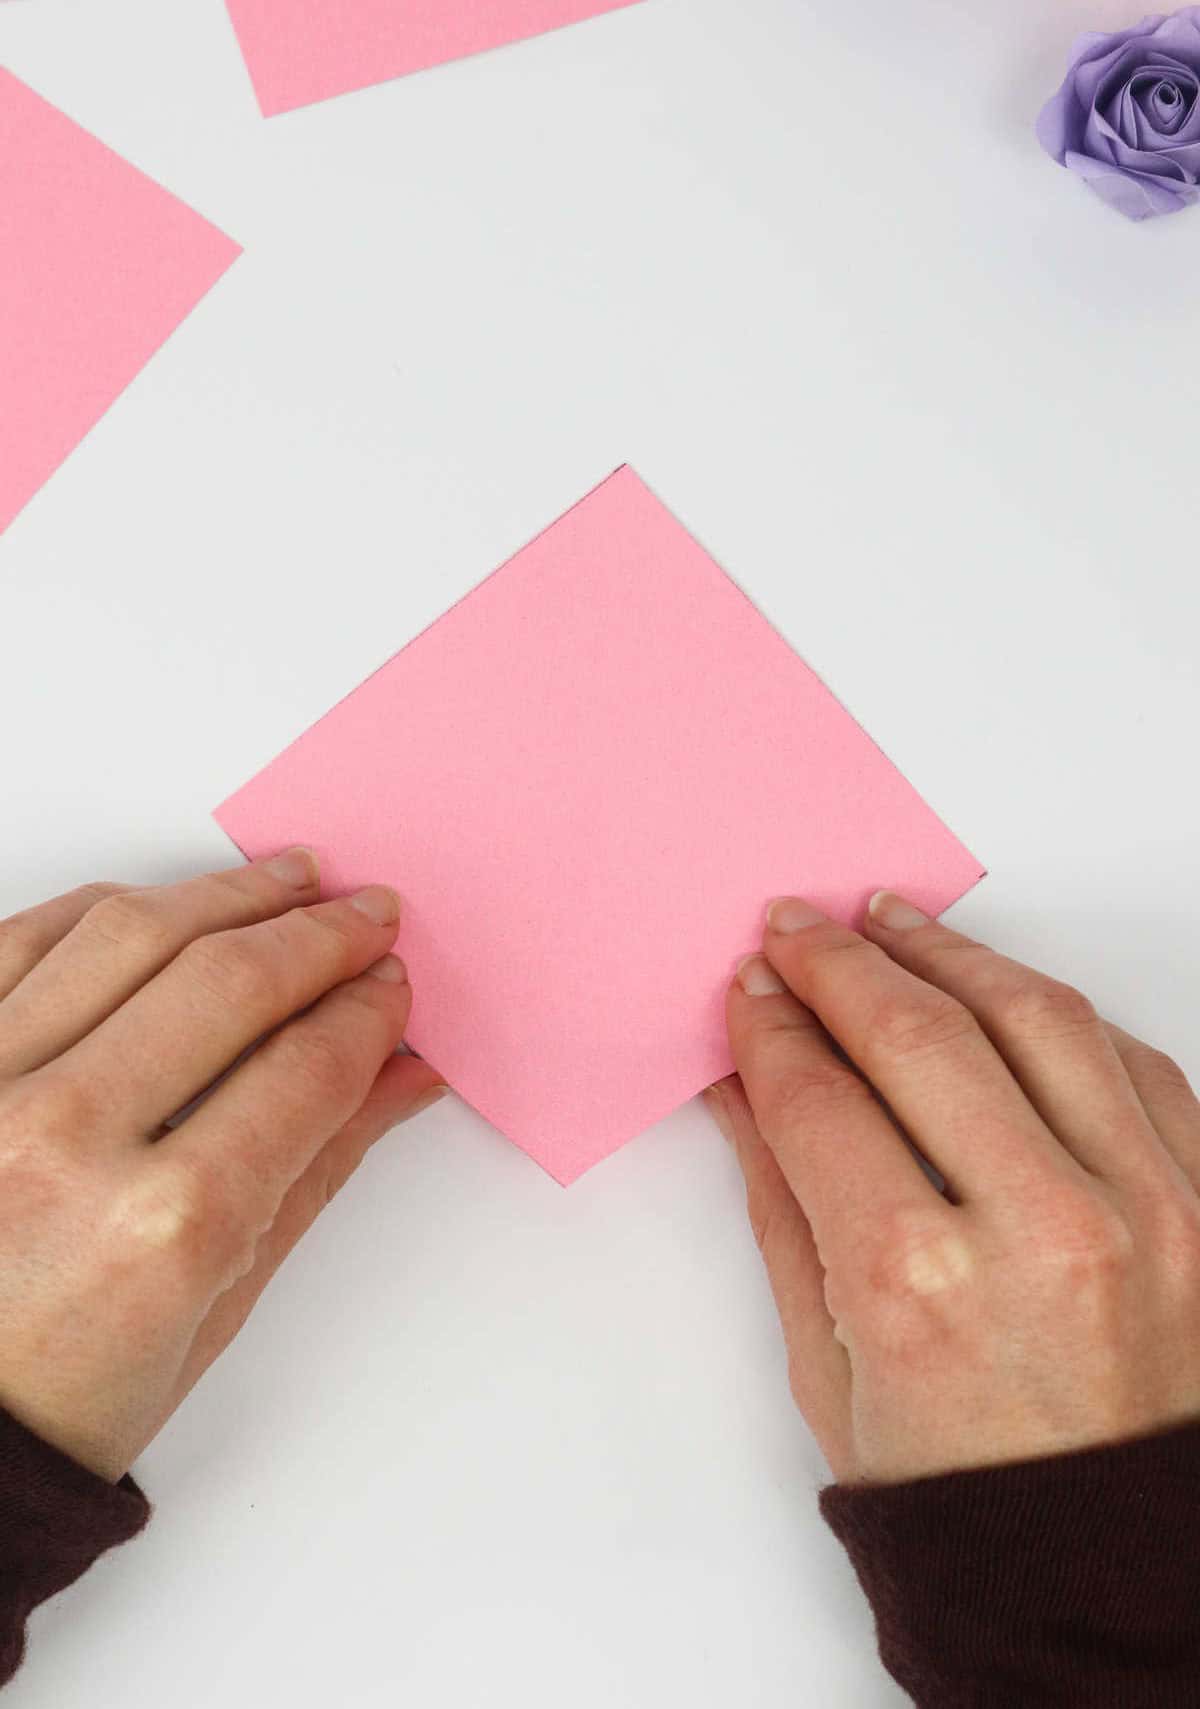
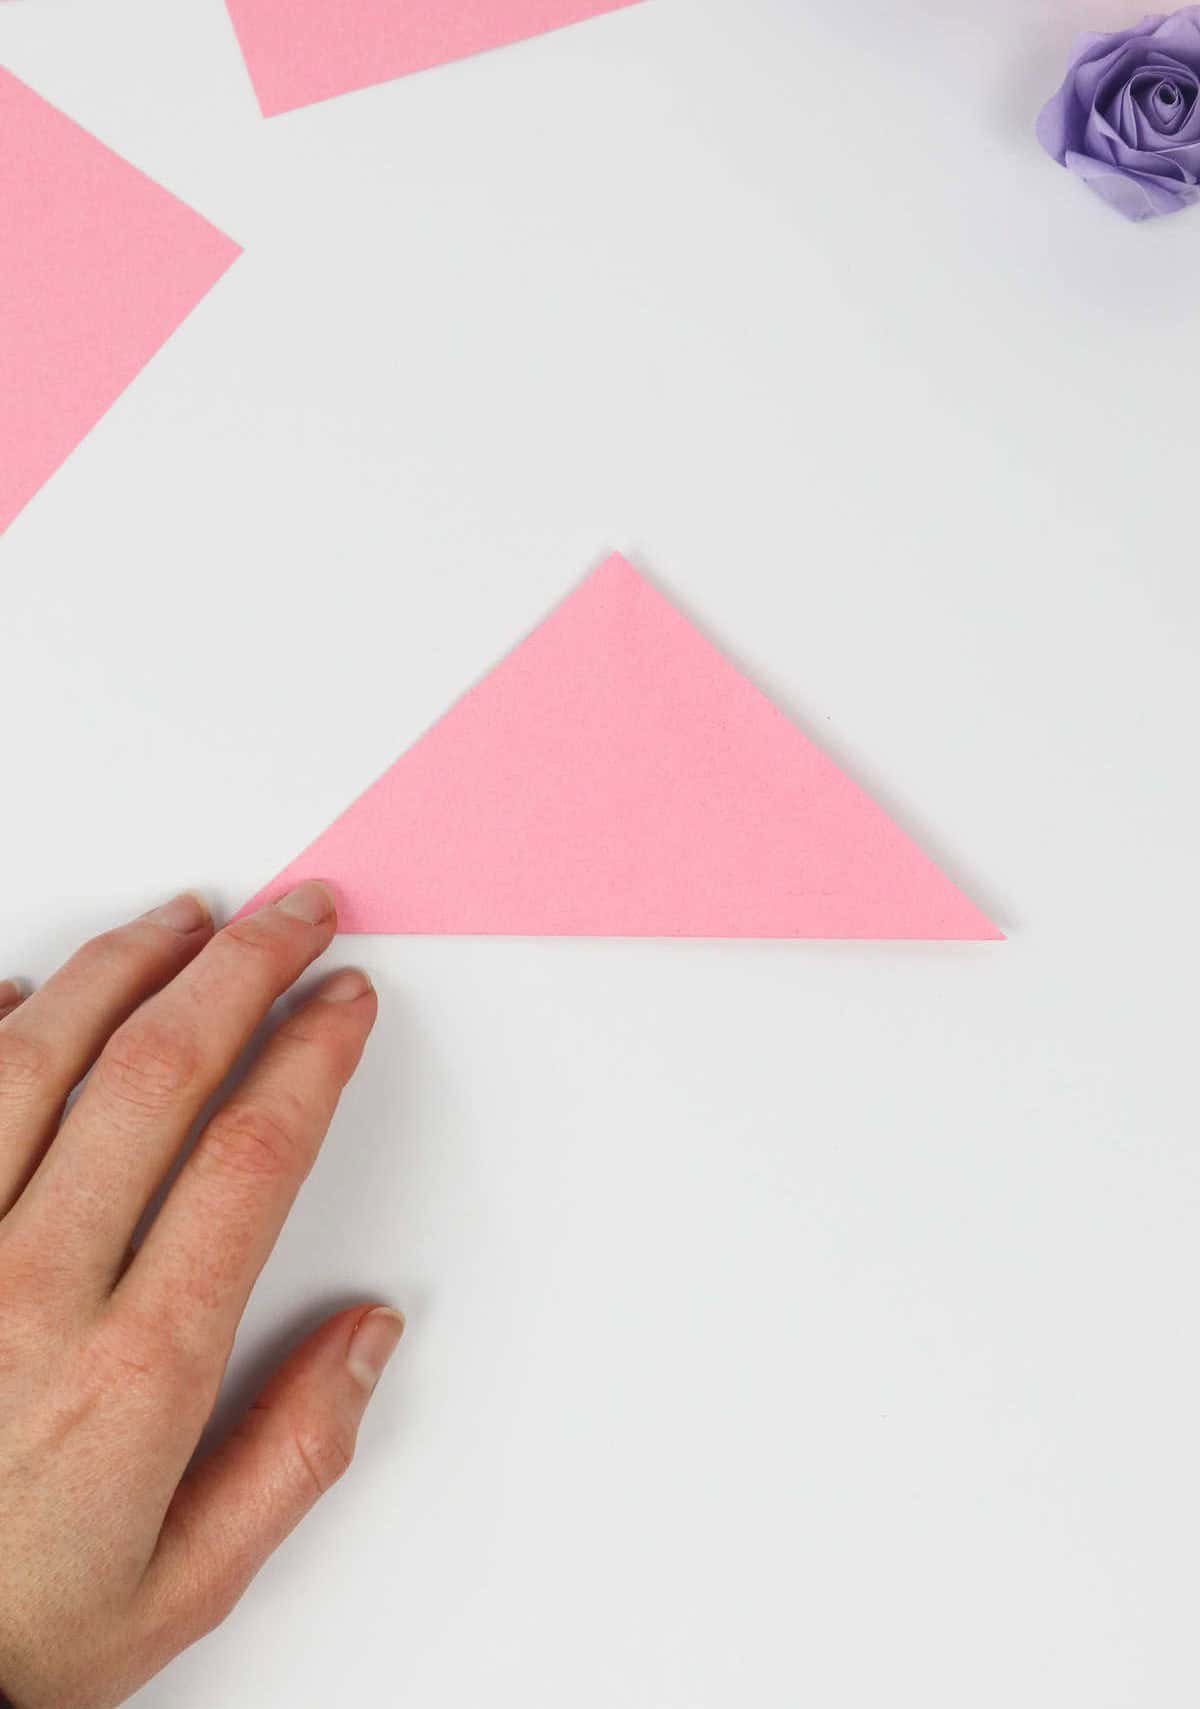
Start by laying your paper flat on a work surface. Begin by folding one corner towards the opposite corner to create a triangular shape. Next, repeat this process to create an even smaller triangle. Once you’ve achieved this smaller triangle, unfold it and you’ll notice a perpendicular crease has formed along its center. This precise fold will serve as your foundation for creating a crisp, symmetrical design.
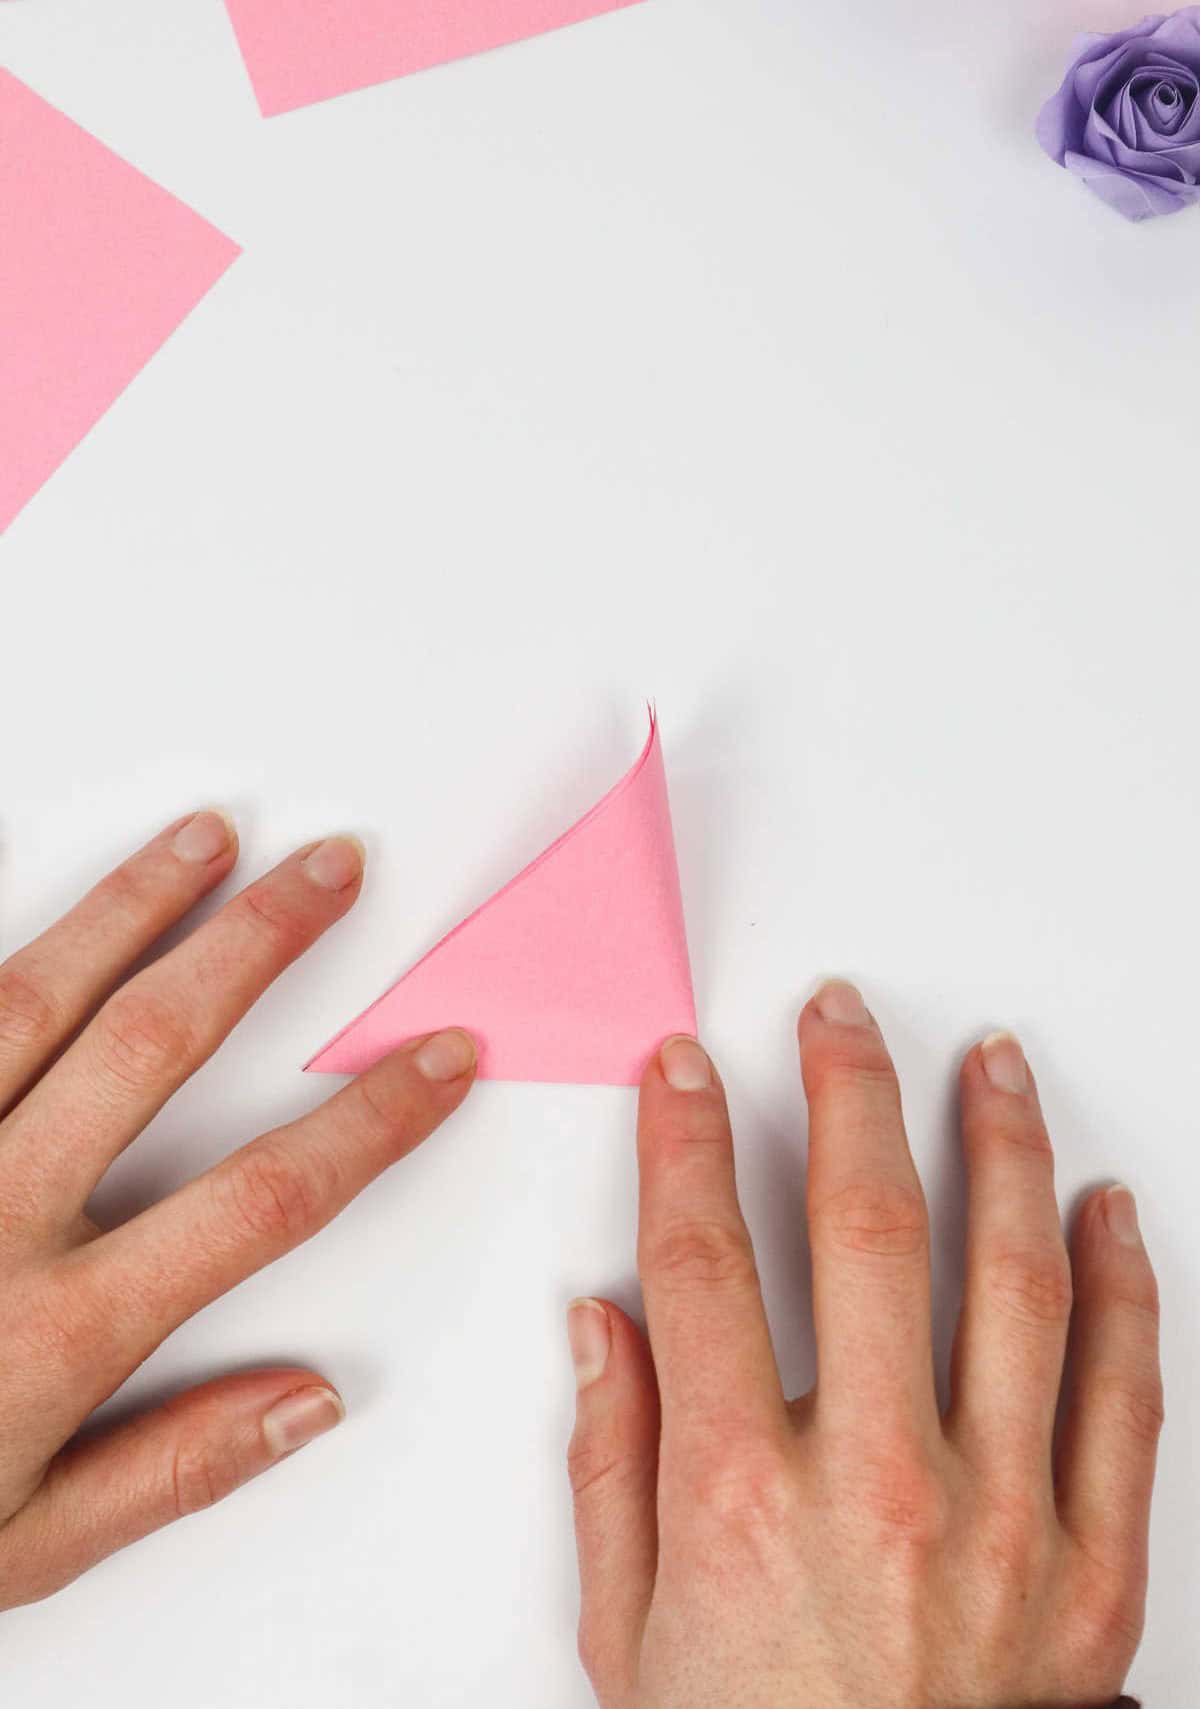
Step 2


Begin by creating a mark on one edge of the paper about an inch and a half from the top. Next, grasp the opposite corner and gently bring it towards the mark, applying gentle pressure to create a crisp crease. Perform this action with the remaining two edges as well, ensuring that each fold is made exactly one and a half inches from the top and folding the opposing end up to meet the mark, pressing firmly to set the crease in place.
Step 3
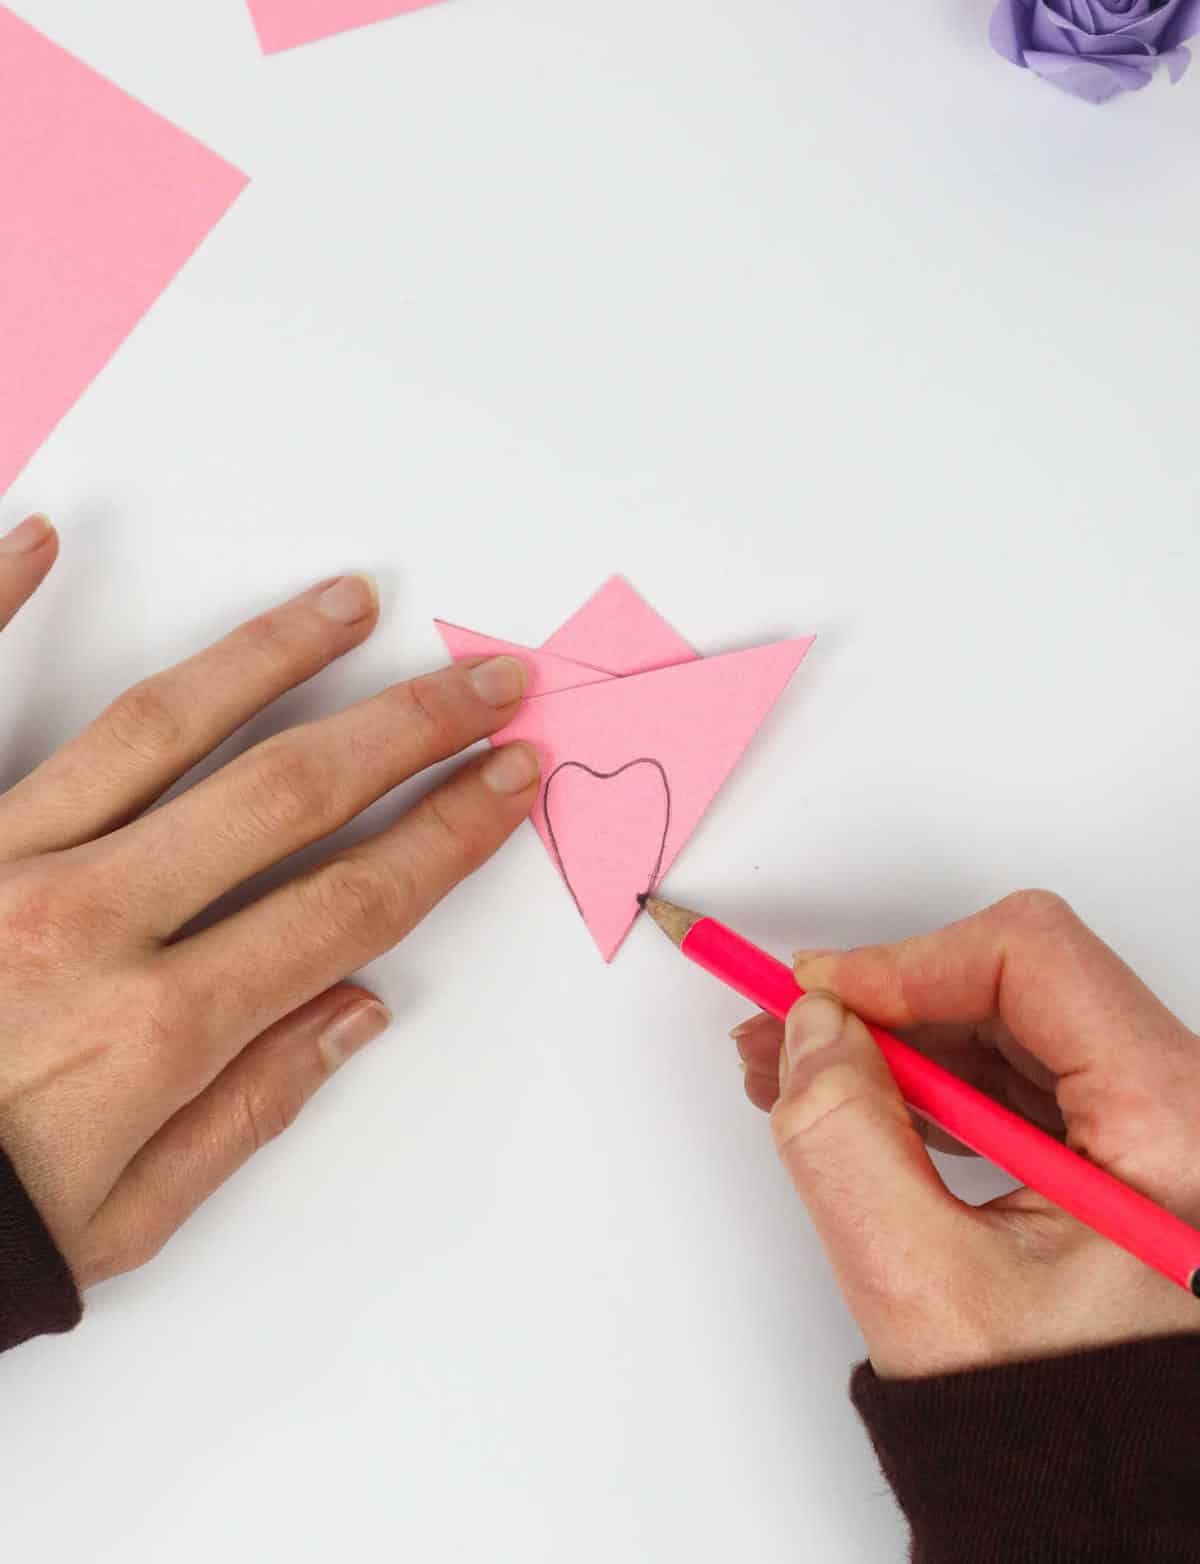

Retrieve your writing instrument and create a small floral element by drawing a petal on the page’s lower portion, mimicking the demonstration. Feel free to explore various petal shapes, sizes, and arrangements, allowing your creativity to flourish.
Step 4
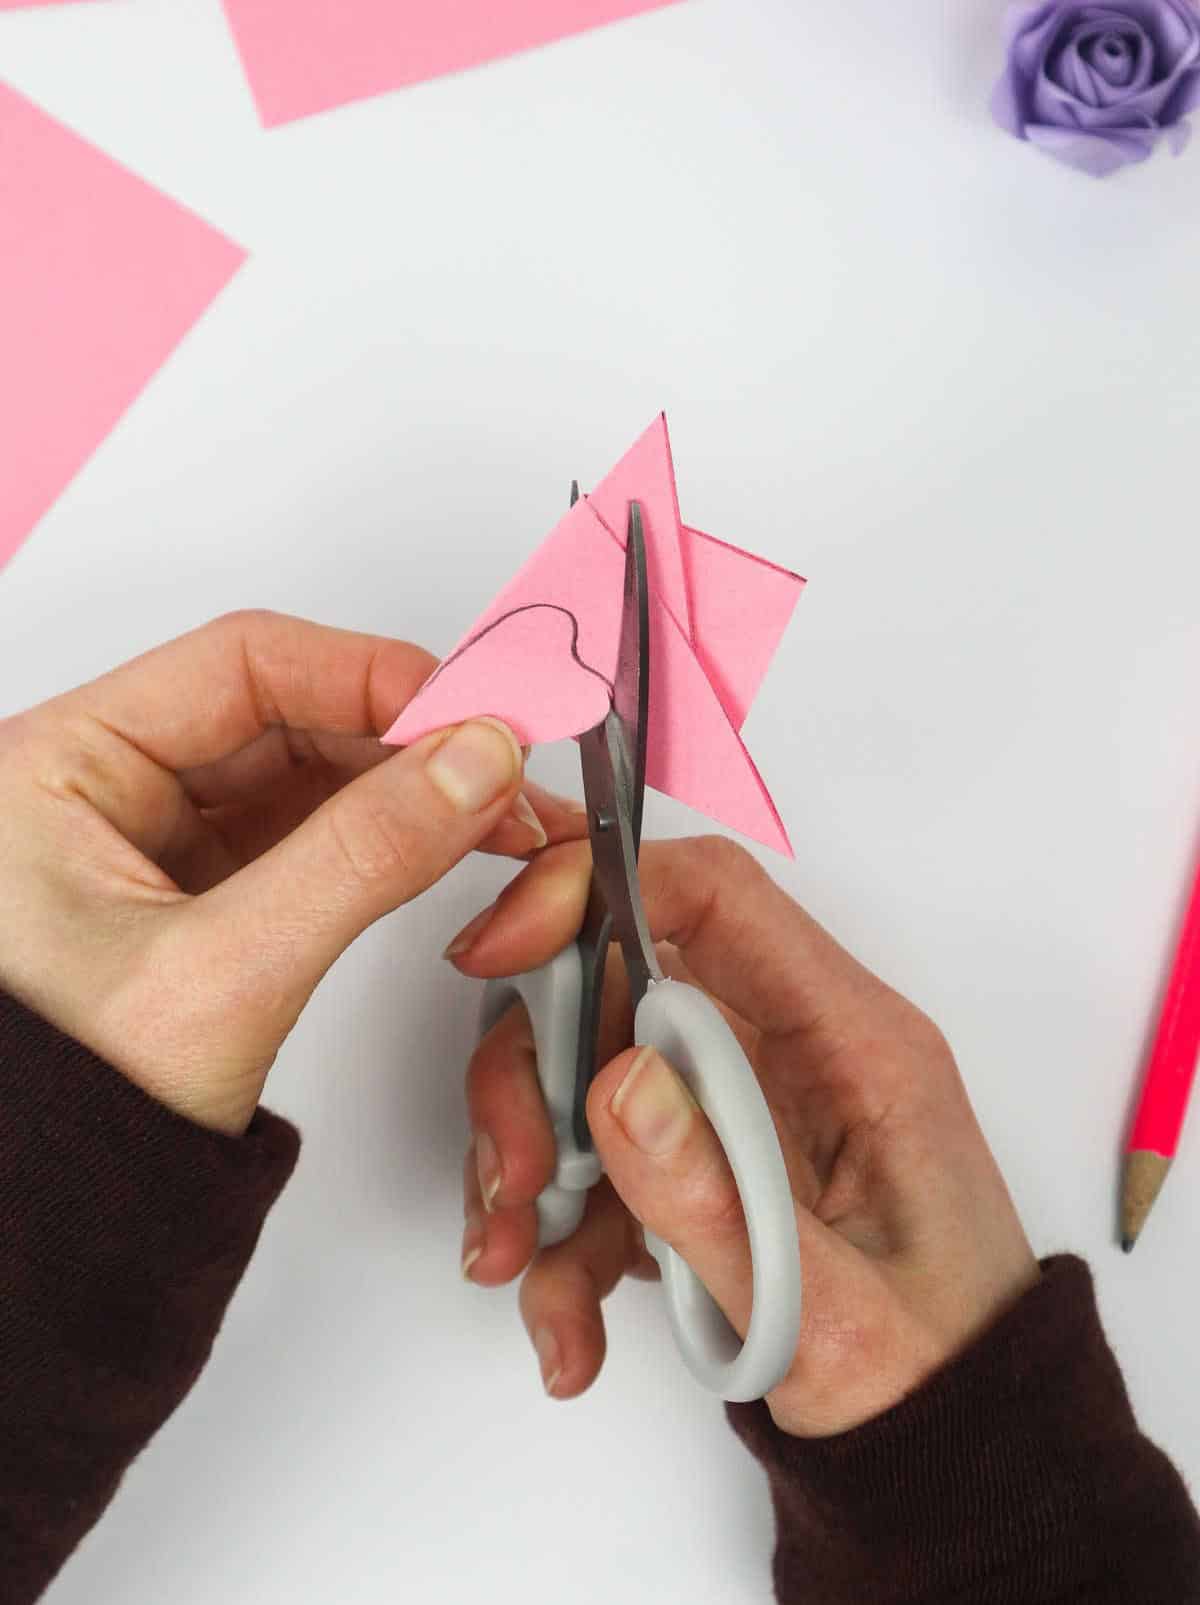
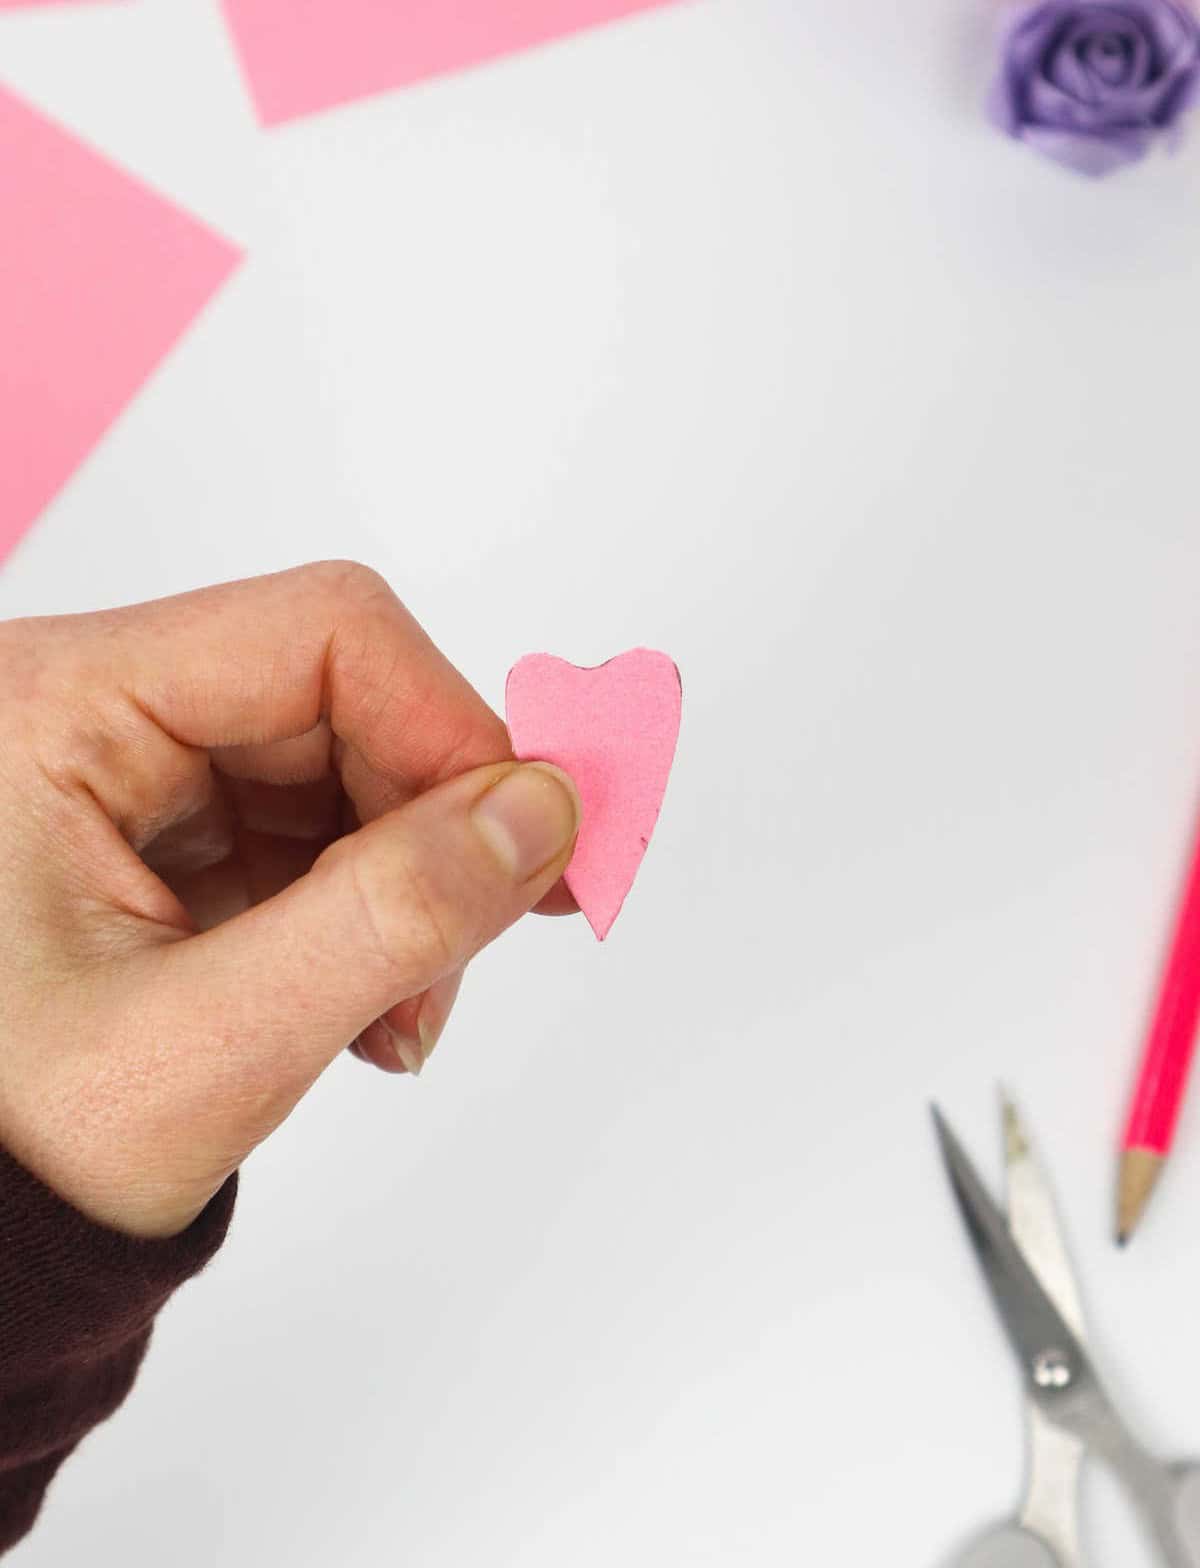
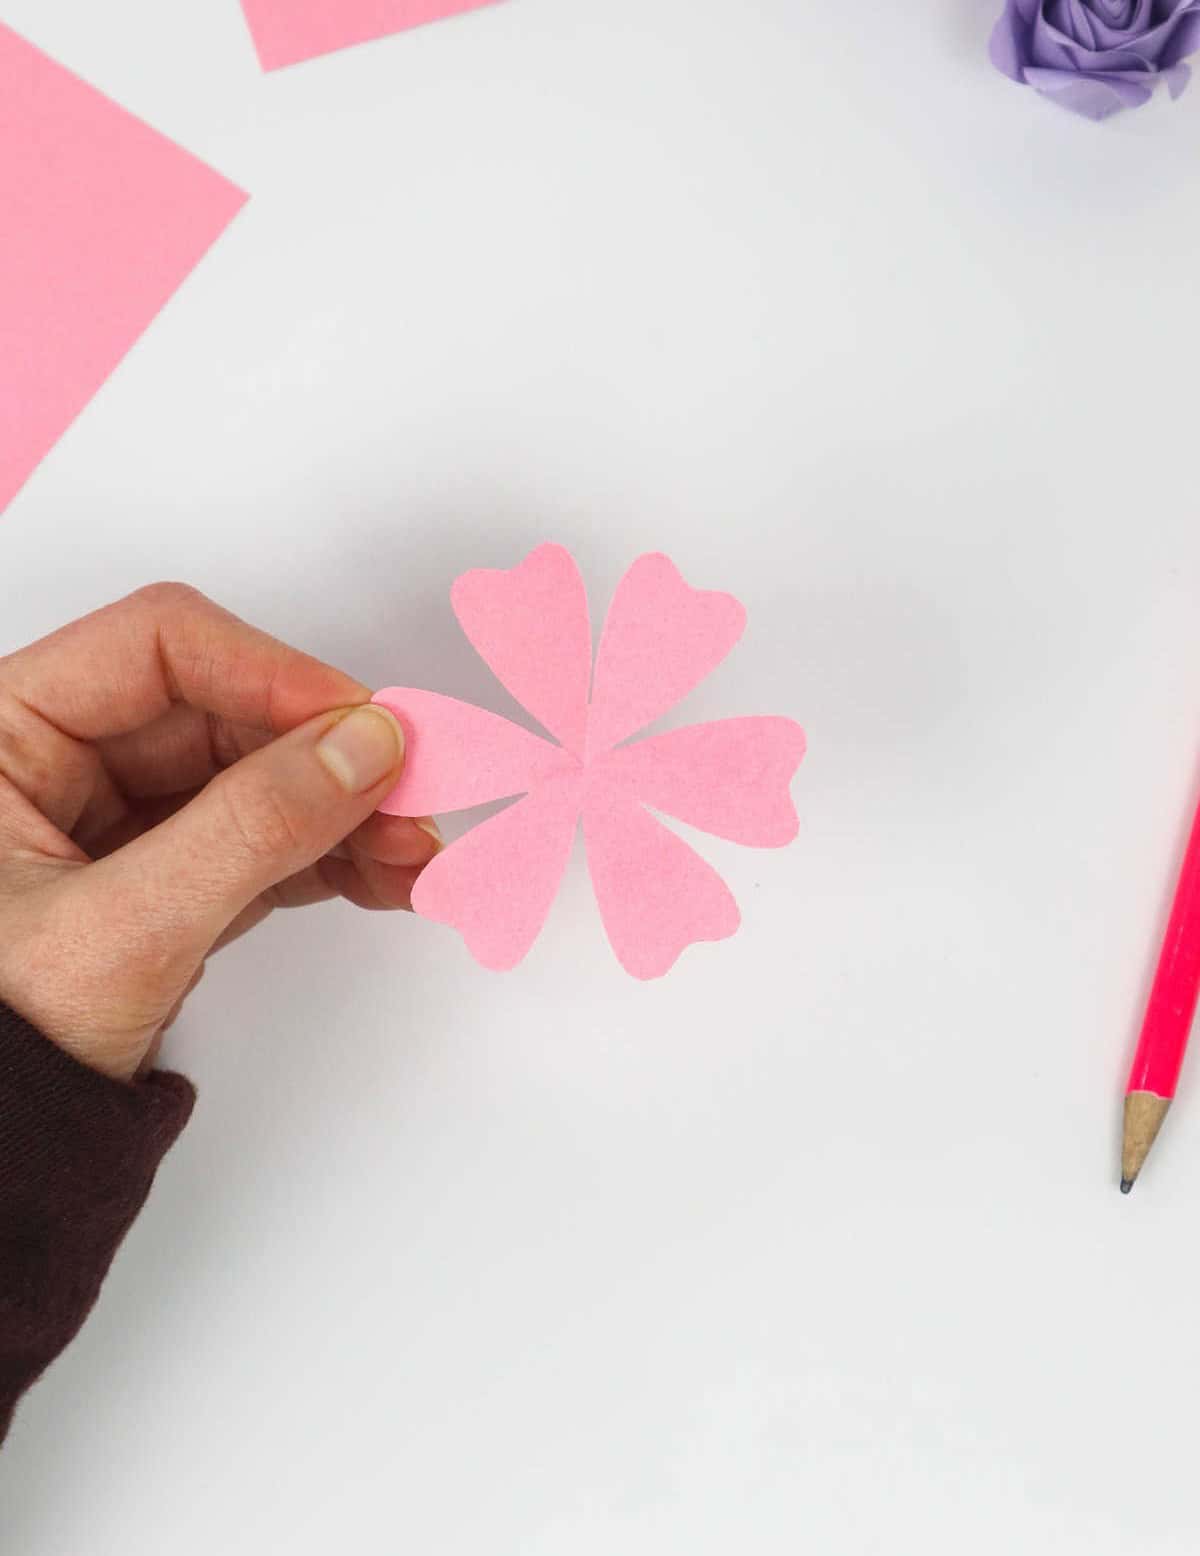
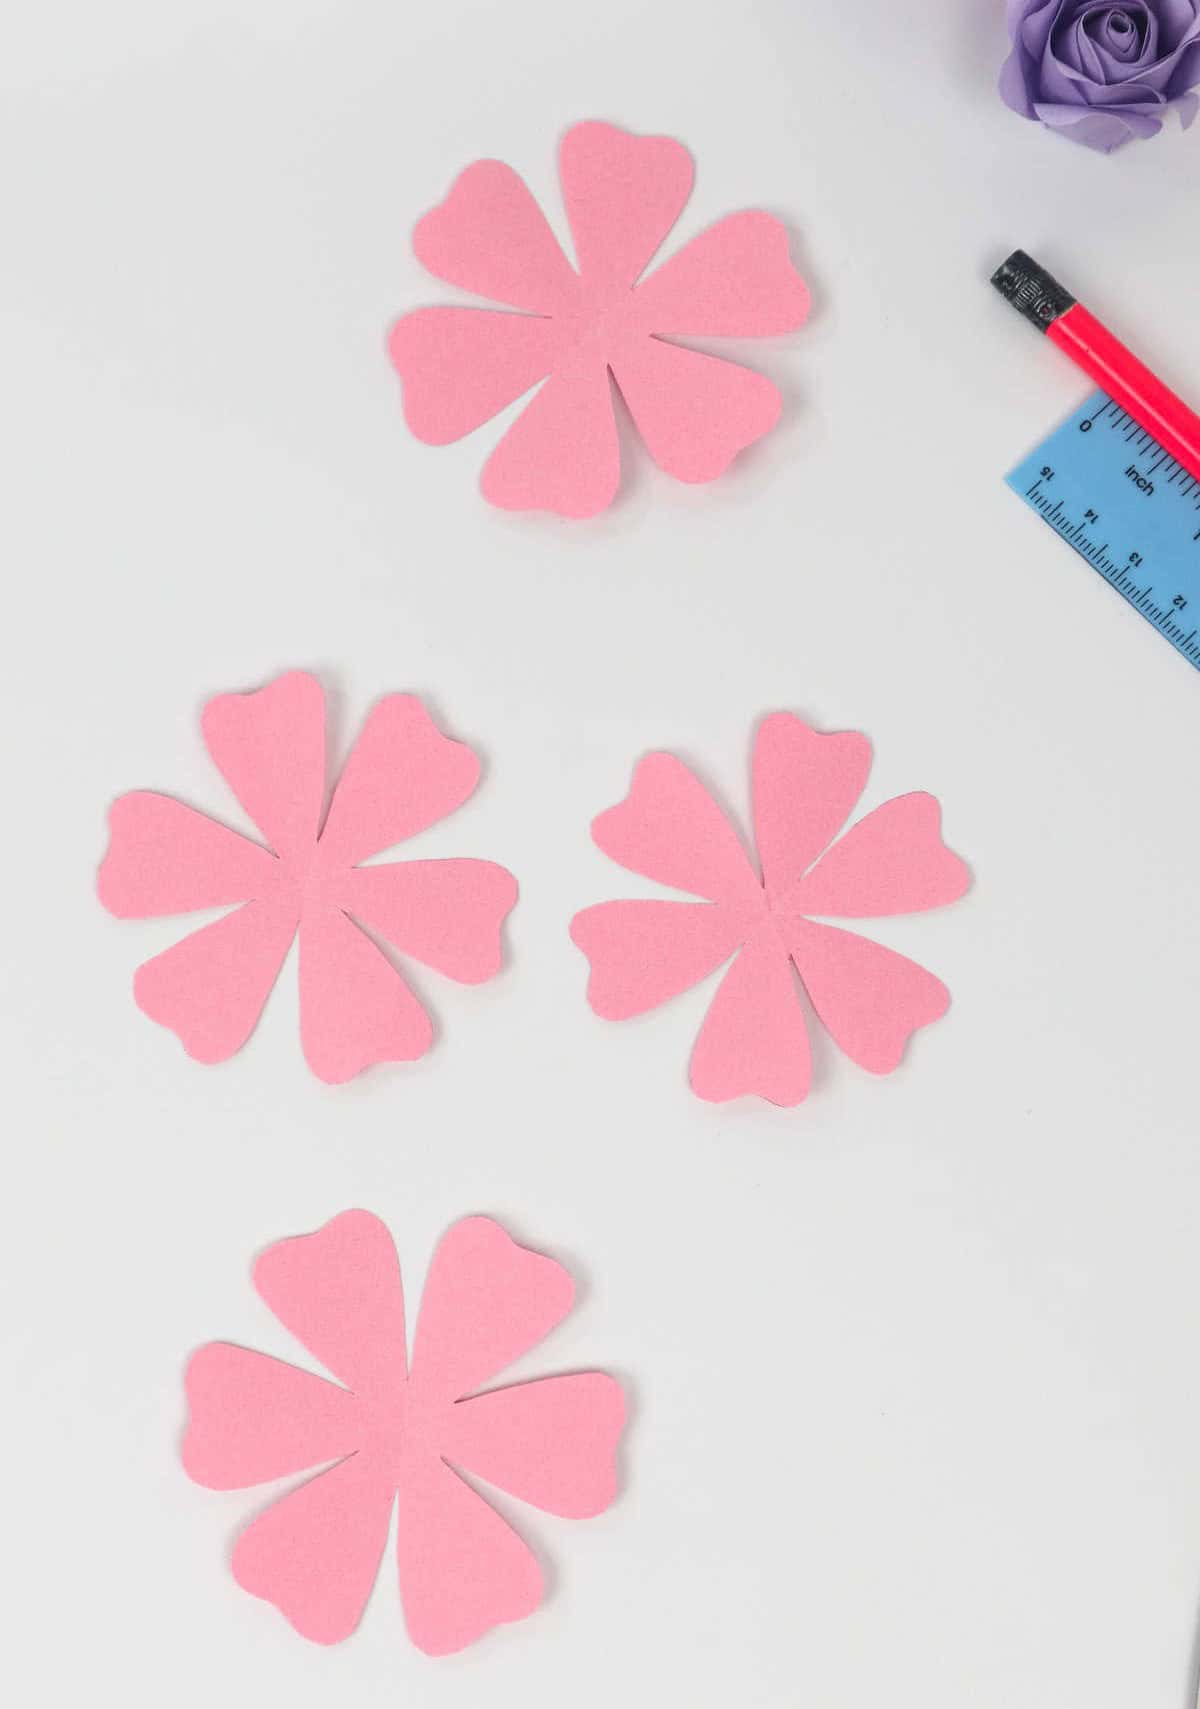
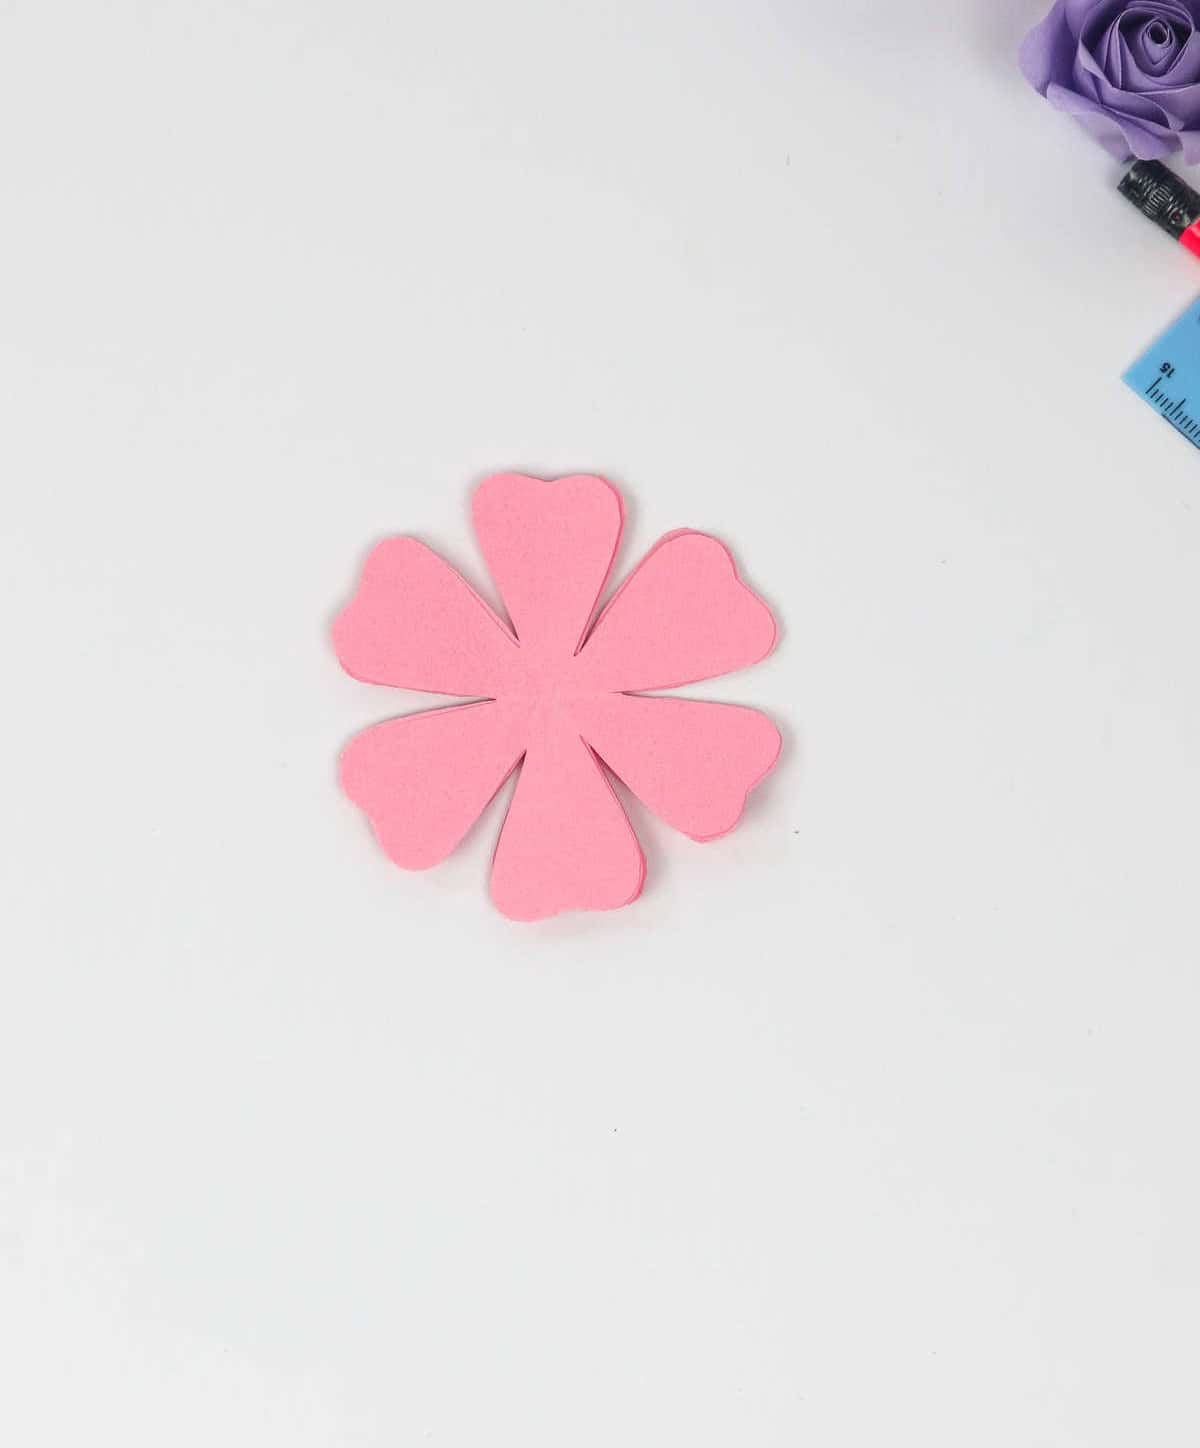
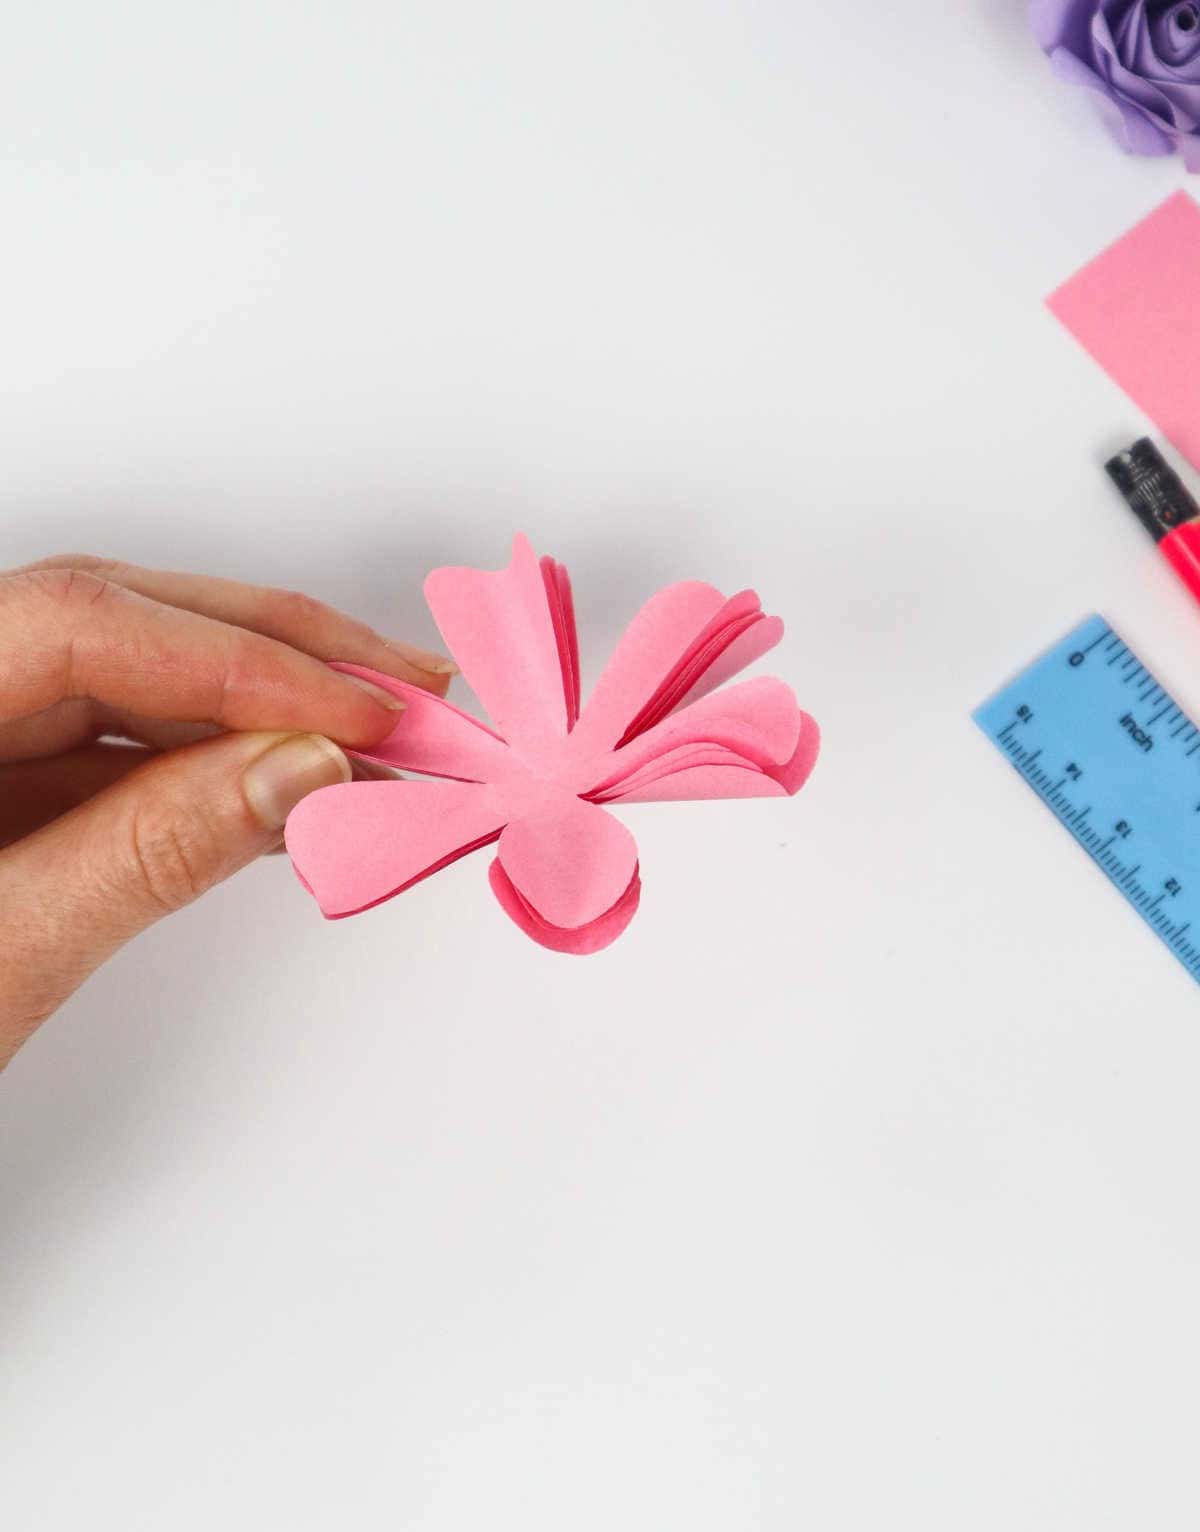
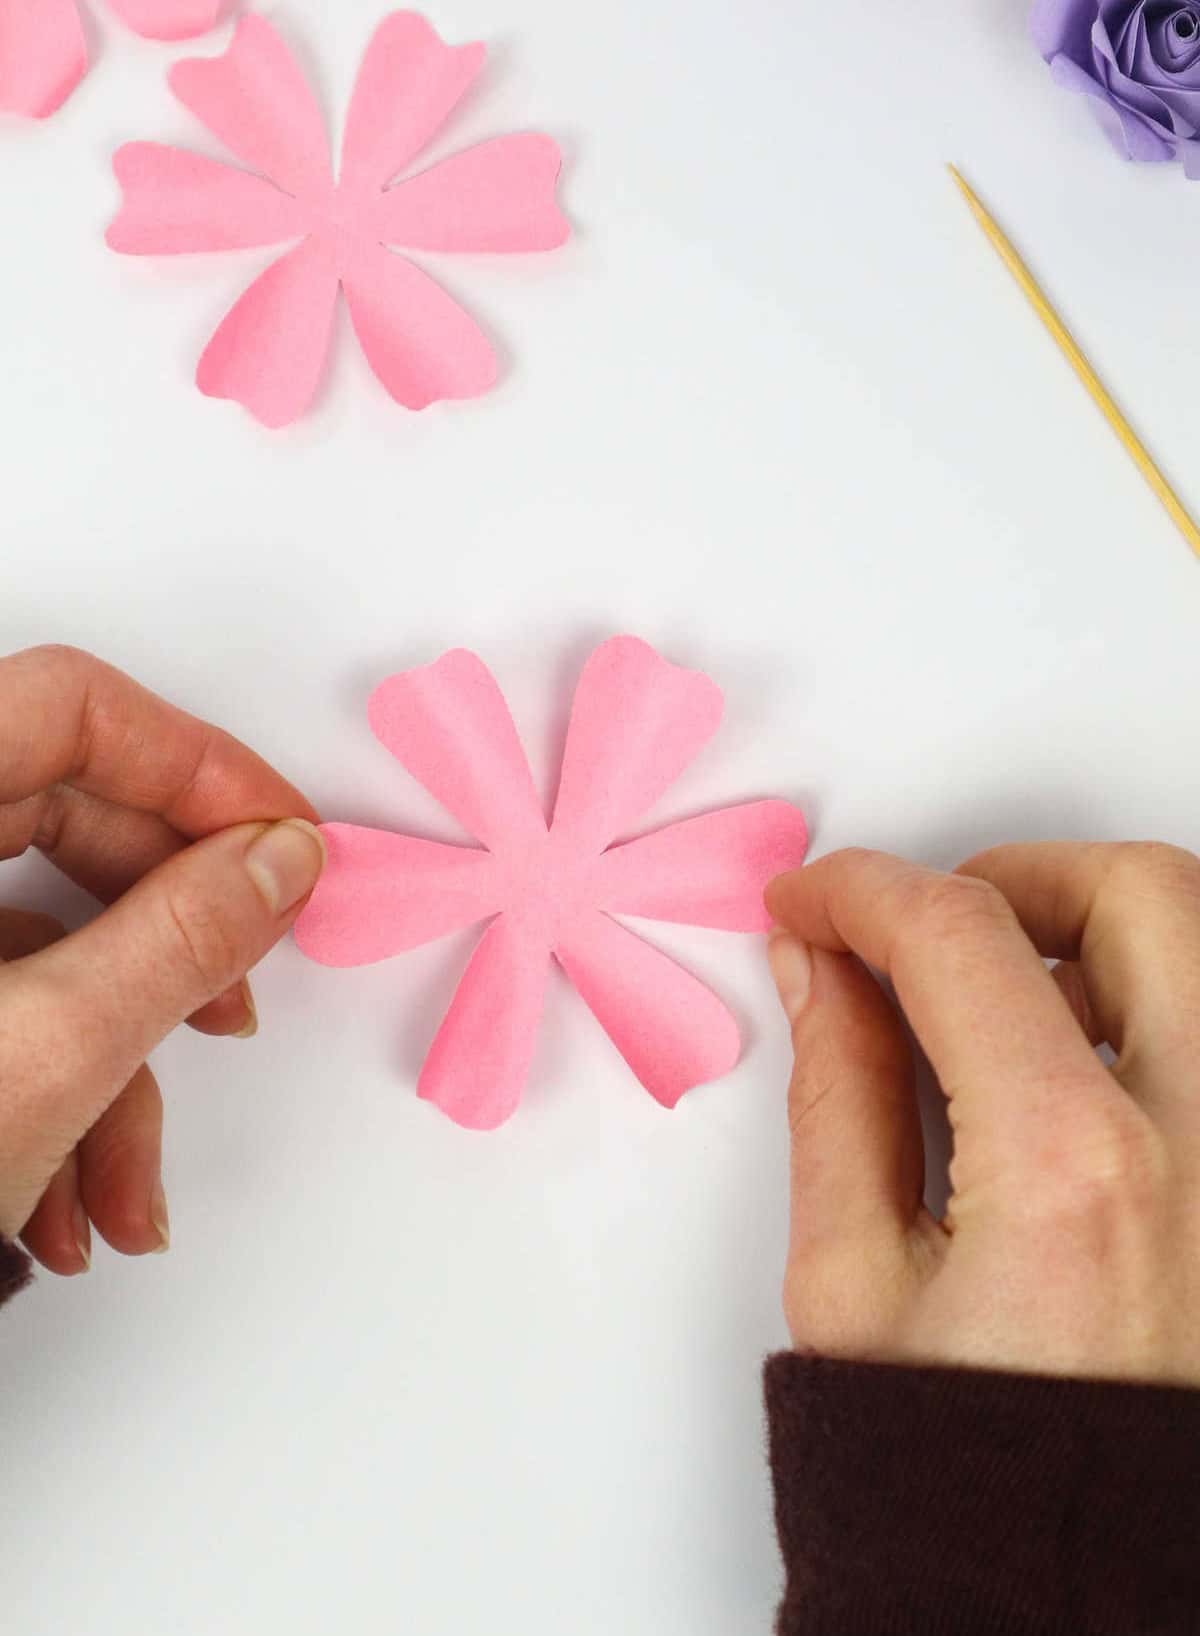
Take a pair of scissors and carefully cut along the petal you’ve just drawn, following its curved shape. As you cut, envision the beautiful flower that will soon emerge. Once your cut-out is complete, unfold it to reveal the delicate six-petal design. To achieve symmetry, repeat this process three more times, ensuring each piece is identical in shape and size before moving forward.
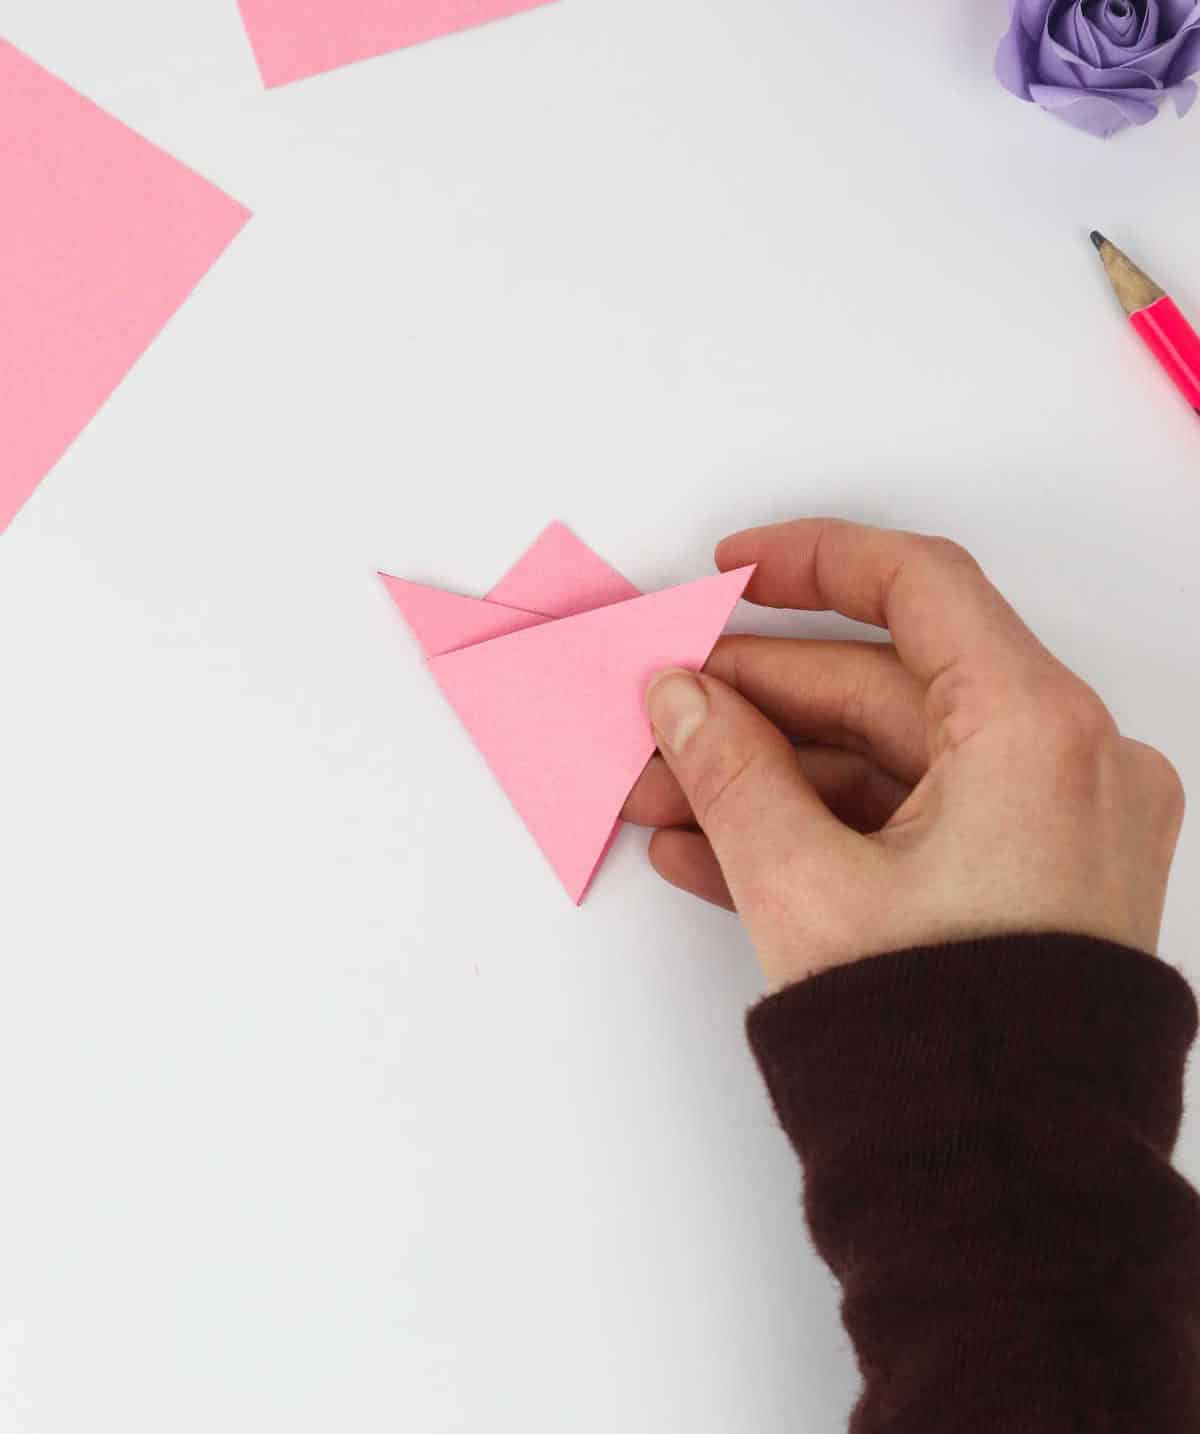
Step 5
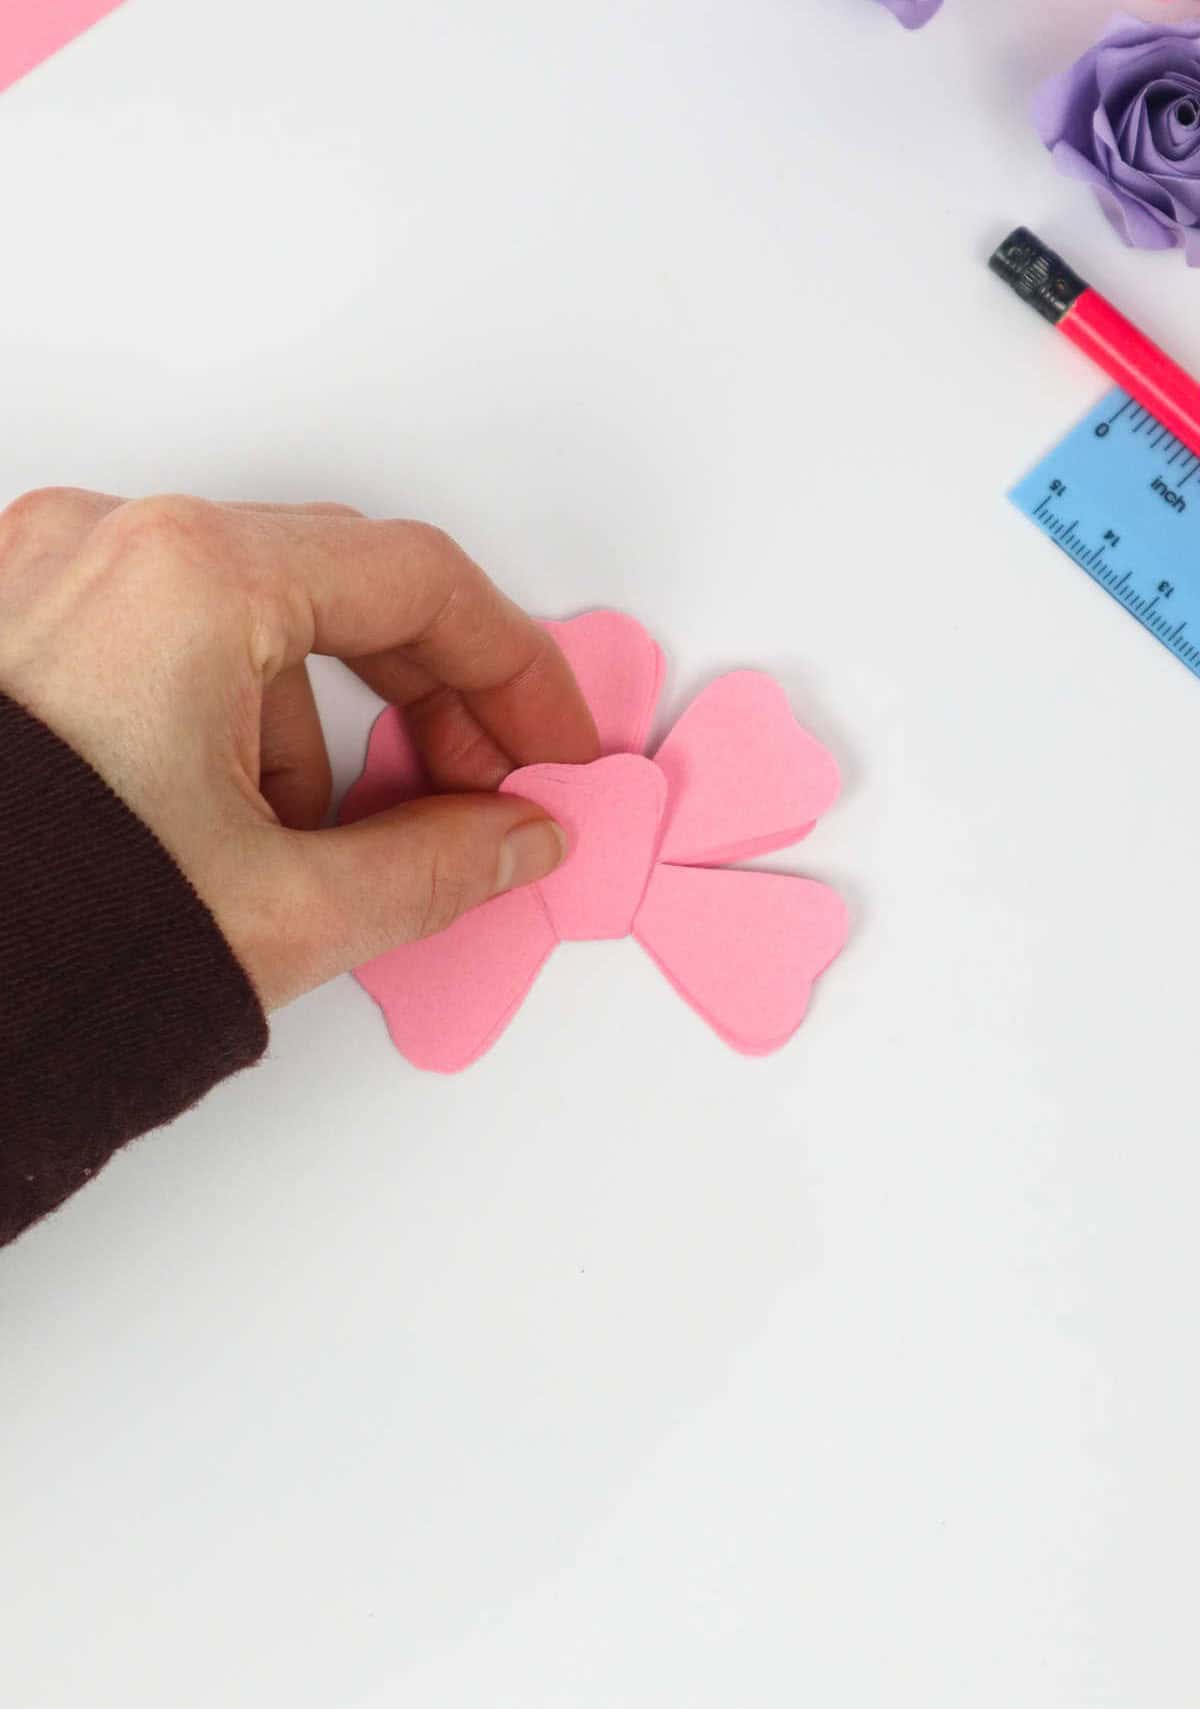
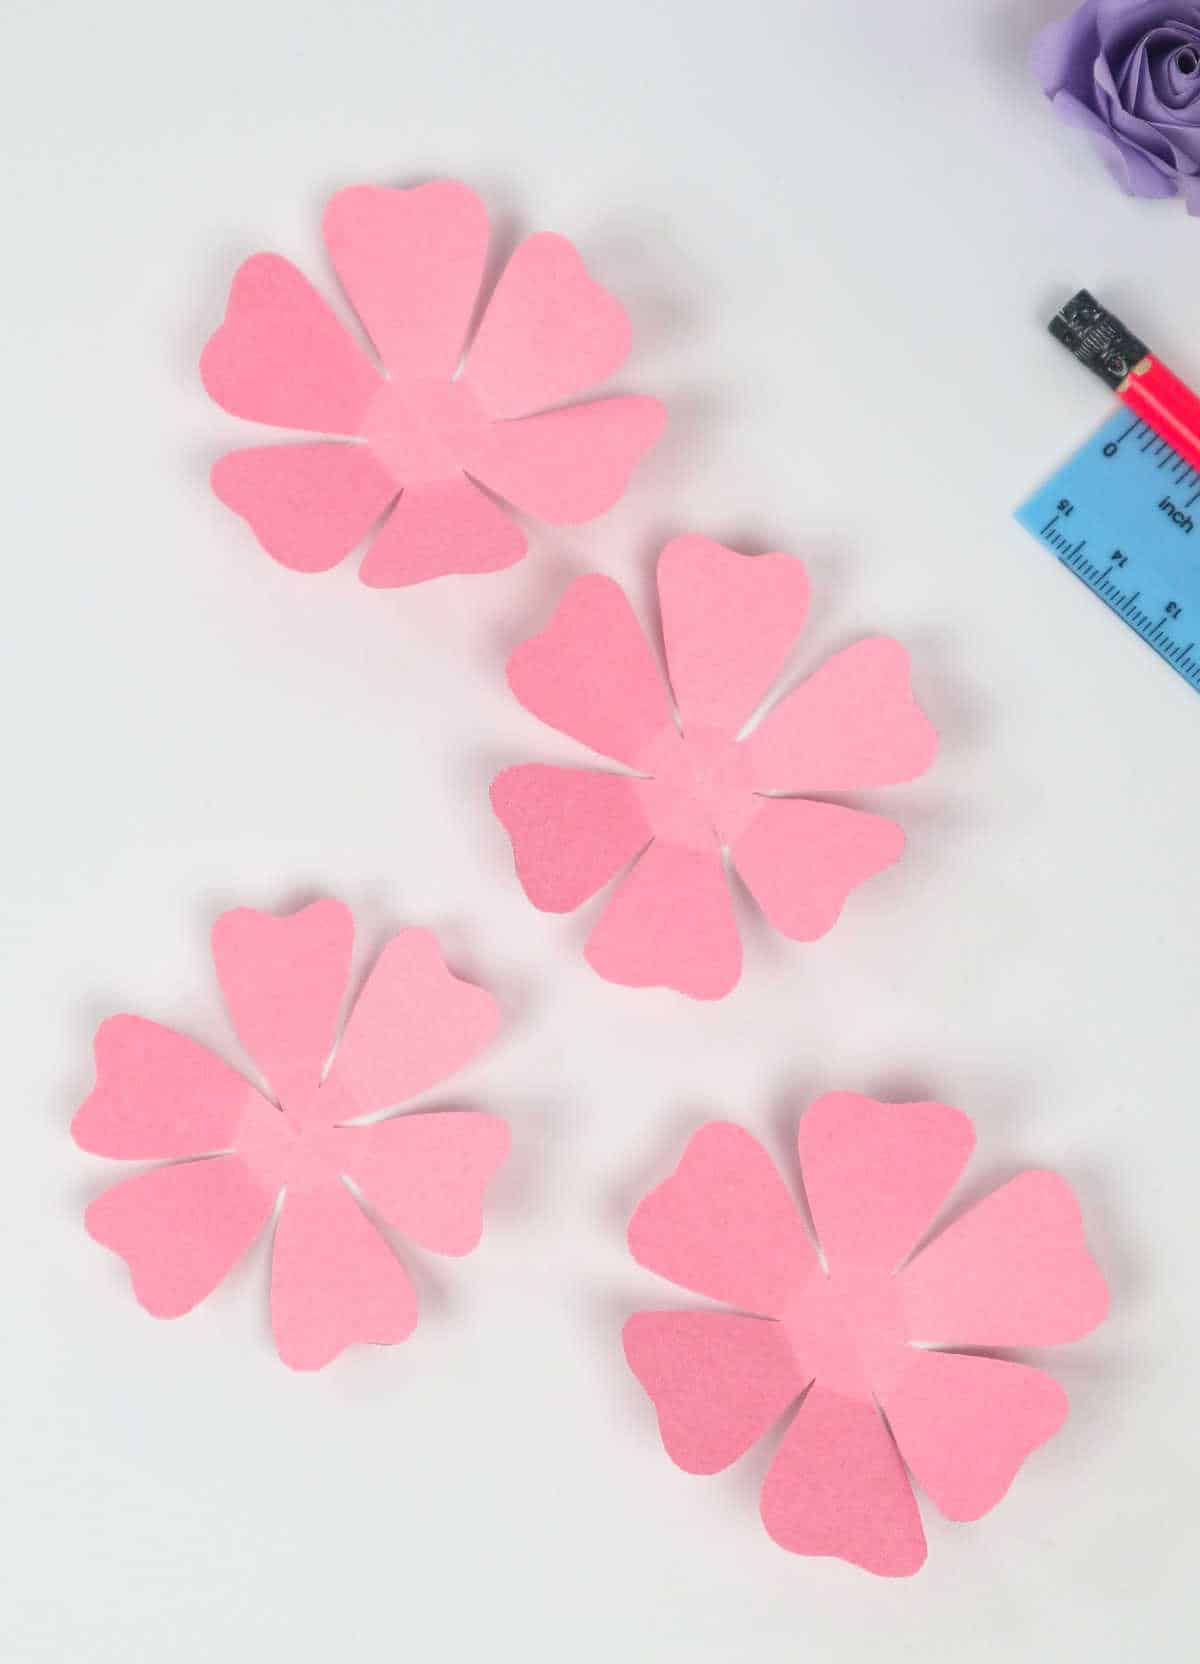
Assemble the four individual flowers by stacking them on top of one another, ensuring they align perfectly. Next, grasp one petal and gently fold it inward. Repeat this process with the remaining five petals, simultaneously working your way around each of the four flower sheets as you go. As you do so, envision the delicate hexagonal cups taking shape.
Step 6
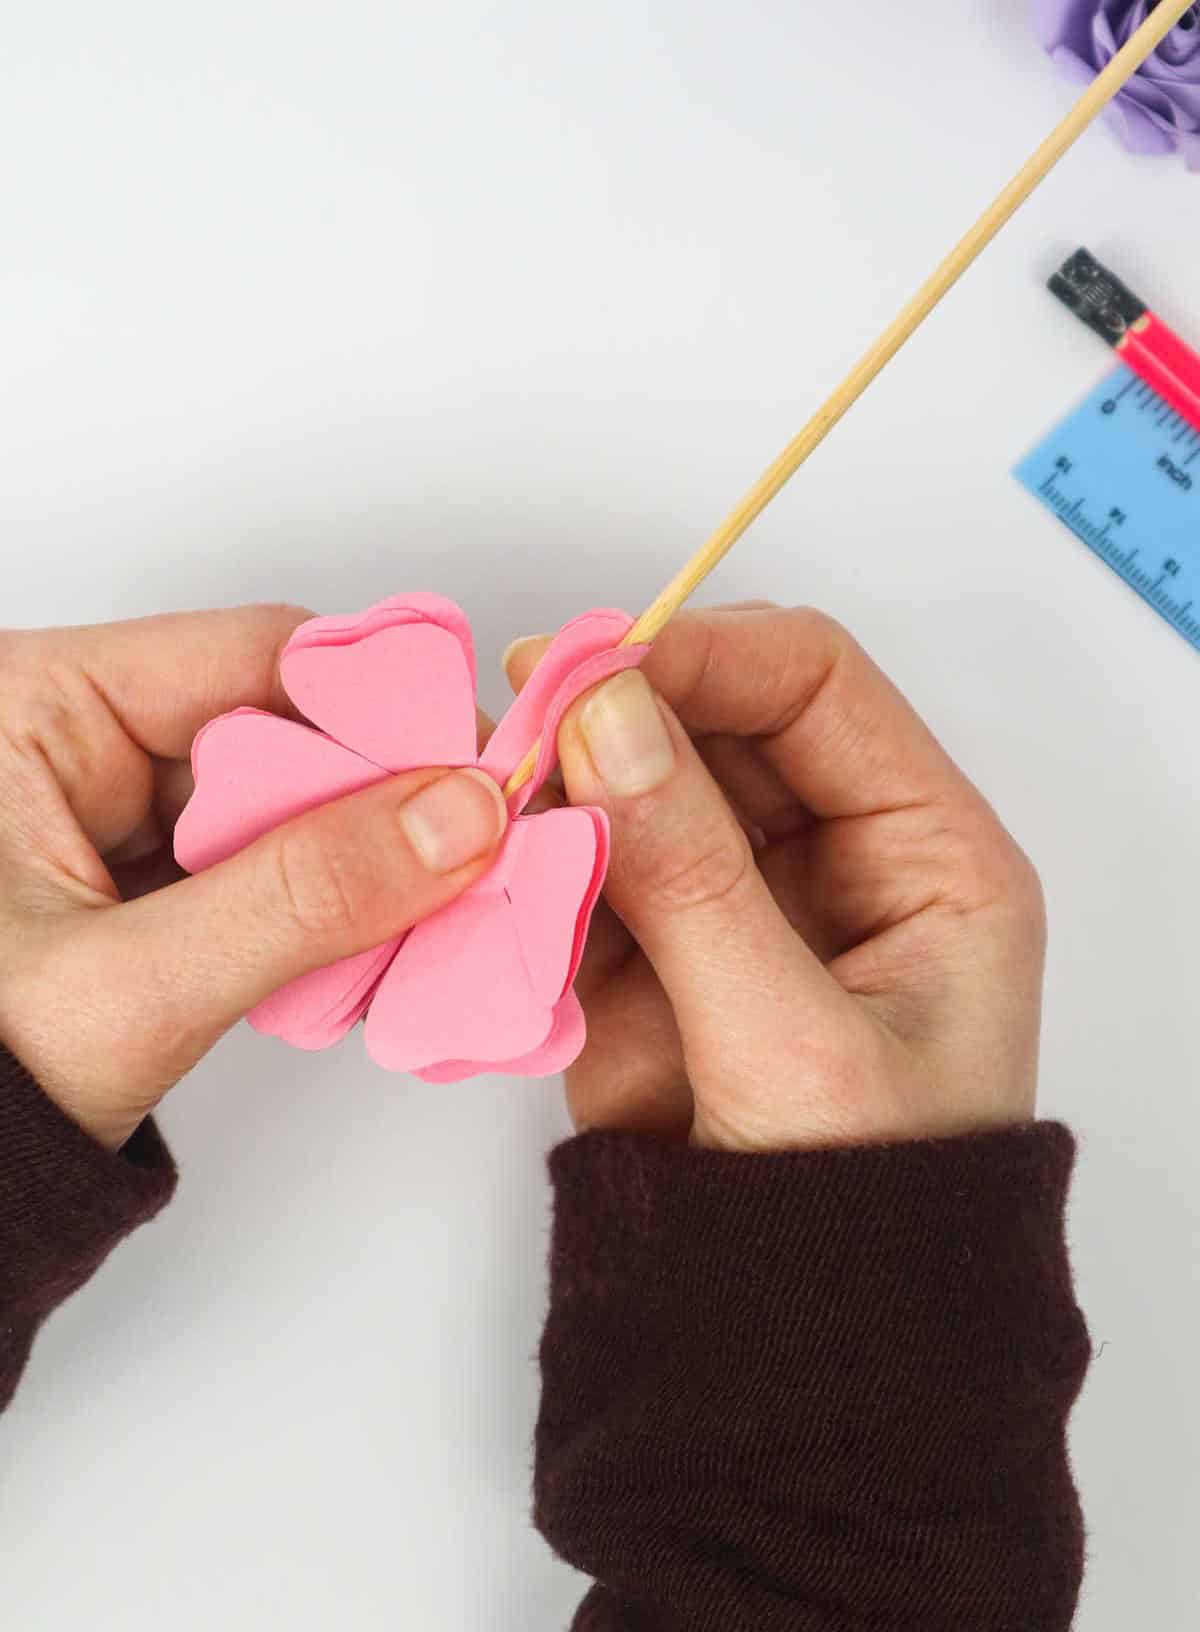

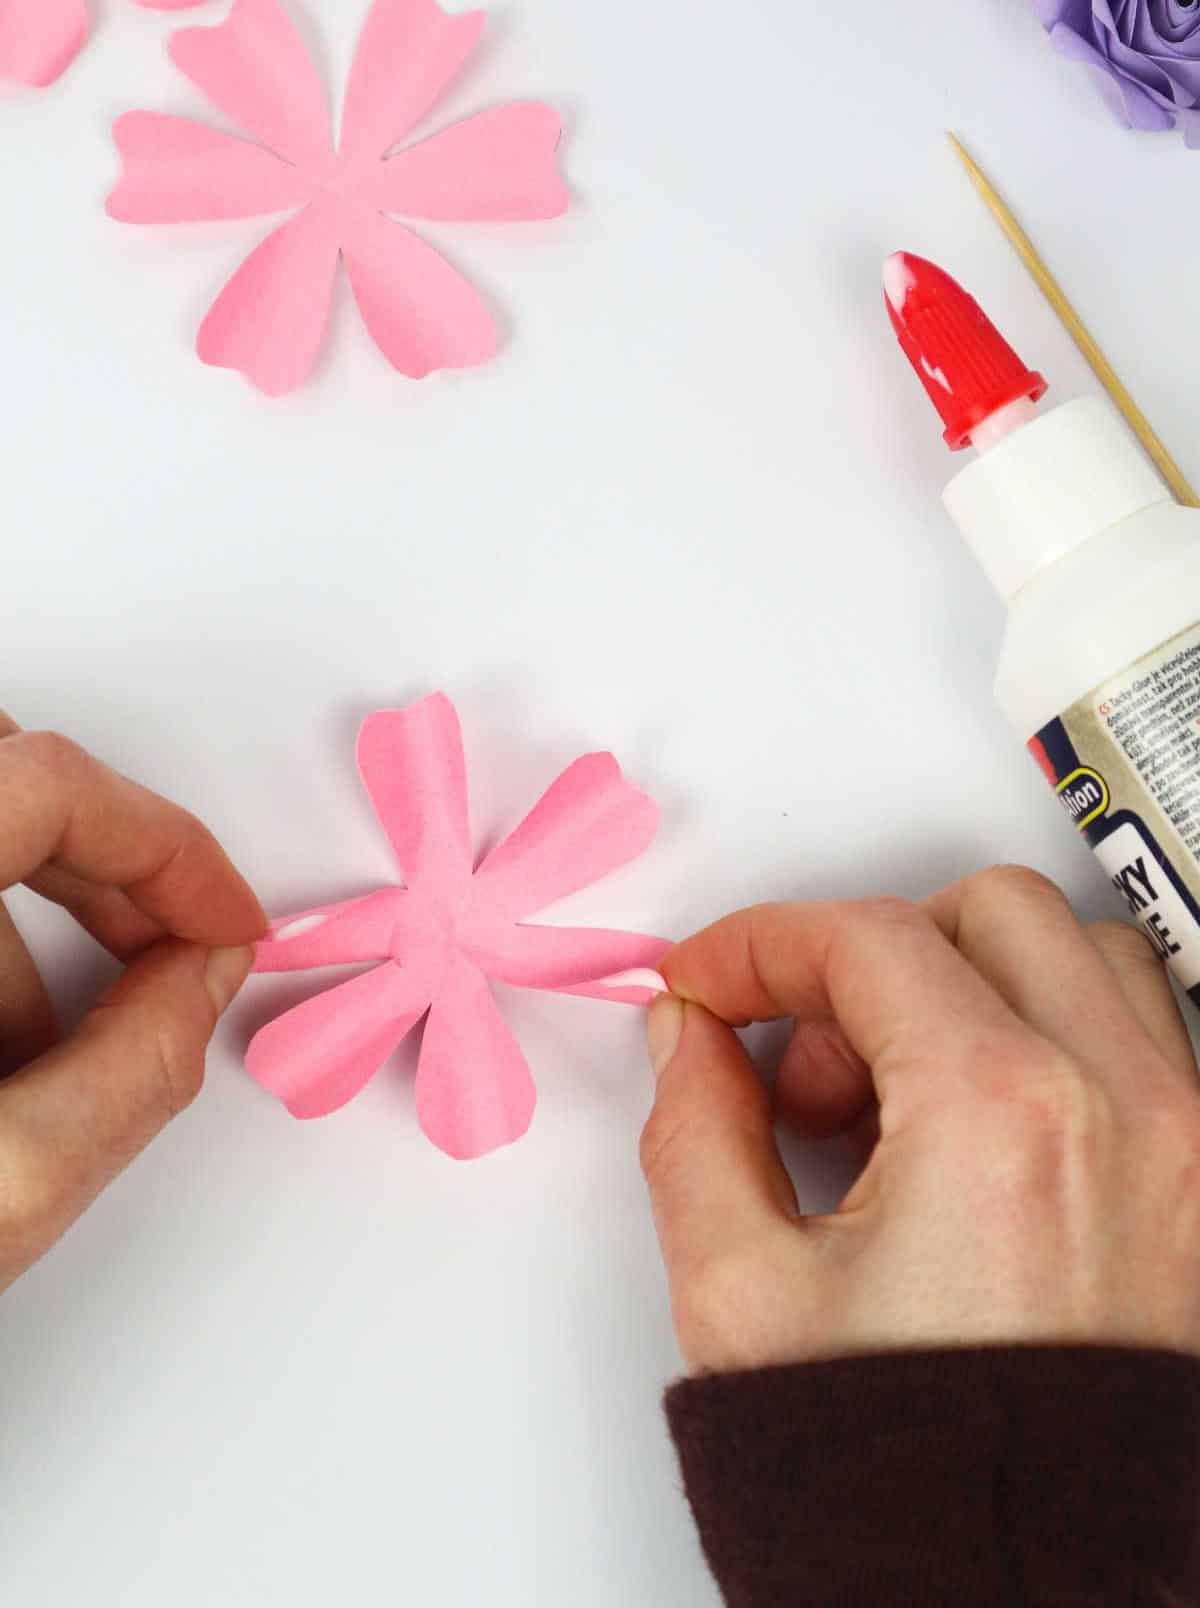
To transform the flat paper petals, take out a wooden skewer and position it at the center of one of the flower’s delicate segments. Slowly wrap the paper around the skewer to gently shape it into a natural-looking petal curve. Perform this process with each of the six petals until they all acquire a softer, more rounded appearance, resembling the softness of real-life flora.
Step 7
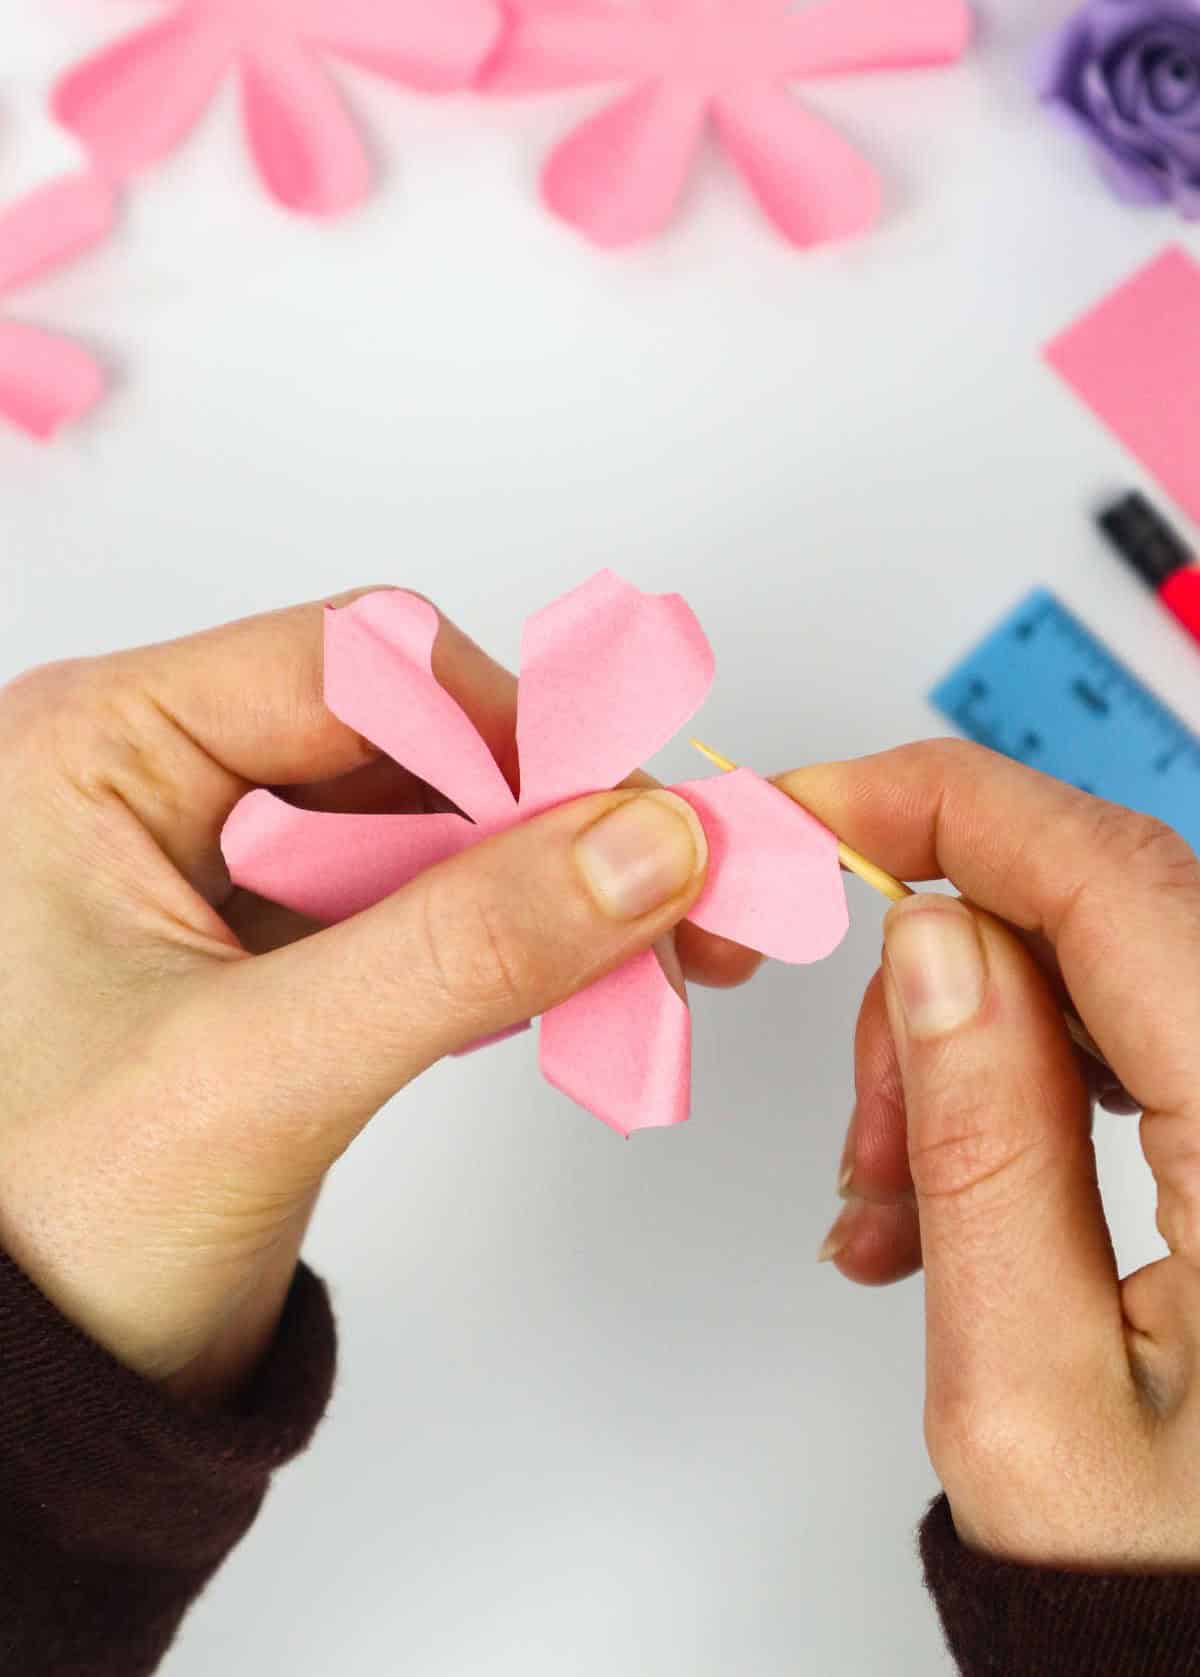
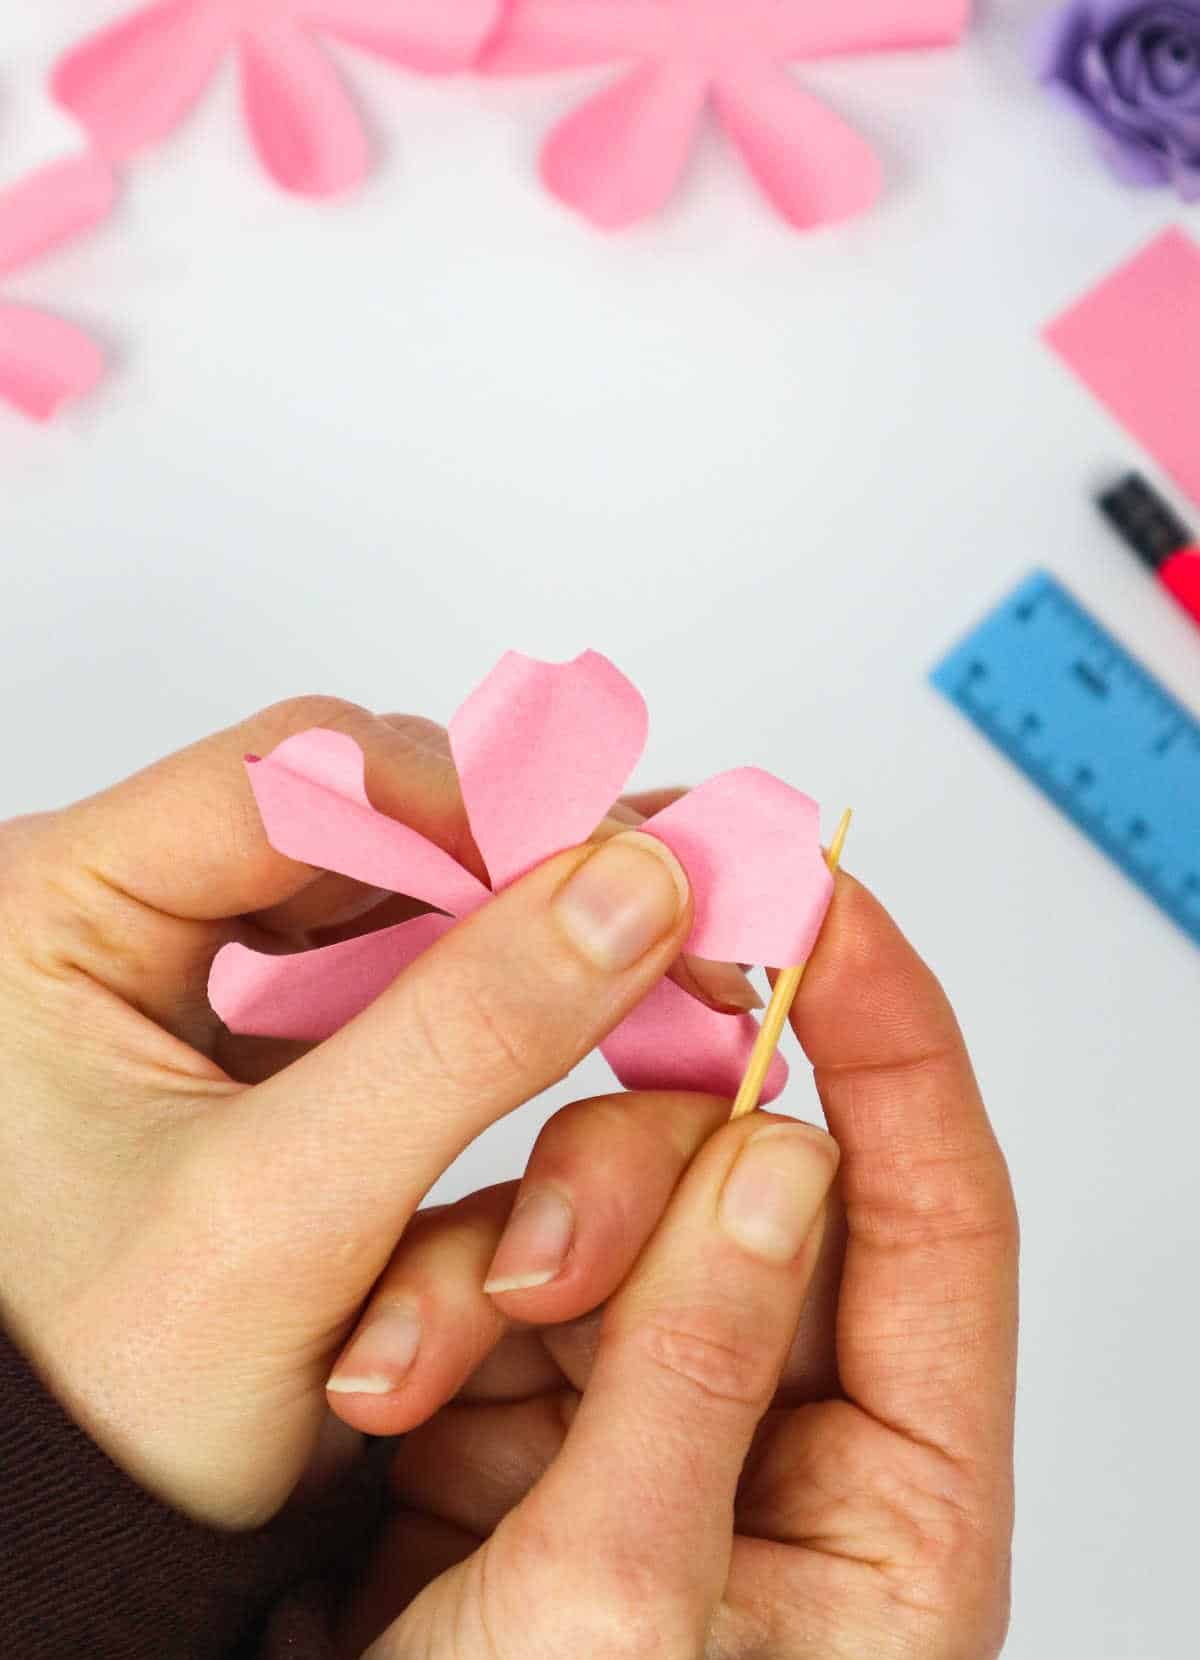
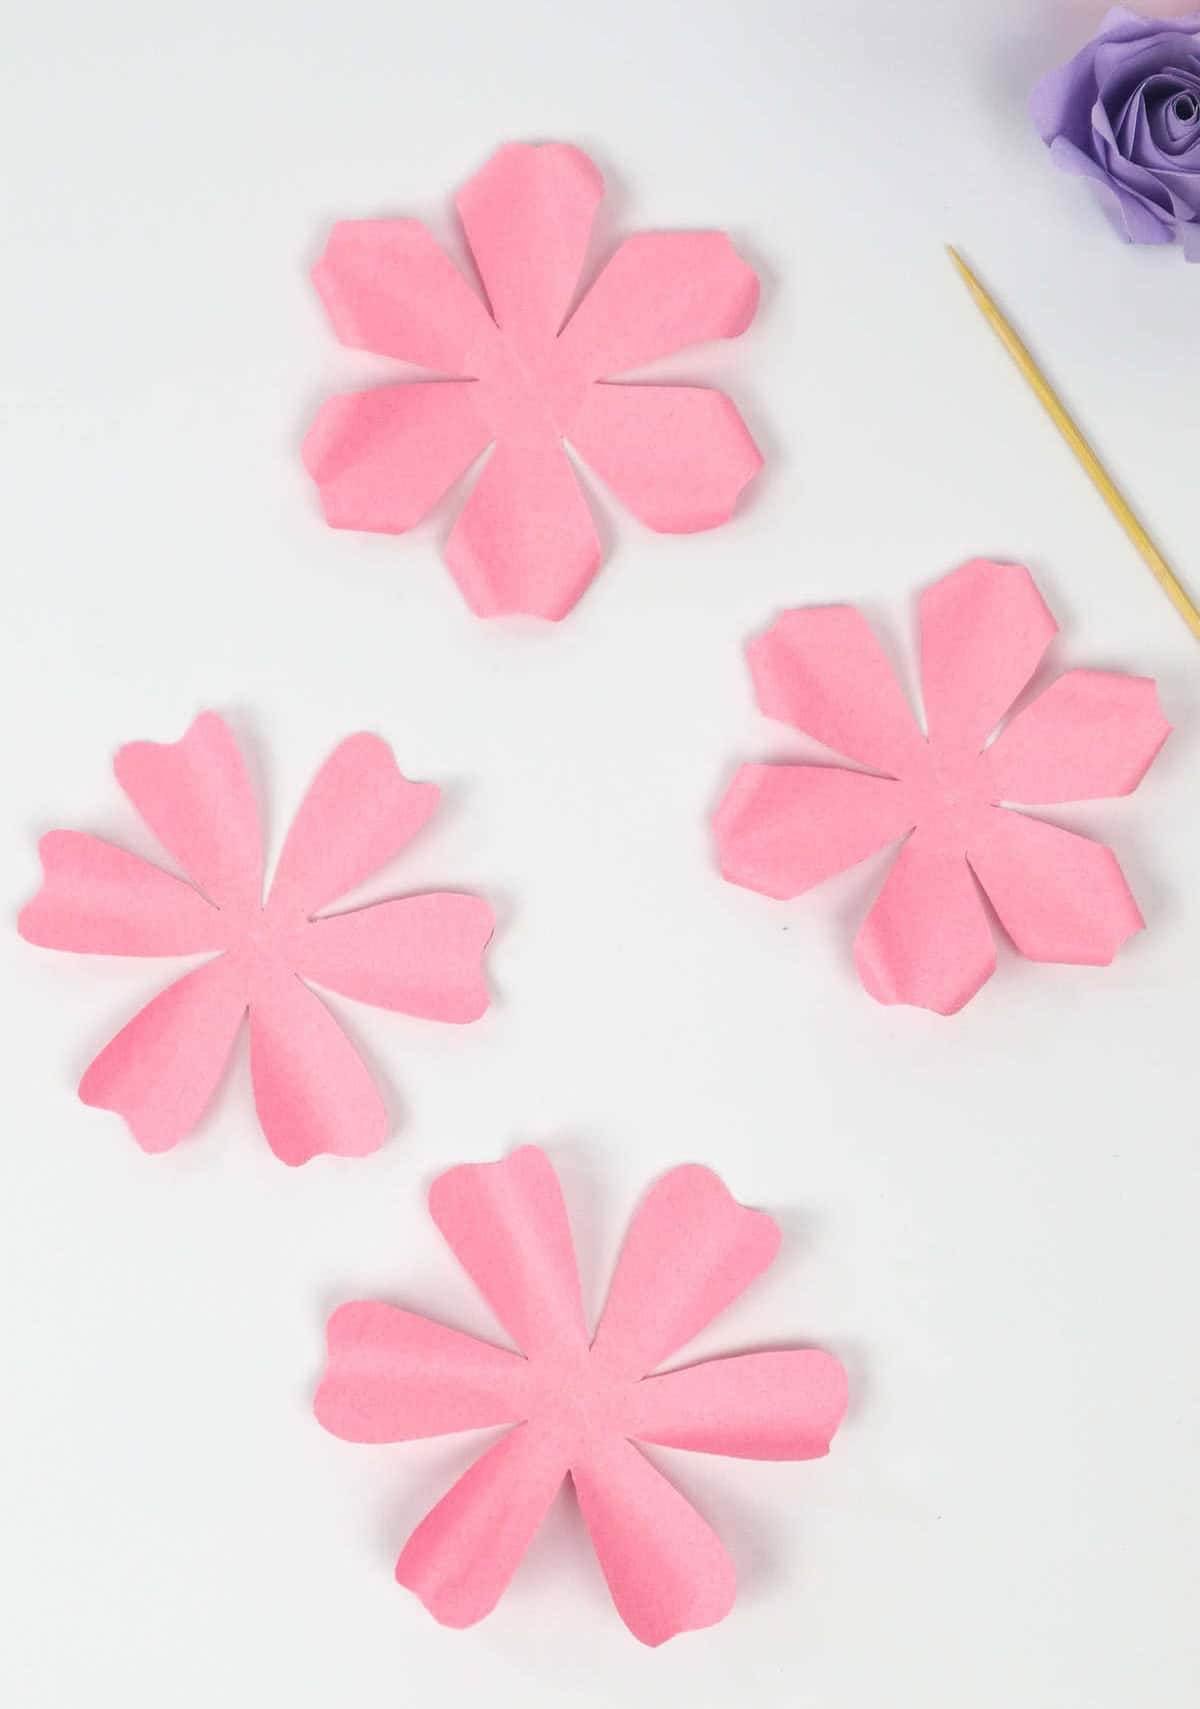
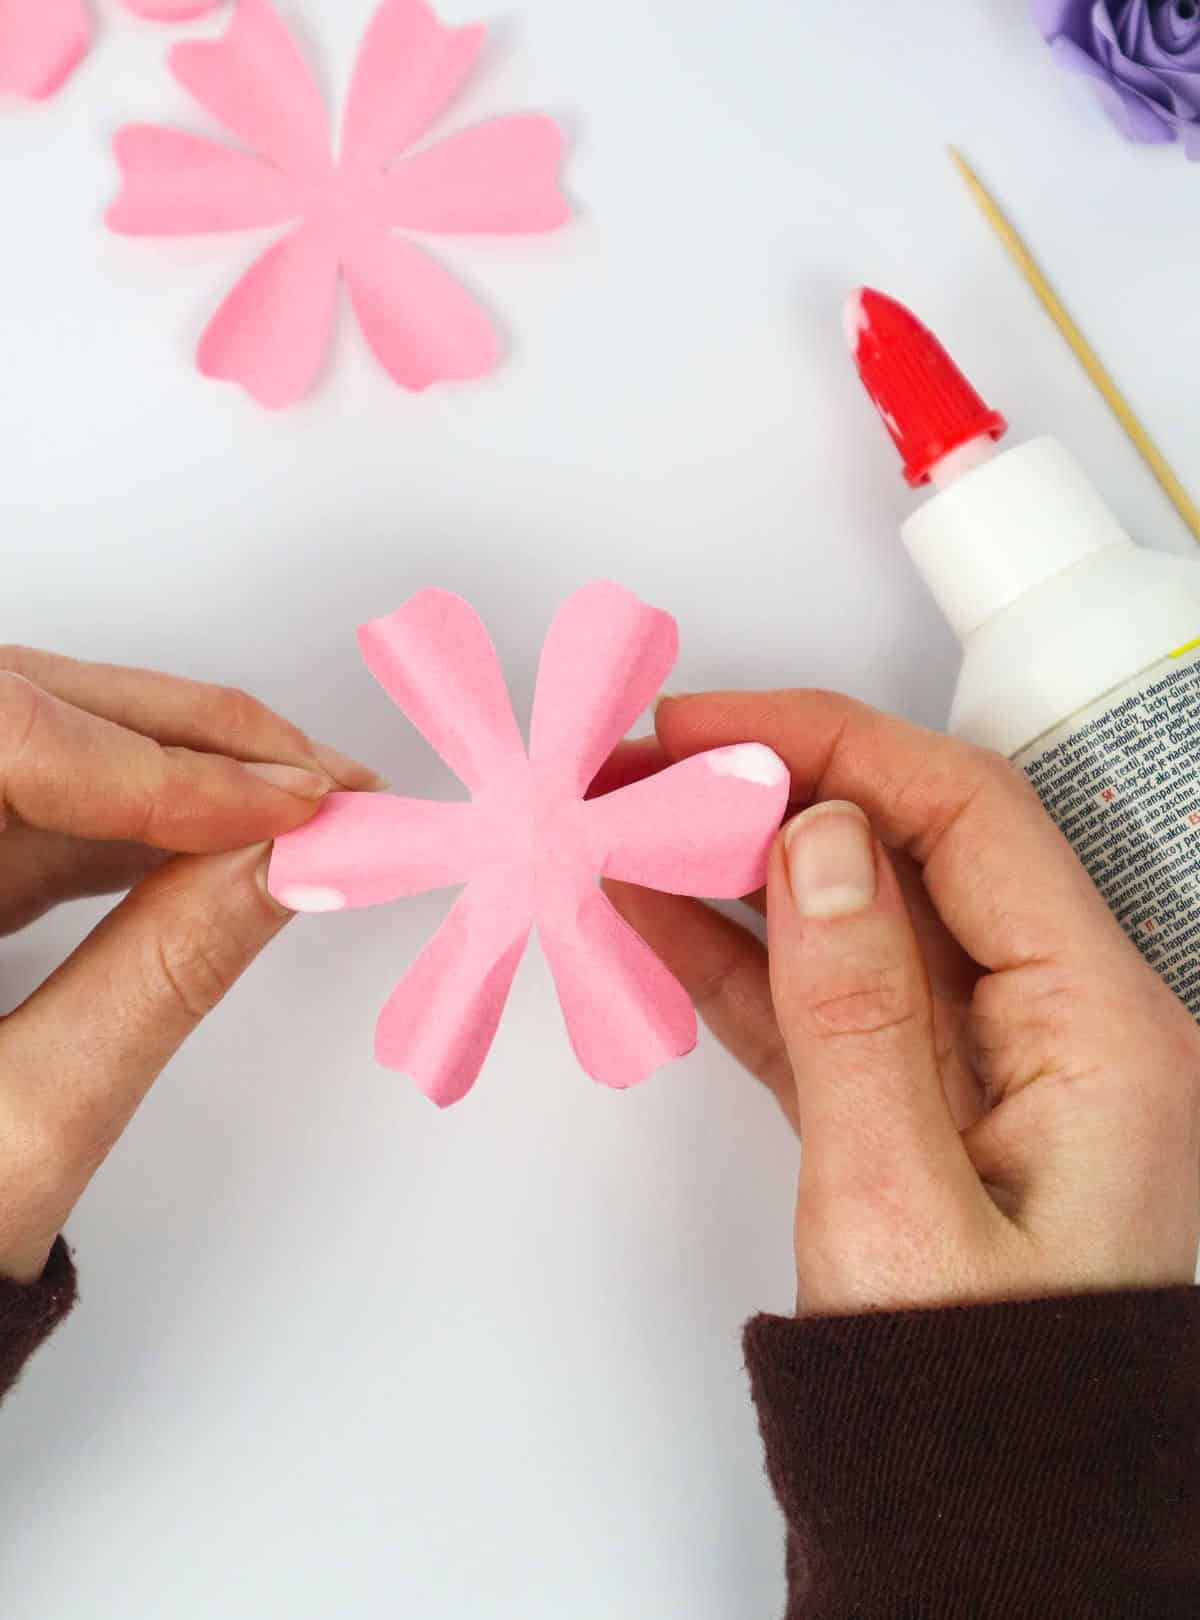
To take your petal design to the next level, employ a toothpick to create subtle curvature at the tips of each petal. This technique allows you to achieve a sense of depth and definition, giving your floral creation added visual interest. As you work on this step, keep in mind that not all petals will require this treatment. In fact, only two of the four sheets will serve as outer petals, while the remaining two will be positioned inwardly.
By carefully curving just the tips of the outer petals, you’ll create a visually appealing contrast between these and the inner petals.
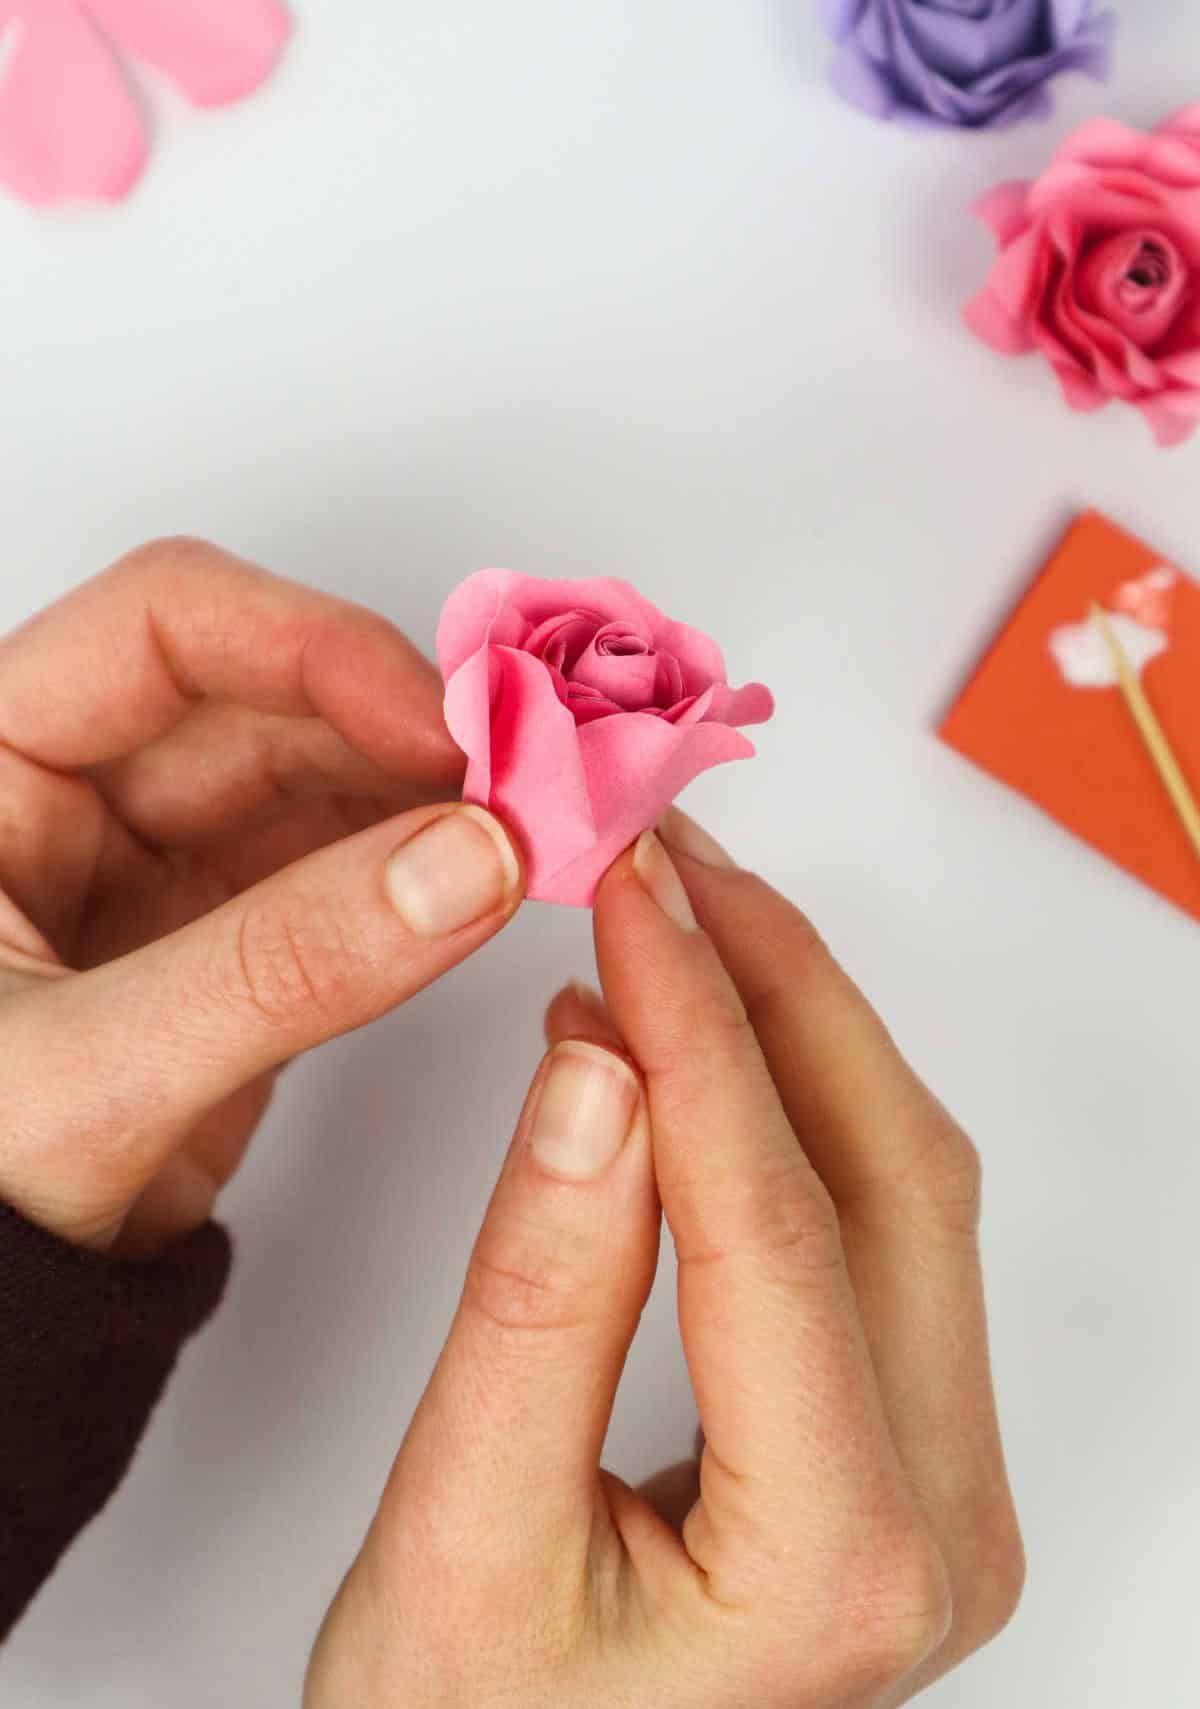
Step 8
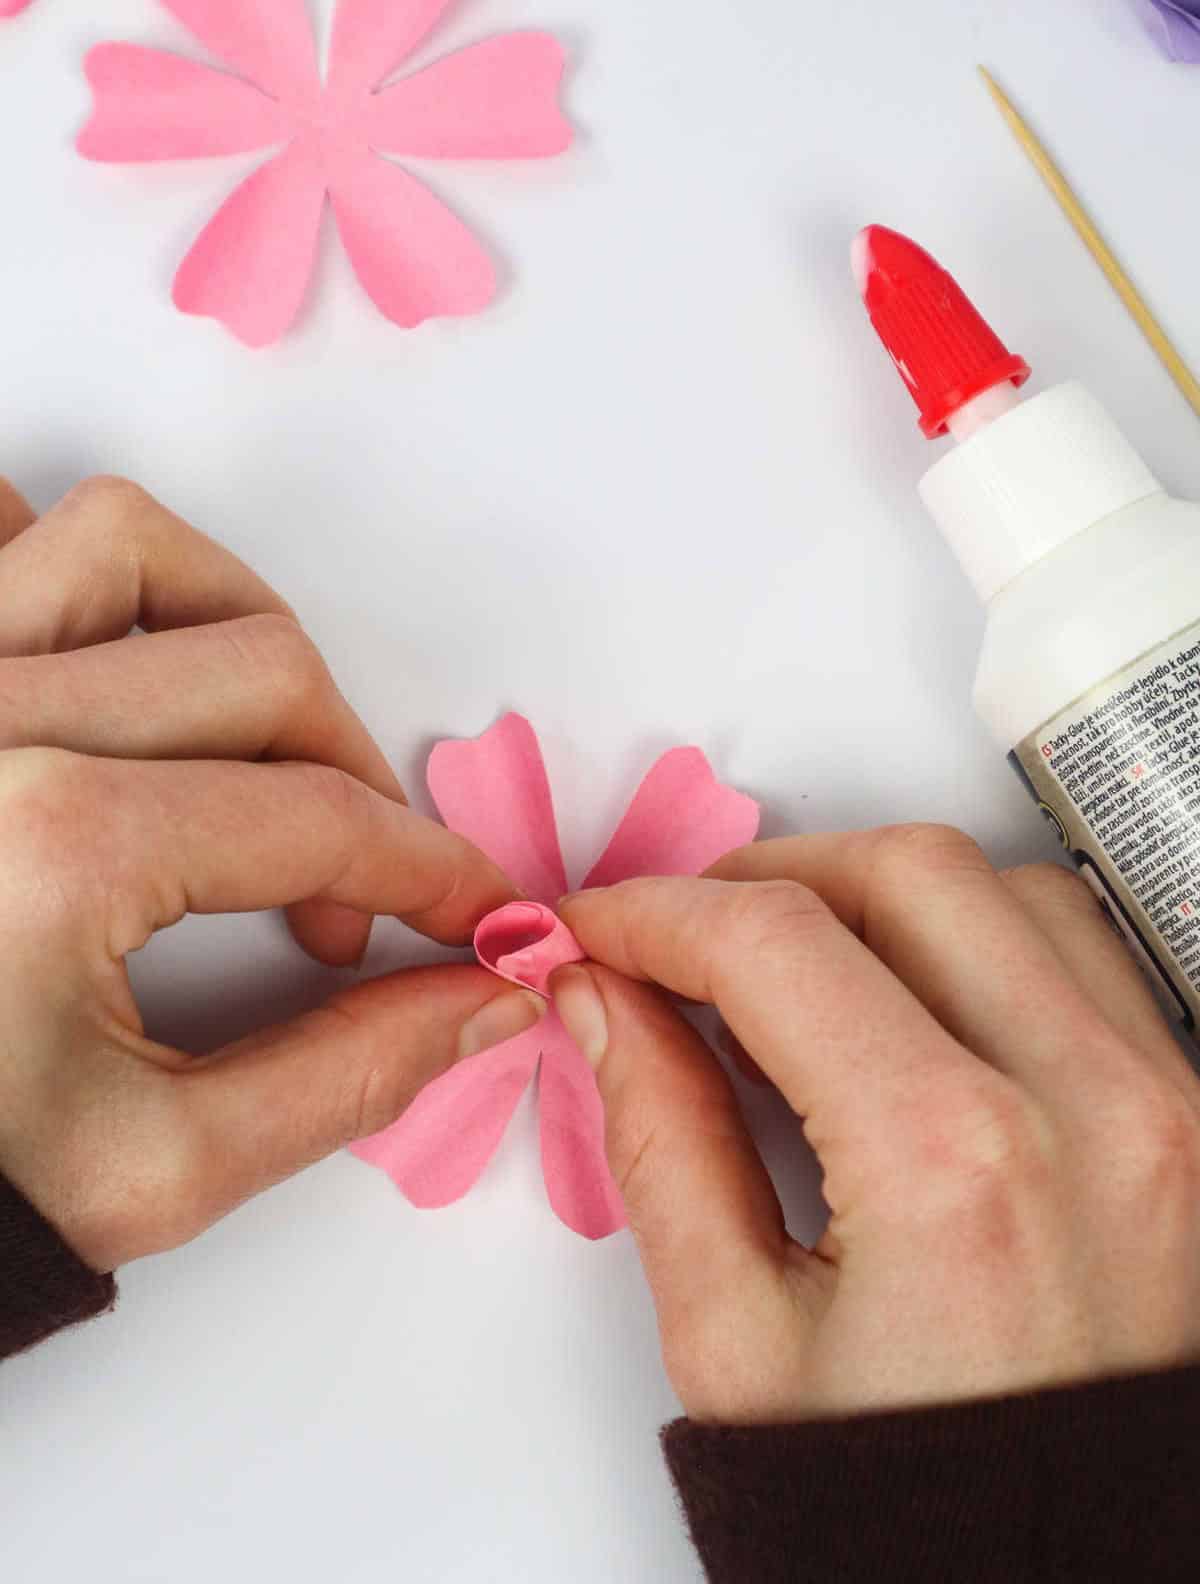

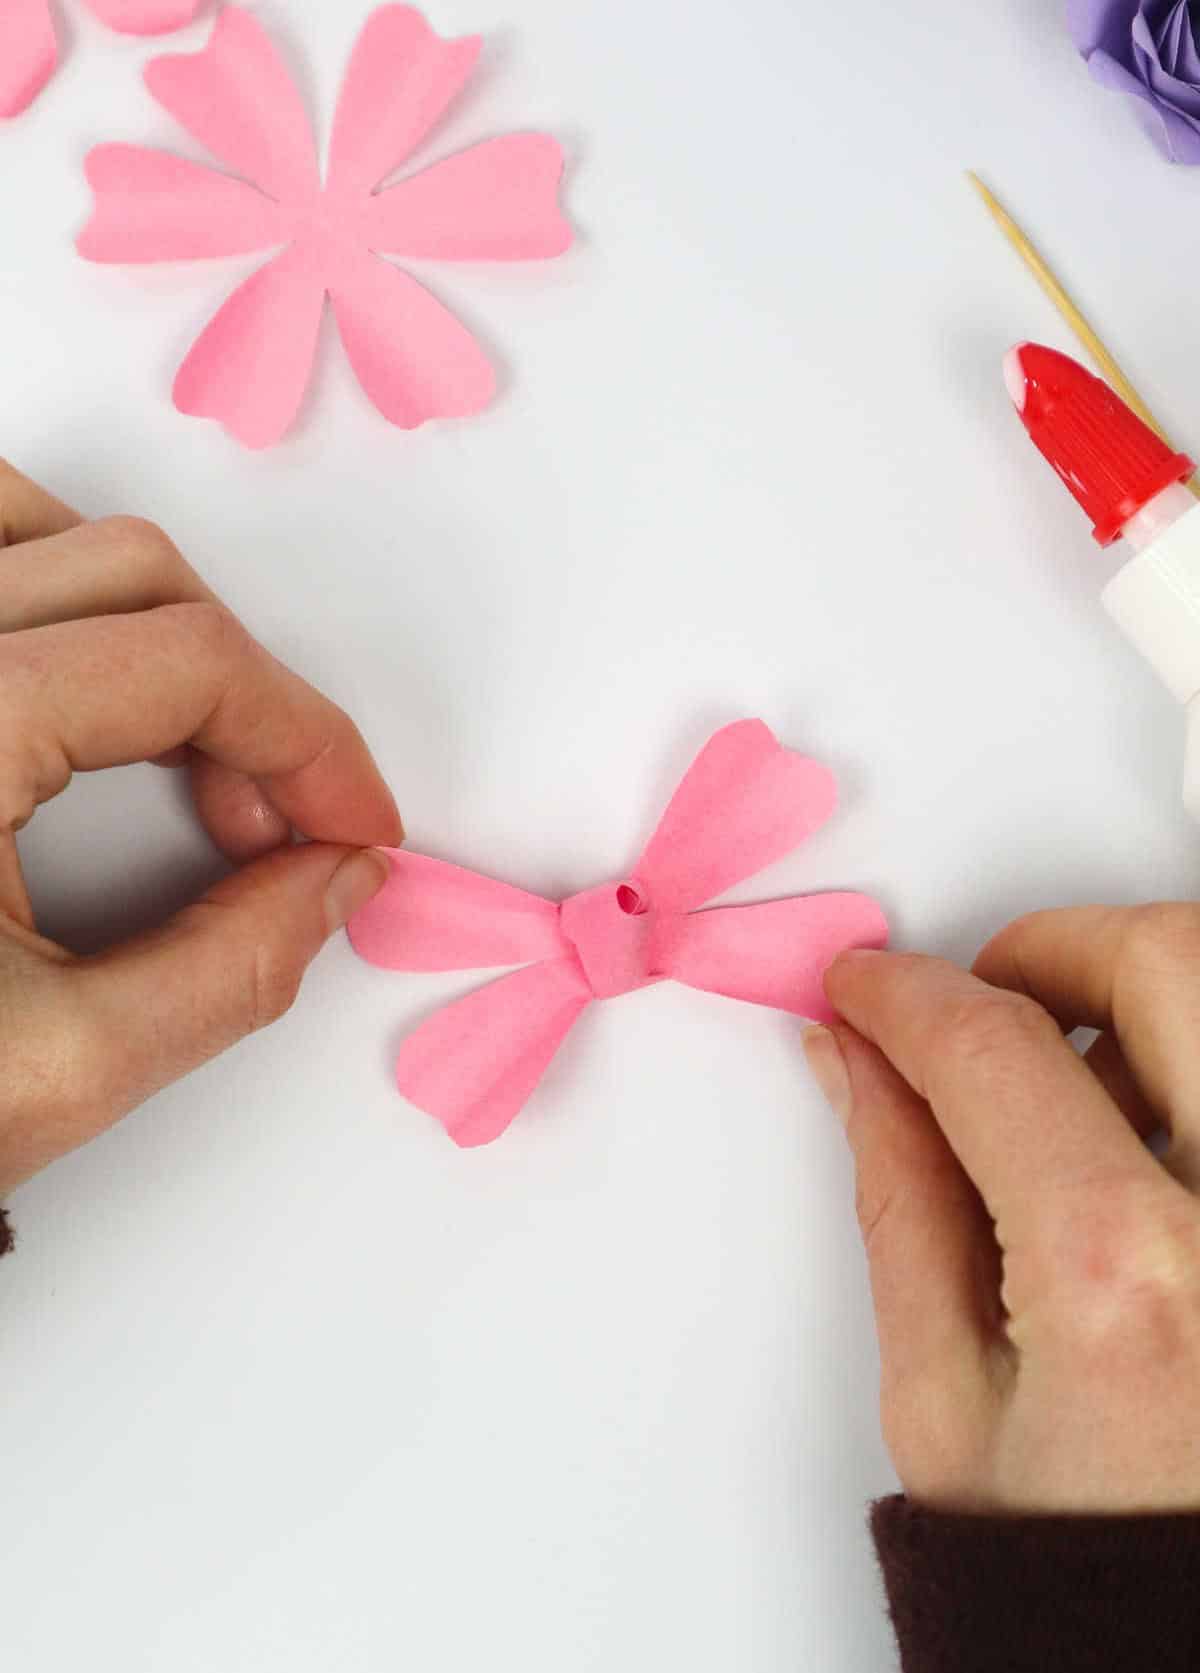
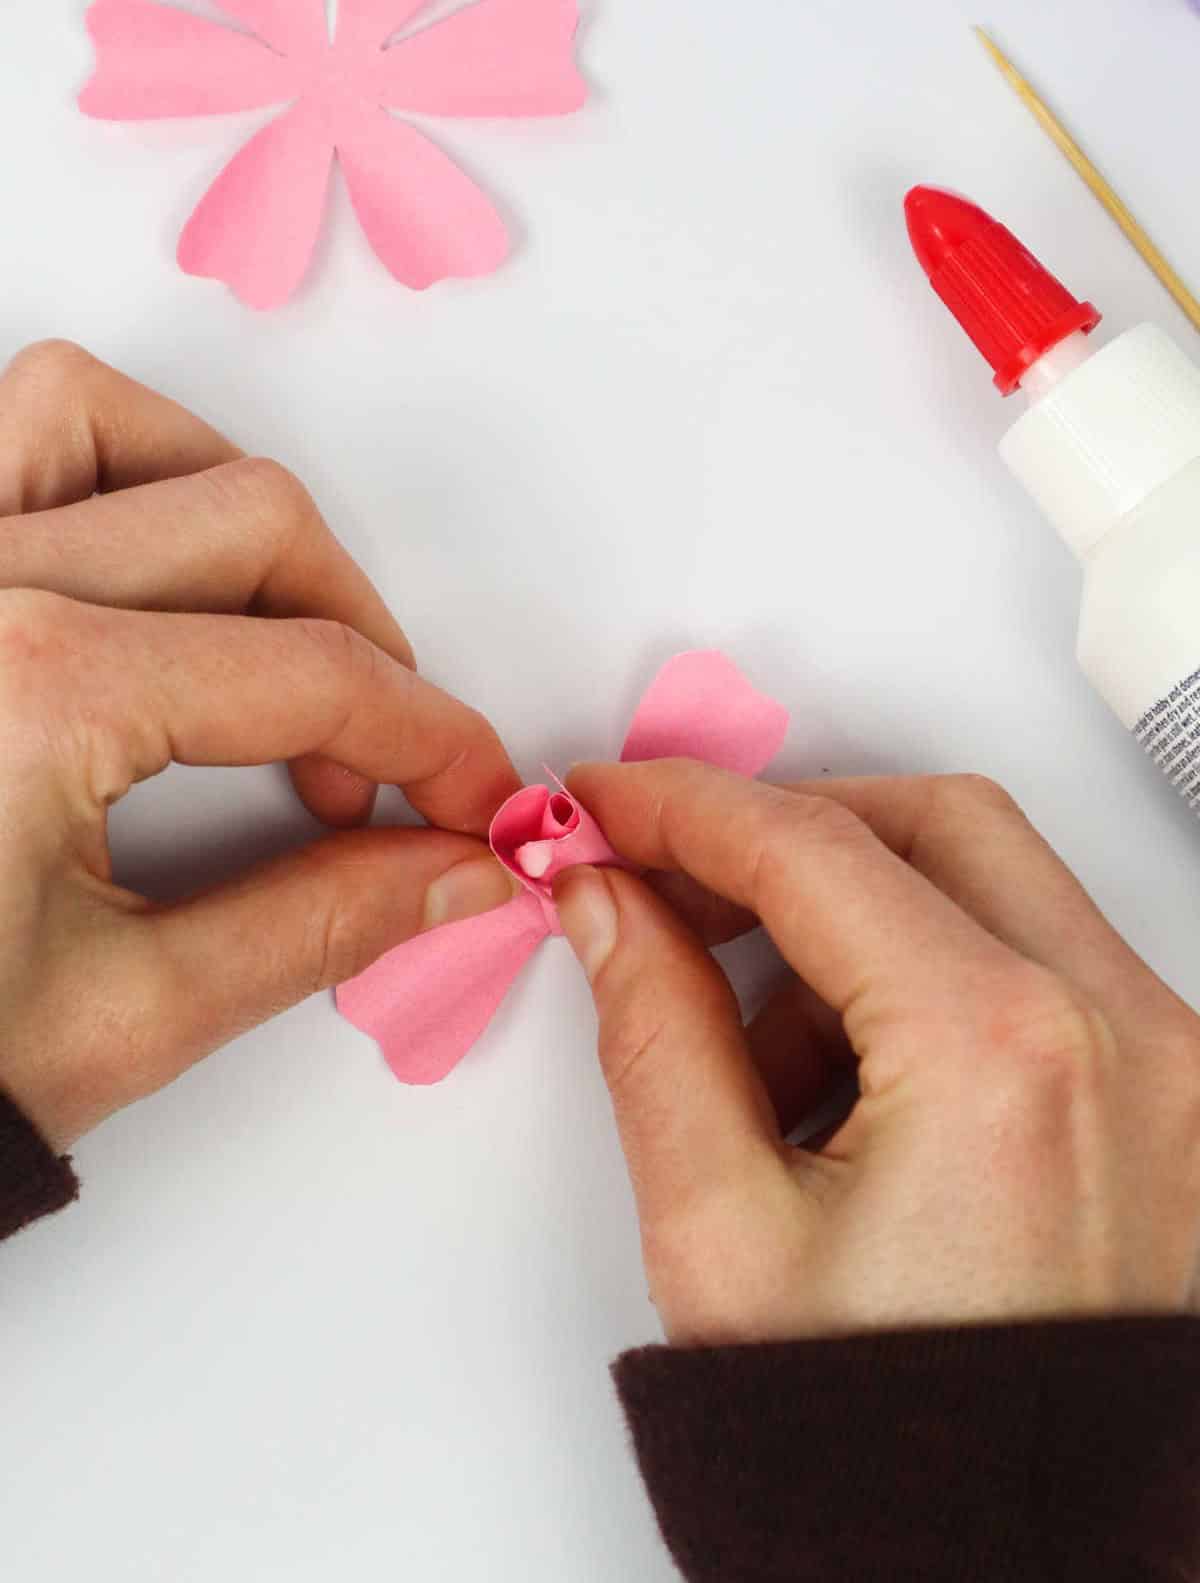
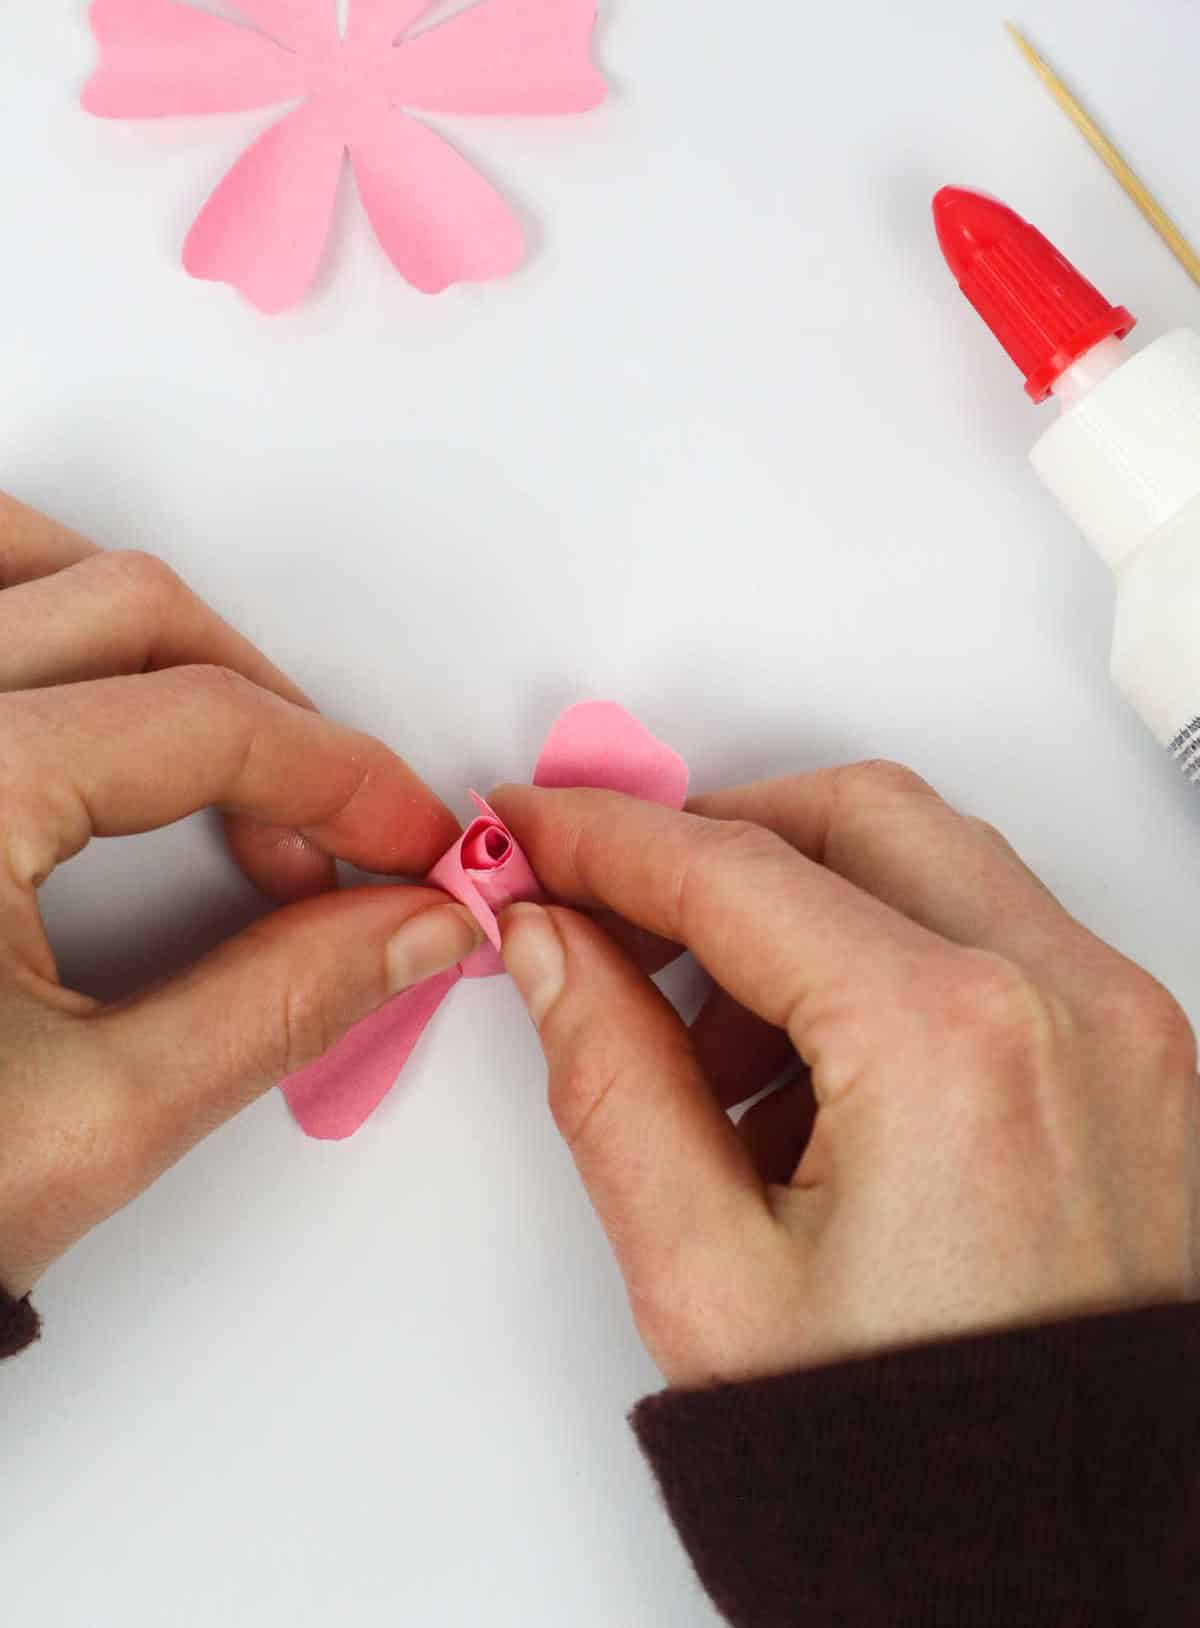
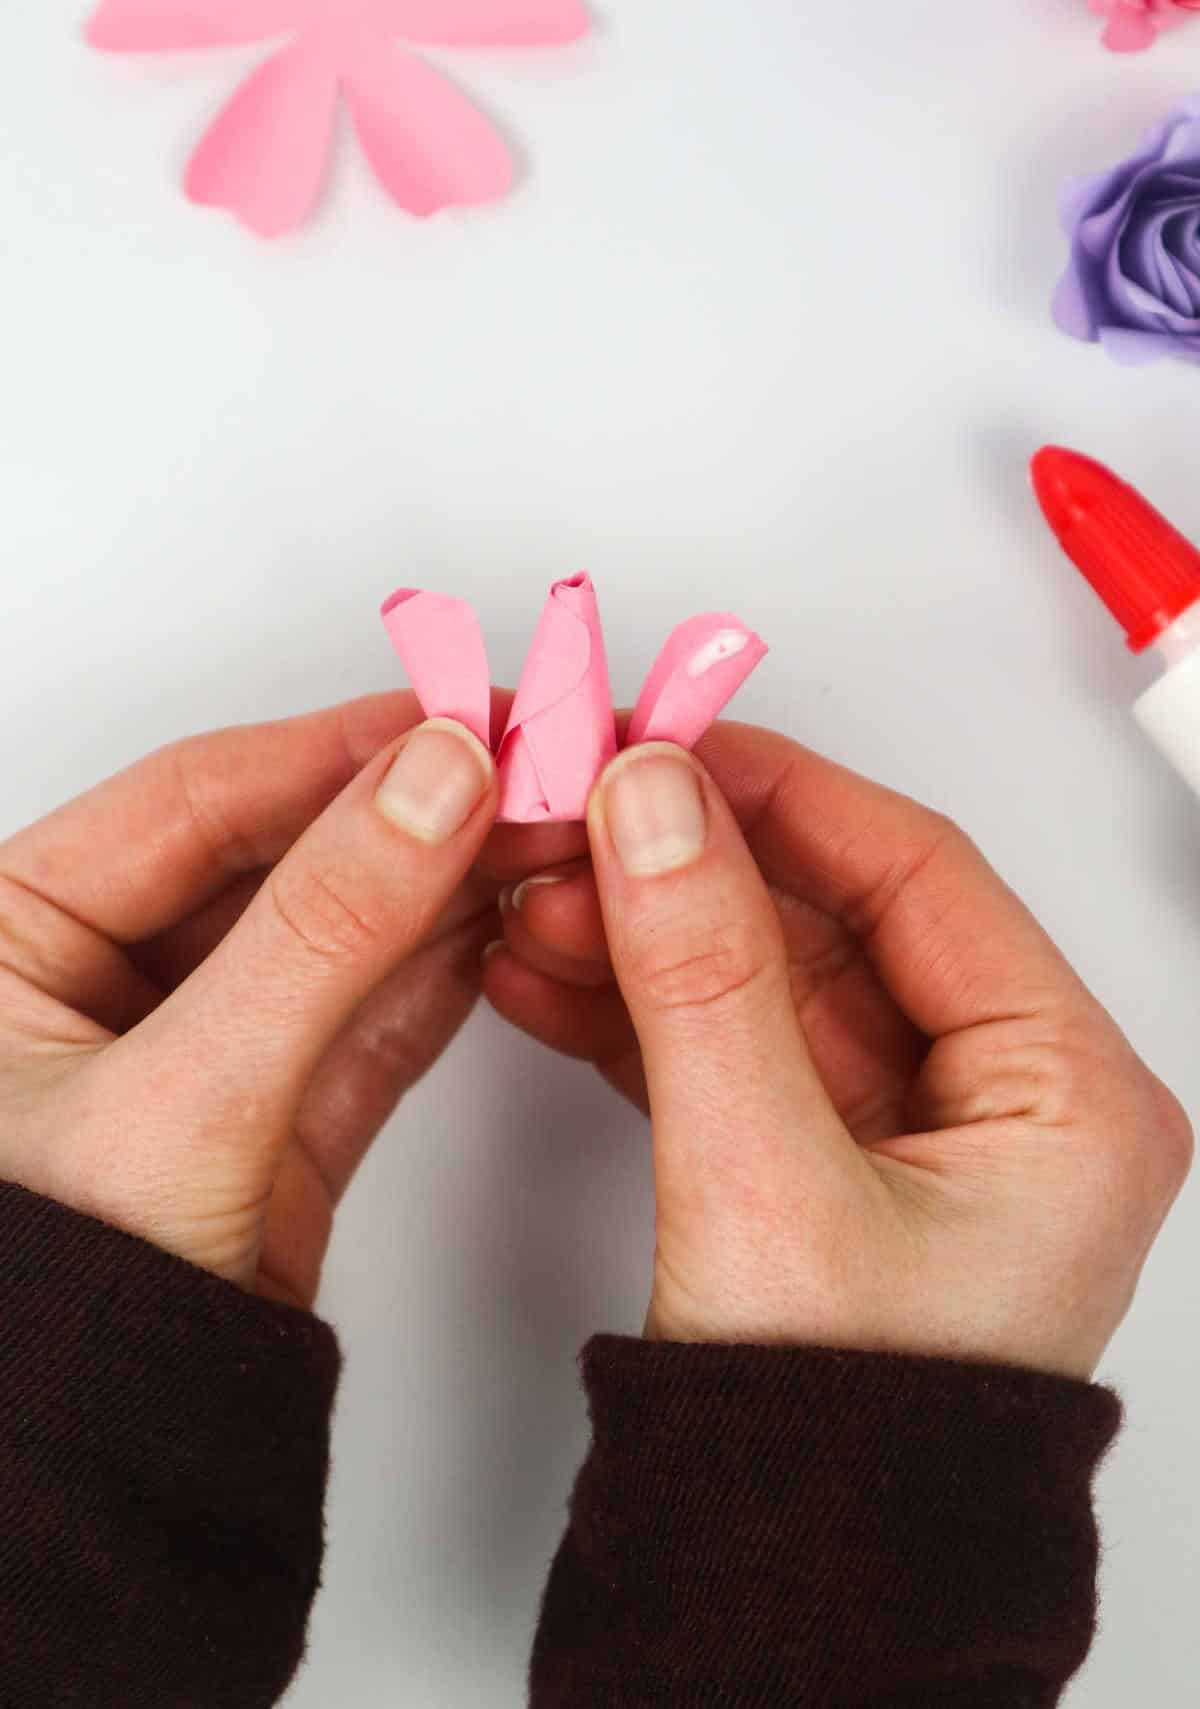
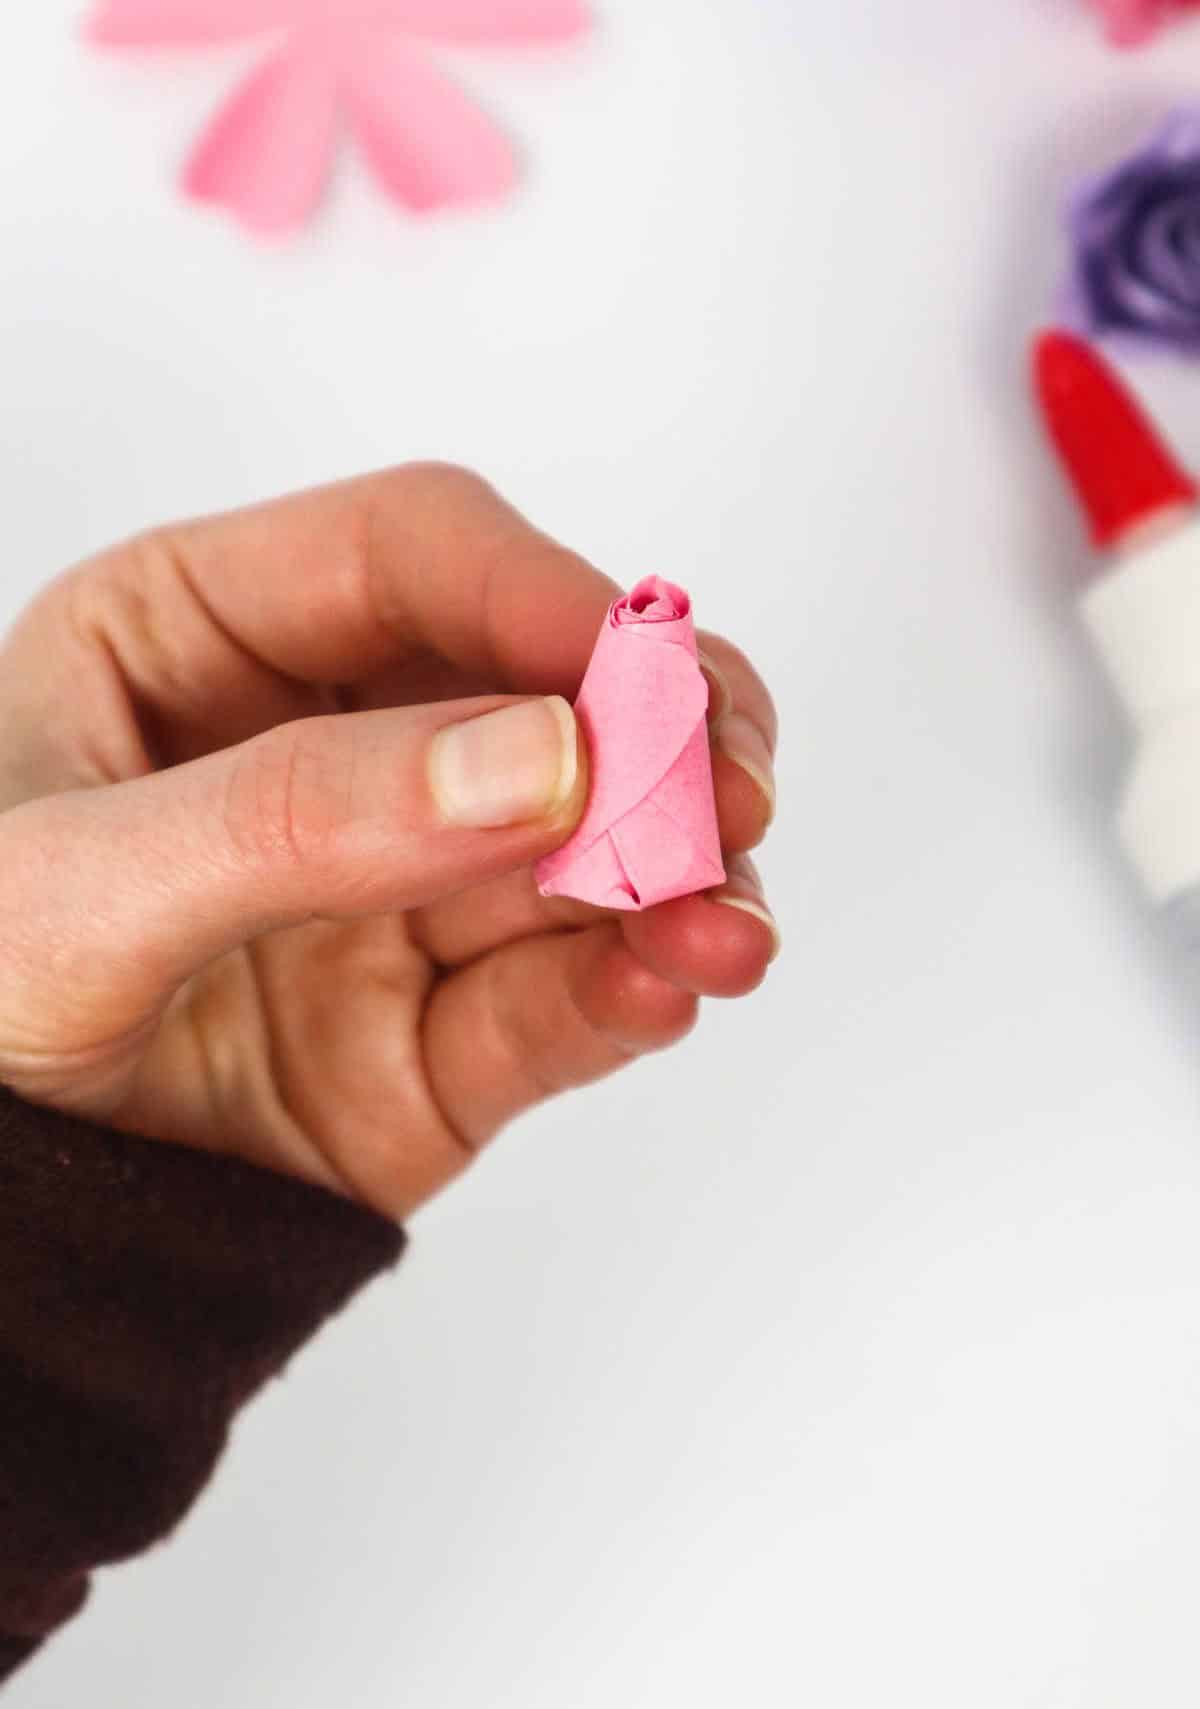
To create the center bud of your rose, start by applying a small amount of glue to the tips of two opposite petals. Gently press these tips together to form the center bud, as illustrated below. Then, add another layer of petals by dabbing glue on the tips of two more opposite petals and bringing them in to surround the center bud. Repeat this process one more time with the remaining two petals, resulting in a neat and tidy central bud for your rose.
Step 9
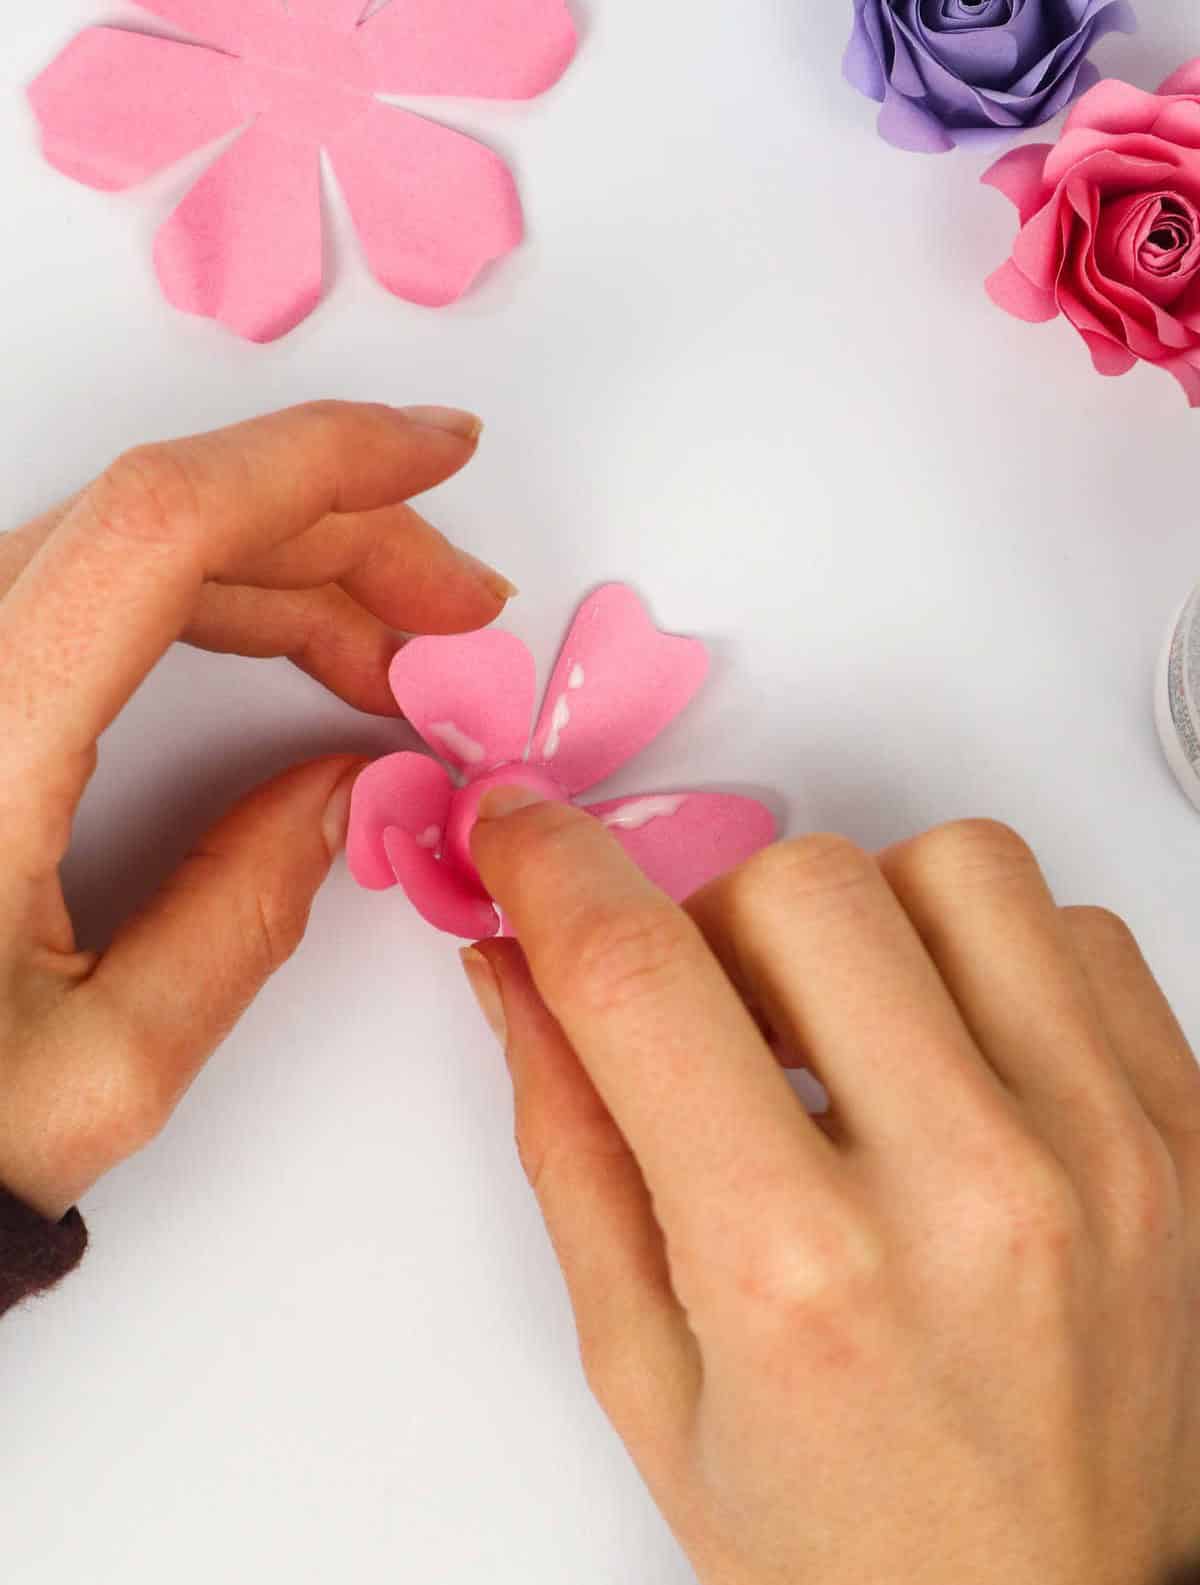

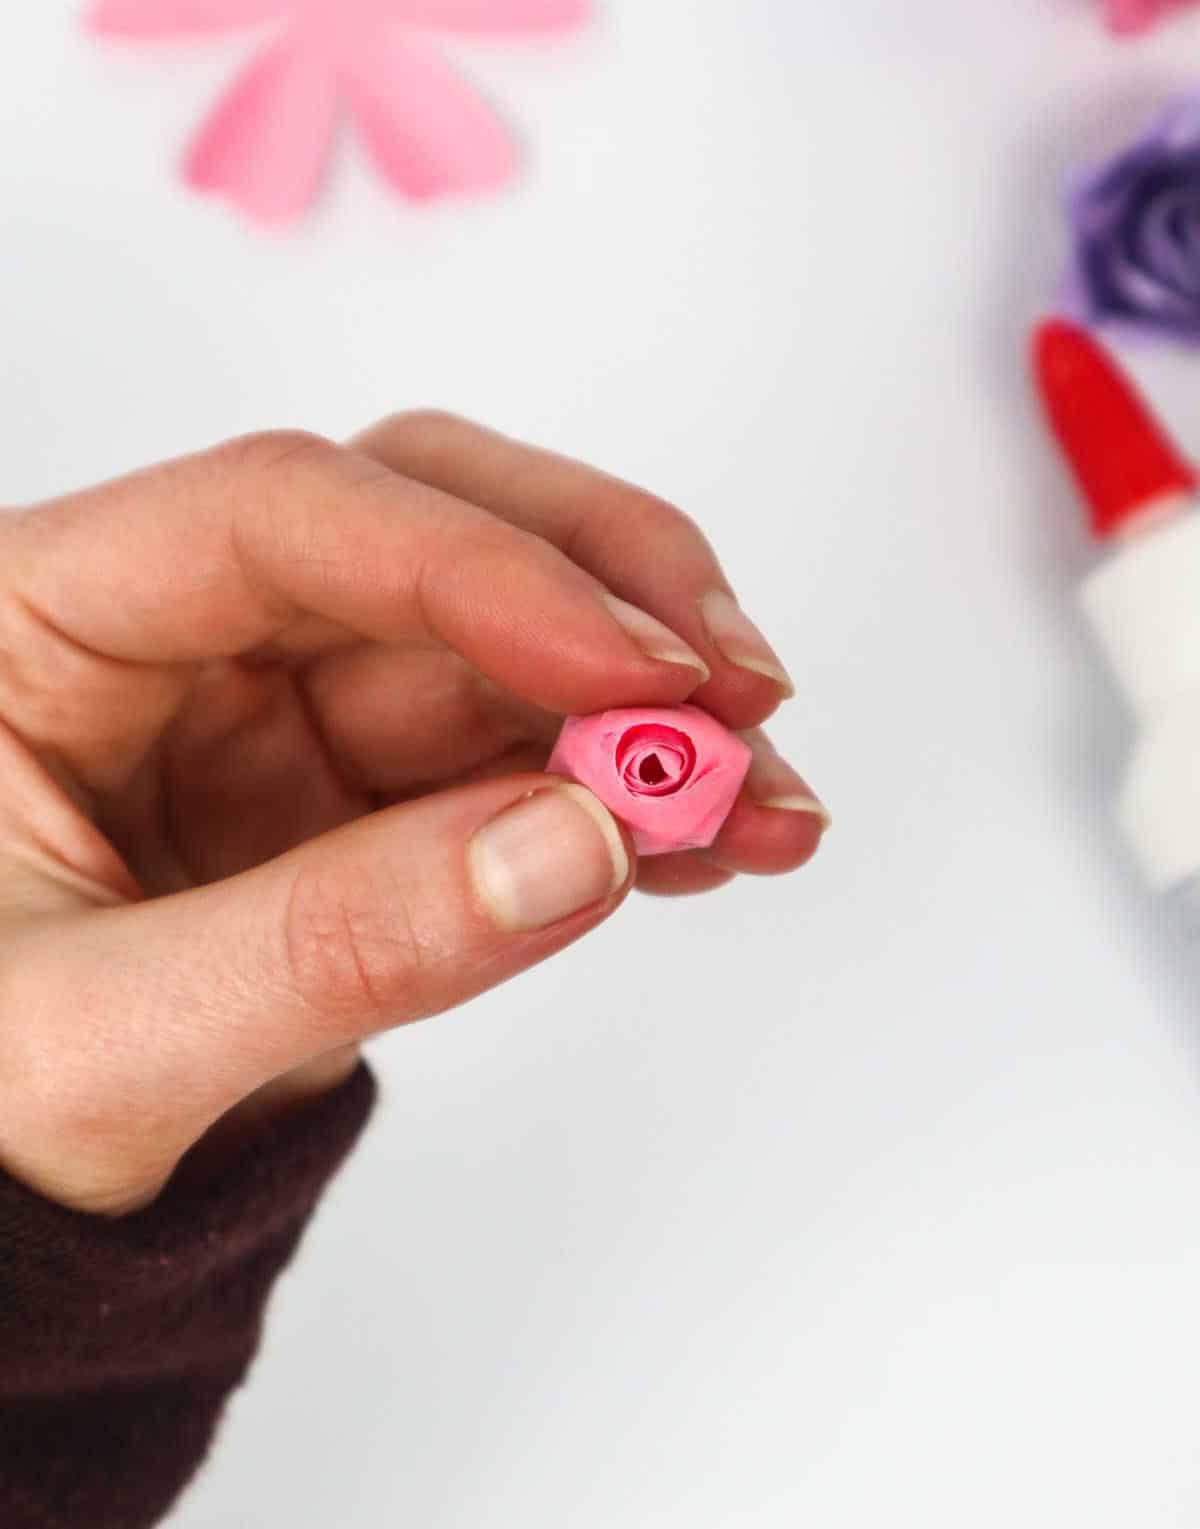
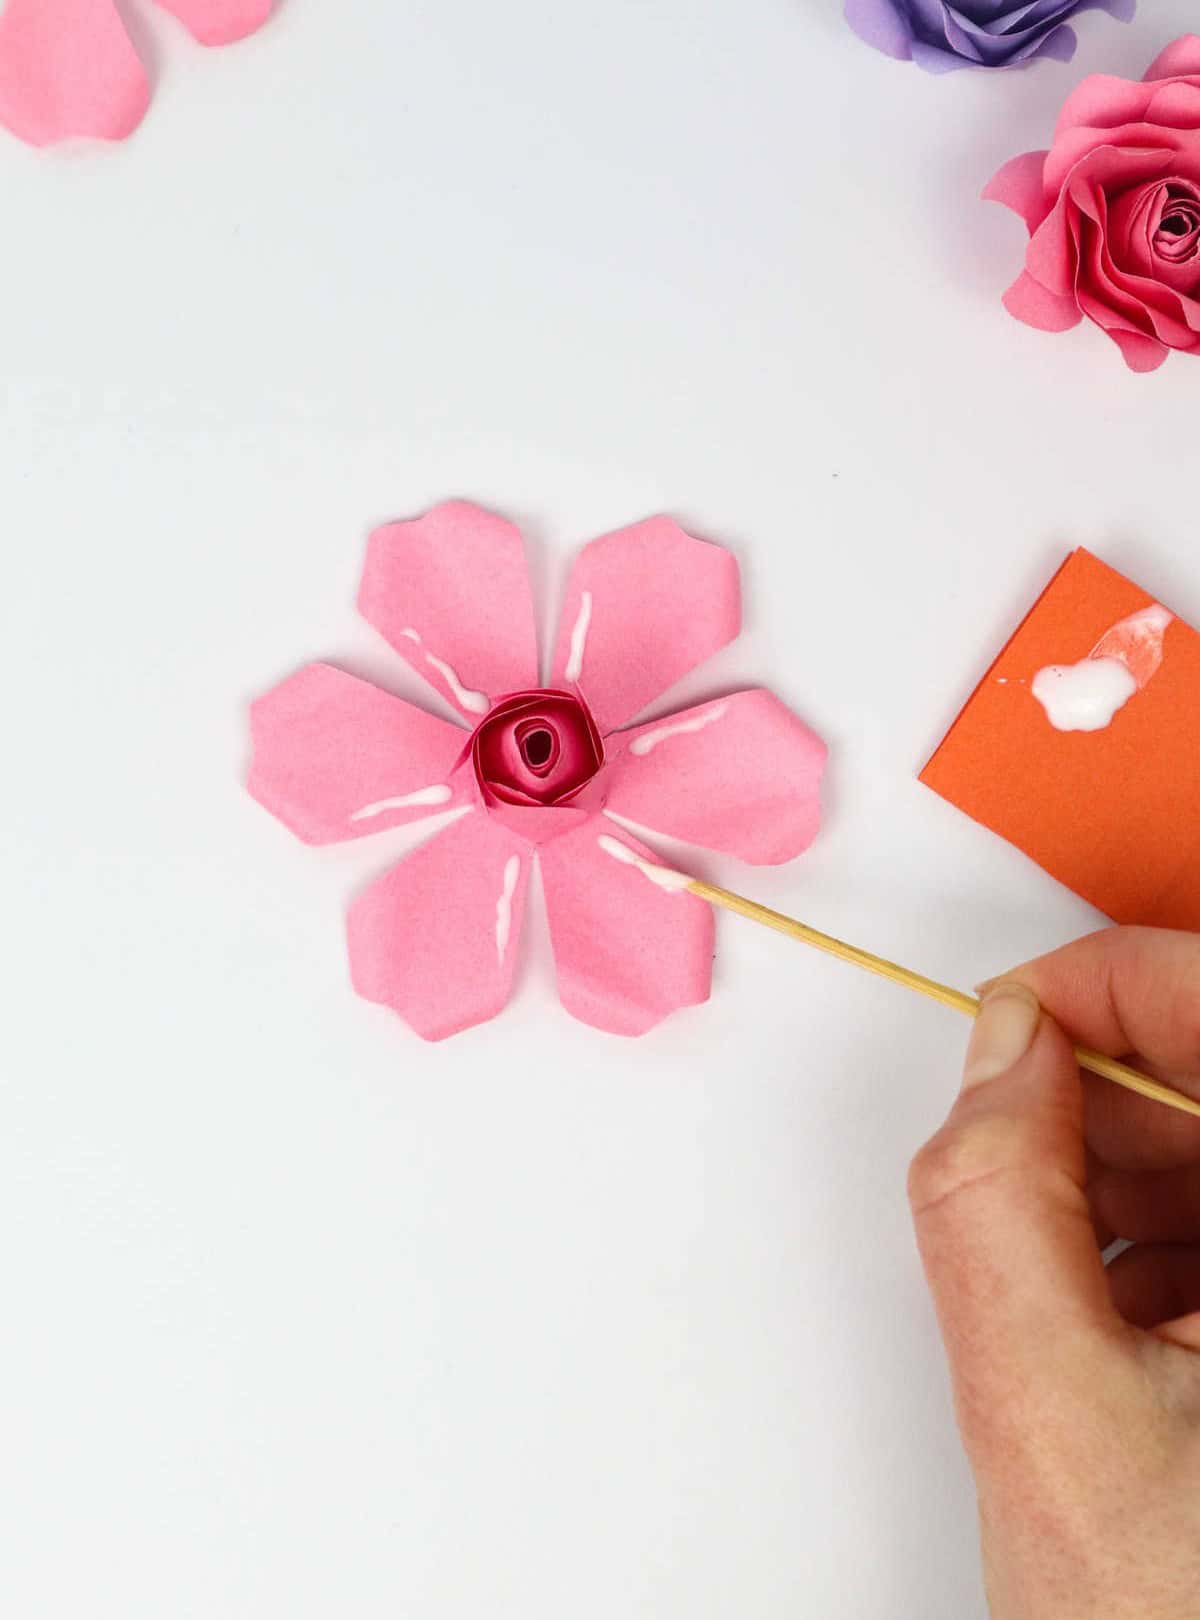
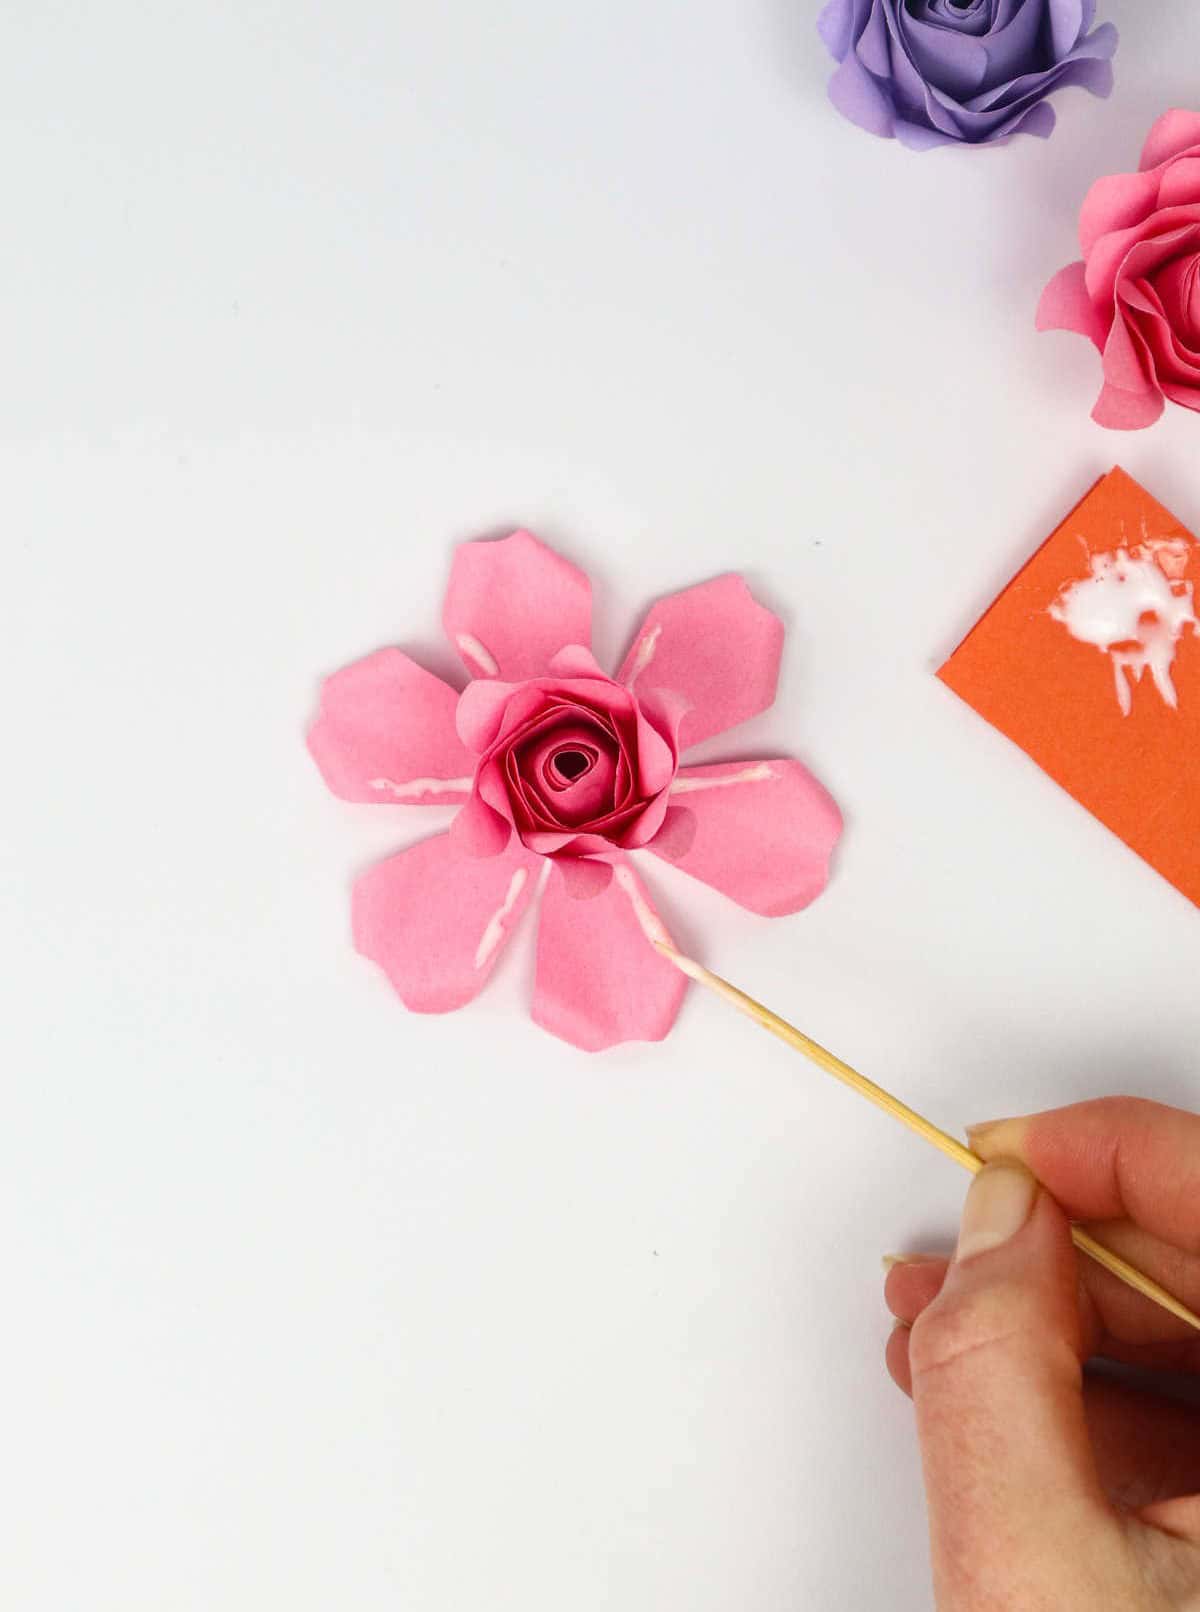
To complete the intricate design, begin by preparing the inner layer sheet’s second piece. Apply a small amount of glue to the center of this sheet, being mindful not to apply too much adhesive. Next, carefully position the conical bud you crafted earlier and gently press it into place, ensuring it adheres securely to the sheet. Hold the two components together for a few seconds to allow the glue to set.
Once the bud is firmly attached, use thin strips of glue to create six gentle lines, one for each petal. Apply these lines along the outer edges of the petals, taking care not to apply too much glue. Then, slowly pull each petal towards the center, allowing them to unfold slightly as you do so. This will give the appearance of the petals gradually opening up. Continue this process until all six petals are attached and arranged in a natural, unfurling manner.
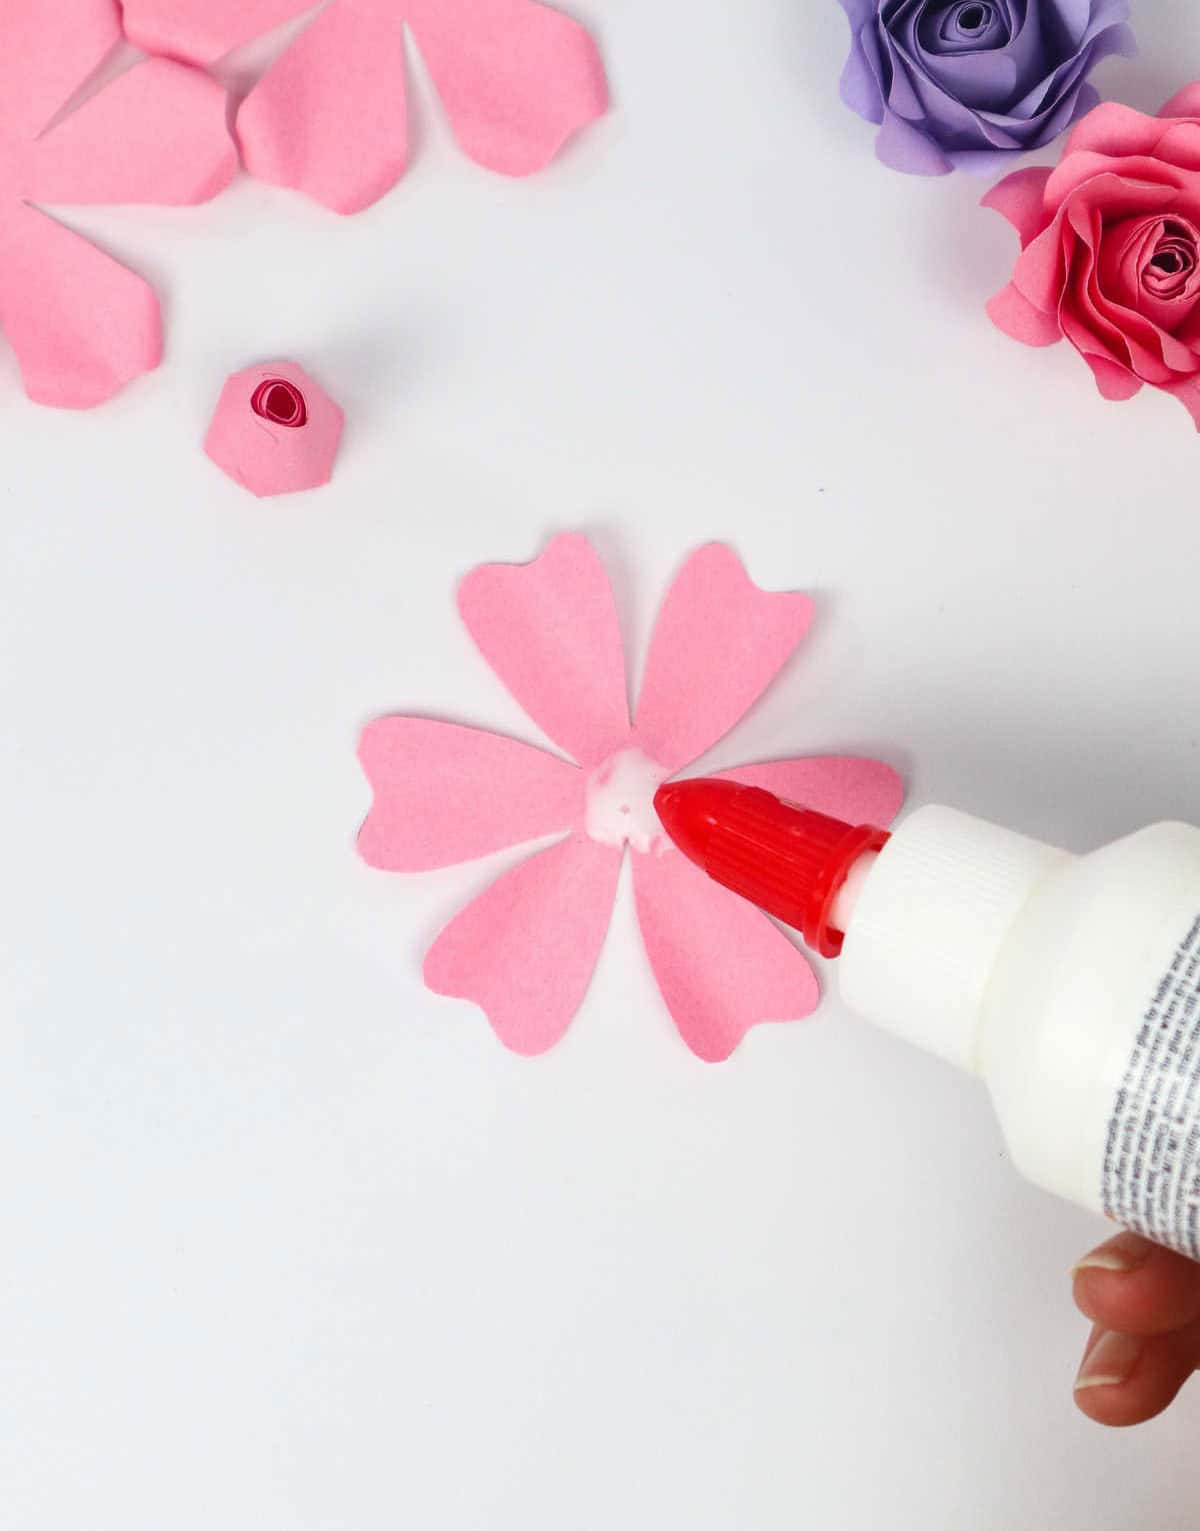
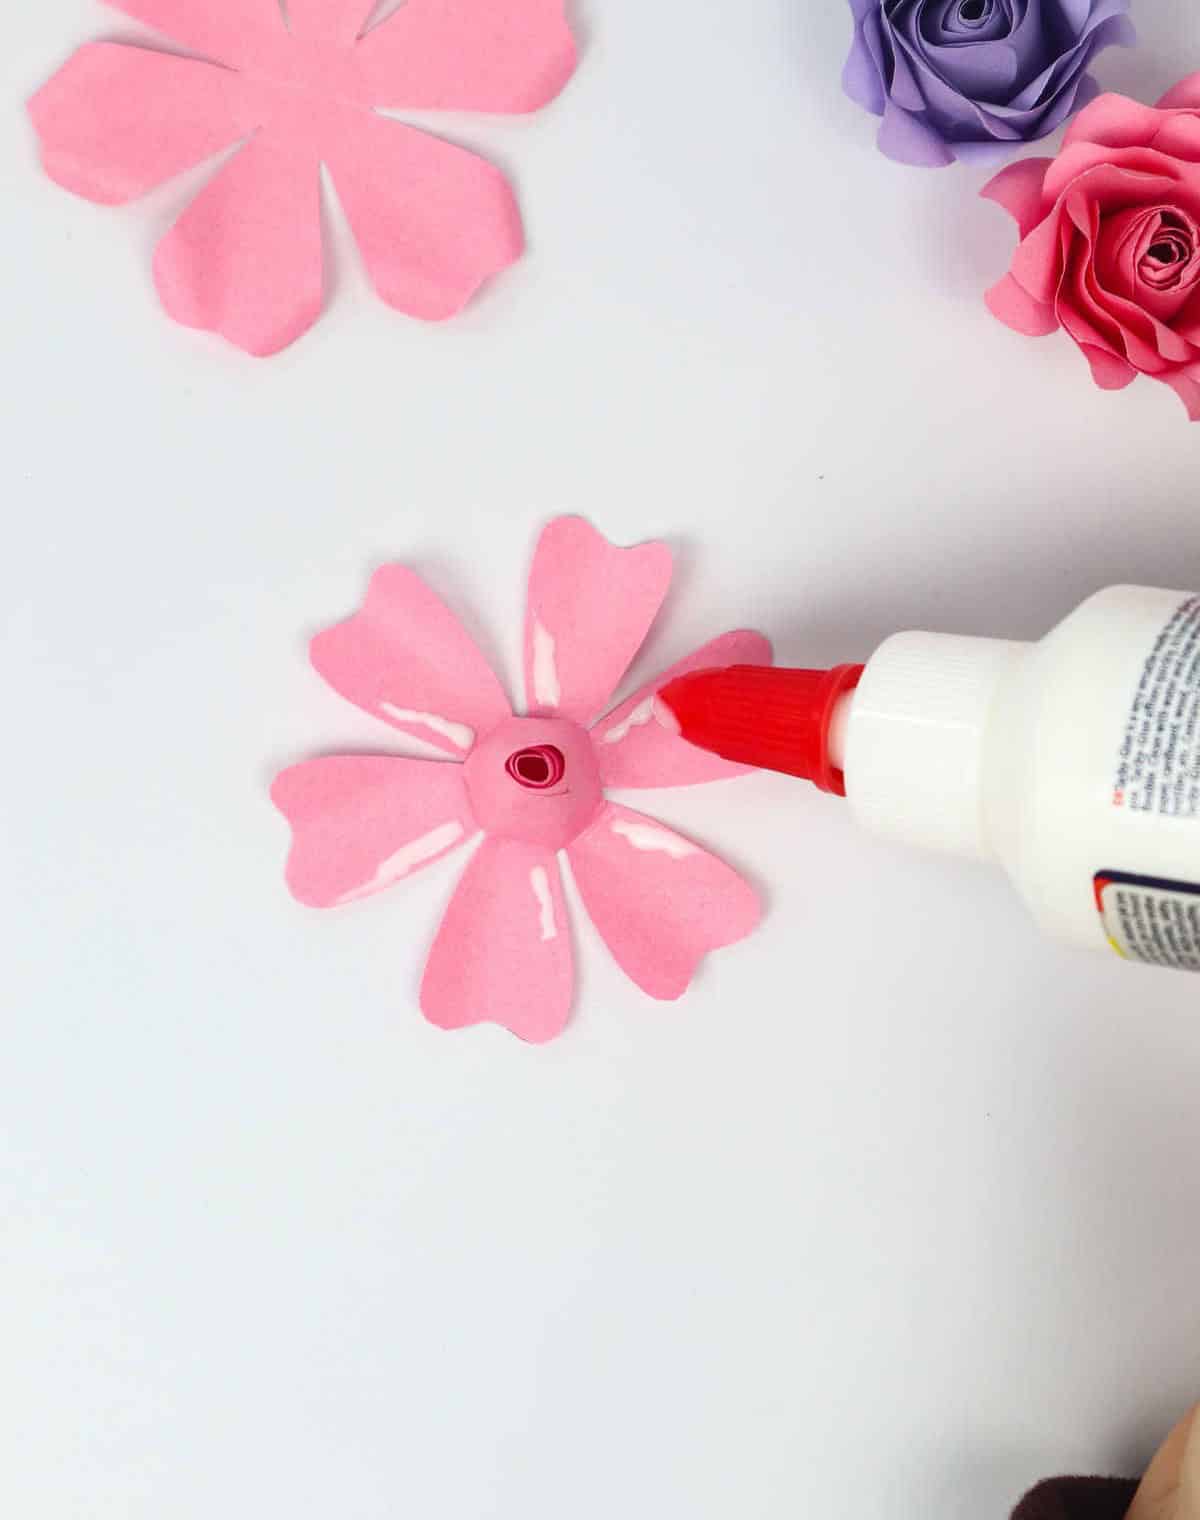
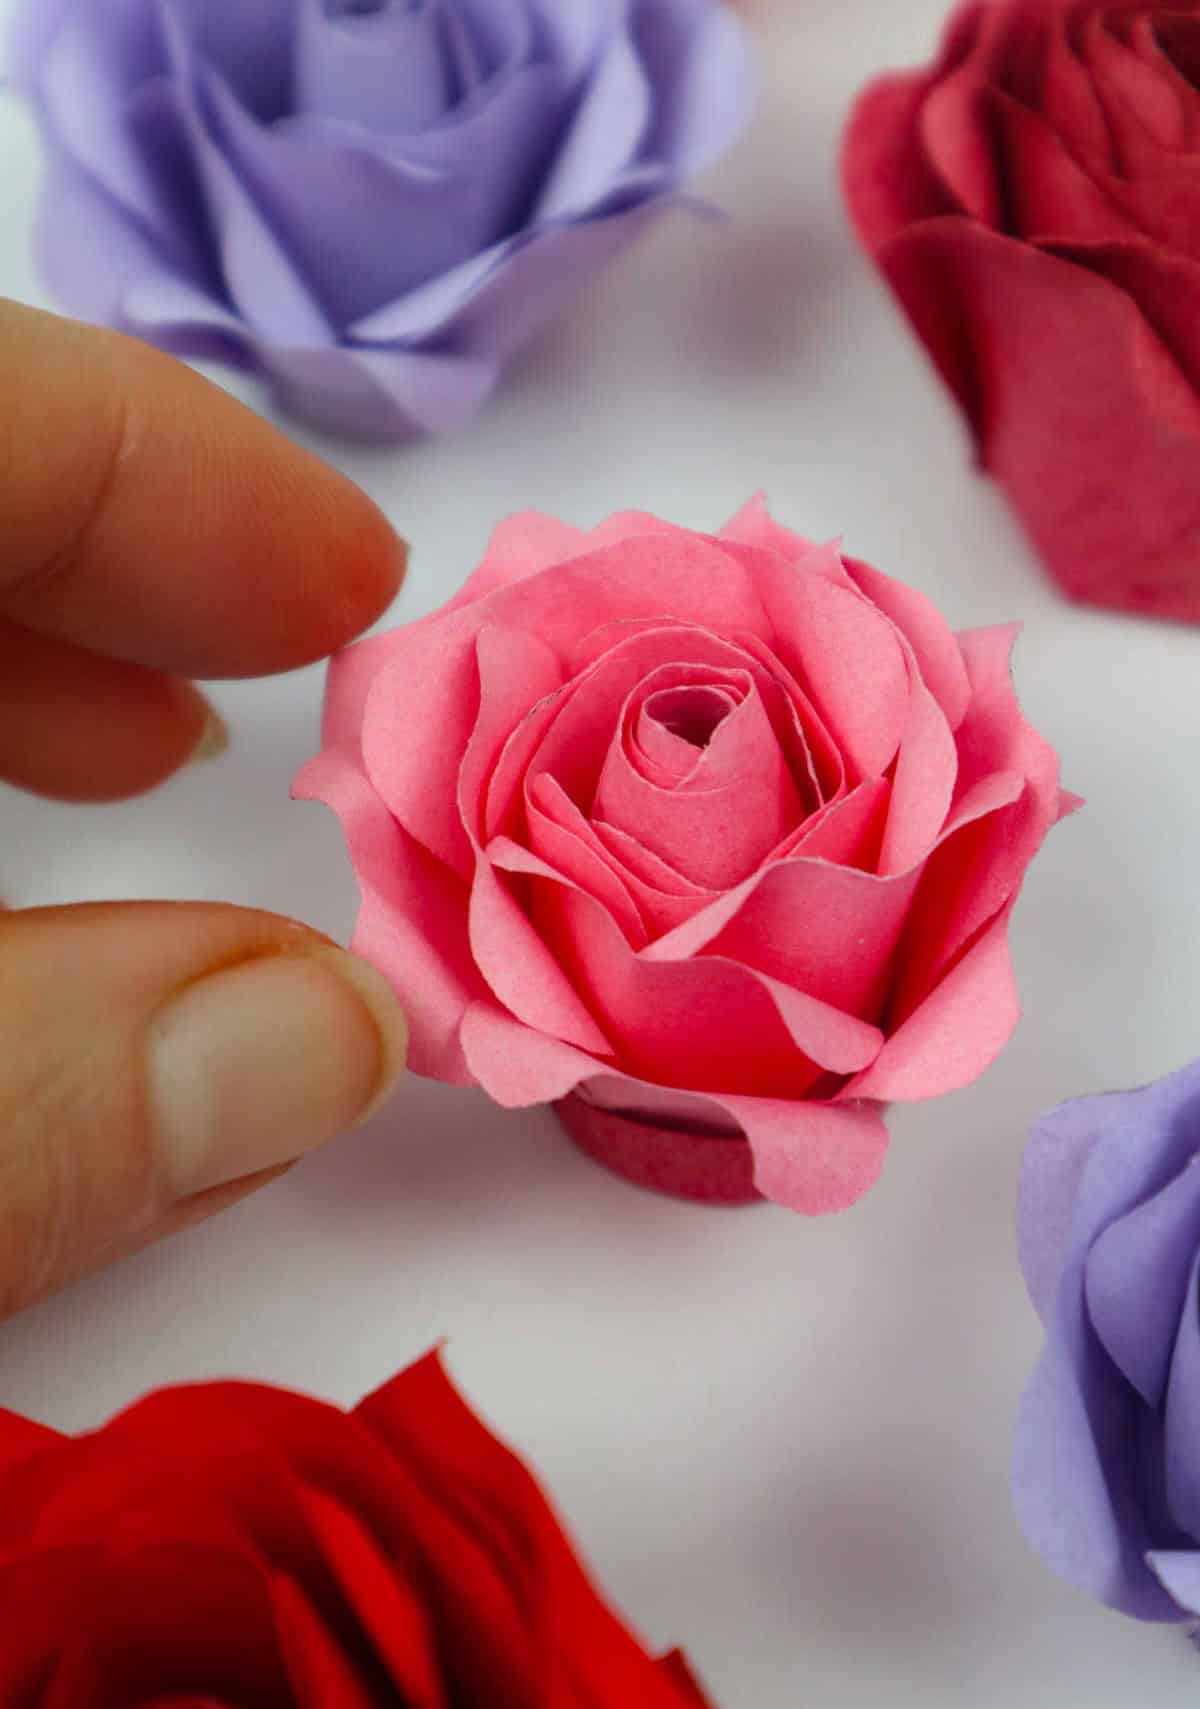
Step 10
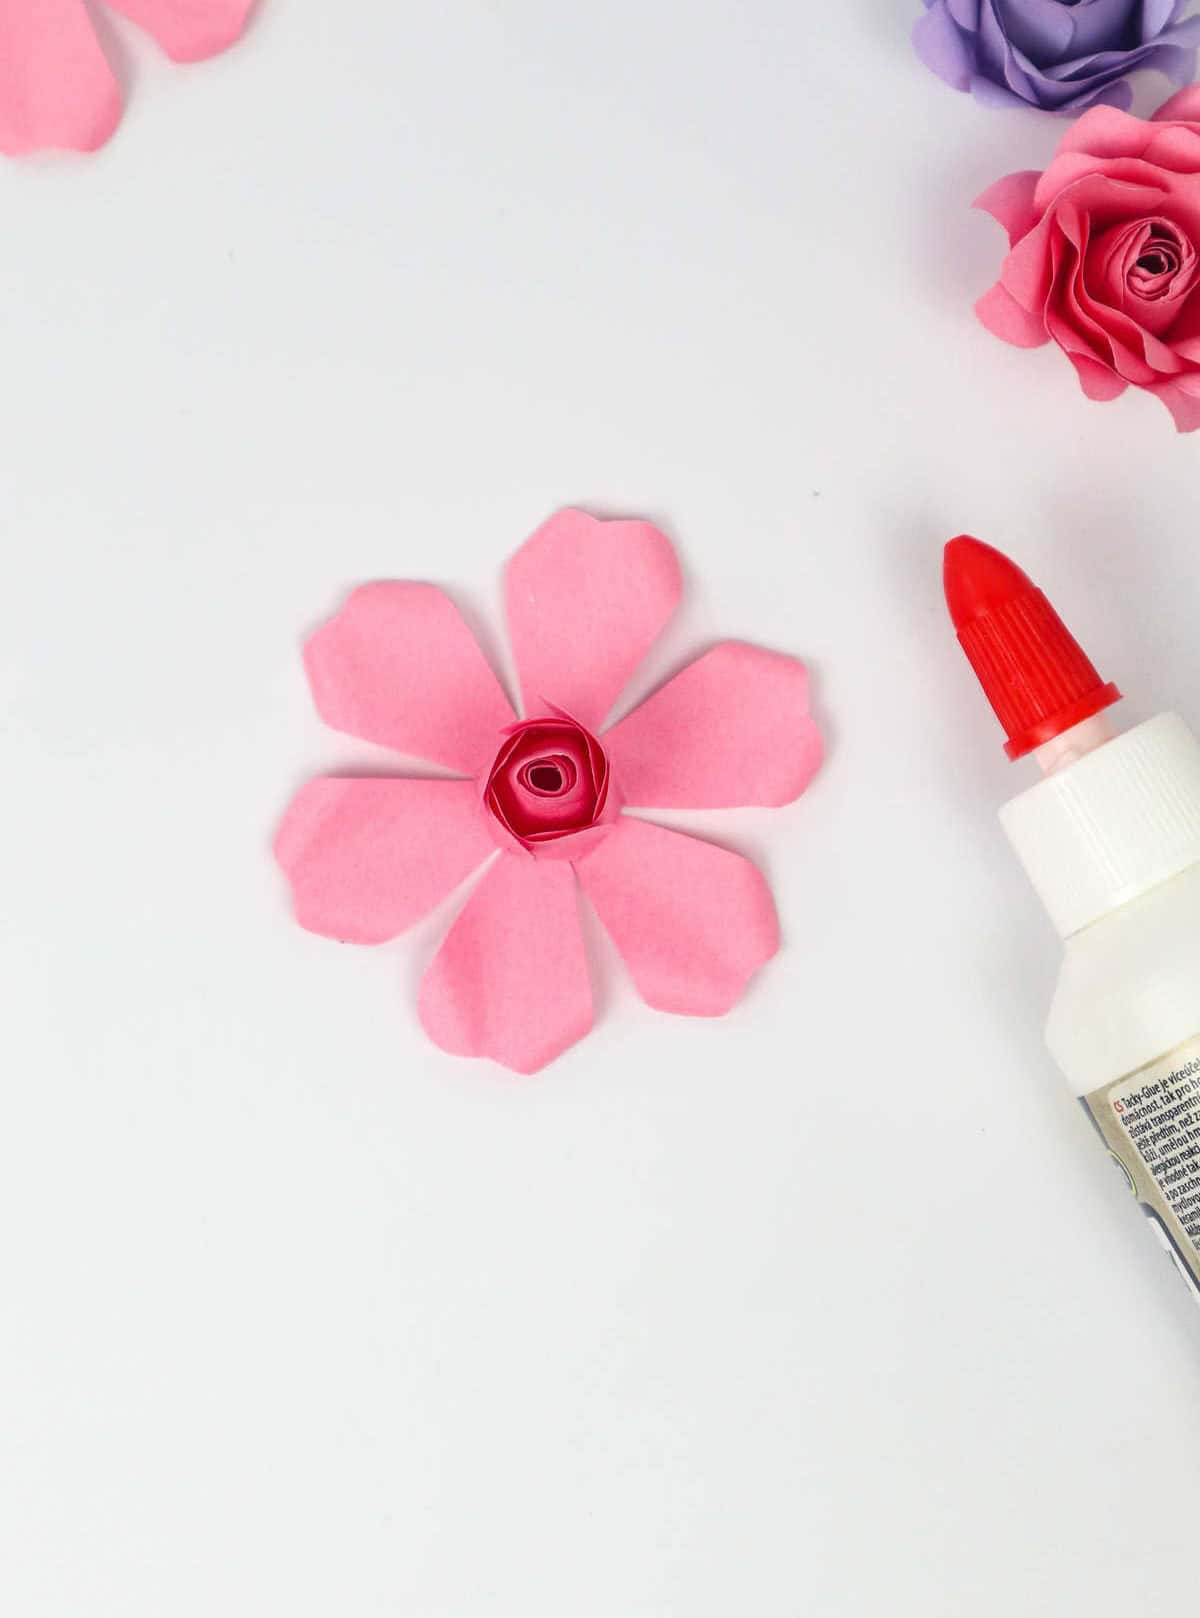
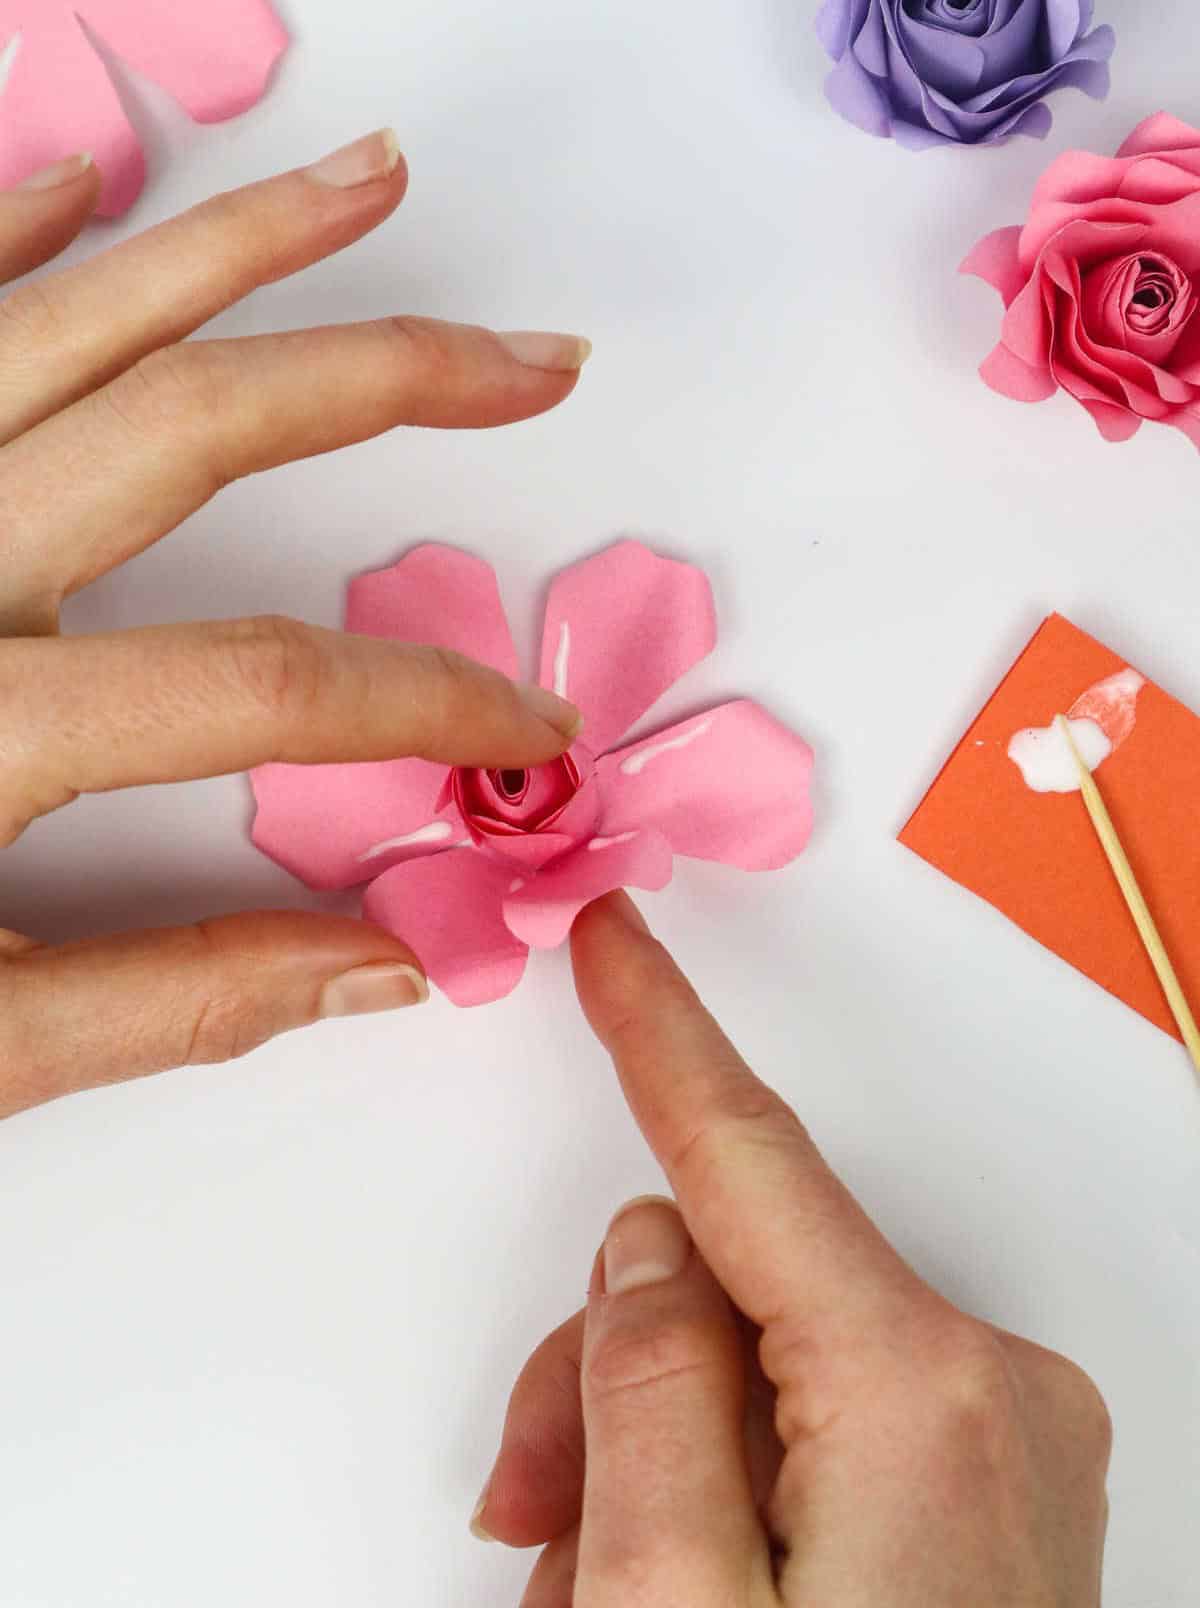

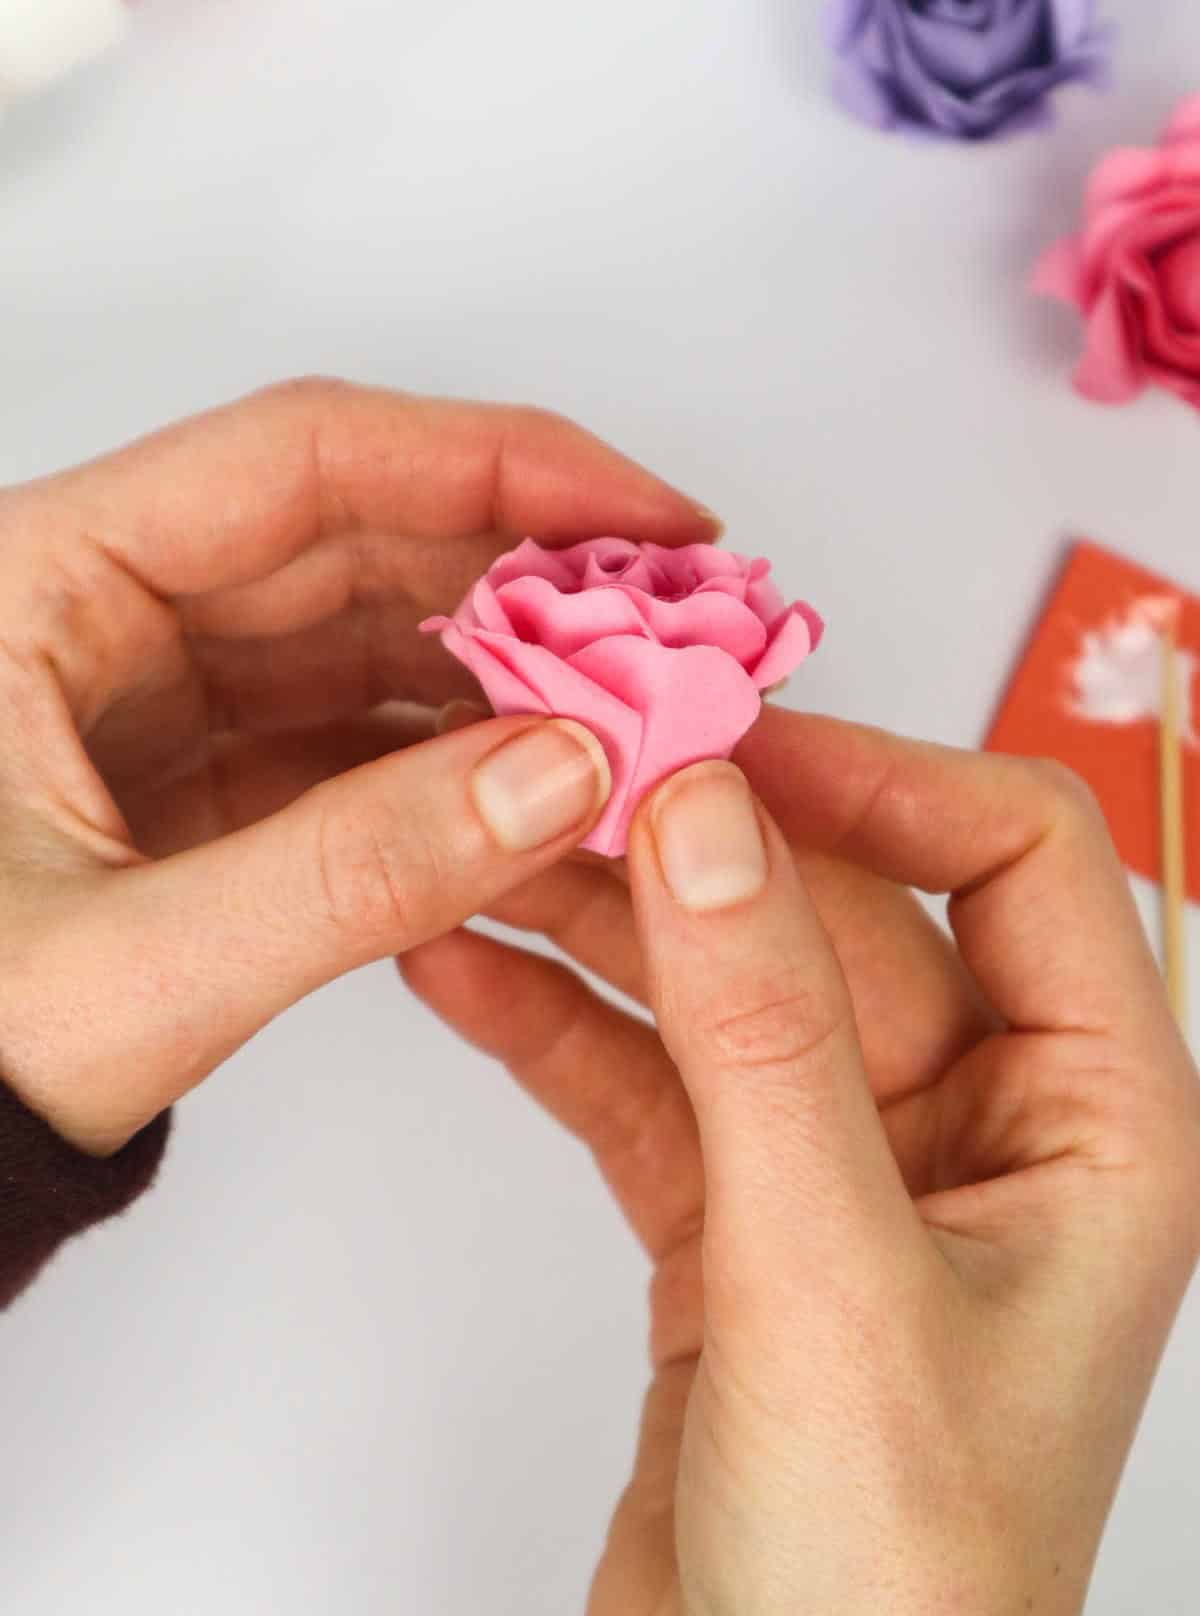
To complete the delicate flower structure, begin by securing the central sheet to the bud, as depicted below. Next, reapply a small amount of adhesive along the petal edges and gently coax them inward, ensuring they adhere to the bud’s surface. Repeat this process for the outermost layer of petals, taking care to attach the center to the bud before moving on to secure the remaining petals.
As you do so, take note of the soft, fluffy texture that has developed due to your earlier curling technique – a testament to the attention to detail required in creating this intricate floral design.
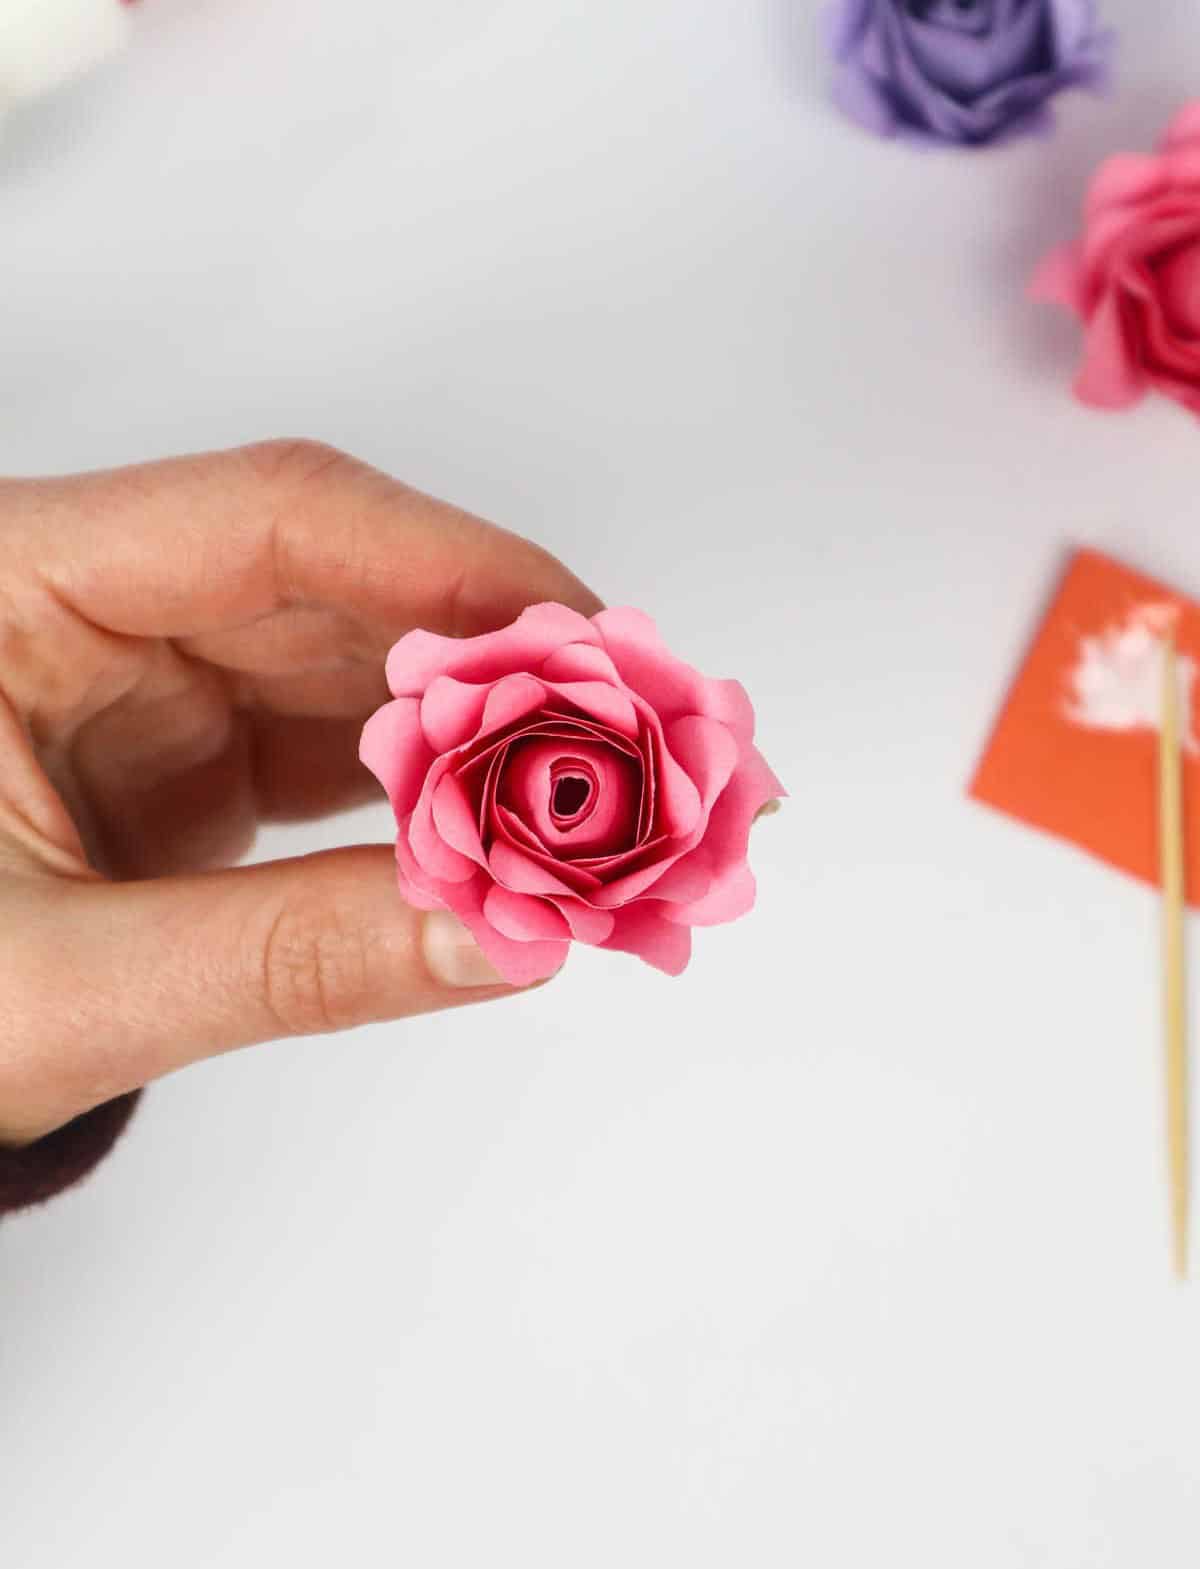
Step 11
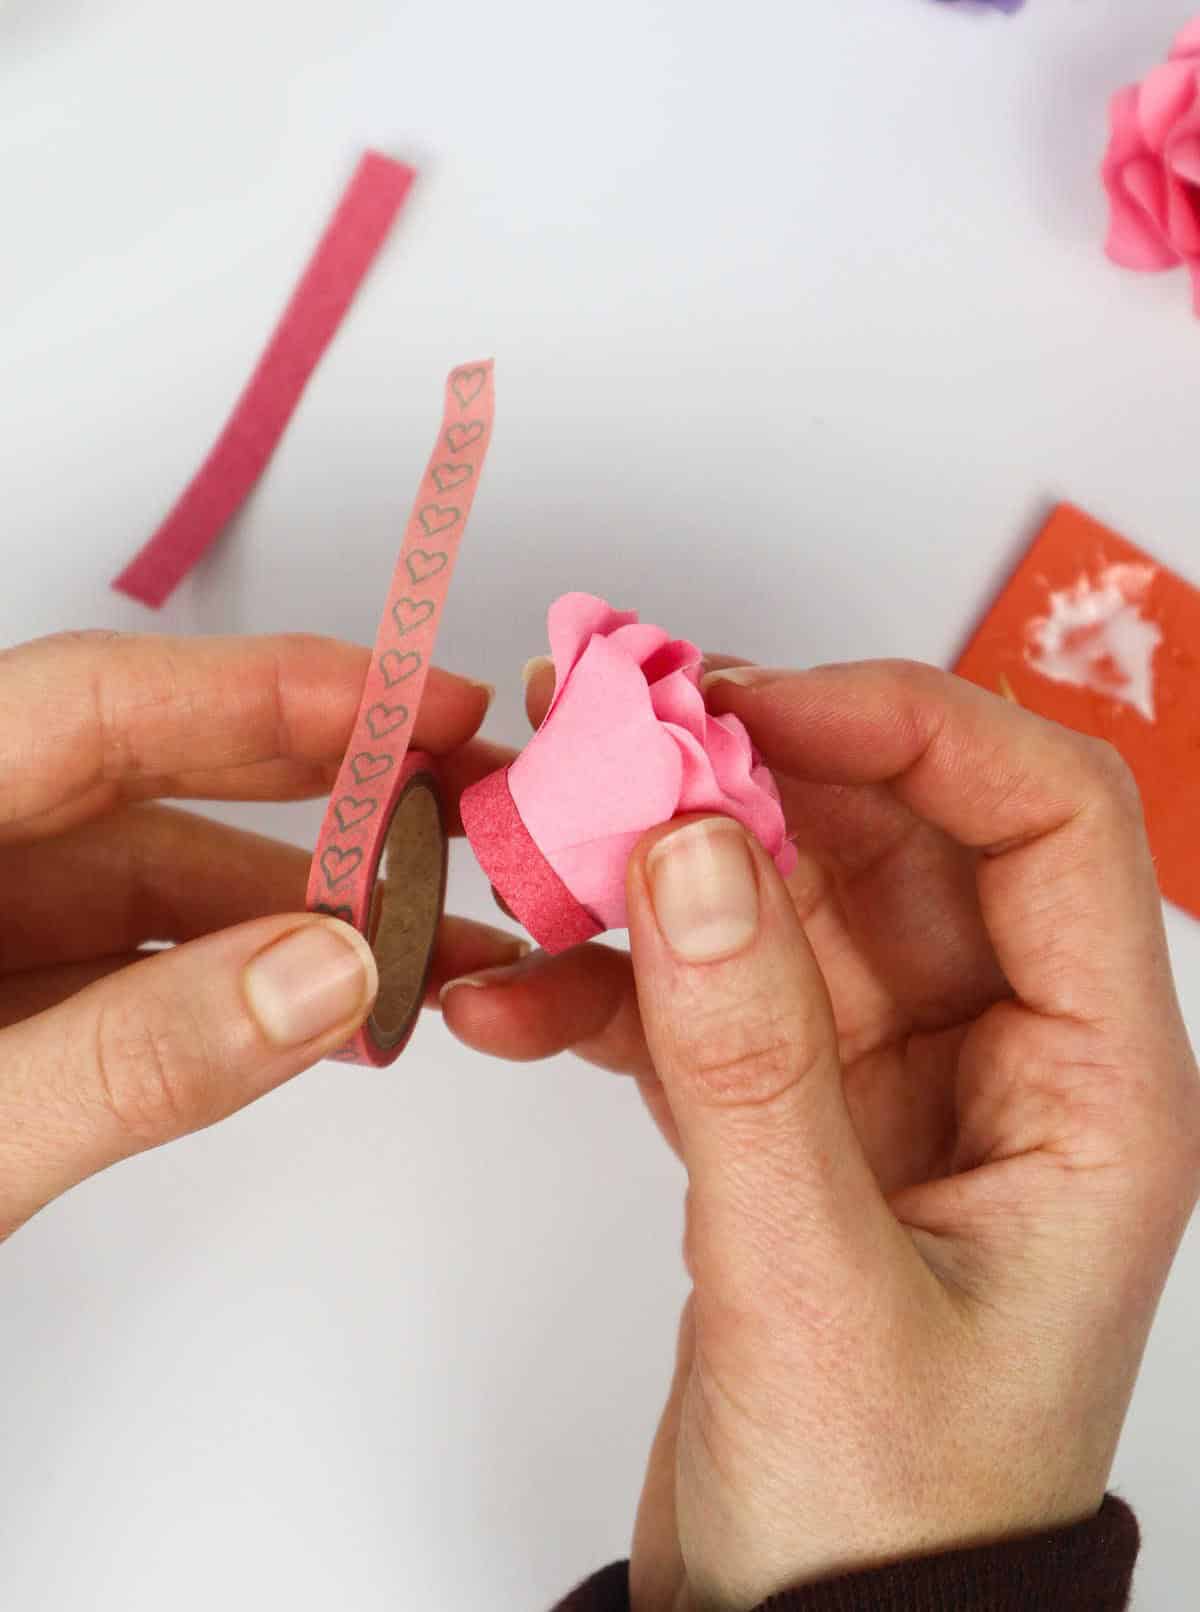
To add an extra layer of elegance to your flowers, consider wrapping a circle of washi tape around the base of each bloom. This simple yet thoughtful touch can elevate the overall appearance of your arrangement and make it truly stand out. With this step complete, you’ve successfully transformed ordinary roses into extraordinary works of art that are sure to impress.
Other Crafts for You
When it comes to creative pursuits, many people assume that the realm of paper crafting is reserved for children. However, the truth is that there are countless ways to get creative with paper that can be enjoyed by adults as well. In fact, making a paper envelope, crafting flowers from paper plates, and creating tissue paper pom poms are just a few examples of the many fun and engaging projects you can try.
But if you’re looking for more inspiration, consider exploring the world of tissue paper crafts, which offers endless possibilities for creative expression. From simple to complex, there’s something for everyone in this realm. For those seeking even more stimulation, why not try your hand at some of the many fun craft projects designed specifically for adults? The results can be truly stunning, and a great way to unwind and express yourself.
How to Make Paper Roses (Step-by-Step)
Transform everyday moments into works of art with this delightful DIY paper rose project. Perfect for teens and adults alike, it’s an enjoyable crafting experience that requires minimal prep time – just five minutes! With a total time of 5 minutes, you can create your very own beautiful paper roses to adorn your space or gift to loved ones. Try it out!
Equipment
Stay Alert: Keeping Your Screen Bright and Awake To avoid accidentally dozing off while working or browsing, make sure to adjust your screen settings to prevent it from turning off. This is especially important when you’re in the middle of a task that requires focus and attention. A simple way to achieve this is by adjusting your device’s auto-lock timer. This setting determines how long your screen remains active before going dark.
By extending the timer or disabling it altogether, you can ensure that your screen stays bright even when you’re engrossed in what you’re doing.
Materials
To create a unique craft project, gather the following materials: four paper squares with dimensions of 3.5 inches by 3.5 inches, some paper glue, a toothpick, a wooden skewer, and a ruler. These simple items will come together to form something truly special.
Instructions
To craft these beautiful paper roses, start by preparing your materials. Begin with one of the four square sheets of paper and fold it in half to form a triangle. Repeat this process until you have a crease down the middle. Next, make a mark about 1.5 inches from the top center using a pencil. Fold the opposite corner up towards this mark and continue folding the paper all the way down. Perform this step with the opposite side as well, ensuring that the coinciding corners align.
Use your pencil to draw the petal shape, experimenting with different sizes and shapes. Cut out six petals from each sheet of paper using scissors, repeating the process for all four sheets. Once you have all the petals cut out, take a wooden skewer and place it along the center of one petal, carefully curving the paper around the skewer to form a hexagonal cup shape. Repeat this step with all six petals from each sheet of paper until they resemble little cups.
Next, use a toothpick to curl up the tips of two opposite petals from two of the four sheets of paper, which will create the outer petal layers and give your rose a fluffy appearance. Take one of the inner sheets and apply glue to the center, then bring up and stick together the tips of two opposite petals to form a conical bud shape. Repeat this process with the remaining two opposite-facing petals until you have a complete central bud for your rose.
Take the next layer and apply glue to the center before attaching it to the top of the previous layer, holding them together until they adhere. Use a toothpick to apply a thin line of glue down each petal and gently bring them inward, overlapping them as you attach them to the back petals of the bud. Repeat this step with the two outer petal layers, noticing that the curled tips will form a fluffy appearance when complete.
You can also add a decorative touch by applying washi tape around the base of the flower. Once your paper roses are complete, allow them to dry completely before displaying or using.