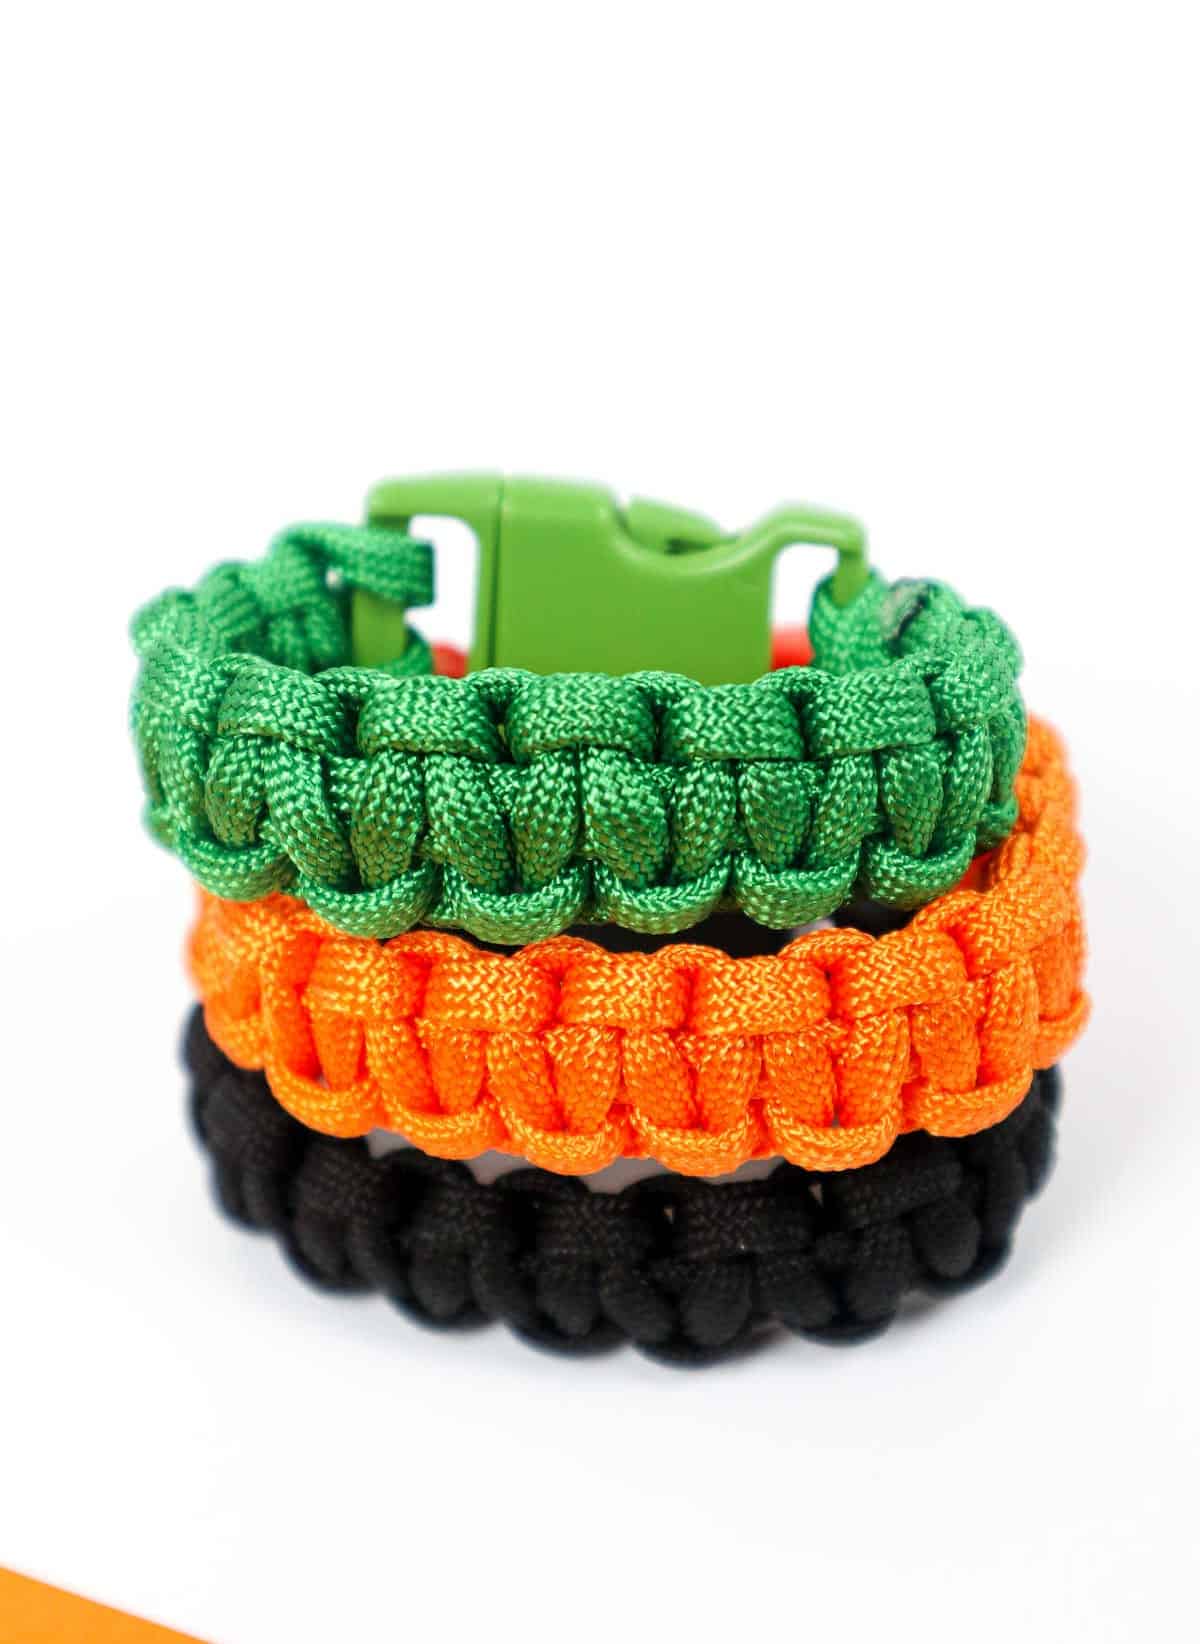
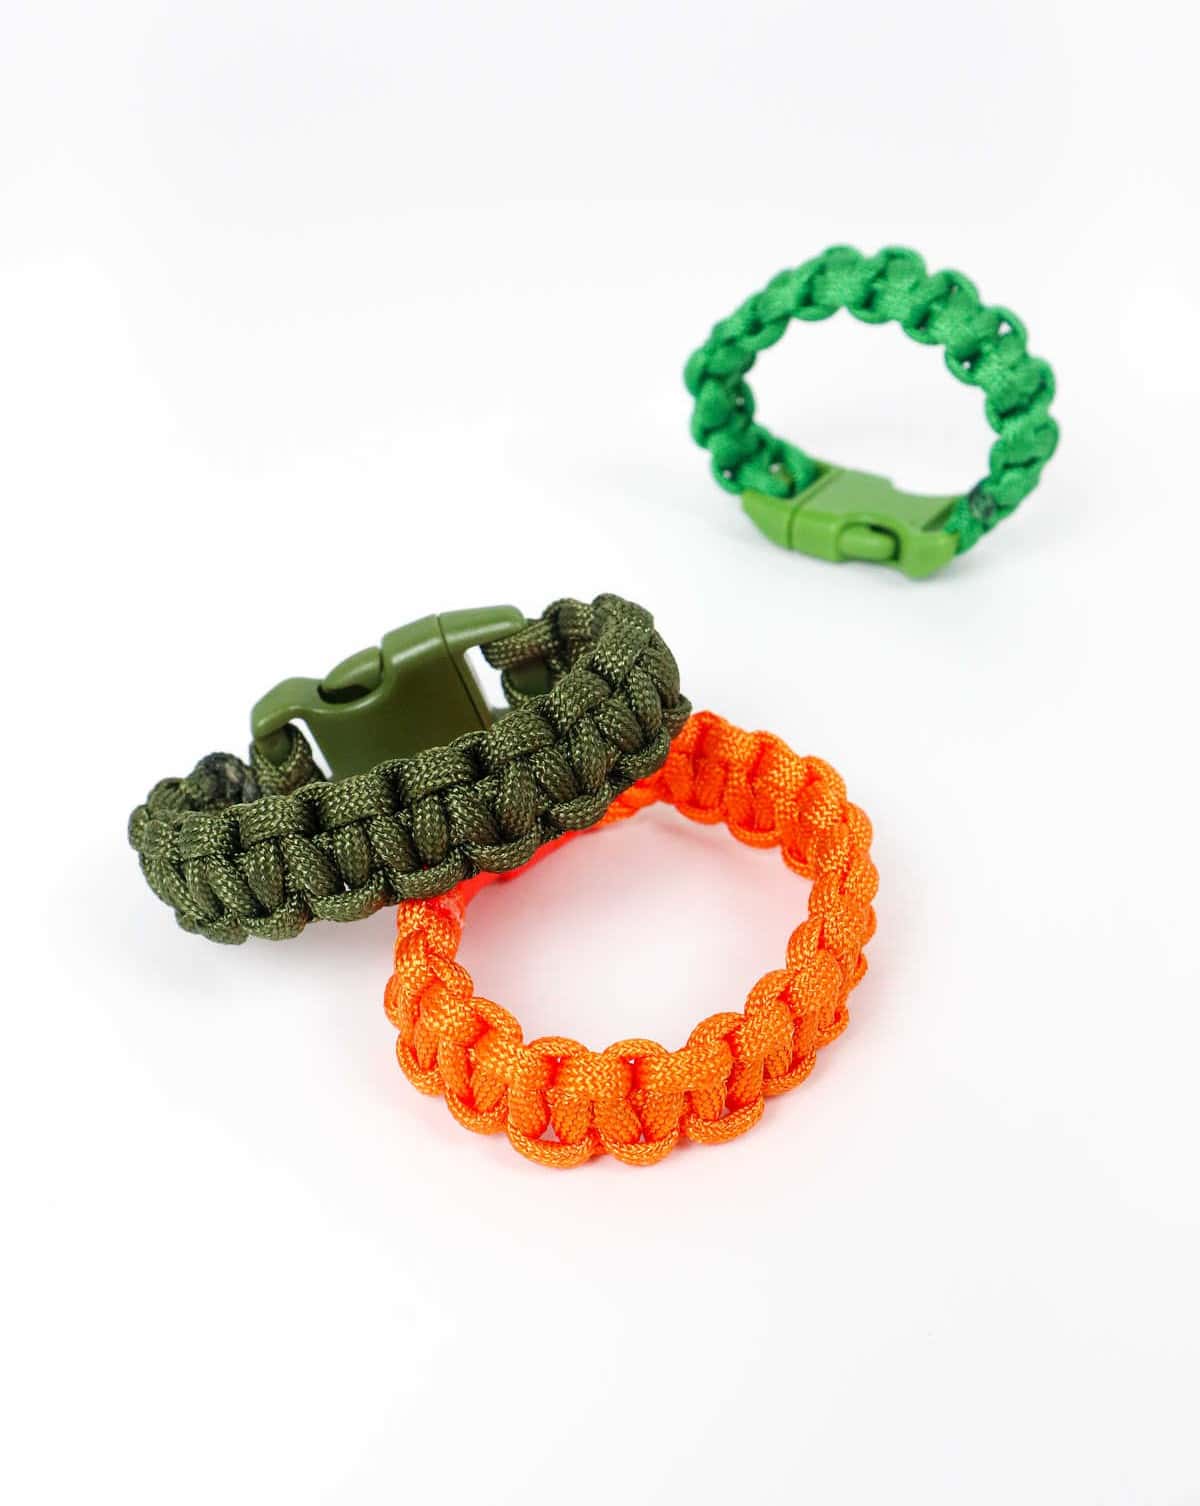
Create your own DIY paracord bracelets from the ground up – a fun and accessible project perfect for kids and teens alike. For many of us, crafting our own accessories was a staple of childhood and teenage years. I’m no exception; I spent hours experimenting with different materials and designs to create unique DIY pieces.
While traditional threads or shoelaces were my go-to choices, paracord always held a special appeal.
And for good reason – these bracelets are incredibly durable and surprisingly easy to make.
In fact, the pattern used in this project bears a striking resemblance to square knots found in macrame products. As such, this DIY paracord bracelet serves as an excellent opportunity for beginners to hone their skills and transition from traditional macrame projects.
Tools and Supplies You’ll Need
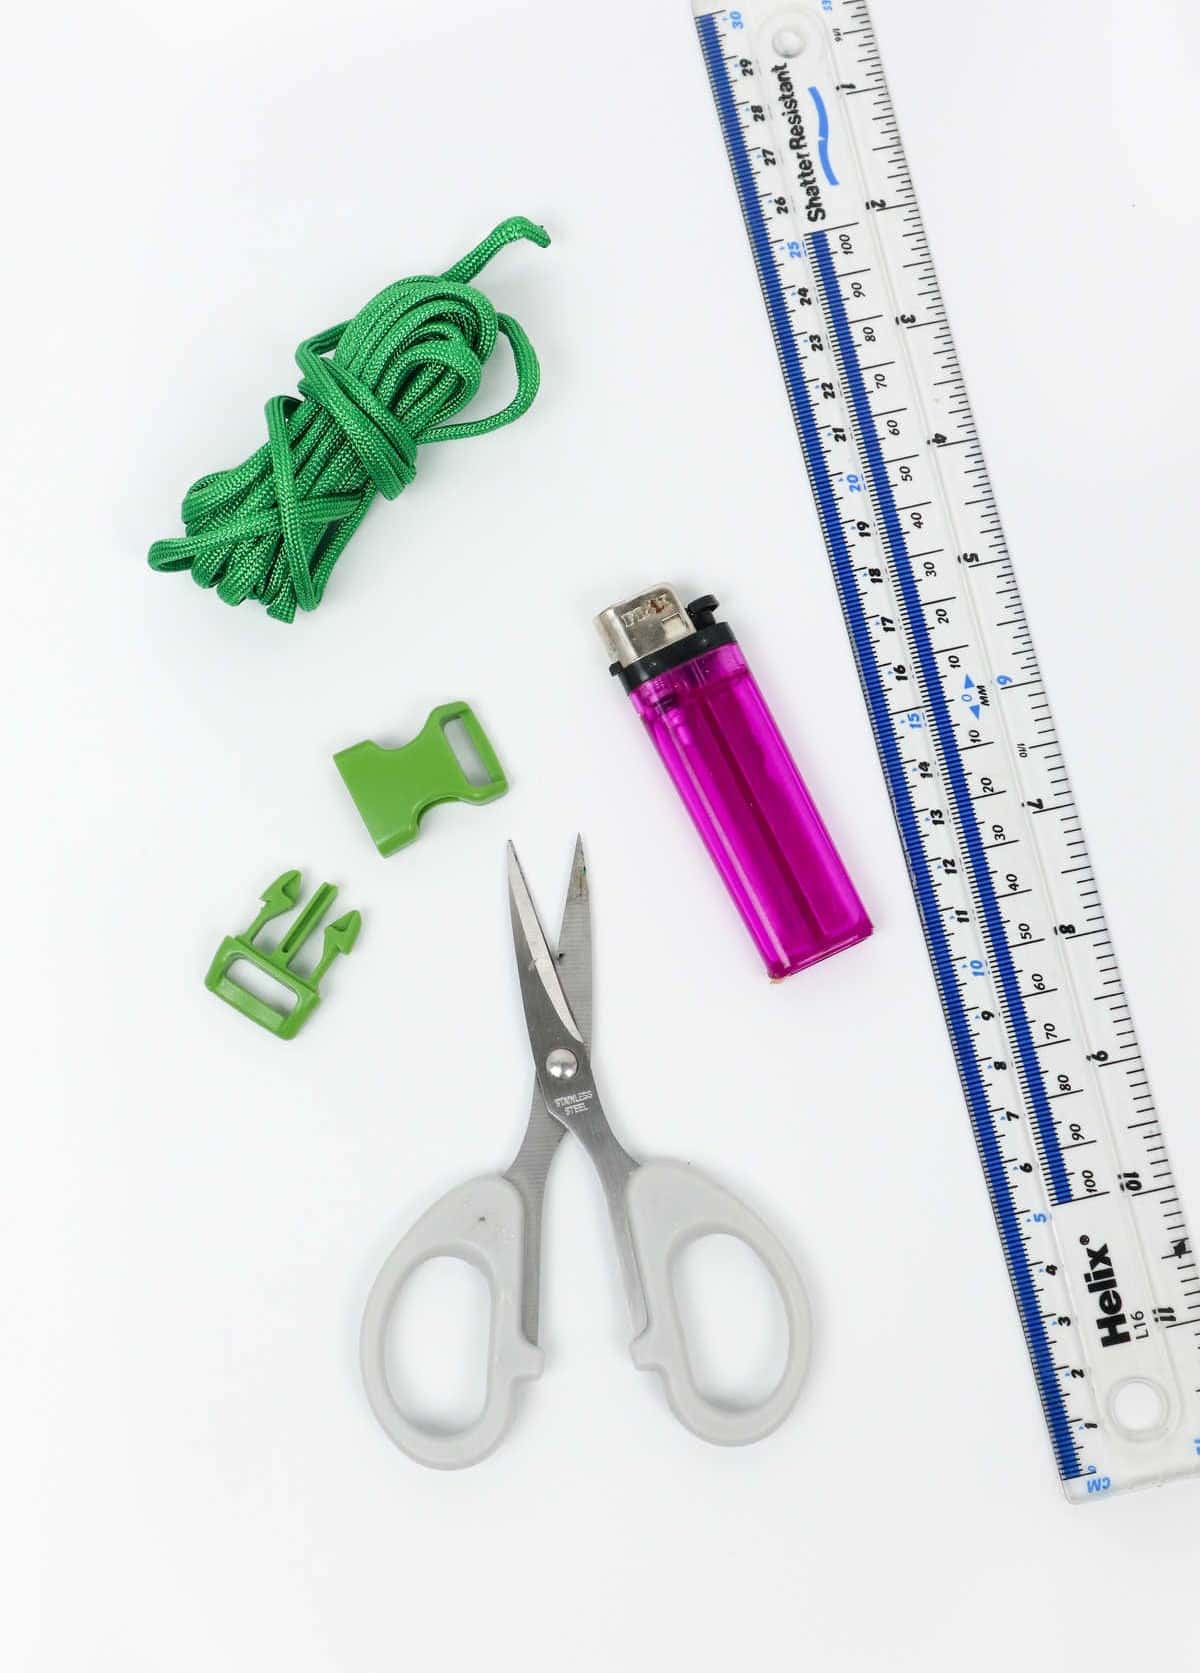
To begin creating your paracord bracelets, gather the following essential materials. These include high-quality paracord, which will serve as the foundation of your project. Additionally, you’ll need a pair of sharp scissors to cut the cord to the desired length, a reliable lighter for melting and sealing the ends, a ruler or straightedge to maintain precision while cutting, and a sturdy buckle to secure the finished bracelet.
How to Make a Paracord Bracelet

When exploring the world of paracord accessories, one of the most appealing aspects is the vast array of vibrant colors available. Moreover, the affordability of paracord makes it an attractive option for DIY enthusiasts and outdoor enthusiasts alike. Now, let’s dive into the process of crafting this bracelet, starting with the initial steps.
Step 1
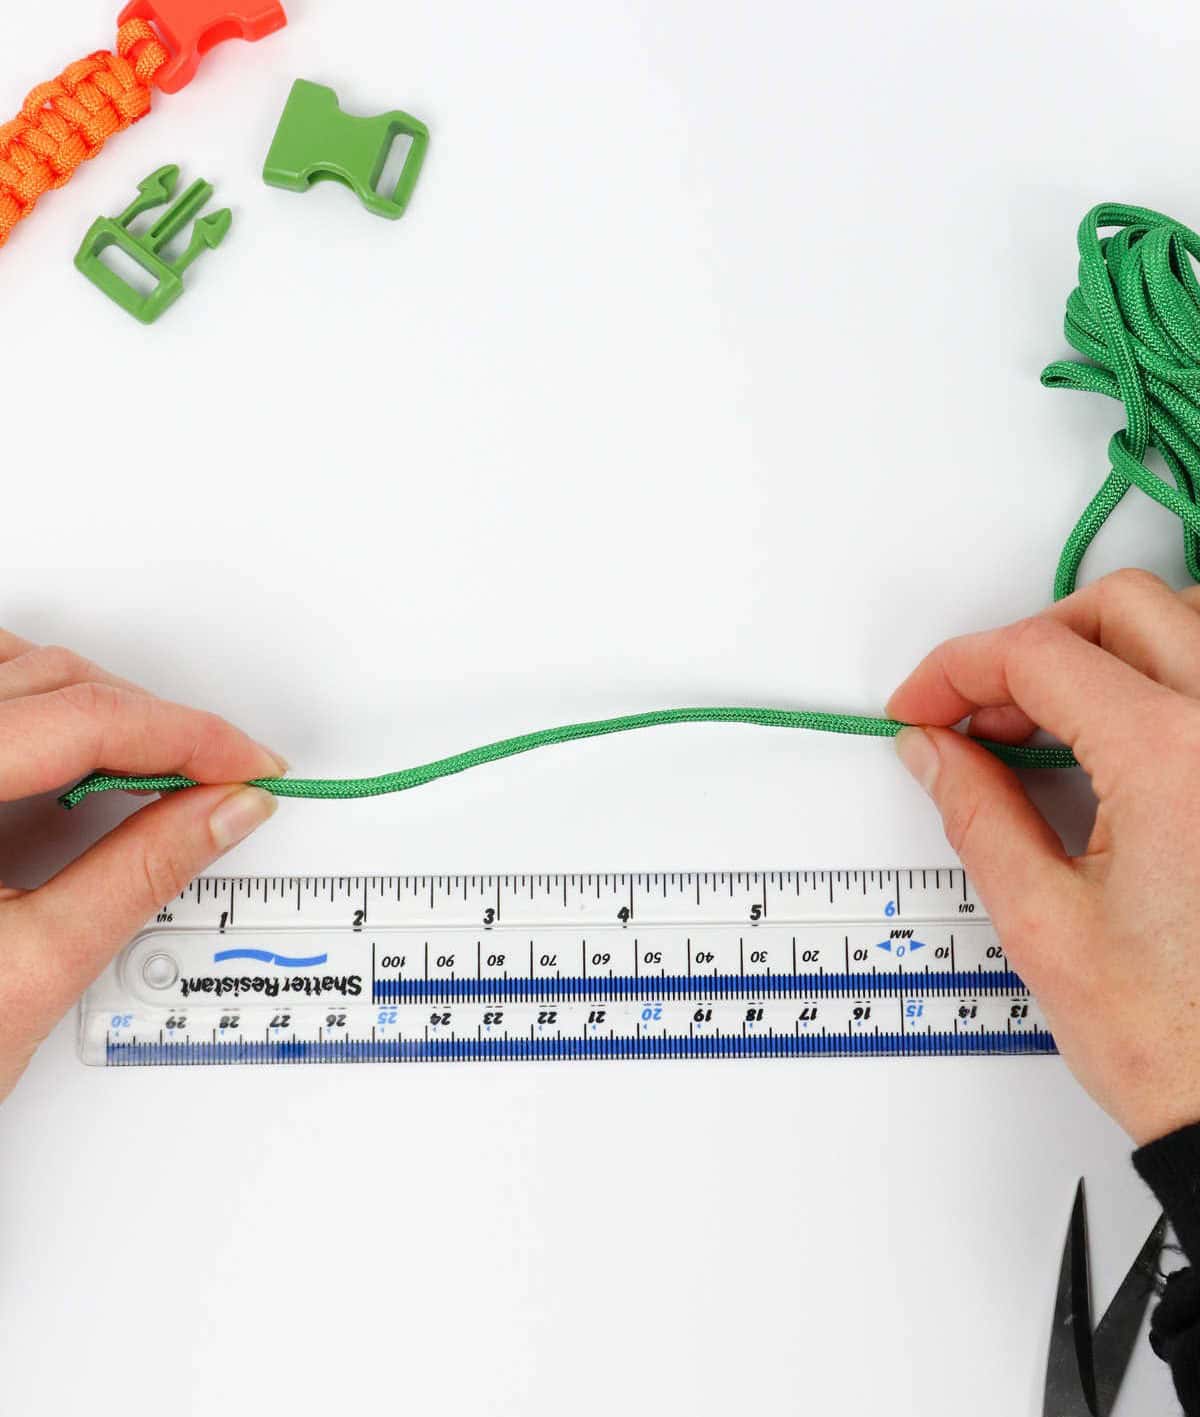
To begin, take out your paracord and a ruler, as these will aid in determining the correct length for your cord. The required length may vary depending on the size of your wrist, so it’s essential to consider this factor. For this particular project, you’ll need a cord that measures approximately 7 feet (85 inches) long, which has been designed to fit comfortably around a wrist with a width of 6 inches.
Once you have your measurements in hand, grab some scissors and trim the paracord to the desired length.
Step 2

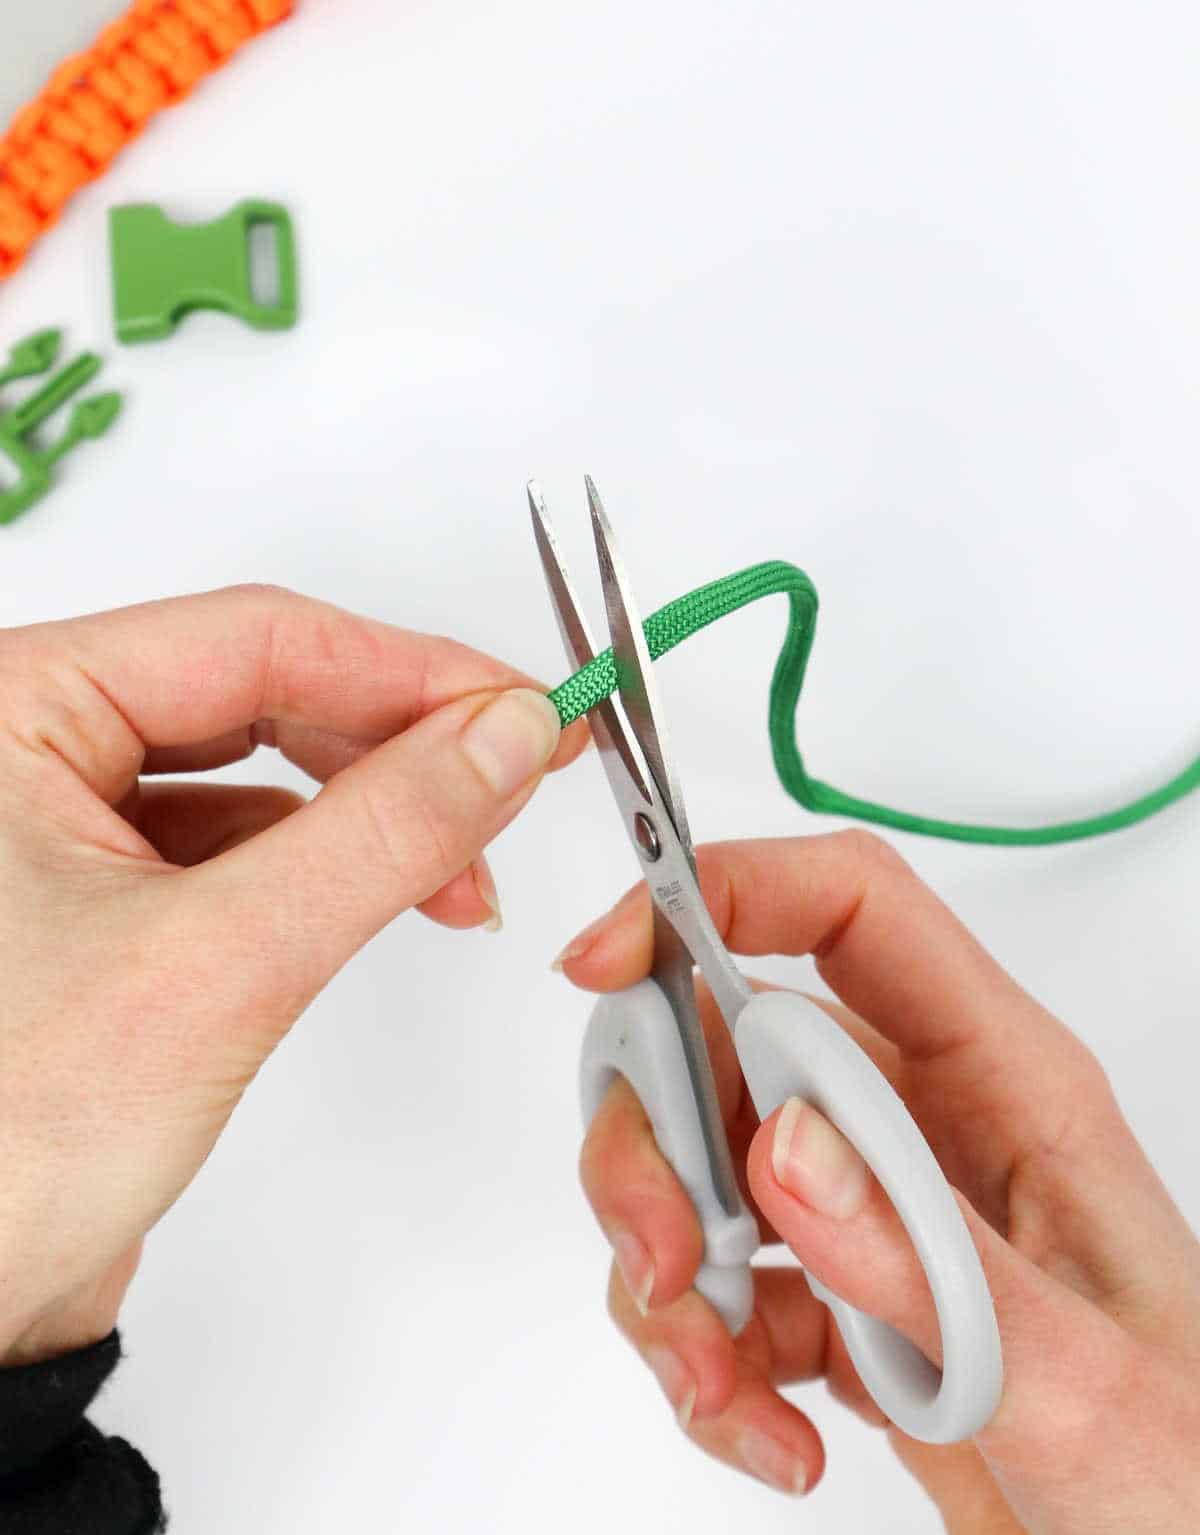
To address the issue of frayed cord ends, you can employ a simple yet effective solution. By applying heat to the ends using a lighter or match, you can melt and subsequently burn off any loose threads that may cause them to unravel. This technique not only prevents further fraying but also helps to seal the ends, effectively preventing any potential damage from occurring.
As the melted plastic cools and solidifies, it will form a smooth surface that can be easily flattened with your fingers or a flat tool, eliminating any sharp edges that could pose a hazard.
Step 3
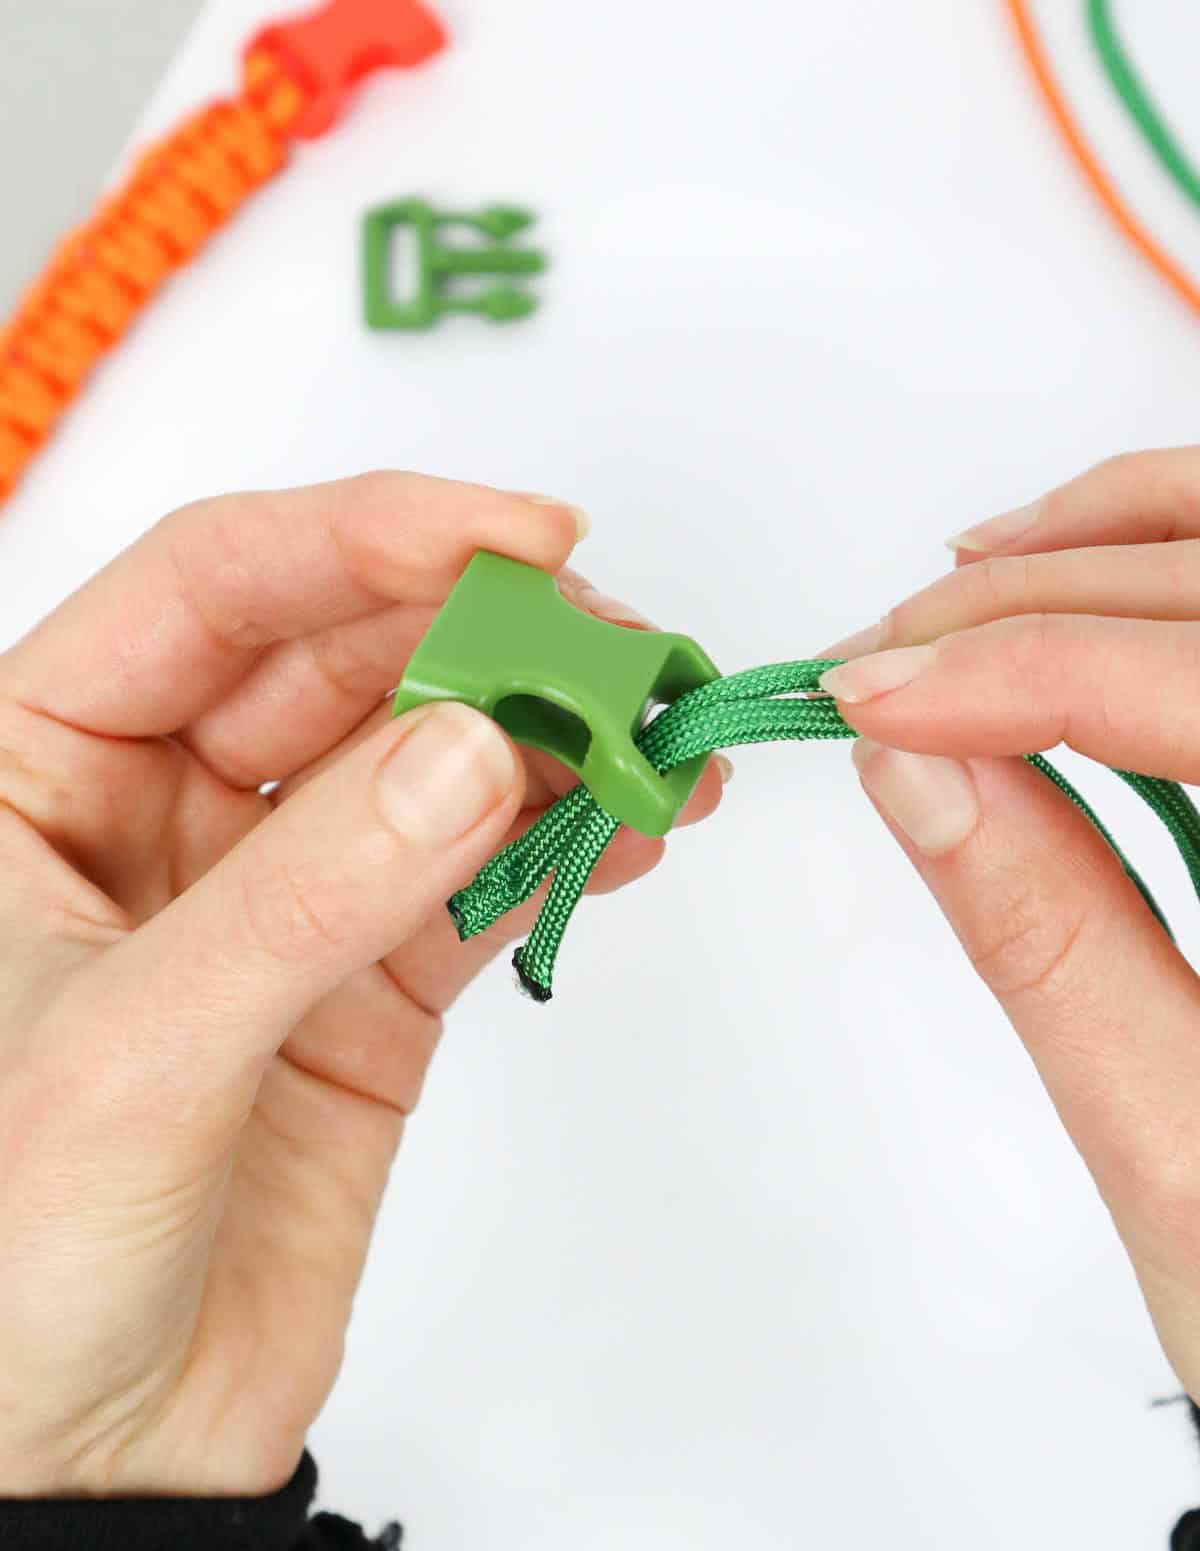

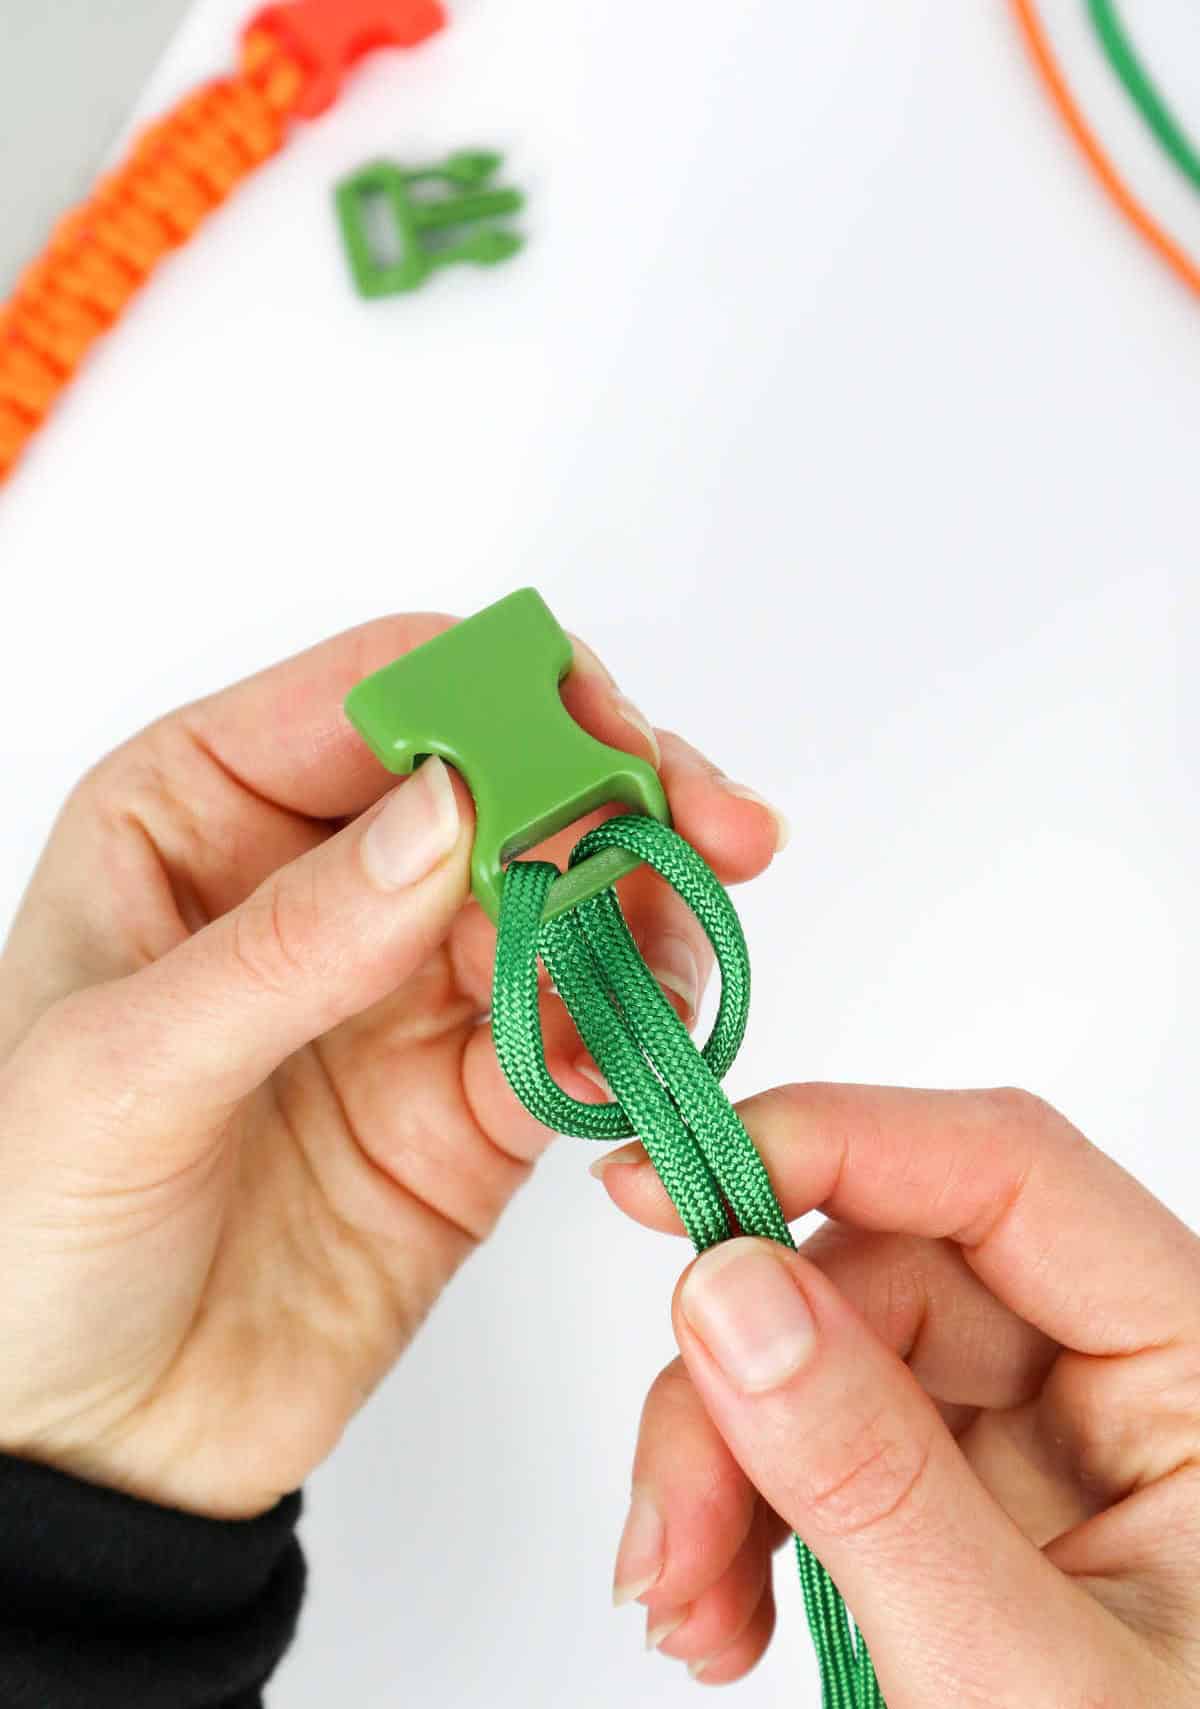
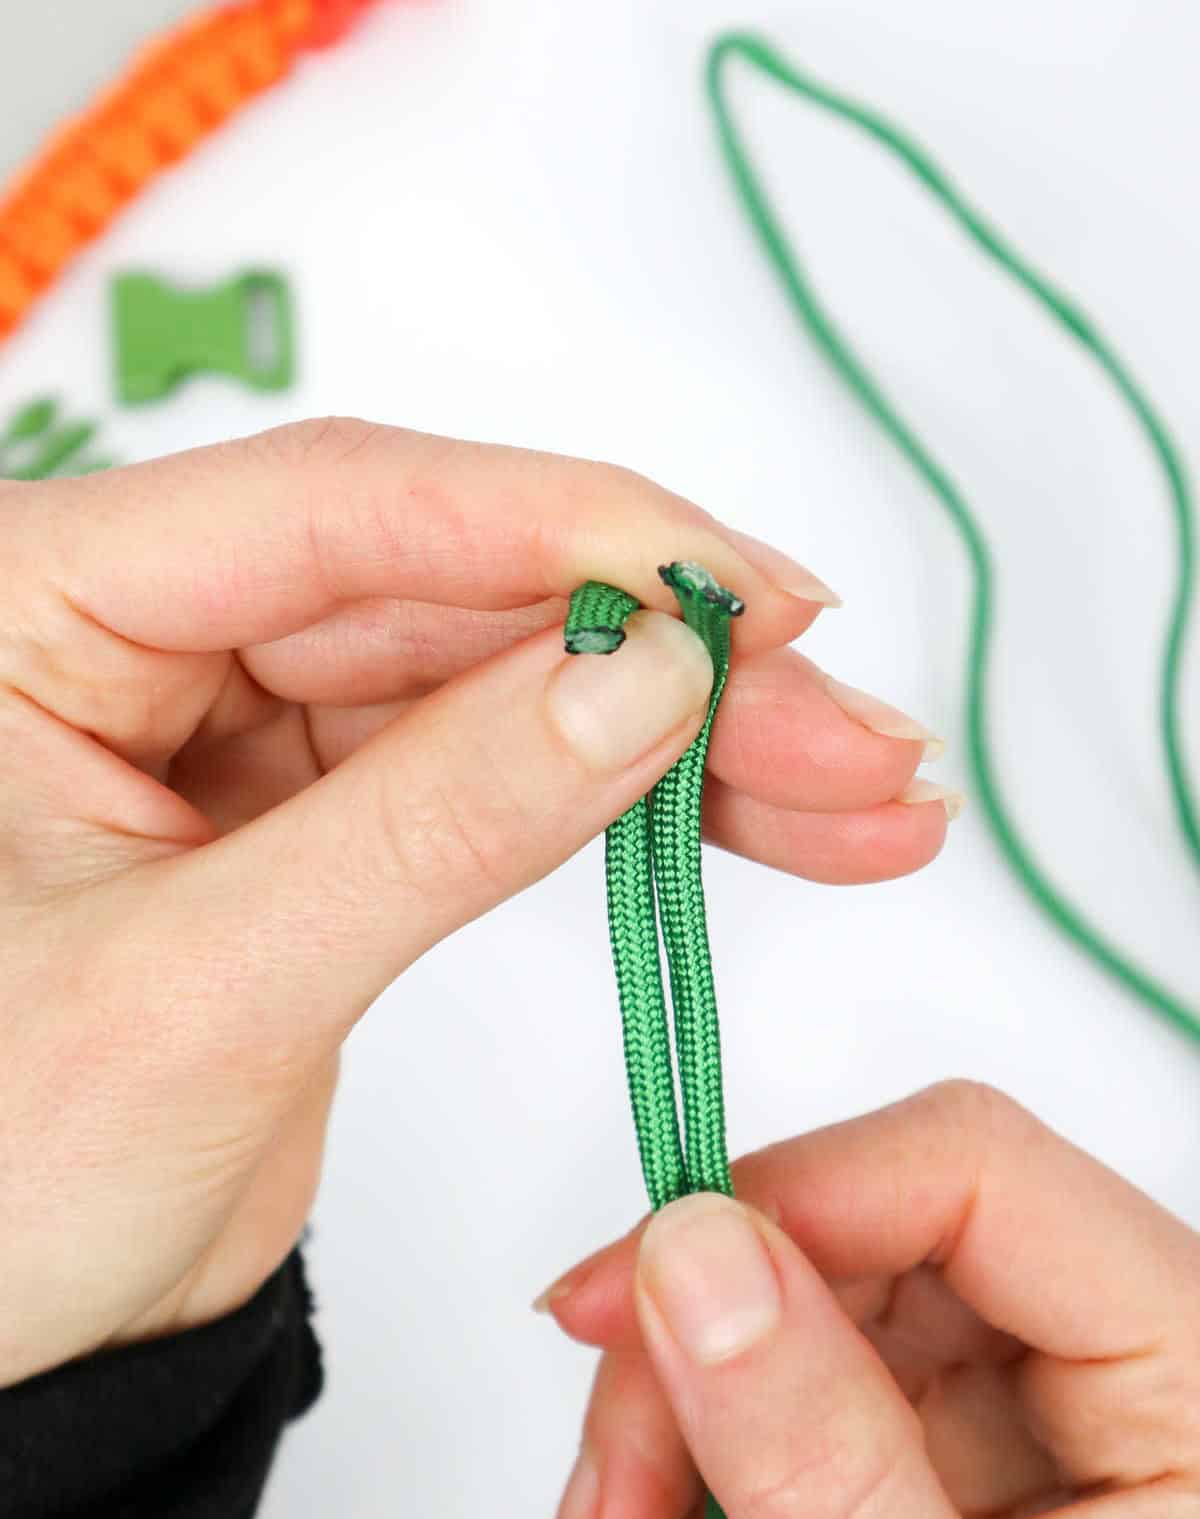
To secure the cord to the clip, start by folding it in half, creating a loop on one side and a double-ended section on the other. Insert the double-ended section into the clip, making sure it’s seated properly.
As you pull the double-ended section through the clip, you’ll want to leave about two inches of the folded end protruding from the opposite side. This will create a foundation for the knot to come.
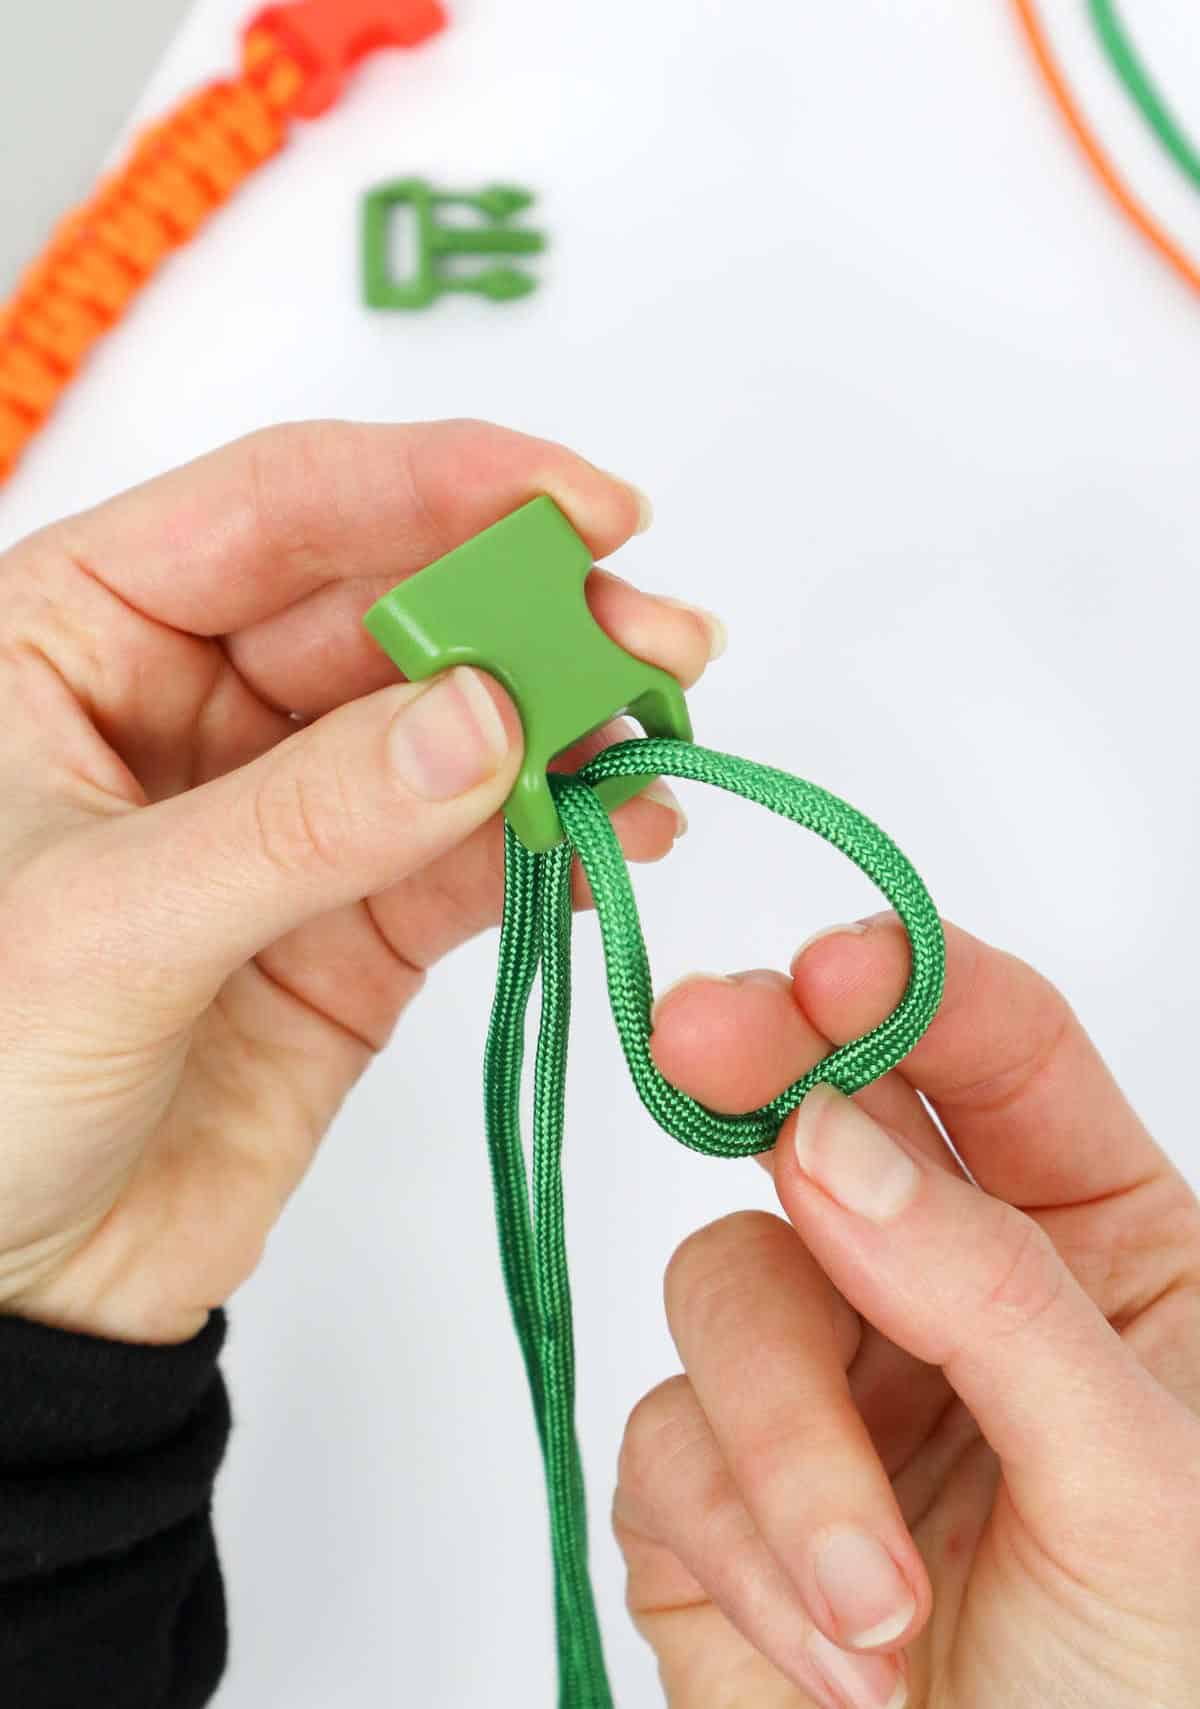
Next, grab both ends of the cord and gently pull them through the loop.
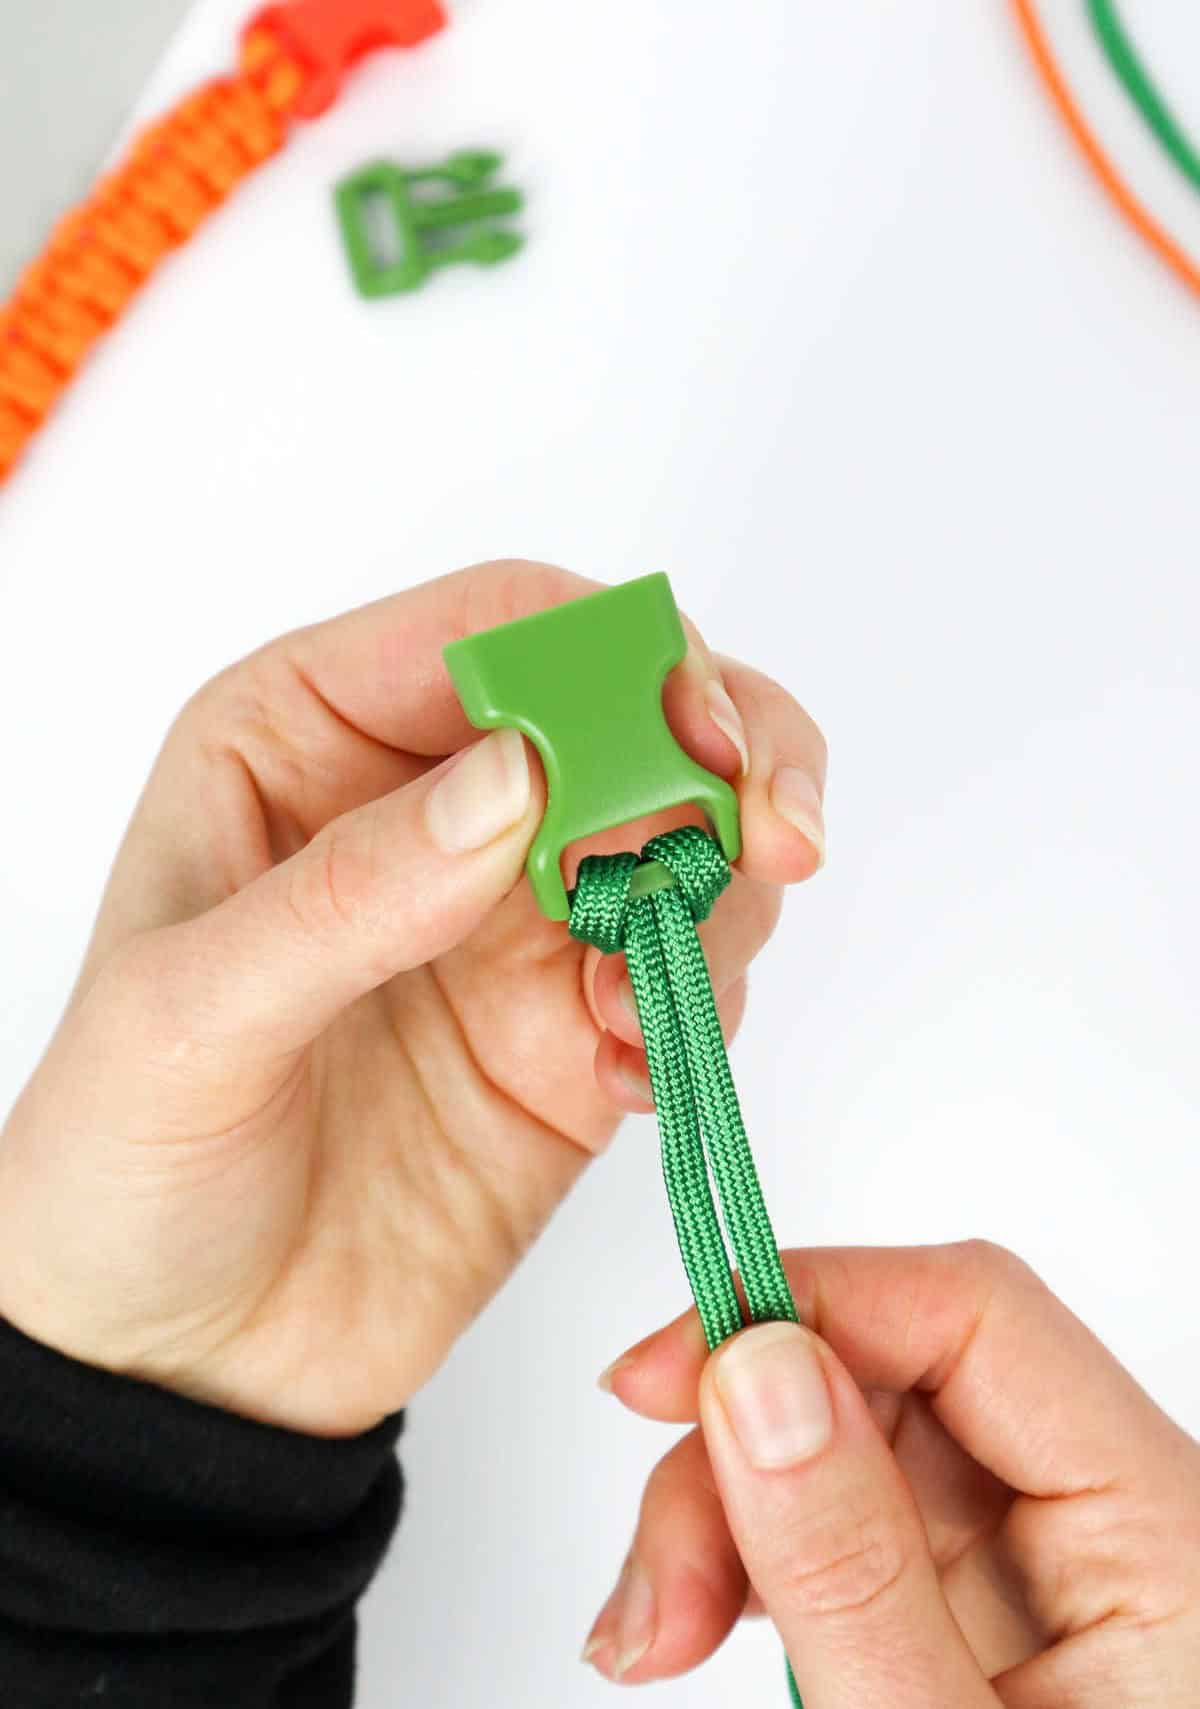
This should form a lark’s head knot, effectively securing the cord to the clip.
To finalize the knot, simply tug on both ends to tighten it in place.
Step 4


To complete the clip, focus on the insert mechanism for the buckle and gently pull the two cords through it. For clarity, loop the cords around your wrist, secure the buckle and insert clips shut, and adjust the cord ends to determine the optimal width. Once you’re satisfied with the length, place your project down and begin designing without altering the measured length.
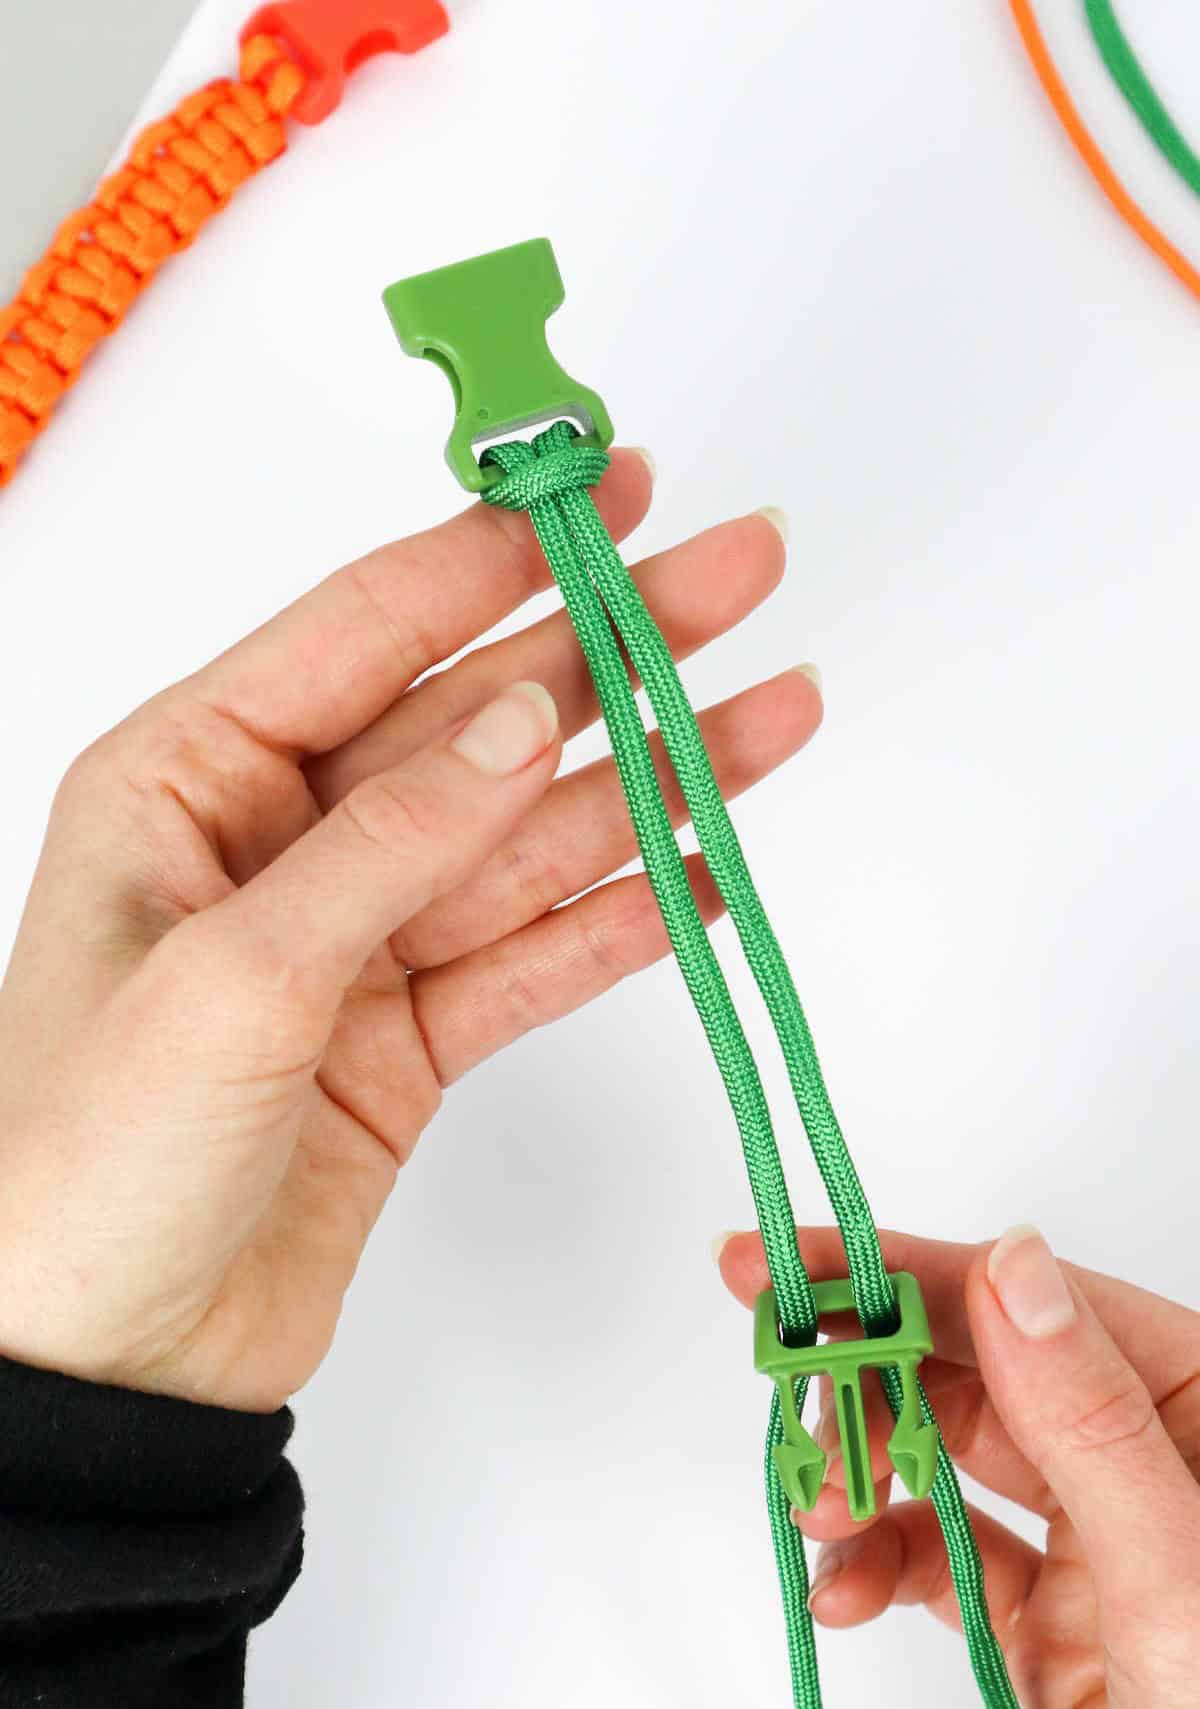
Step 5
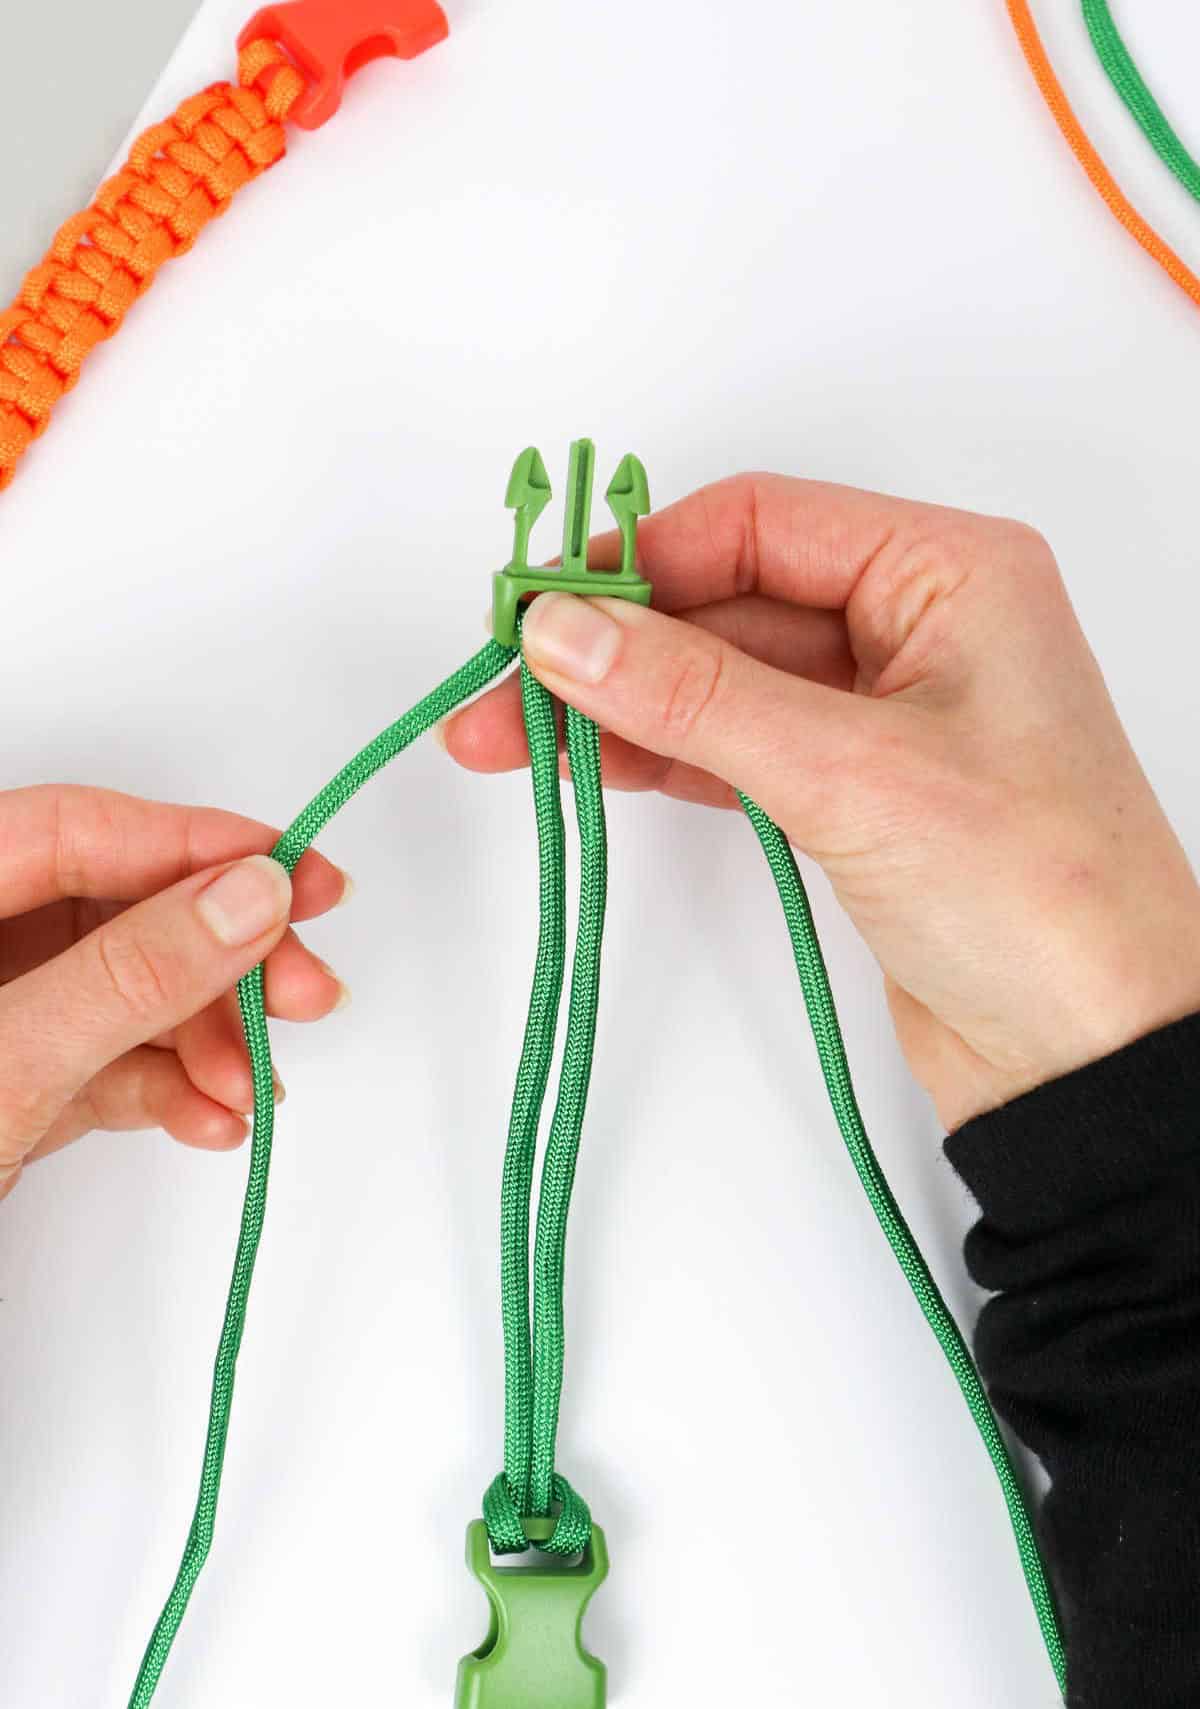
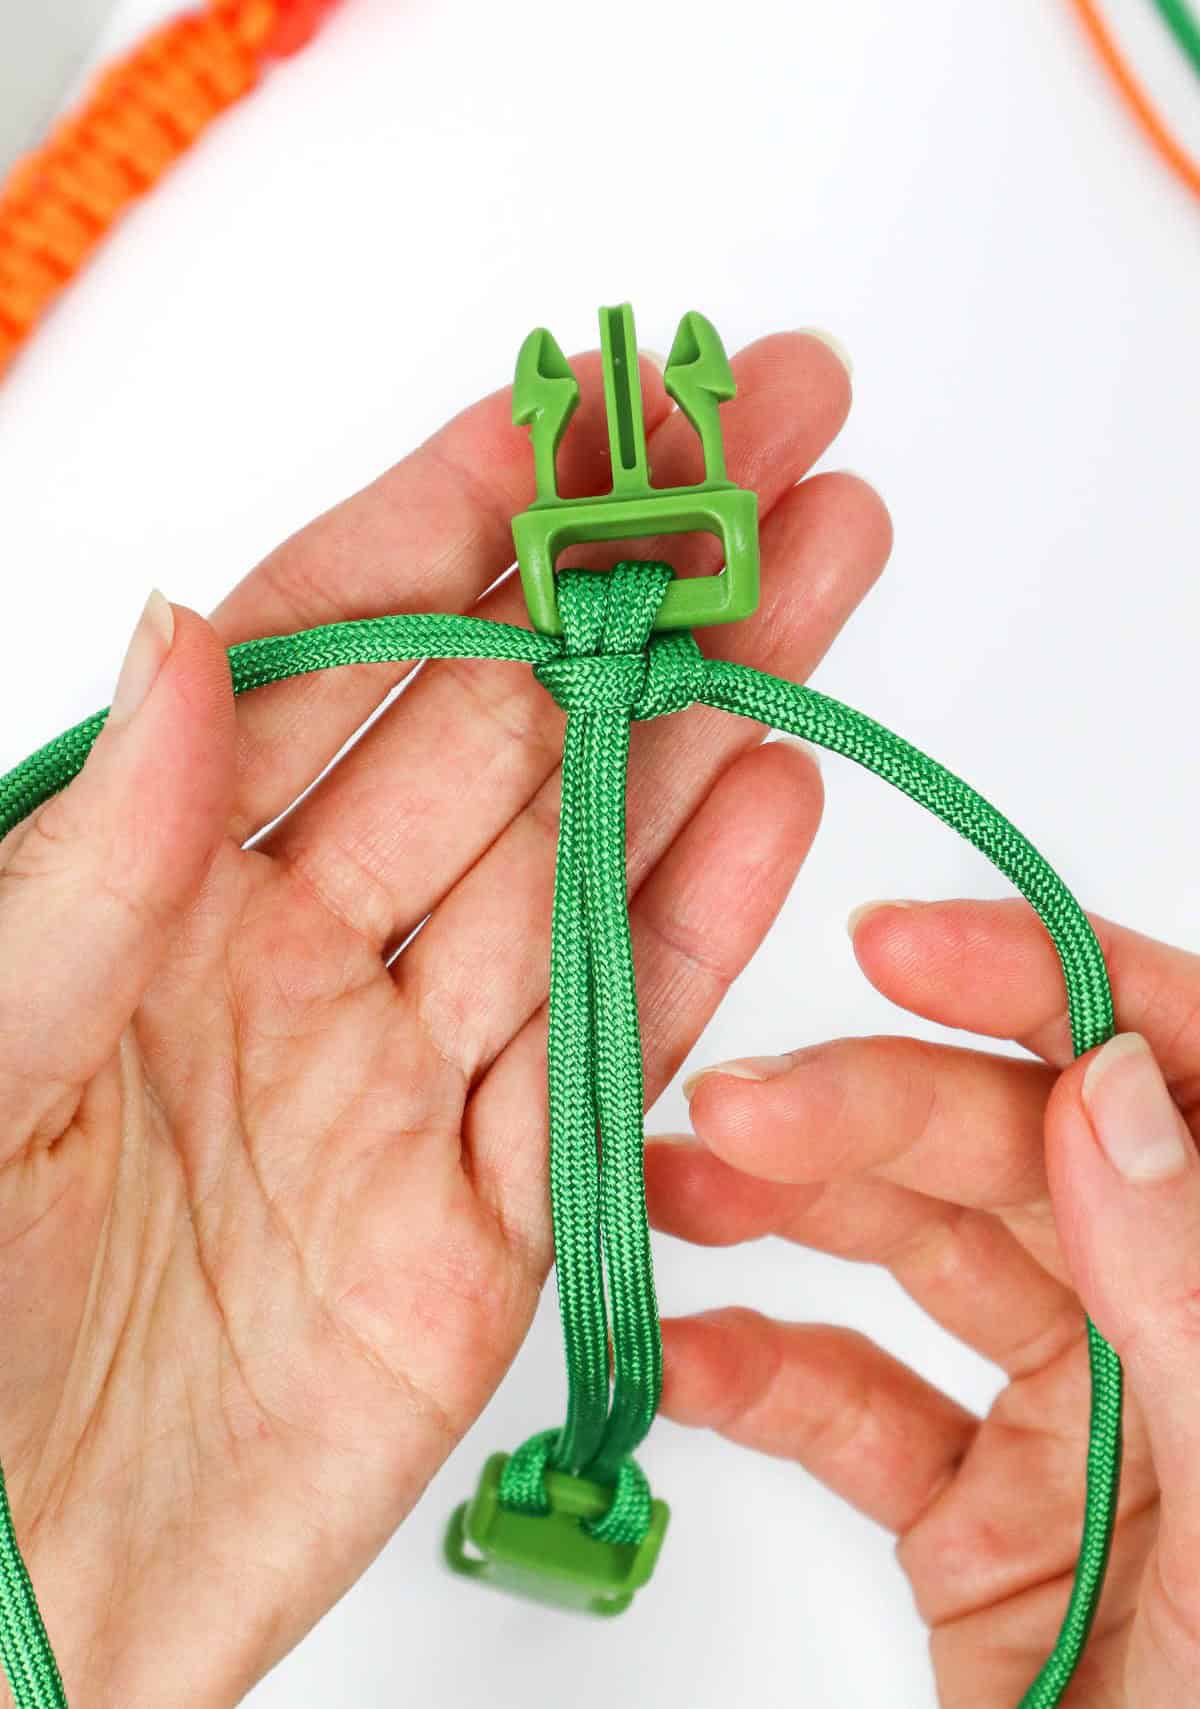
To complete the connection, start by holding the insert clip firmly in place with one hand while using your thumb to secure the cords. As you work along the length of the cable, create a series of interconnected knots that will eventually form a sturdy bond. Begin by forming the foundation of the first knot. Use your dominant hand to lift the left cord and bend it into a loop shape that rests over the two central cords.
Next, guide the right cord over the top of the left cord before threading it under both of these middle cords. With gentle yet firm pressure, draw the right cord through the loop you just created. Once you’ve completed this initial knot, take a moment to tug gently on the end of the cord to tighten the bond and prepare for the next stage in the process.
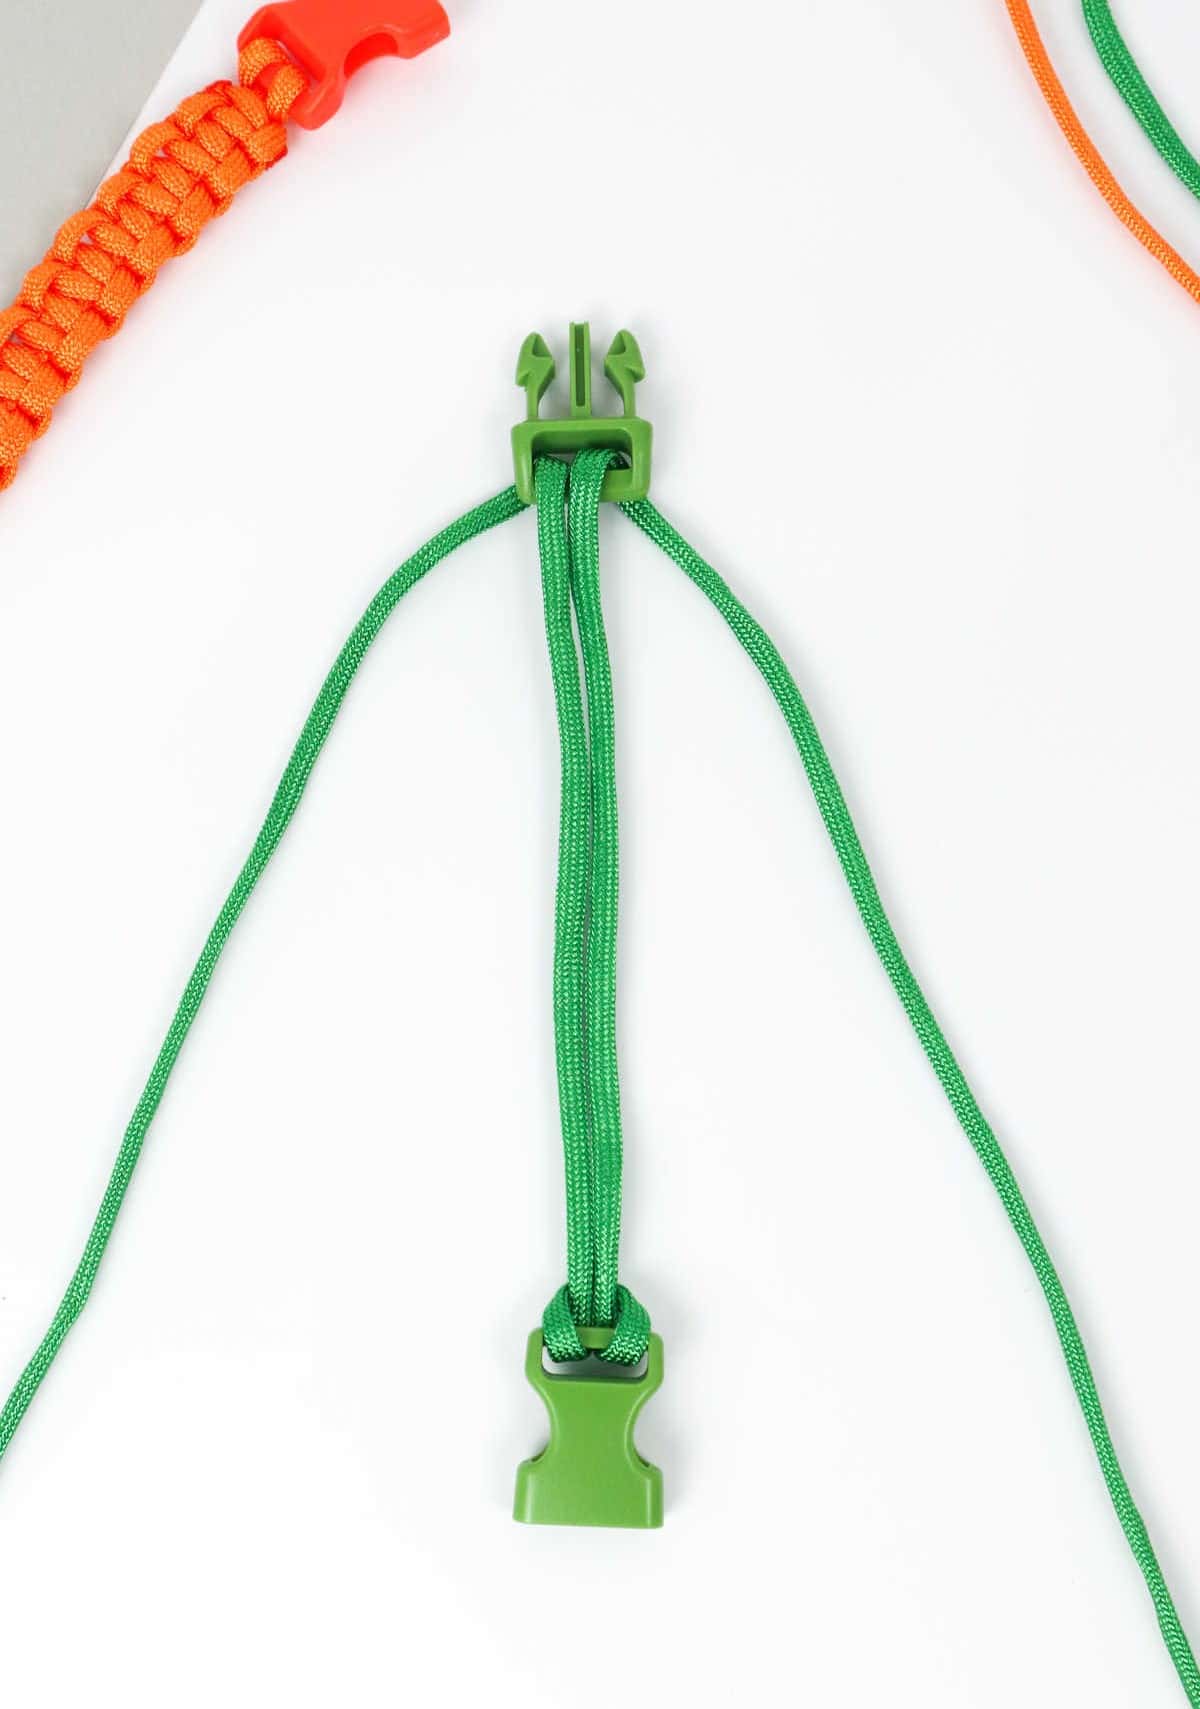
Step 6
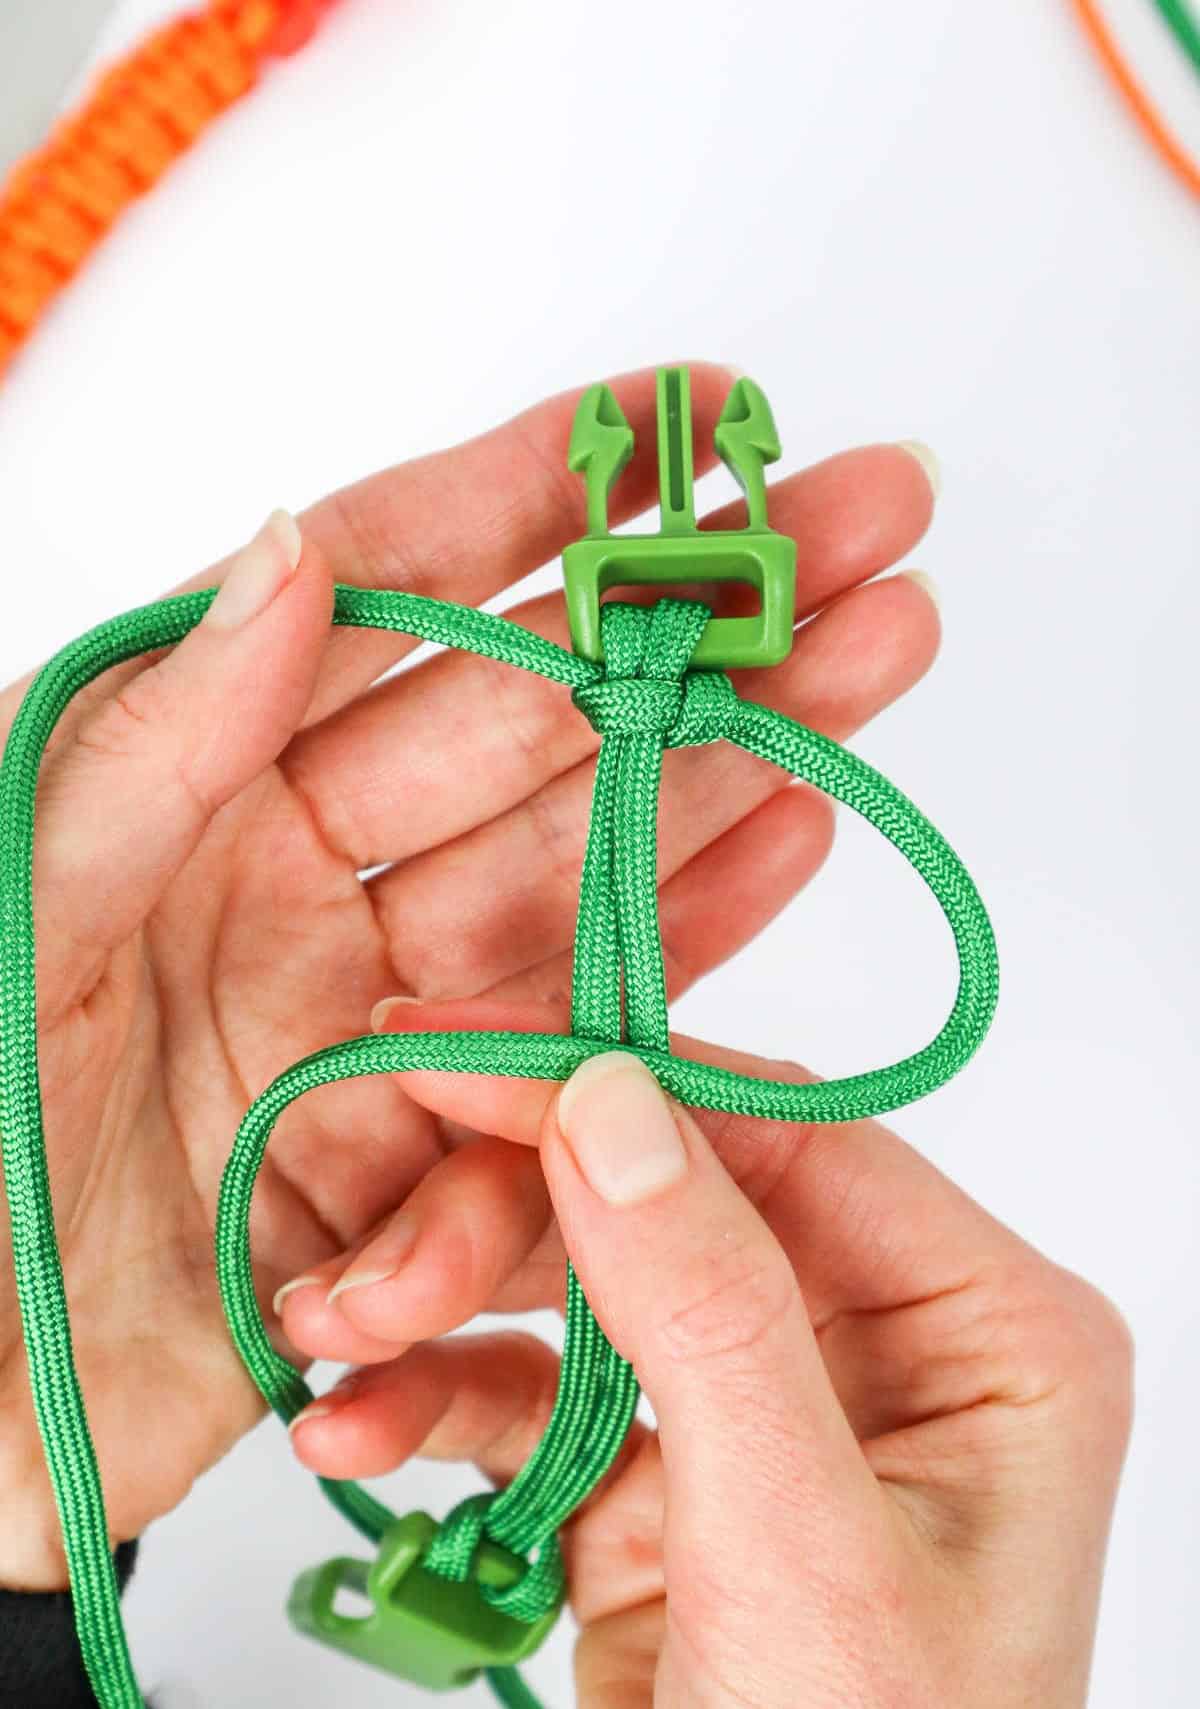
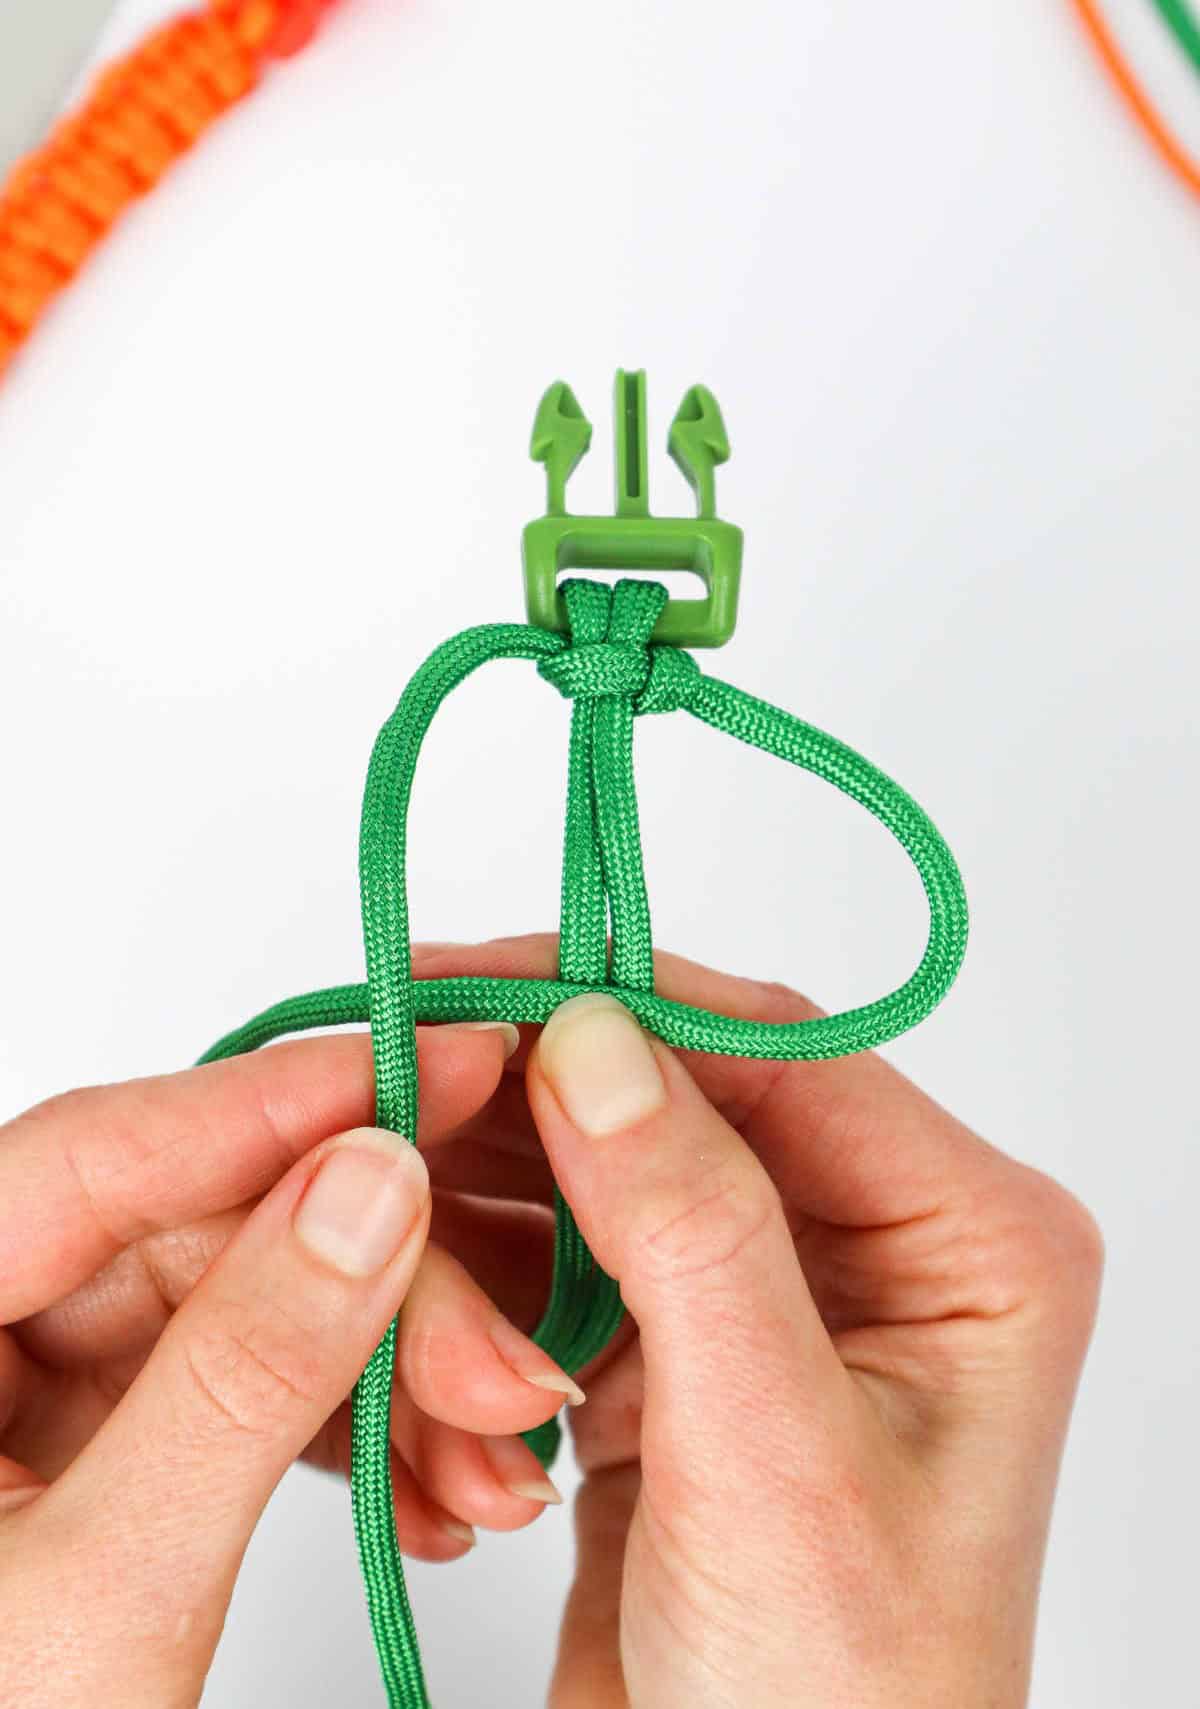


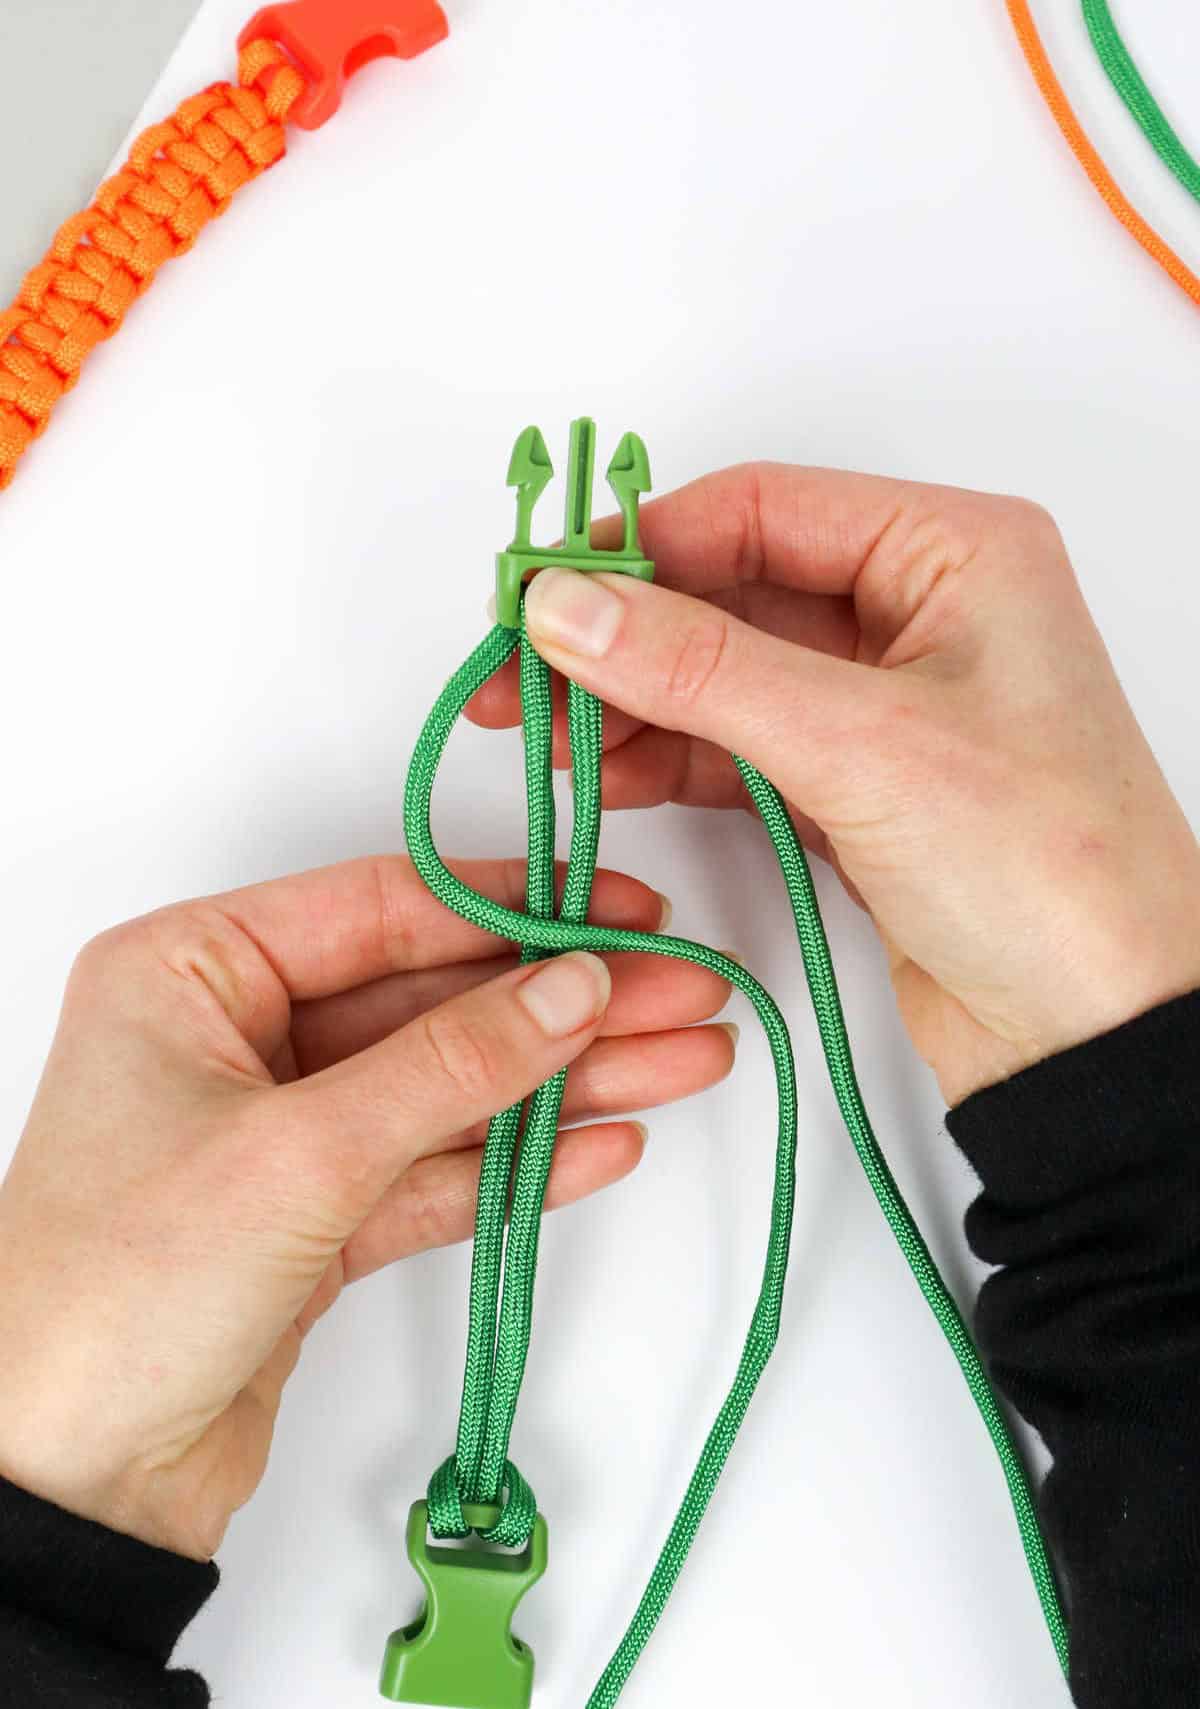
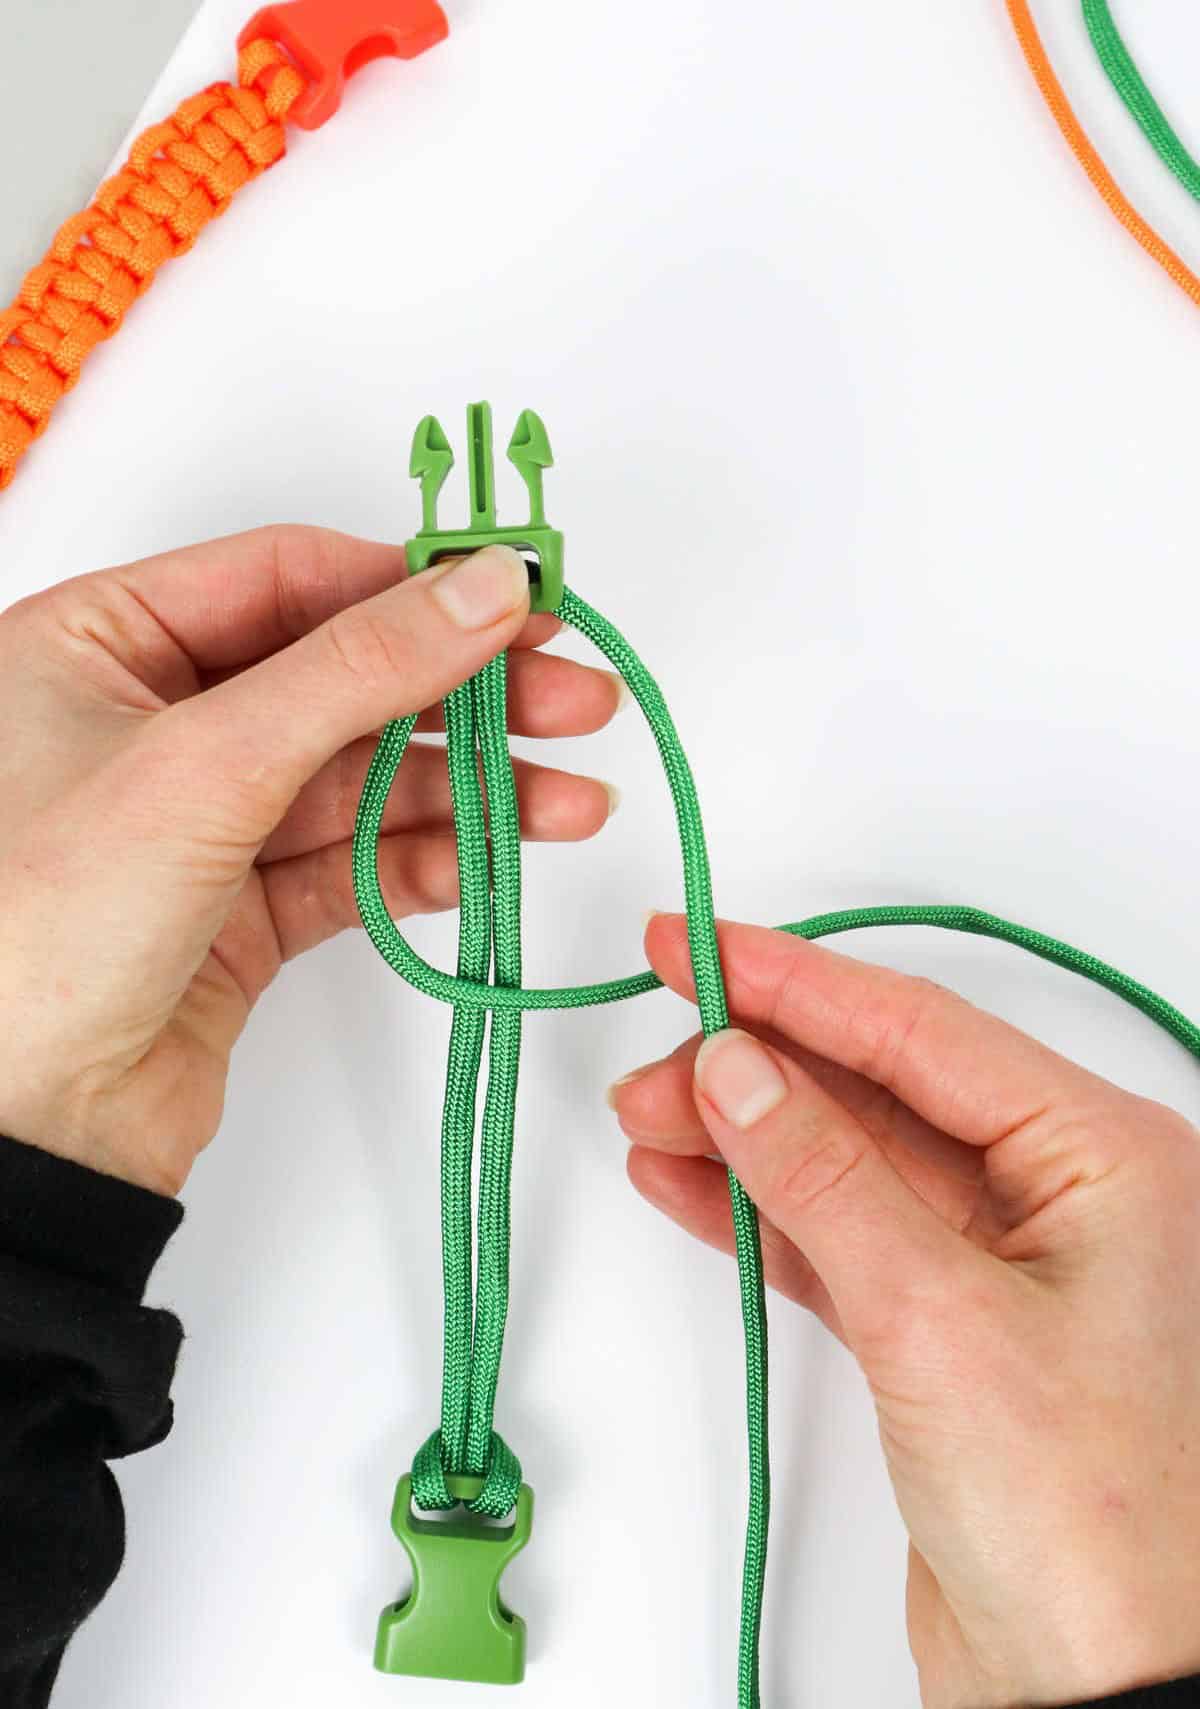
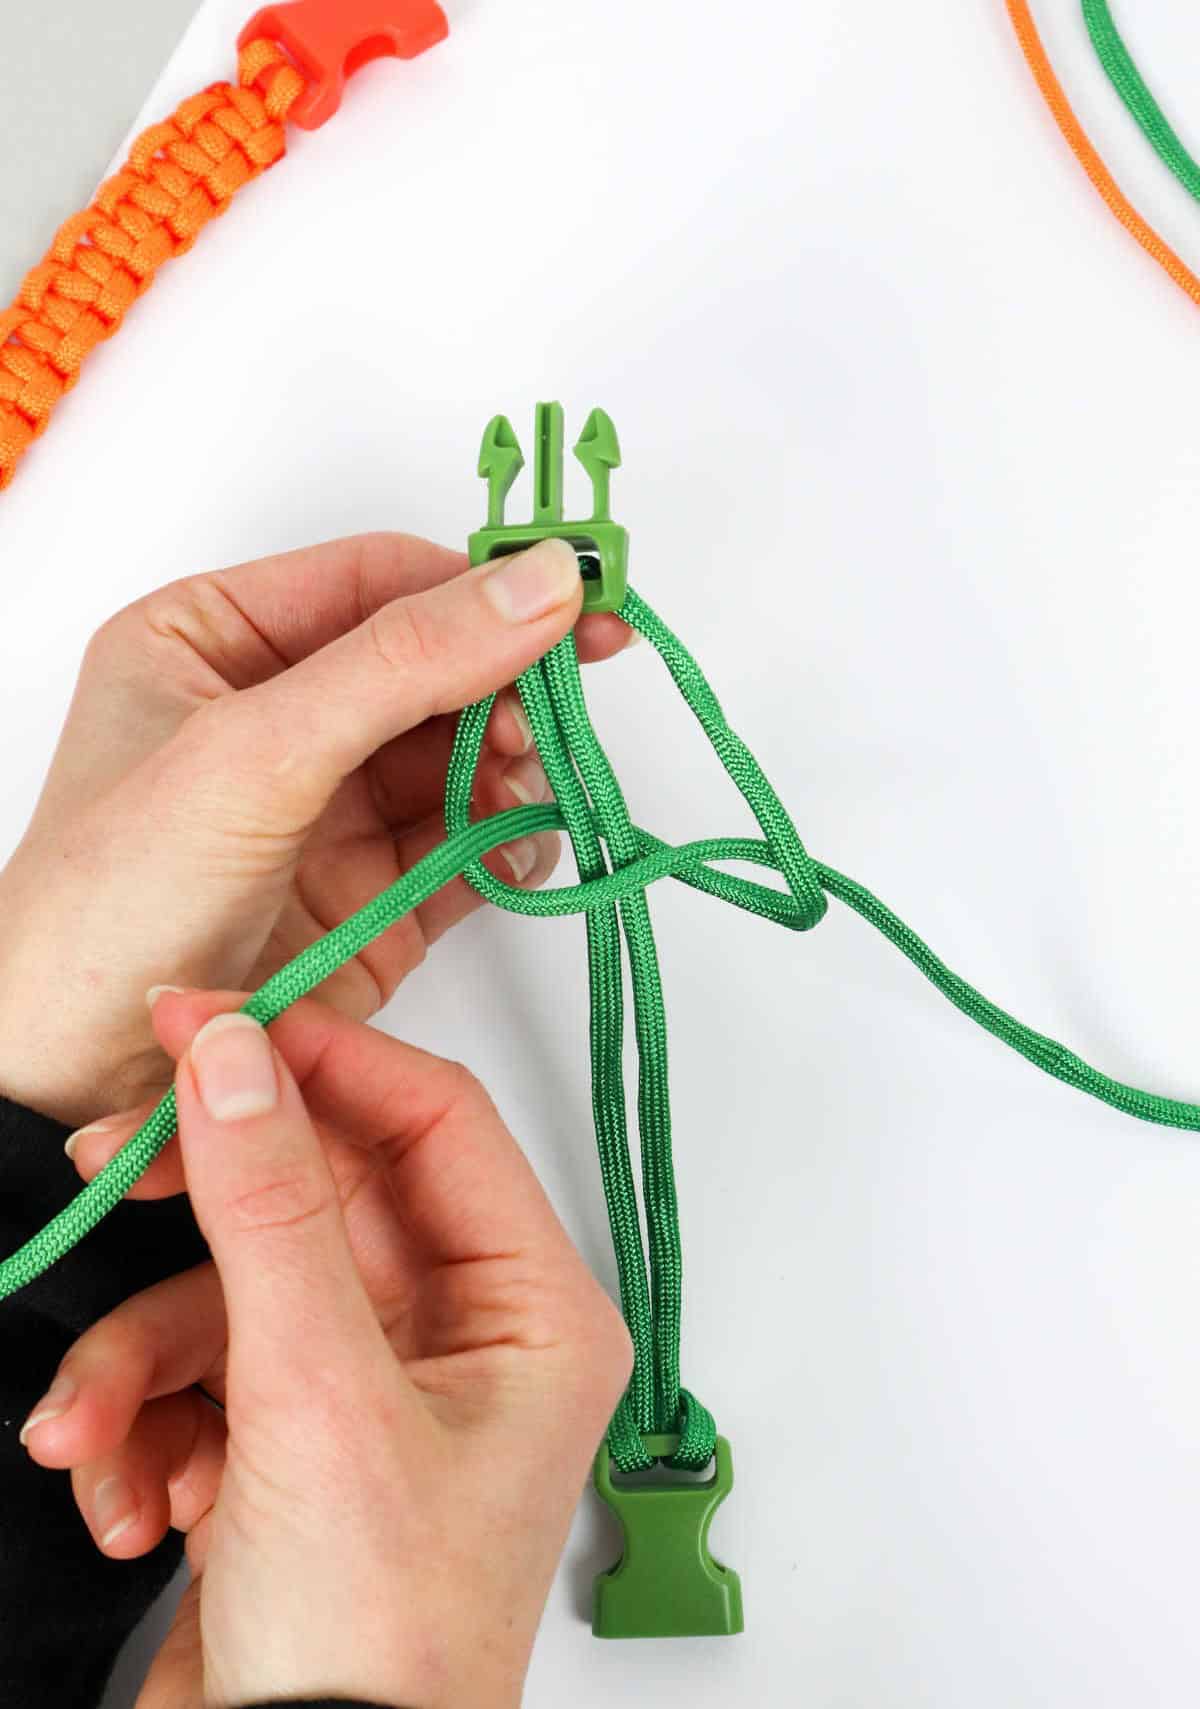
To create the initial square knot, start by taking the correct cord and wrapping it around the central cords to form a loop. Next, take the cord on the left and pass it over the right cord, then slide it under the middle cords. Give both ends a gentle tug to tighten the knot, ensuring it’s snug but not overly constricting. Once you’re satisfied with the initial shape of your square knot, give both ends another firm pull to secure it in place before moving on to the next step.
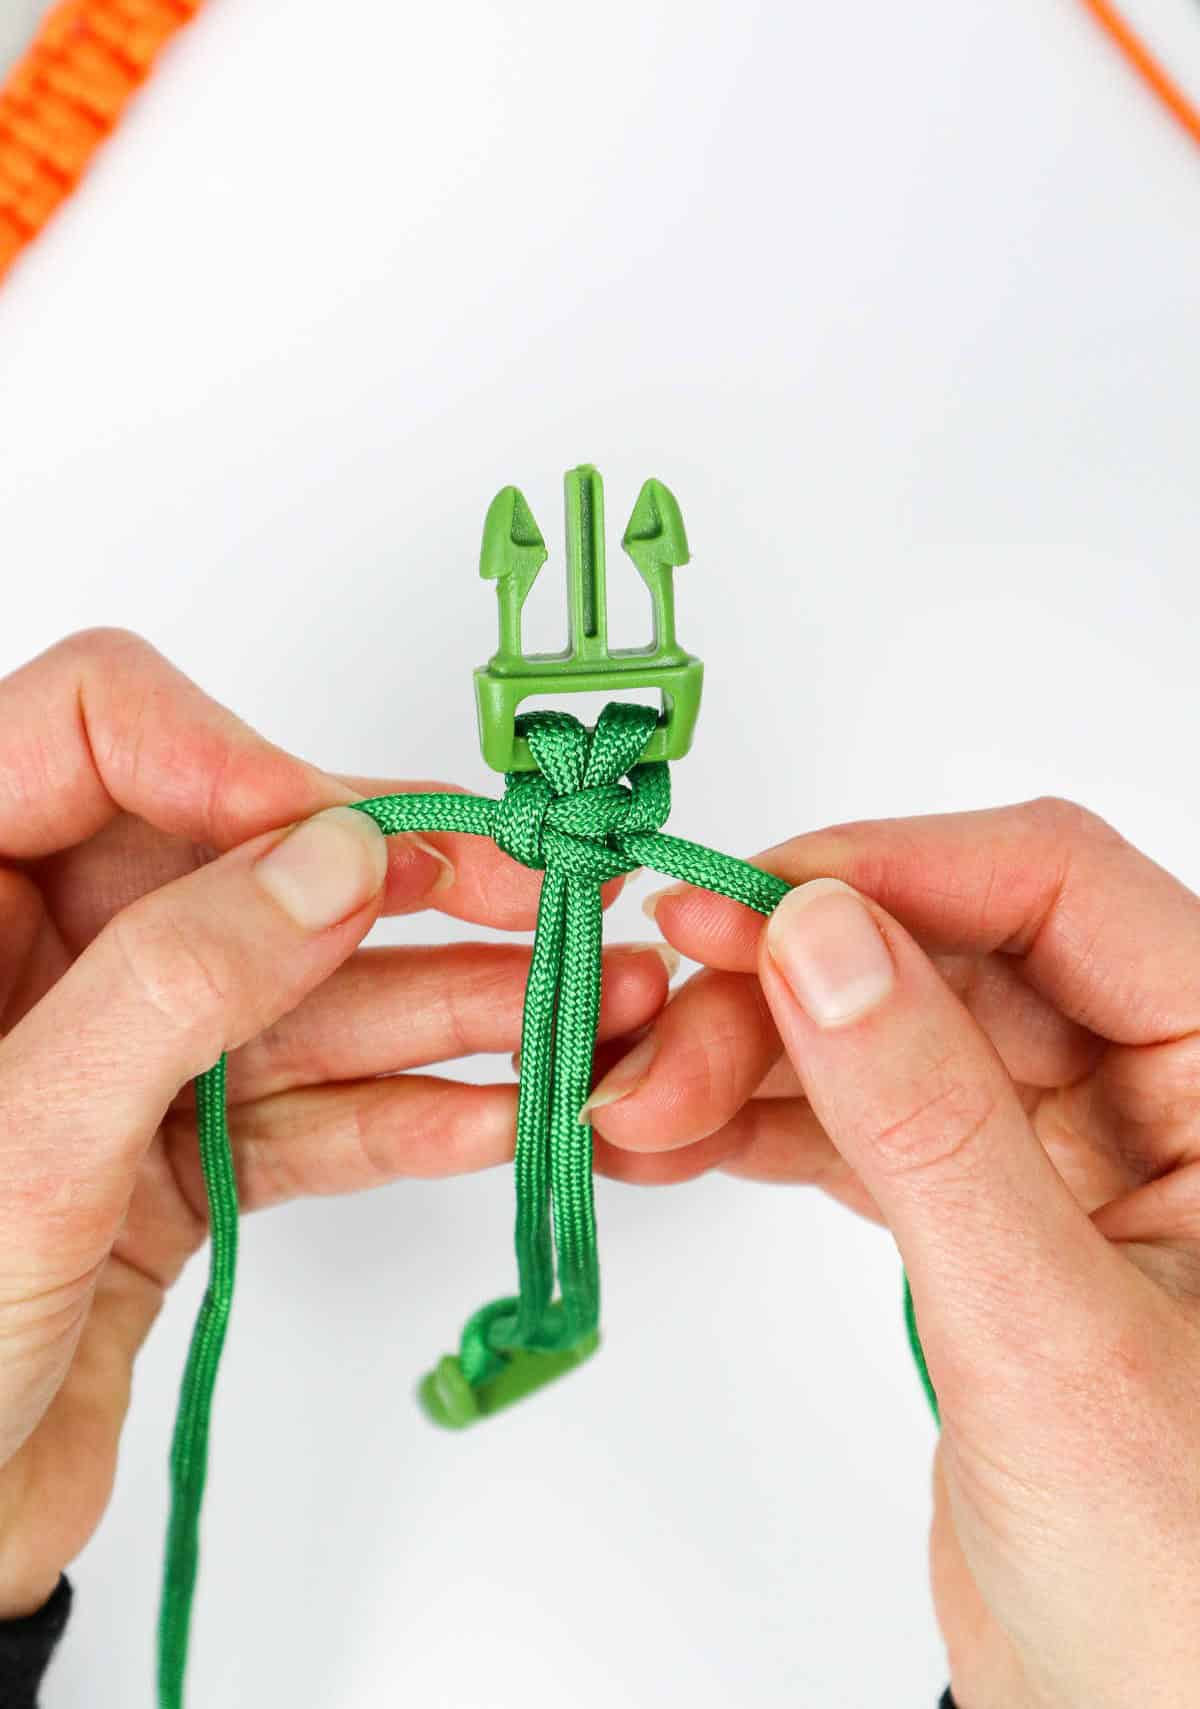
Step 7

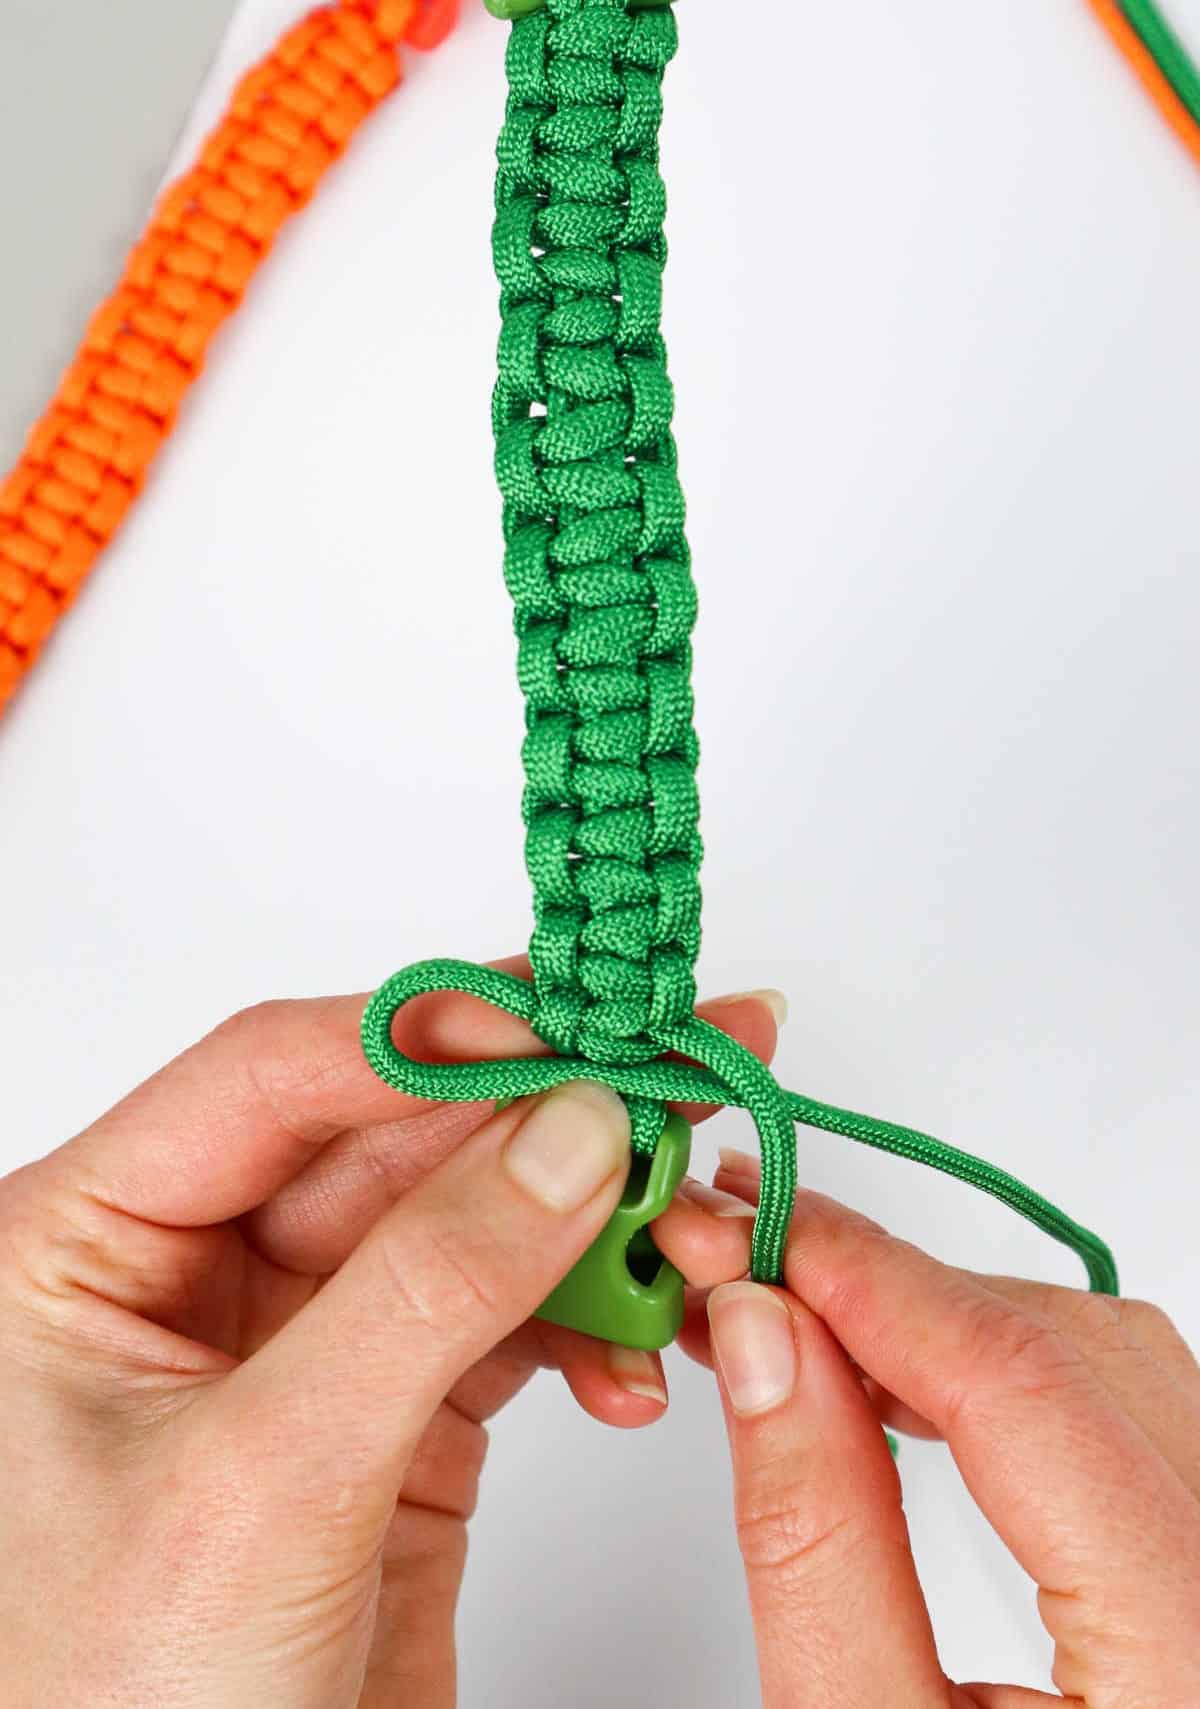
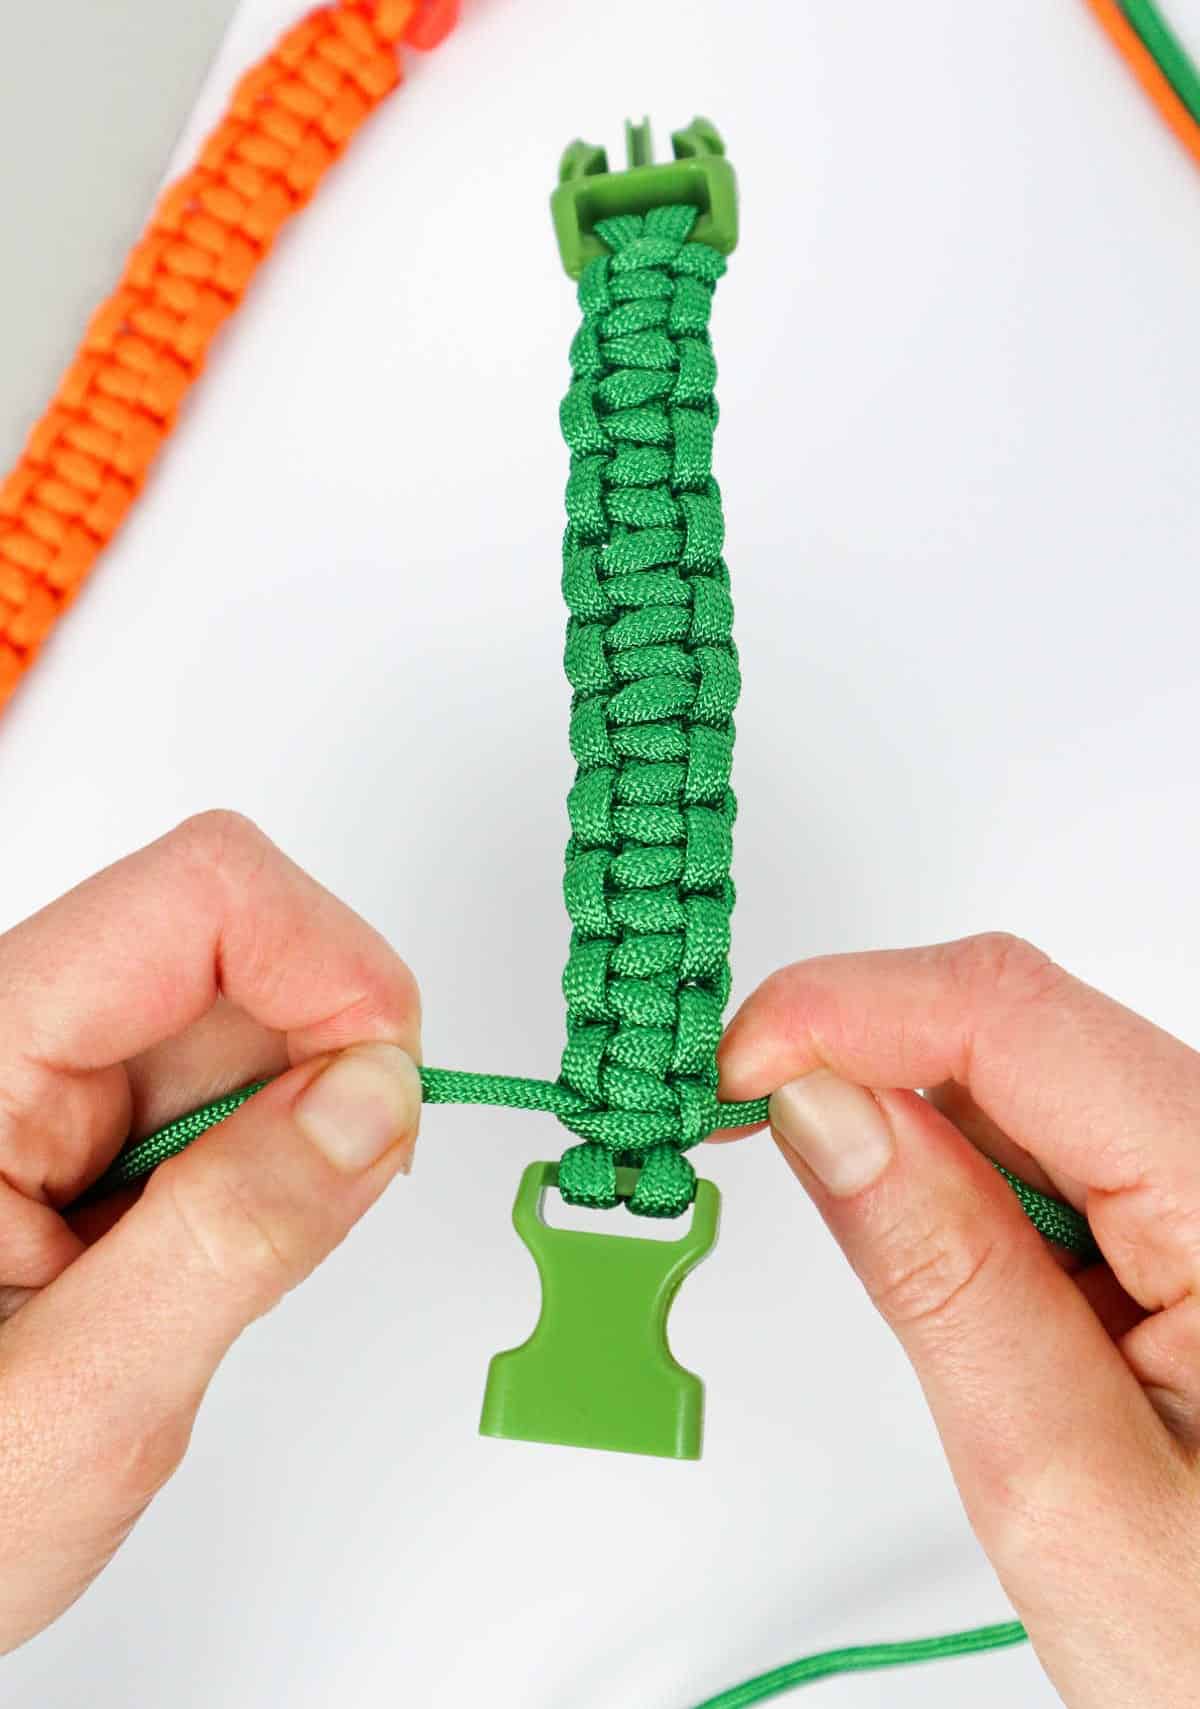
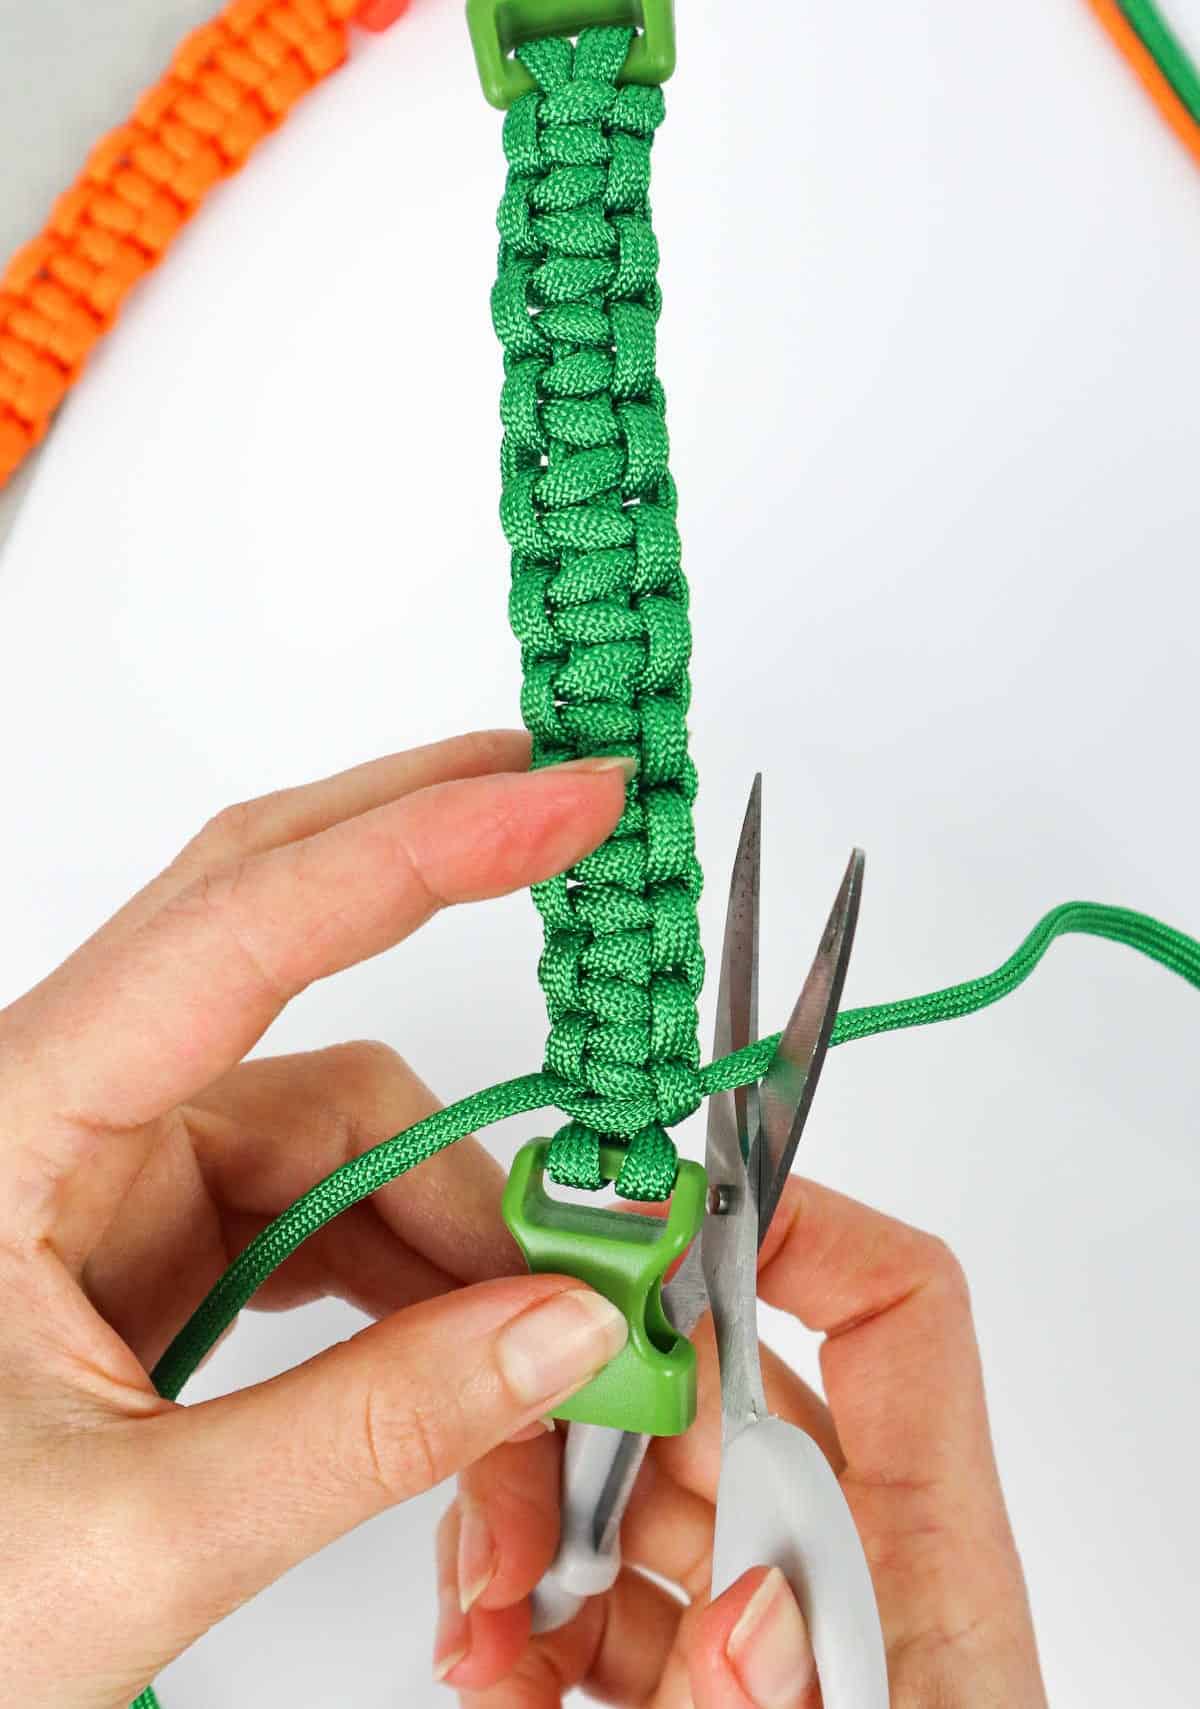
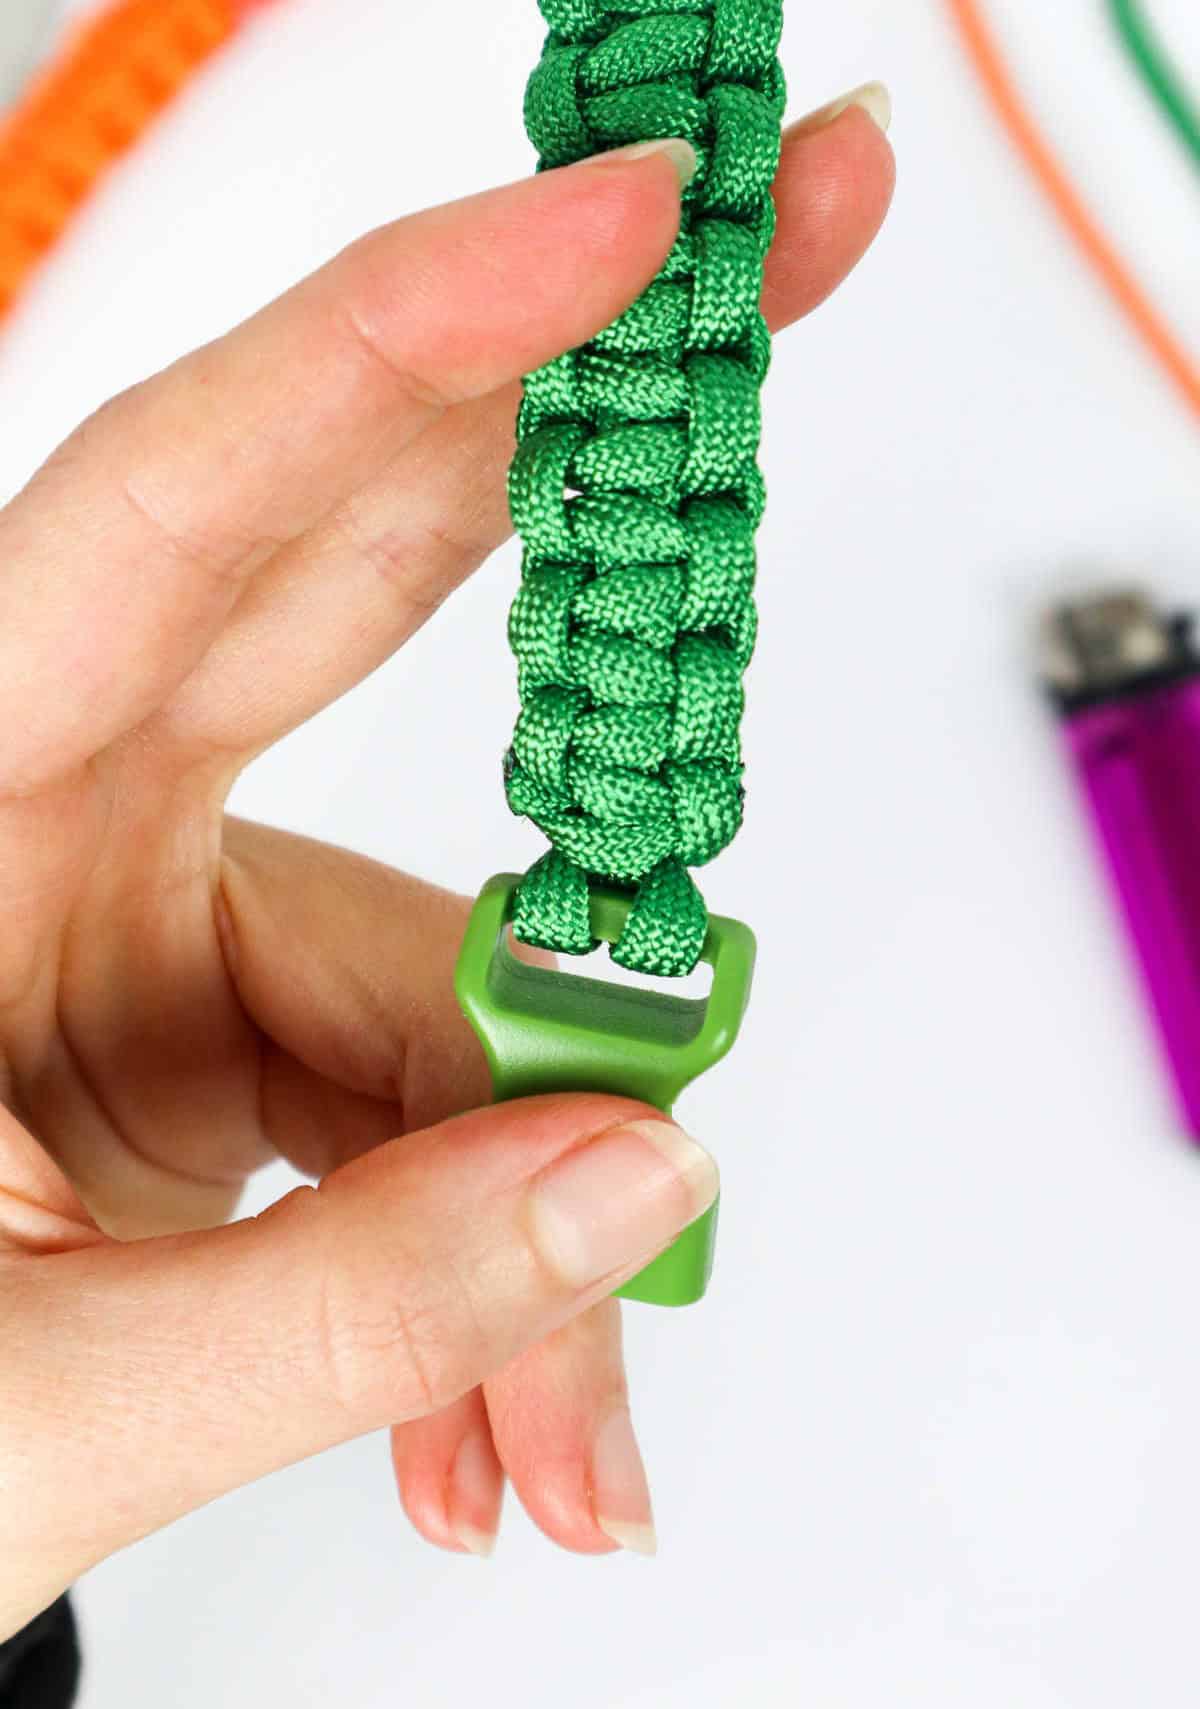
As you near the end of your project, it’s time to secure the cords with square knots. Start by creating a series of these knots, working your way down the length of the cord and connecting both ends of the clip. Continue this process until you reach the final knot, which should be placed right above the buckle clip. Once you’ve completed this last knot, take a moment to trim any excess cord, leaving just a small amount.
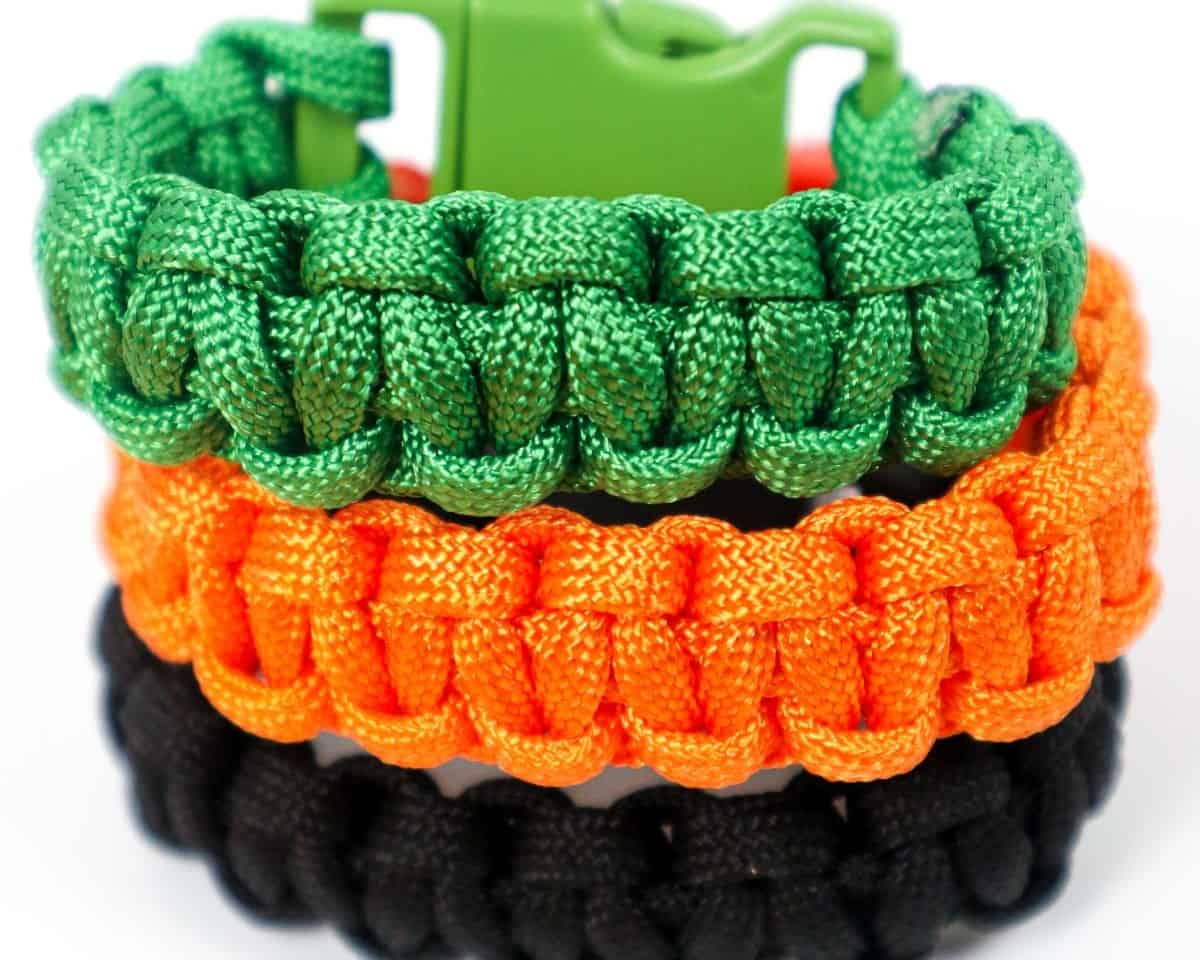
You’ll be pleased to find that your finished product has a clean and smooth appearance.
Step 8

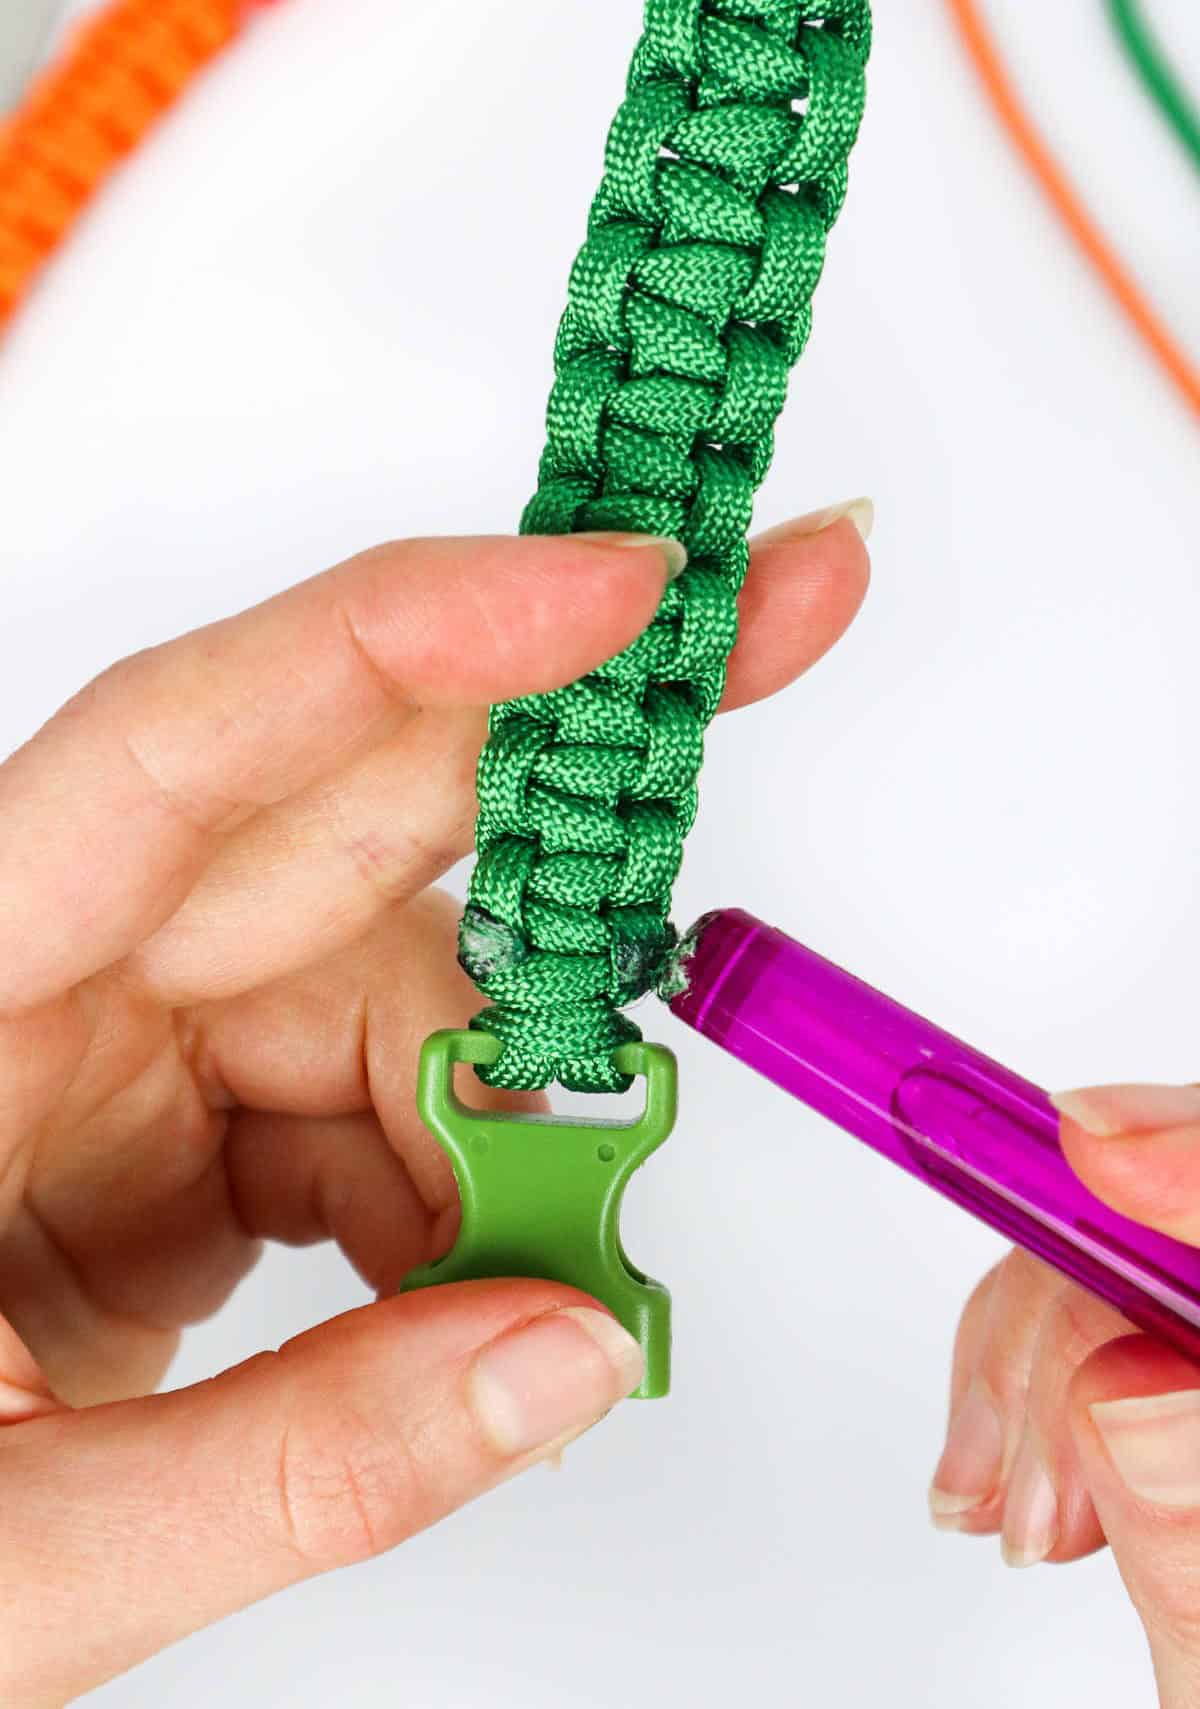
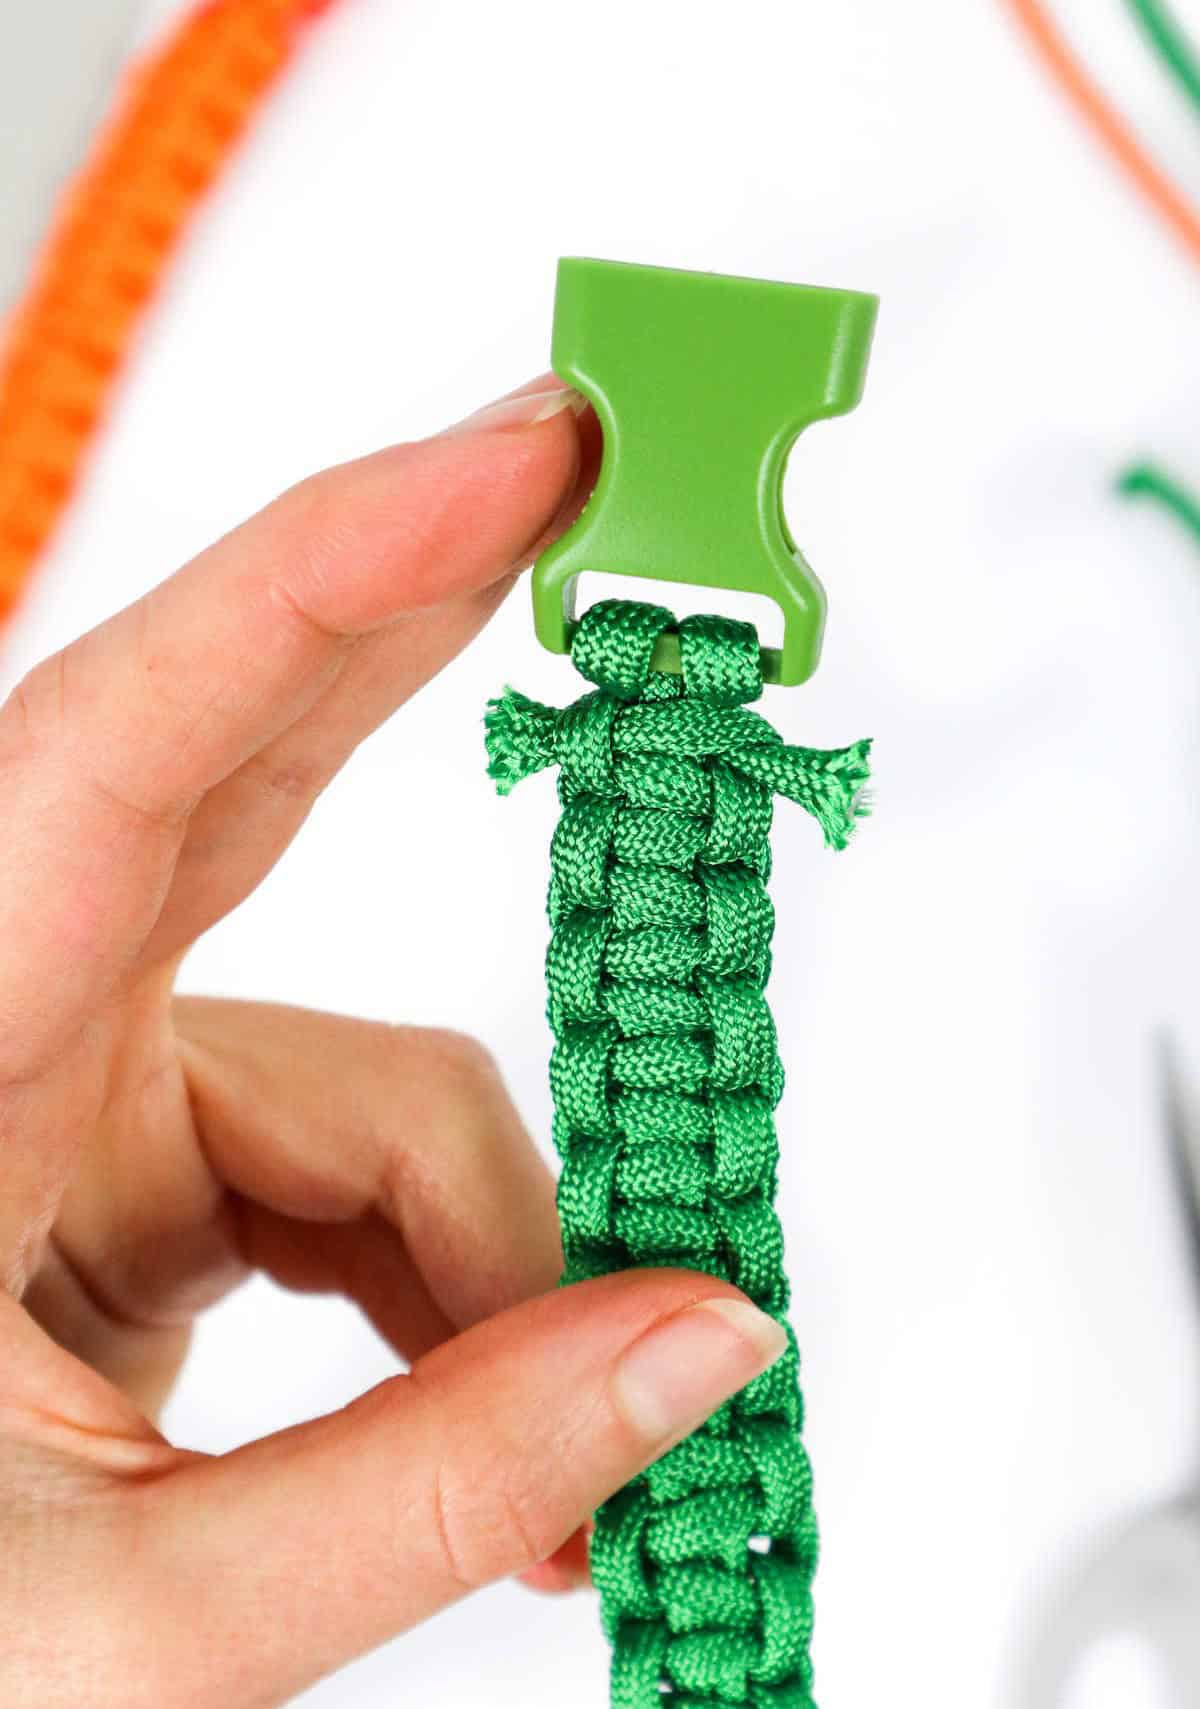
As you prepare to complete your paracord bracelet, revisit the lighter one last time. This time, carefully melt only the tips of each cord end, taking care not to burn through the entire bracelet. Your goal is to create a small, precise fold that will help the ends blend seamlessly with the rest of the cord. Next, use the still-warm ends to gently press them into the sides and back of the bracelet. Focus on flattening the tips and smoothing them out so they’re flush with the rest of the cord.
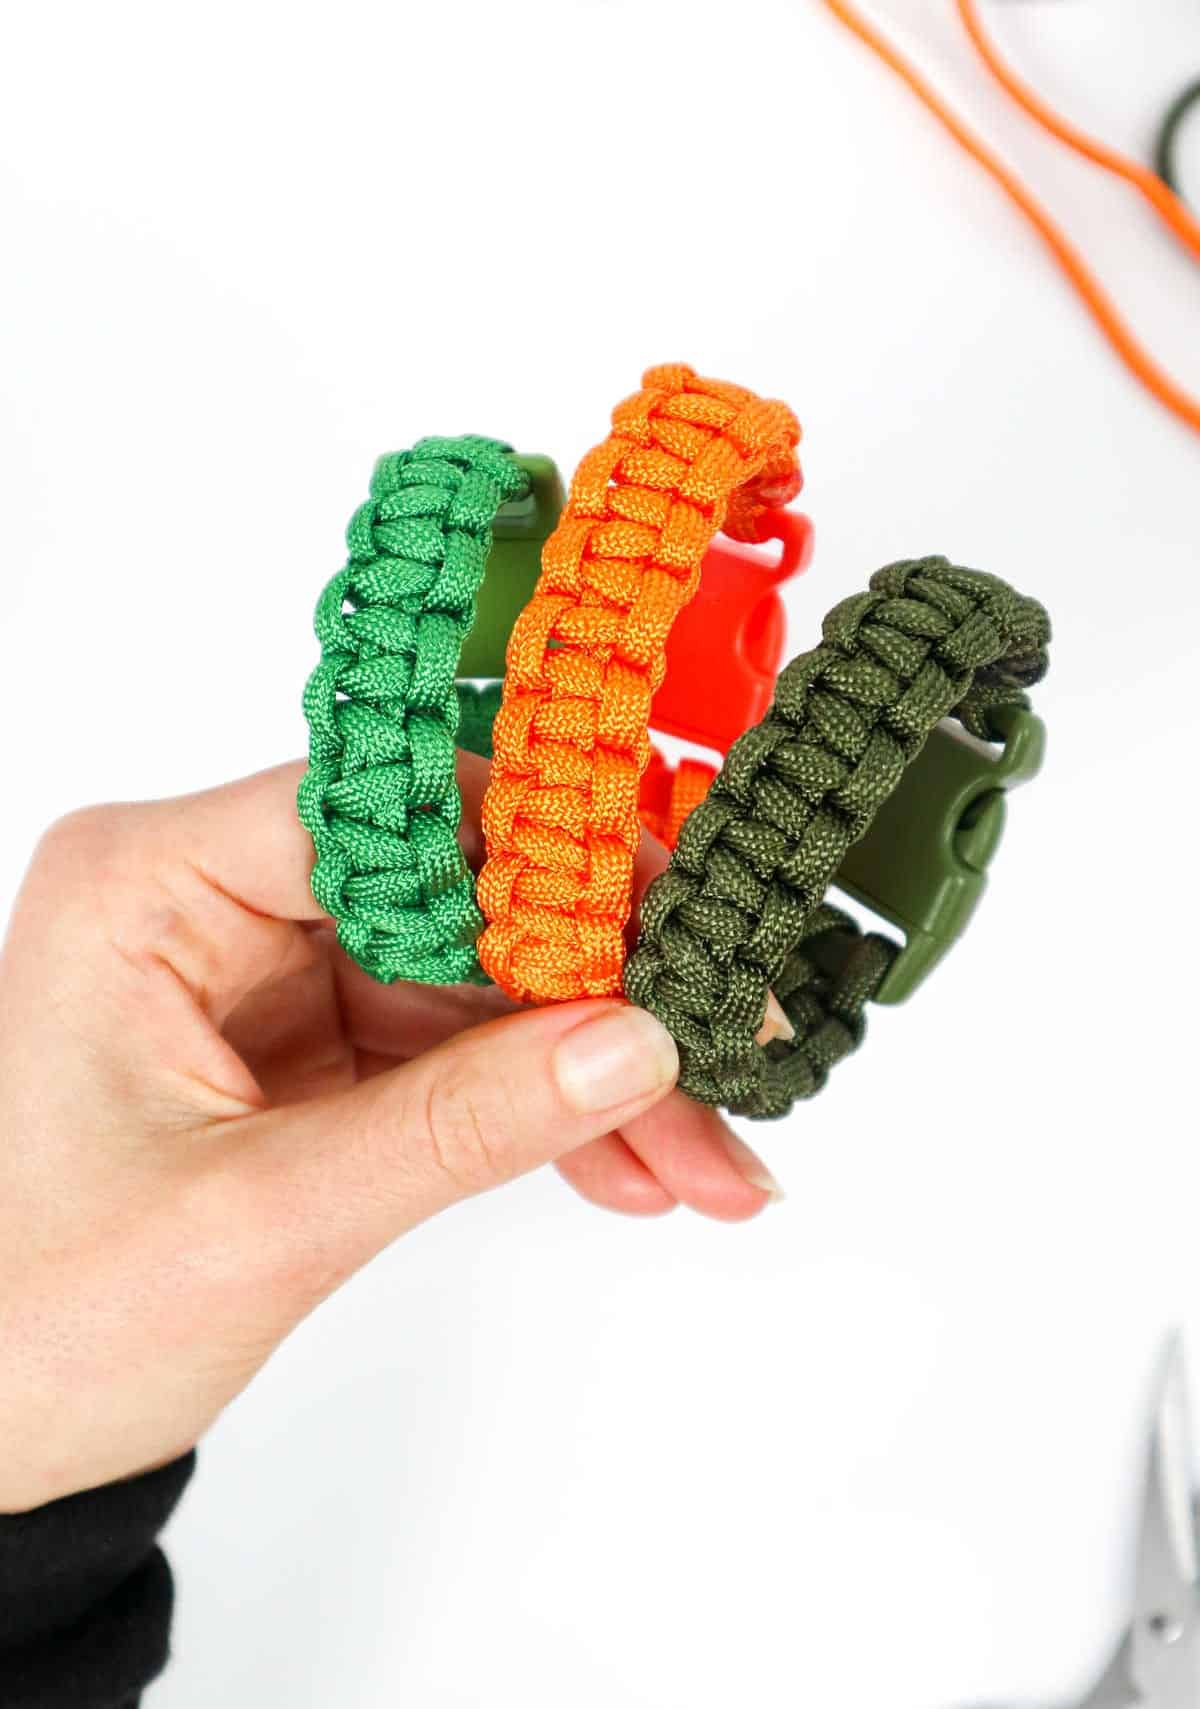
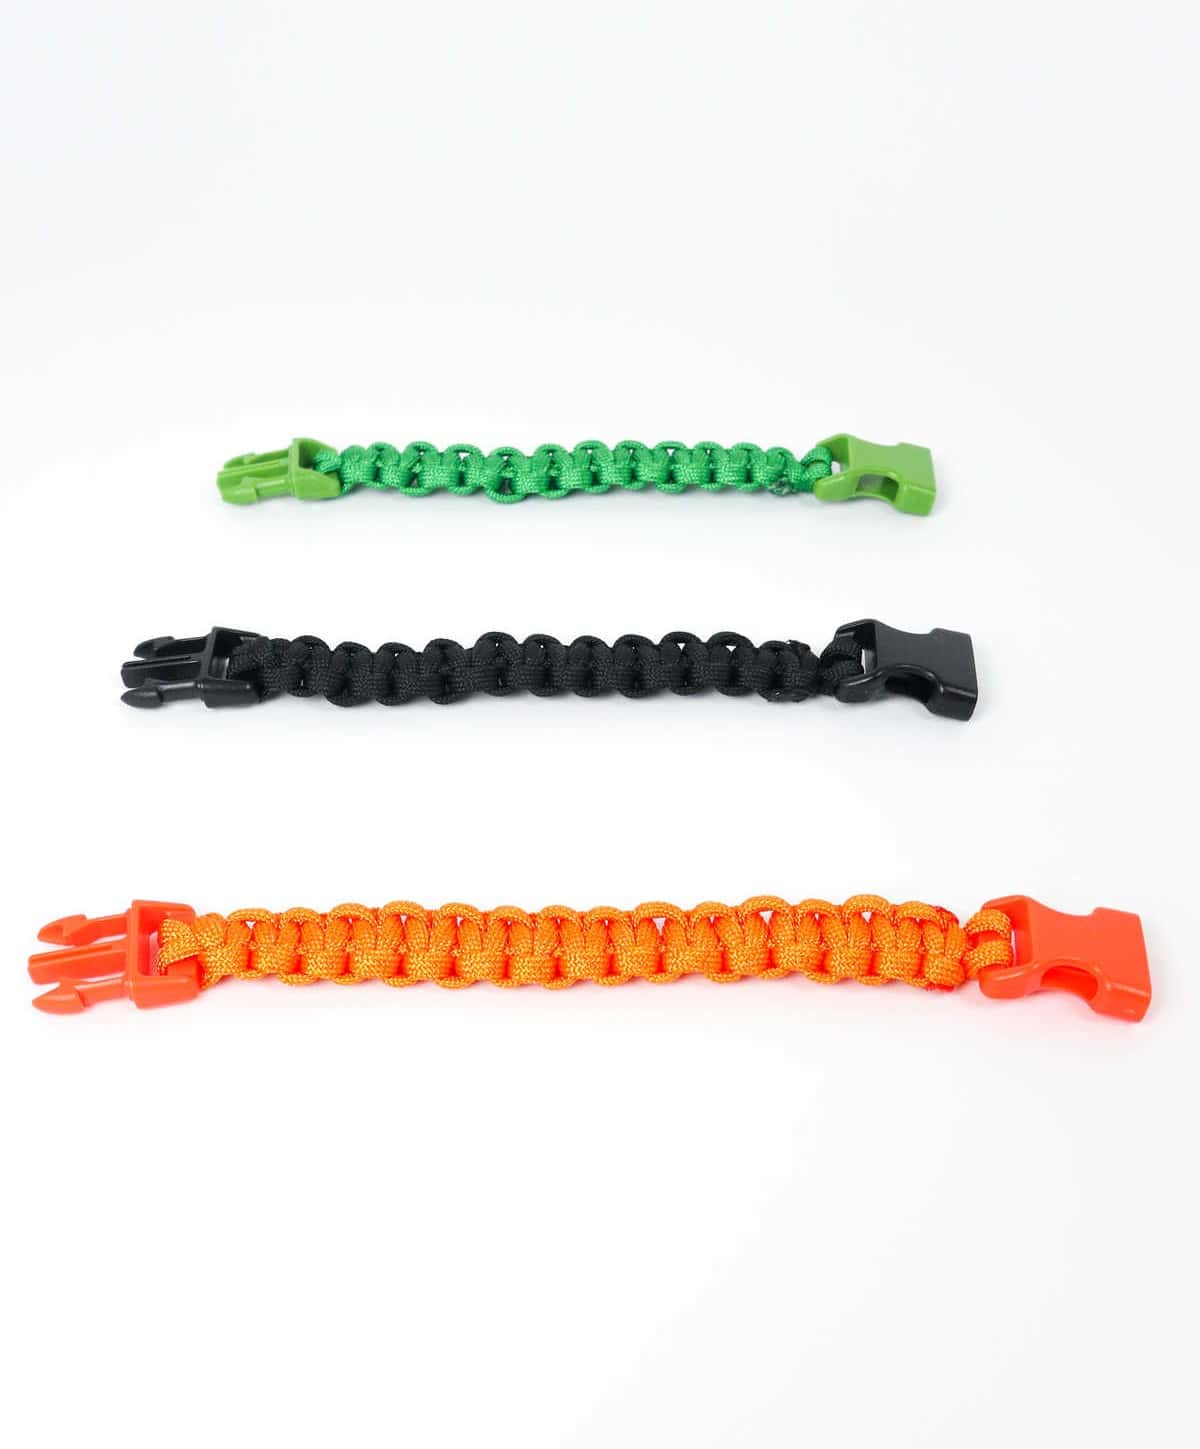
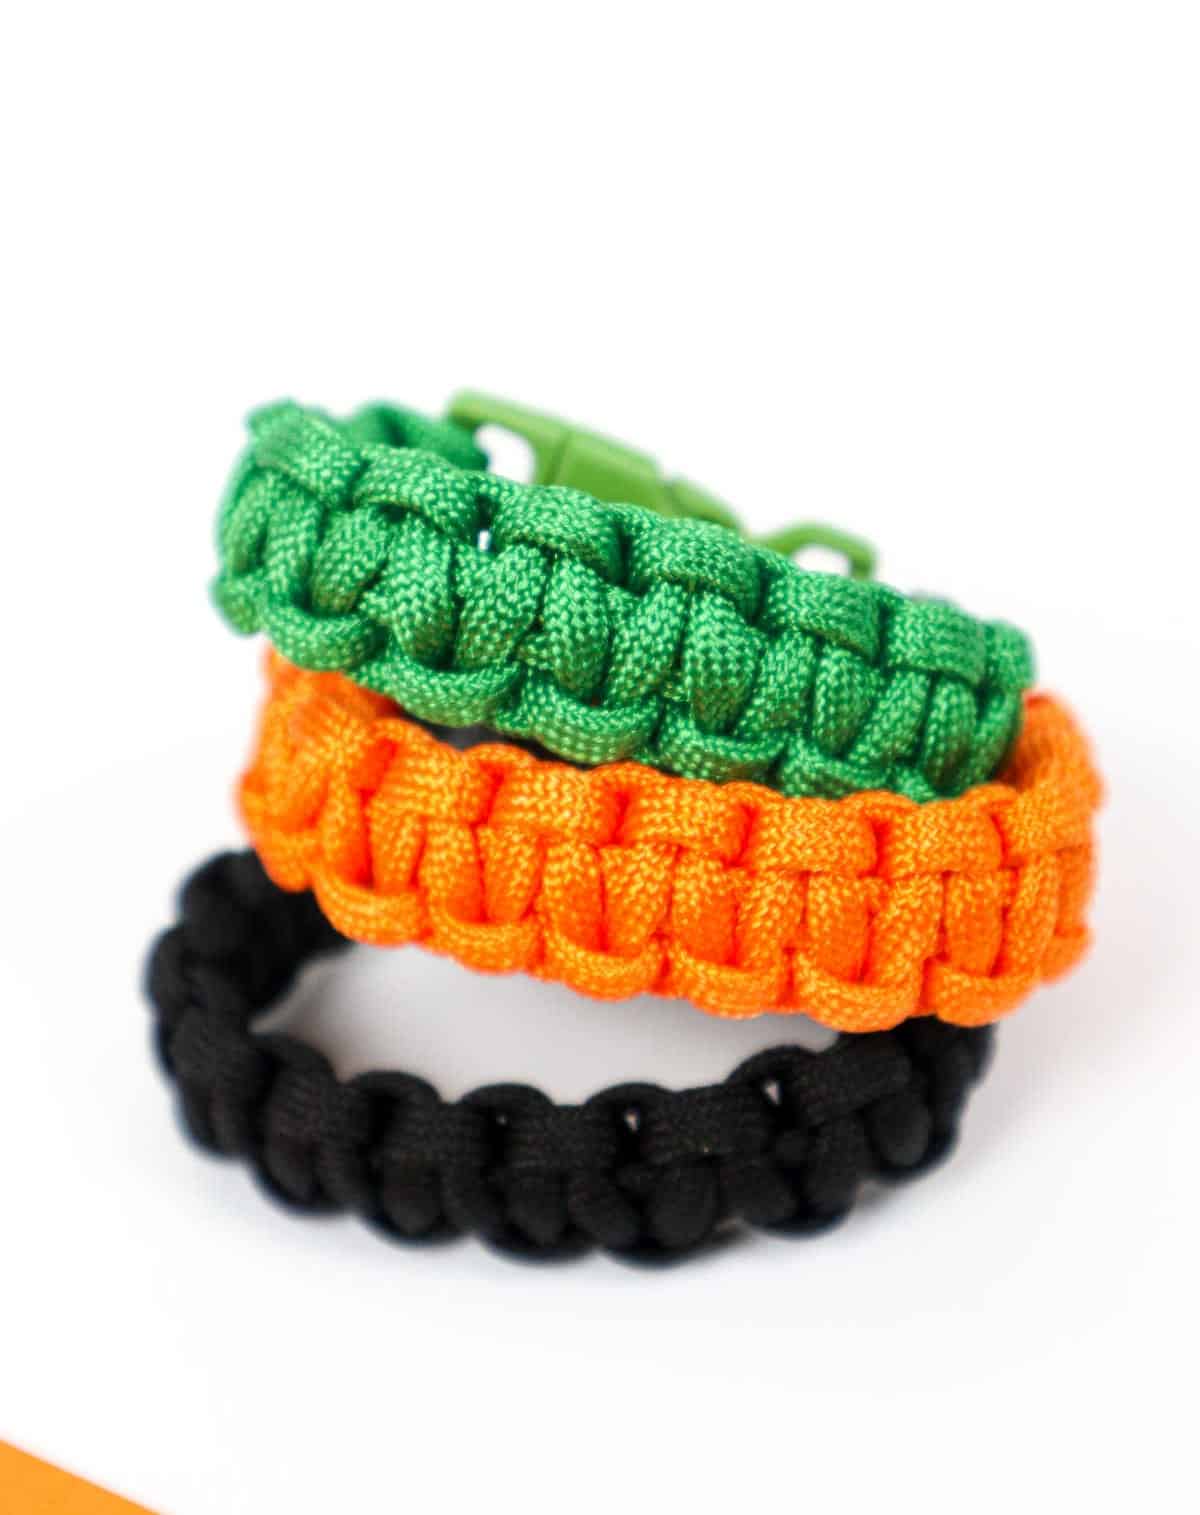
With this final step, your paracord bracelets are now complete! Feel free to explore different sizes, colors, and patterns to create a unique collection of accessories.
Who Can Make This DIY Bracelet?
This DIY bracelet is surprisingly accessible, even for young crafters above the age of ten. With some guidance from an adult, most kids can successfully navigate the pattern. It’s important to note that this project requires the use of a lighter to melt and shape the ends, making it essential to have an adult present to ensure safety and supervision during the process.
Other DIY Projects You Might Like
For creative teens looking to express themselves, there’s no shortage of fun and innovative projects to try. From upcycled treasures to handmade accessories, here are some exciting options: transforming old t-shirts into headbands, crafting earrings and rings from everyday materials, making unique jewelry with shoelaces, and more. Whether you’re a student looking for classroom crafts or just seeking inspiration for your own DIY endeavors, this list has something for everyone.
How to Make a Paracord Bracelet
Looking for a fun and affordable DIY project? Want to create something unique that showcases your creativity without breaking the bank? Look no further than making a paracord bracelet! With just 30 minutes of hands-on time, you can craft a stylish accessory that’s perfect for everyday wear. To get started, simply prepare yourself in 5 minutes, and then dive into the active crafting process which will take another 25 minutes. That’s it!
Equipment
To ensure uninterrupted work sessions, it’s essential to keep your screen from auto-locking and dimming. One simple solution is to adjust your device’s settings to prevent the screen from turning off or reducing its brightness when not in use. This can be done by navigating to your device’s display settings and selecting the option that keeps the screen active for a longer period, or even indefinitely.
Materials
Instructions
To begin your DIY paracord bracelet project, first gather the necessary supplies. Then, measure the width of your wrist to determine the length of cord required. For a 6-inch wrist, you’ll need approximately 85 inches or 7 feet of cord. Cut the cord using scissors, taking care to melt the ends to prevent unravelling and fraying. Next, fold the cord in half, creating a loop on one side and two end cords on the other.
Pull the looped end through the buckle clip and secure it with a lark’s head knot. Follow this by pulling the two end cords through the insert clip. Loop the buckle and insert clips around your wrist to measure the length of cord needed, adjusting as necessary by tightening or loosening the two end cords. Once you’re satisfied with the fit, carefully place the project on your work surface. The next step is to create a series of square knots along the length of the cord.
To make each knot, grab the left cord and pull it over the middle cords to form a loop. Then, pull the right cord over the left, under the middle cords, and through the loop. Tug the ends to secure the knot. Repeat this process for the second half of the square knot, then continue making knots along the length of the two middle cords. When you reach the insert clip, cut off any excess cord.
Finally, use a lighter to melt the ends of the chords before flattening them into the sides and back of the bracelet. Be cautious when working with heat. With these steps complete, your DIY paracord bracelet is finished.