If you’re passionate about working with resin, creating DIY keychains is an excellent project for both teens and adults. Not only can you enjoy this crafty endeavor yourself, but you’ll also have a practical gift idea for loved ones. Resin crafts offer endless opportunities to experiment, customize, and get creative with color, style, and more.
If you’re just starting out, begin with a simple project like making a coaster or resin keychain – it’s the perfect way to build confidence before moving on to more complex designs. There’s something undeniably charming about resin keychains, especially those featuring pressed flowers inside. To get started, gather your supplies and dive into this fun and rewarding craft.
Supplies You’ll Need
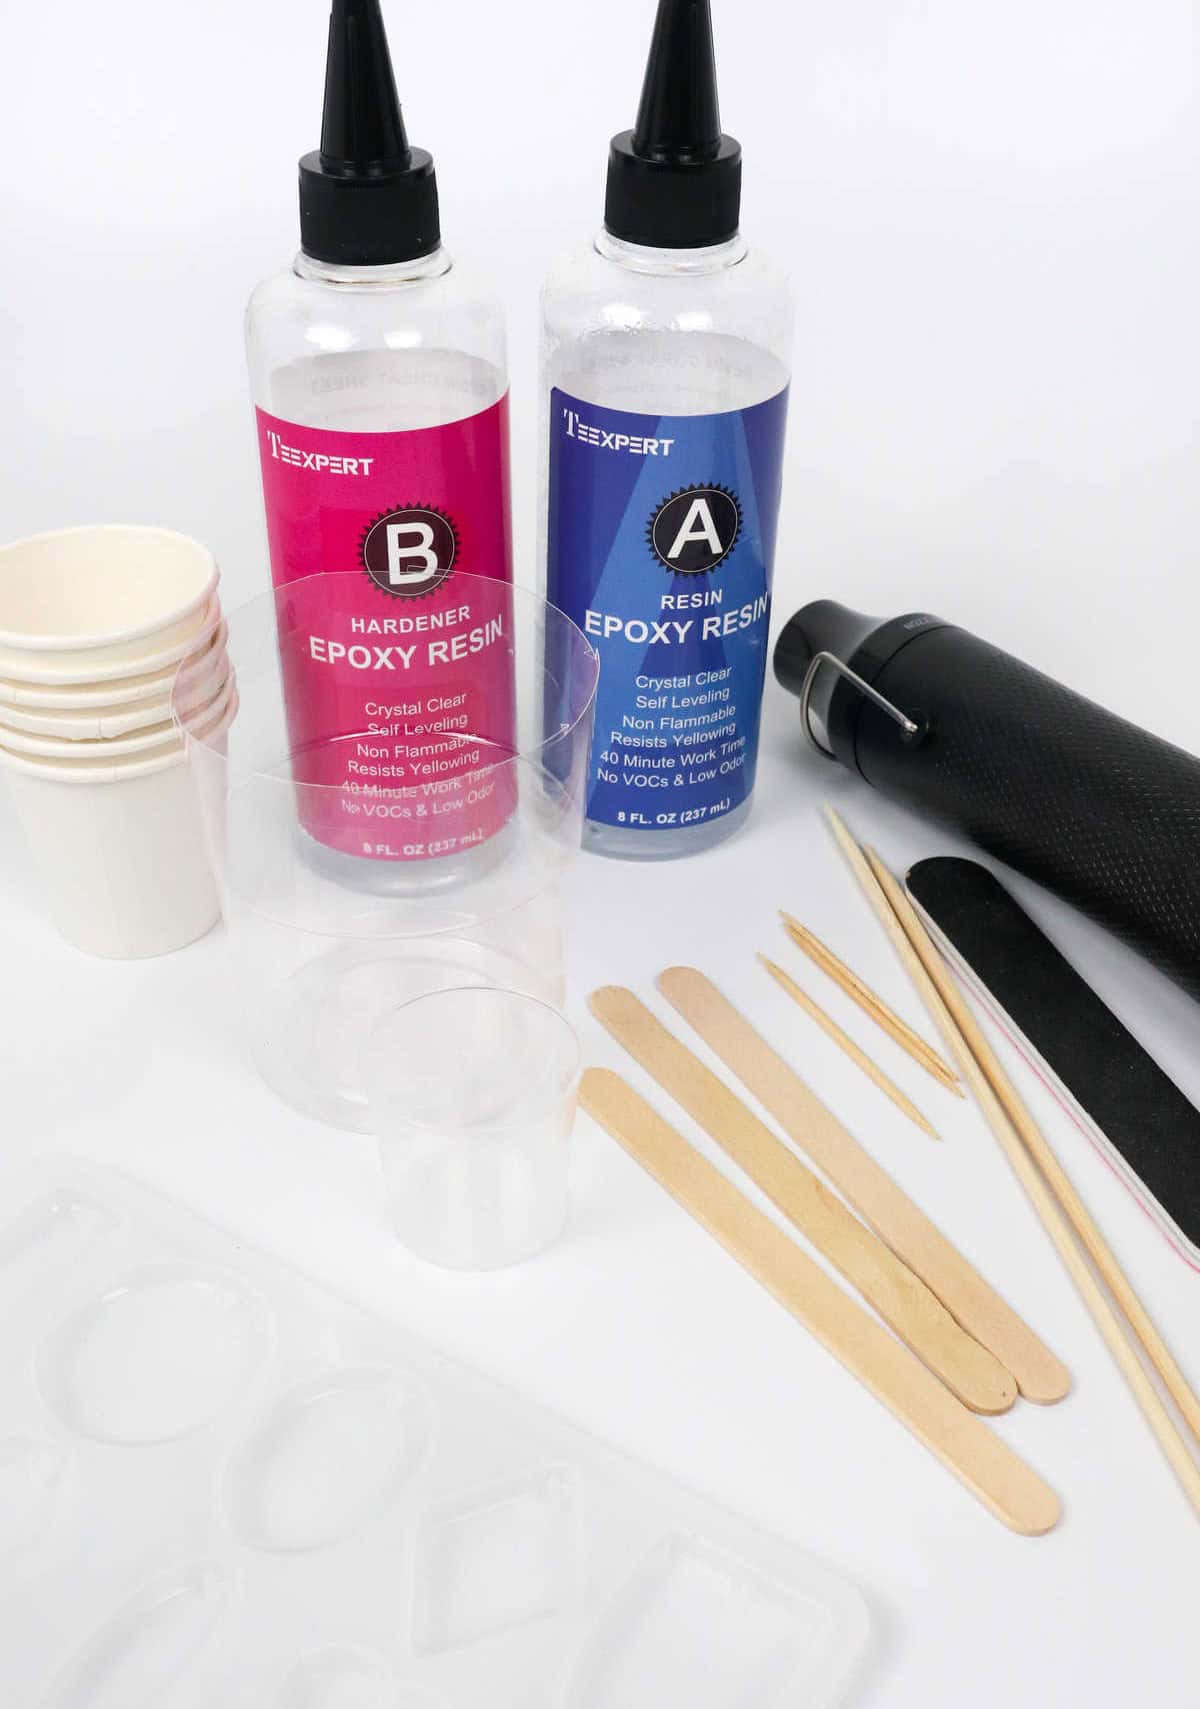
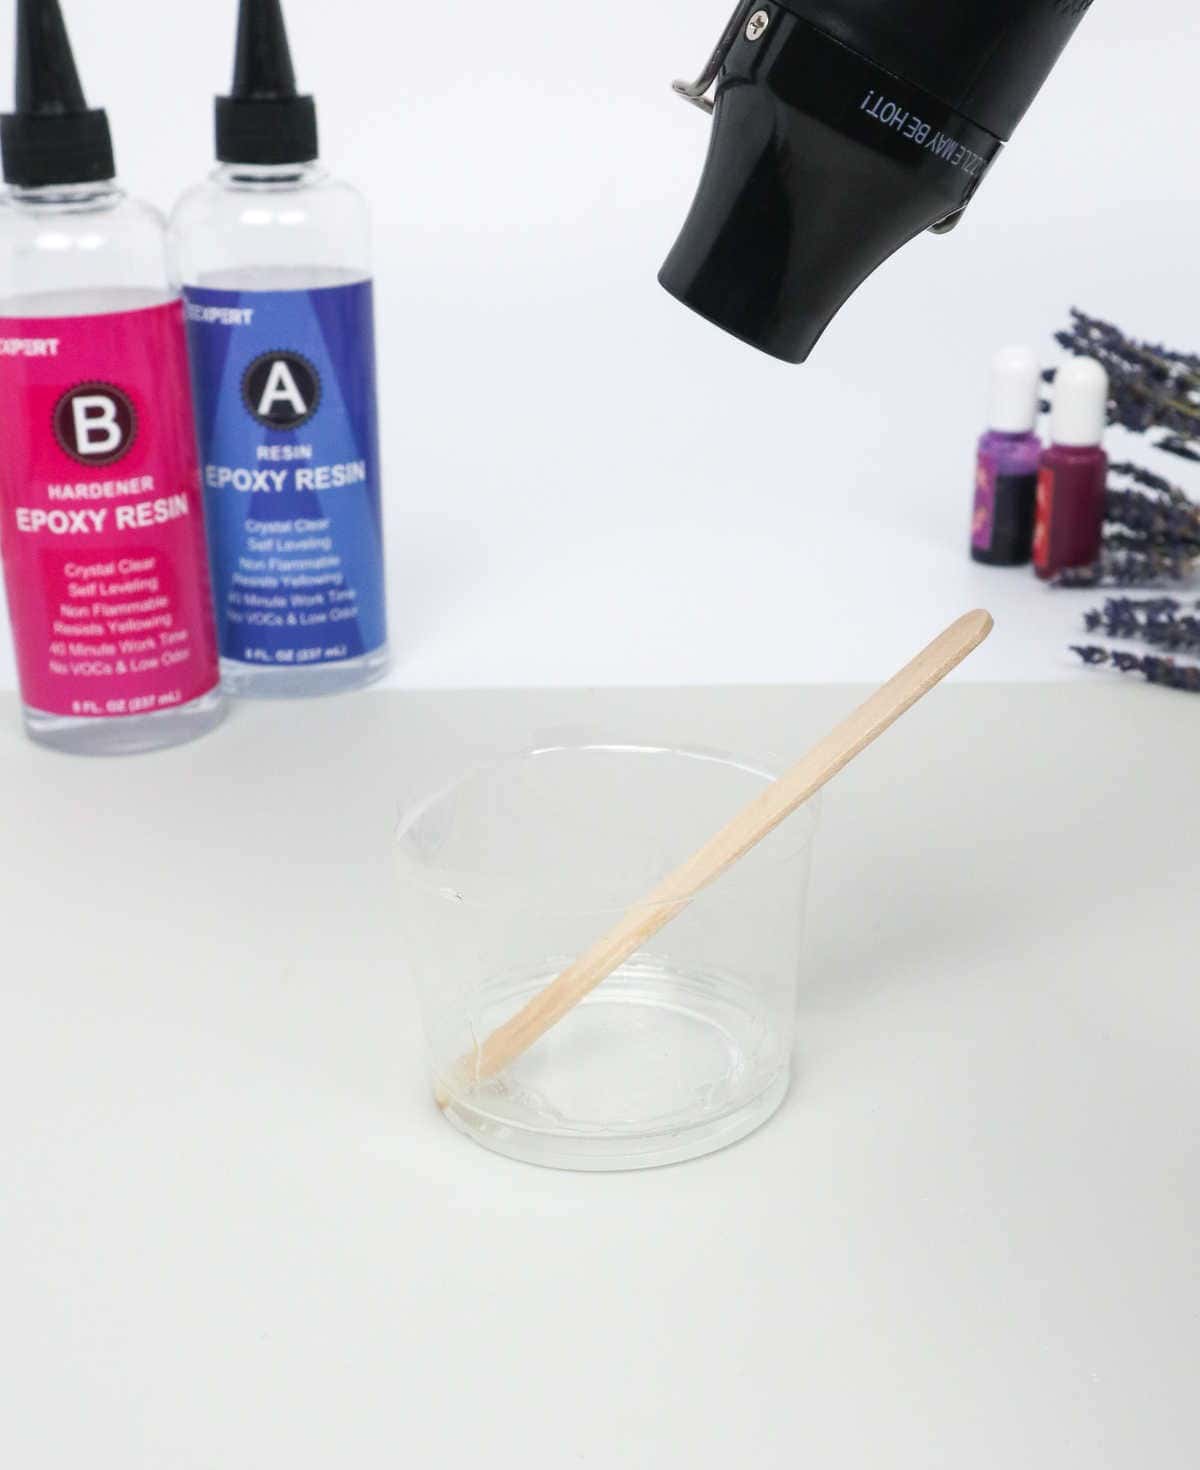
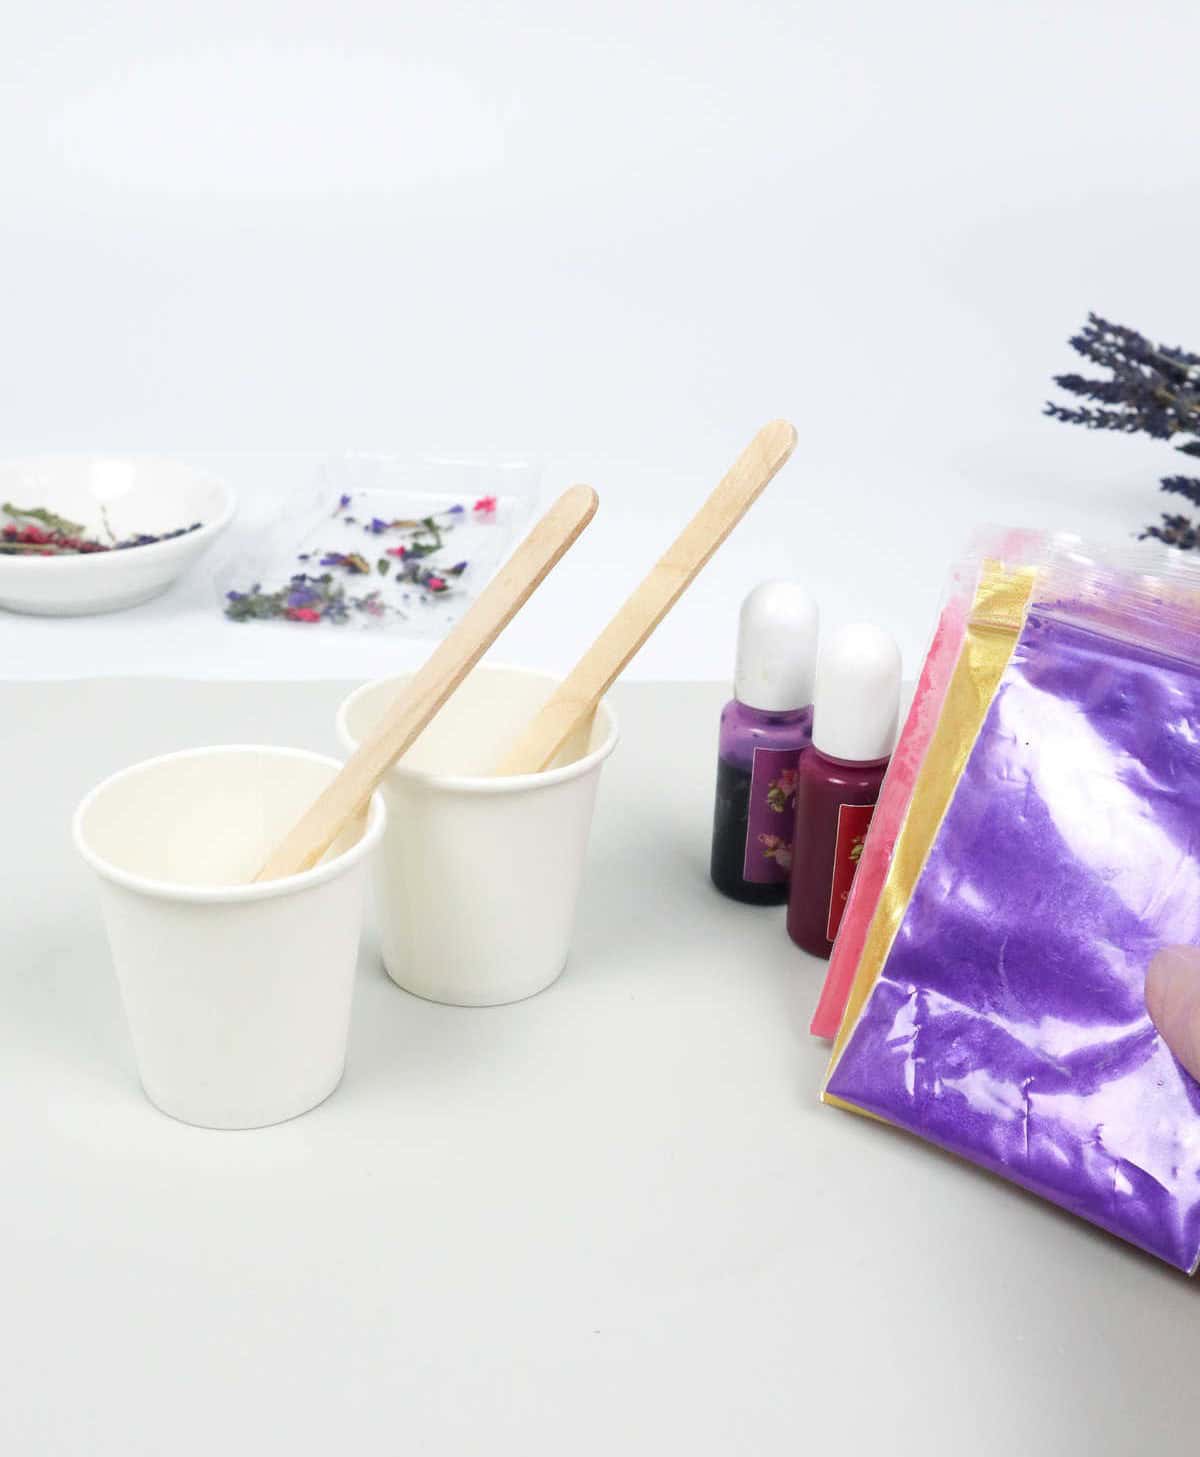
To embark on a DIY resin keychain project, you’ll need to gather the following essential materials. First and foremost, you’ll require epoxy resin and its corresponding hardener. In addition to these primary components, you’ll also need a few miscellaneous items to facilitate the process. These include small plastic cups, a larger one for mixing, a toothpick, wood skewer, silicone molds for shaping your keychains, and spatulas for mixing and pouring the resin.
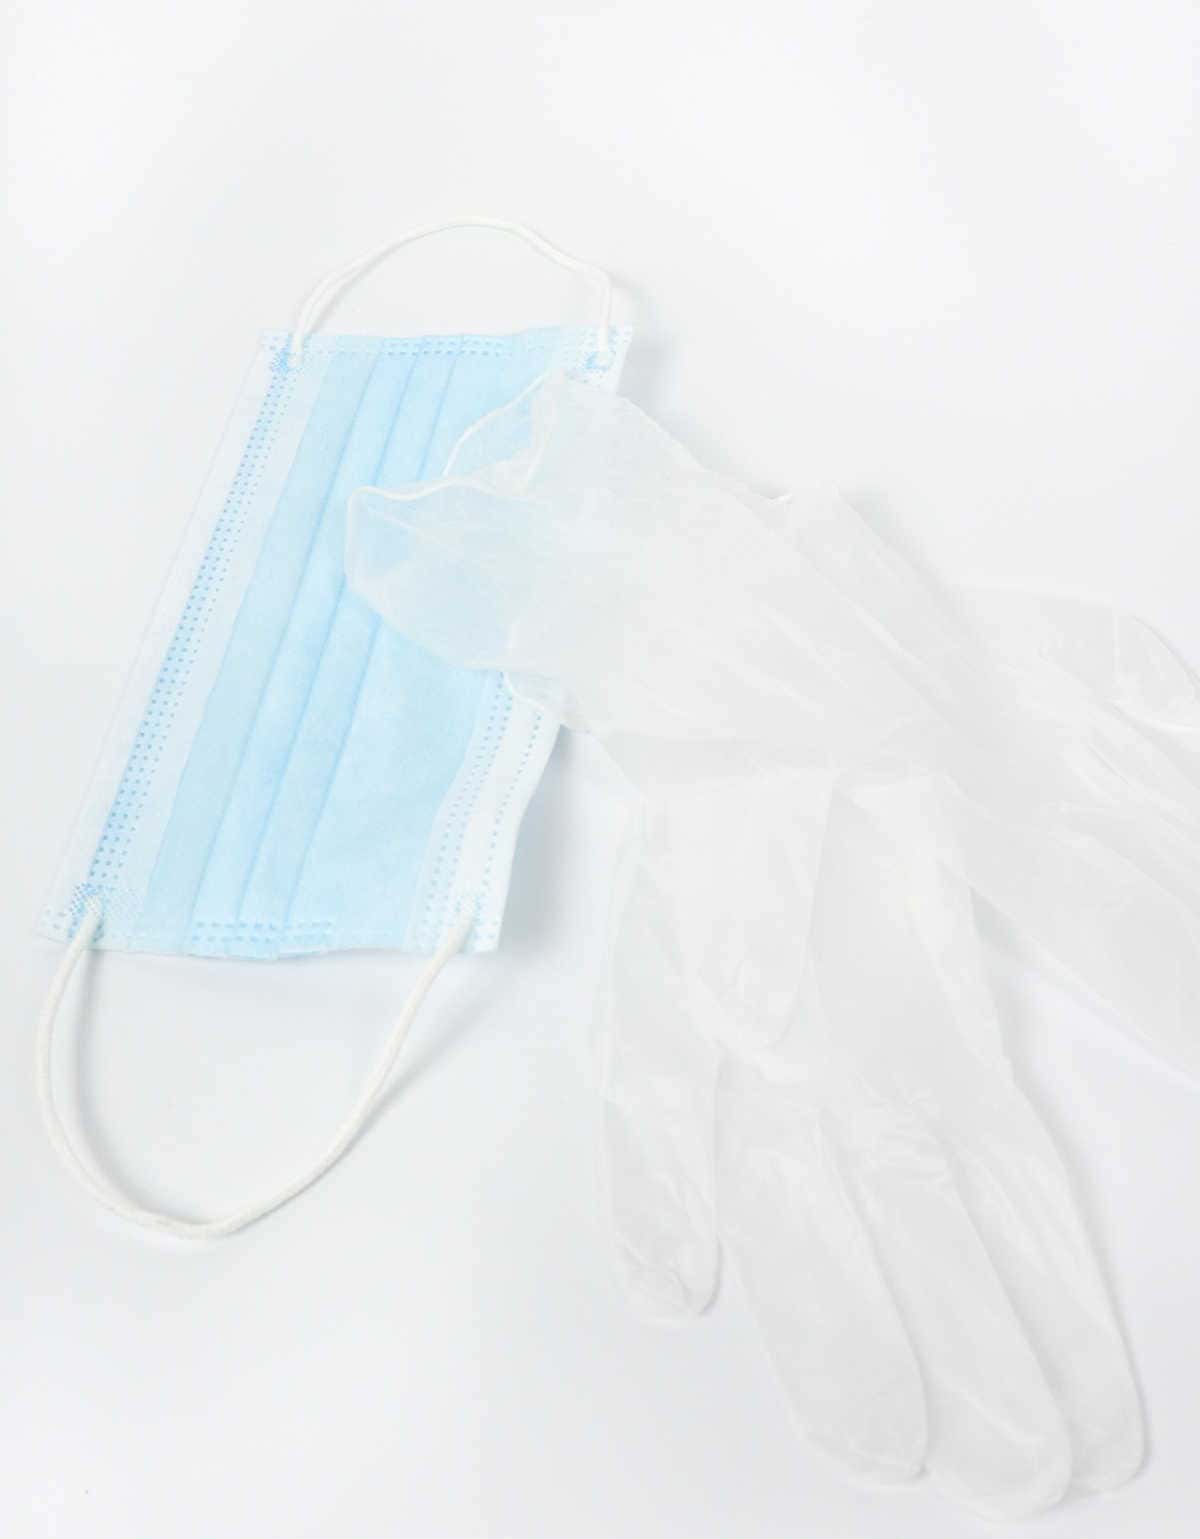
You may also find it helpful to have a heat gun on hand, which can be used to speed up the curing process or remove any air bubbles that form during application. For the actual keychain blanks, you’ll need some blank keychains to serve as the base for your creations. To ensure your workspace remains clean and protected, consider wearing a face mask and gloves while working with resin. Now, let’s move on to the materials needed for decorating your keychains.
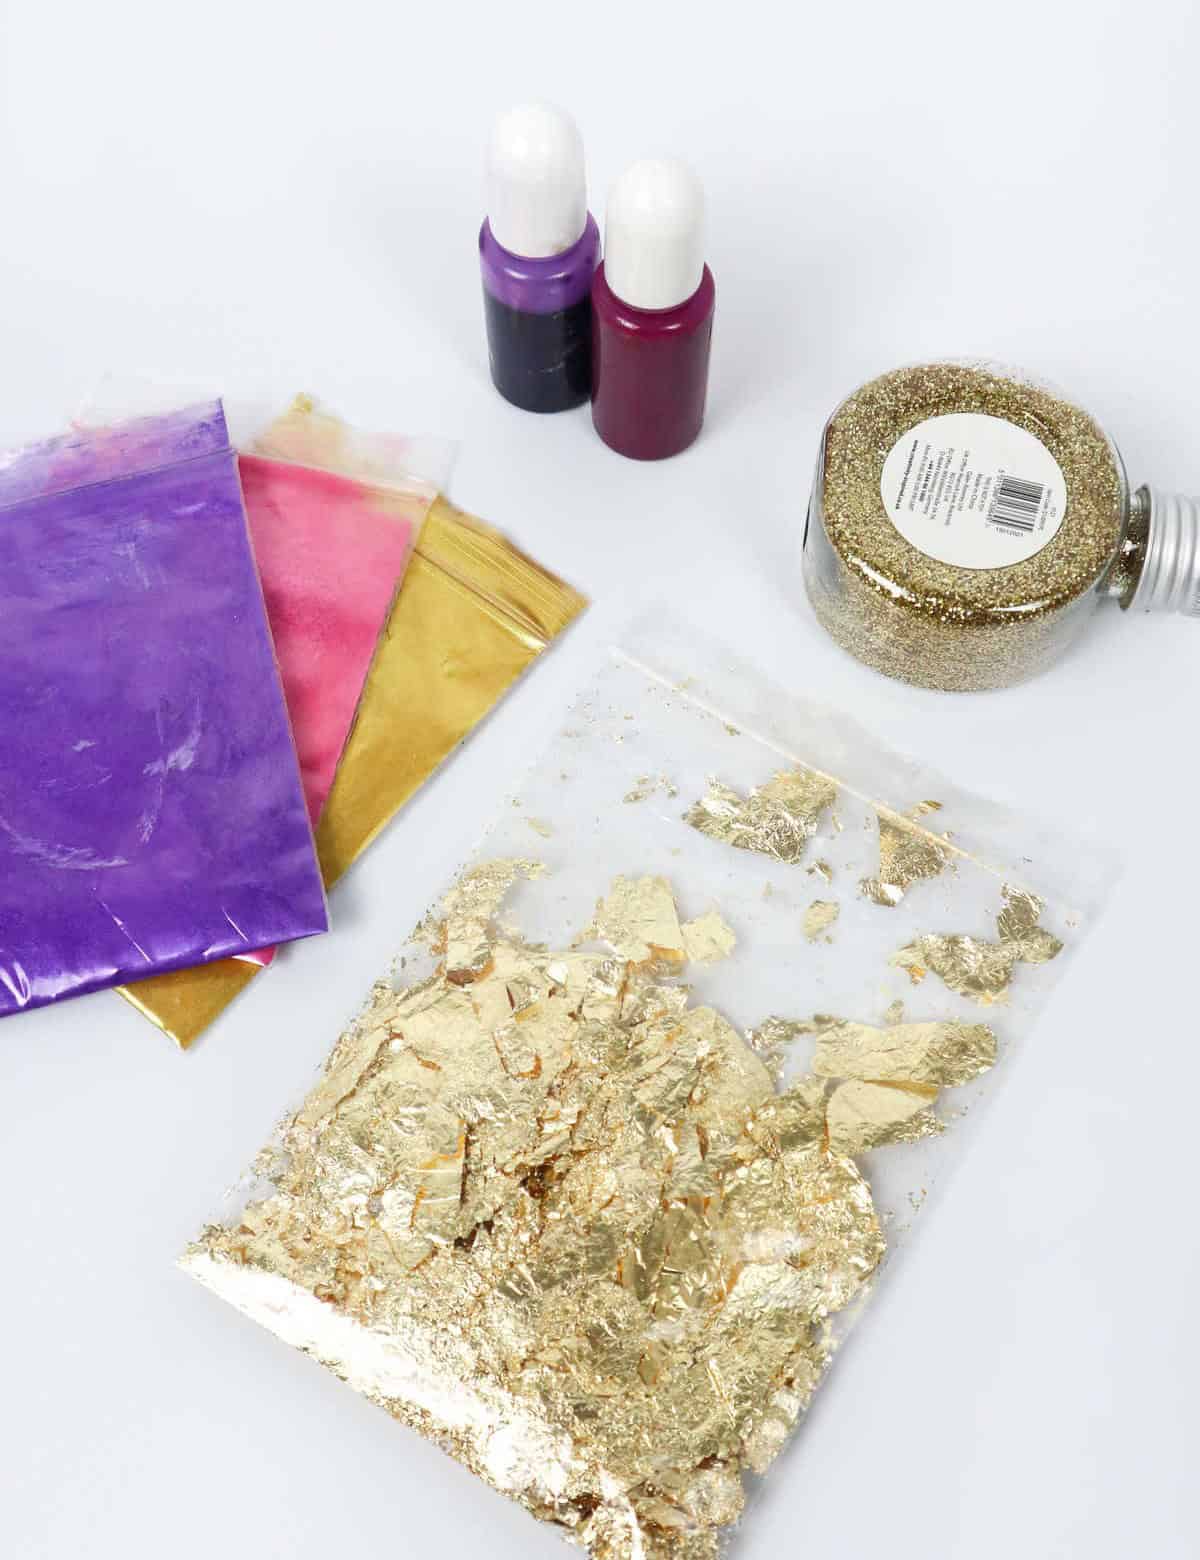
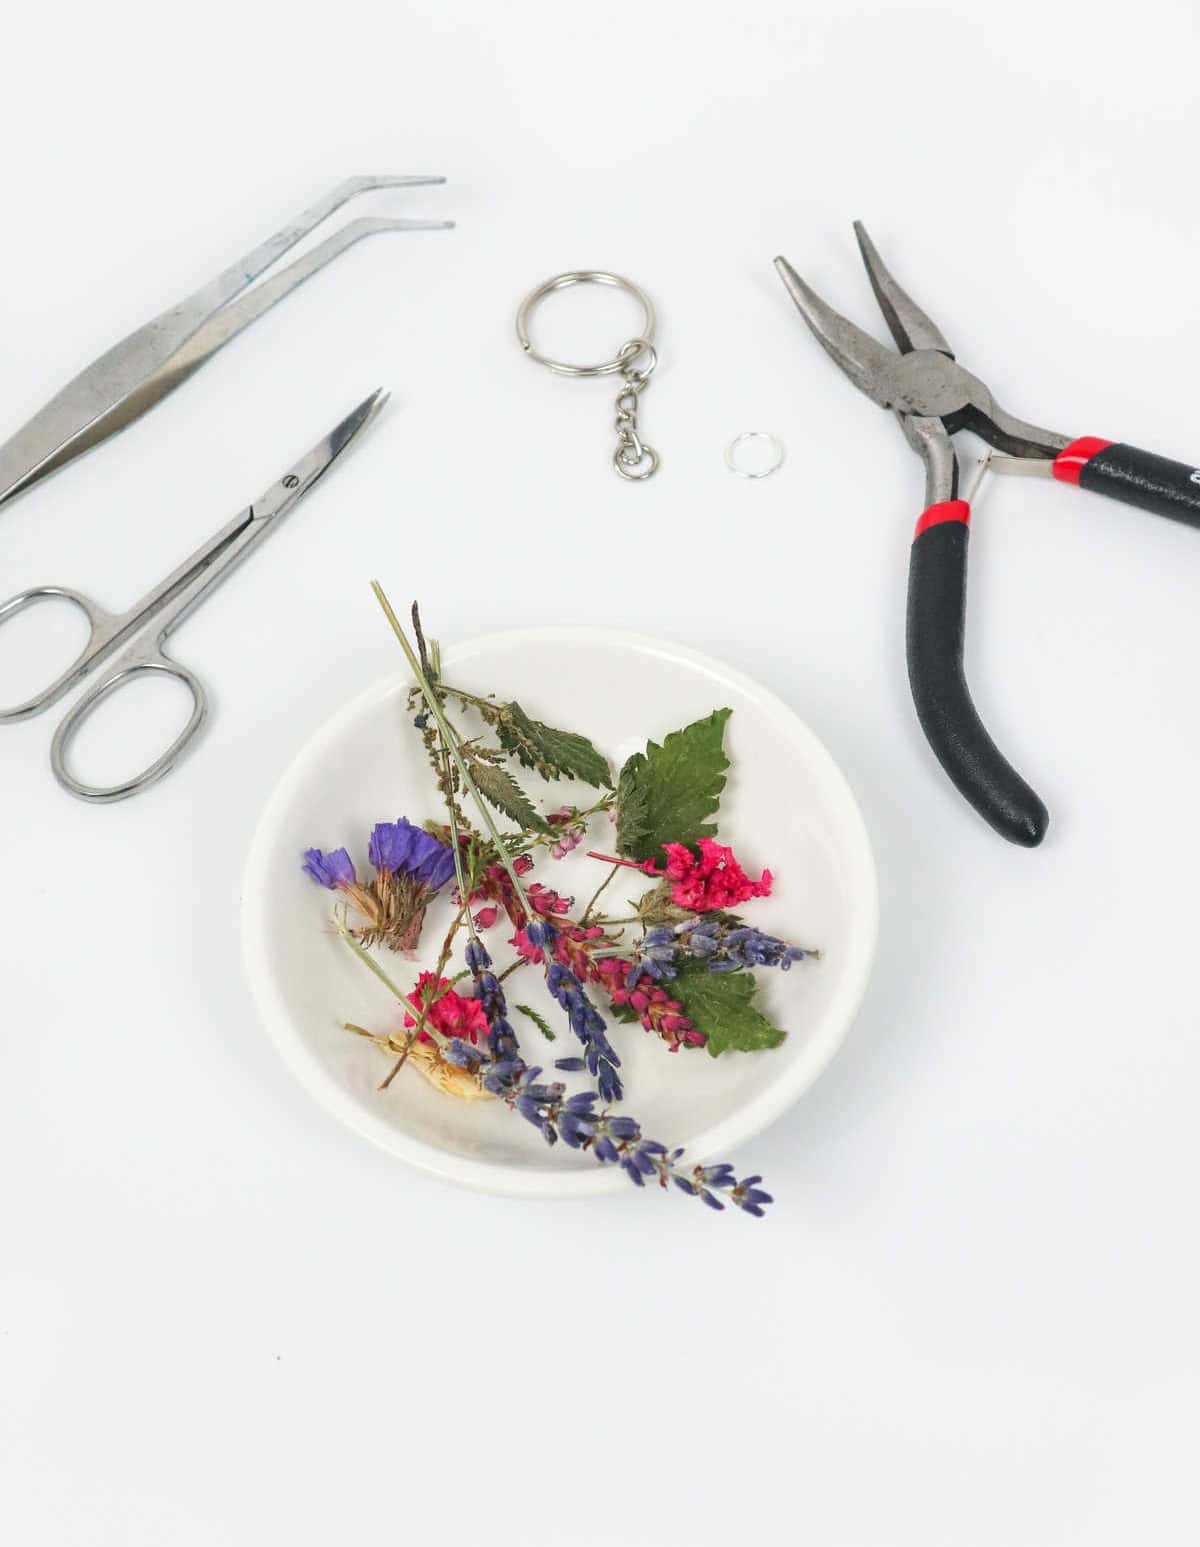
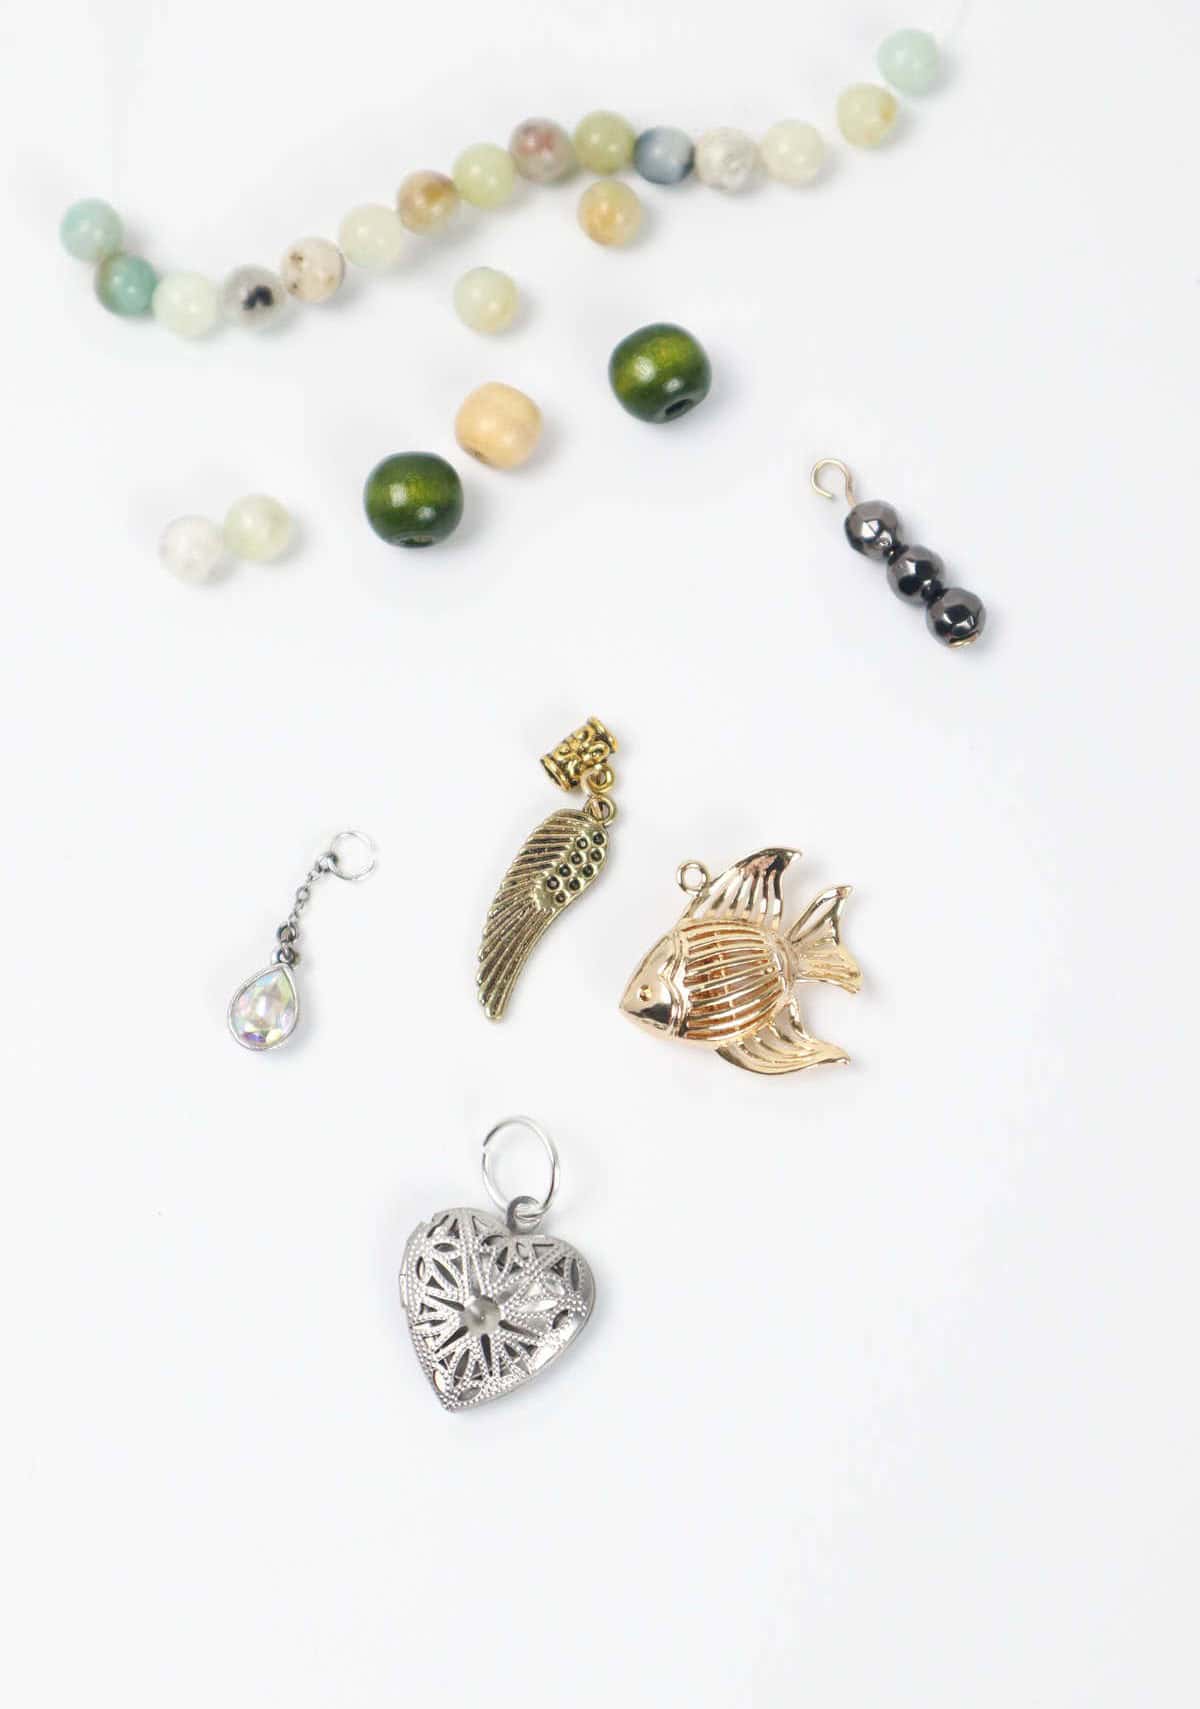
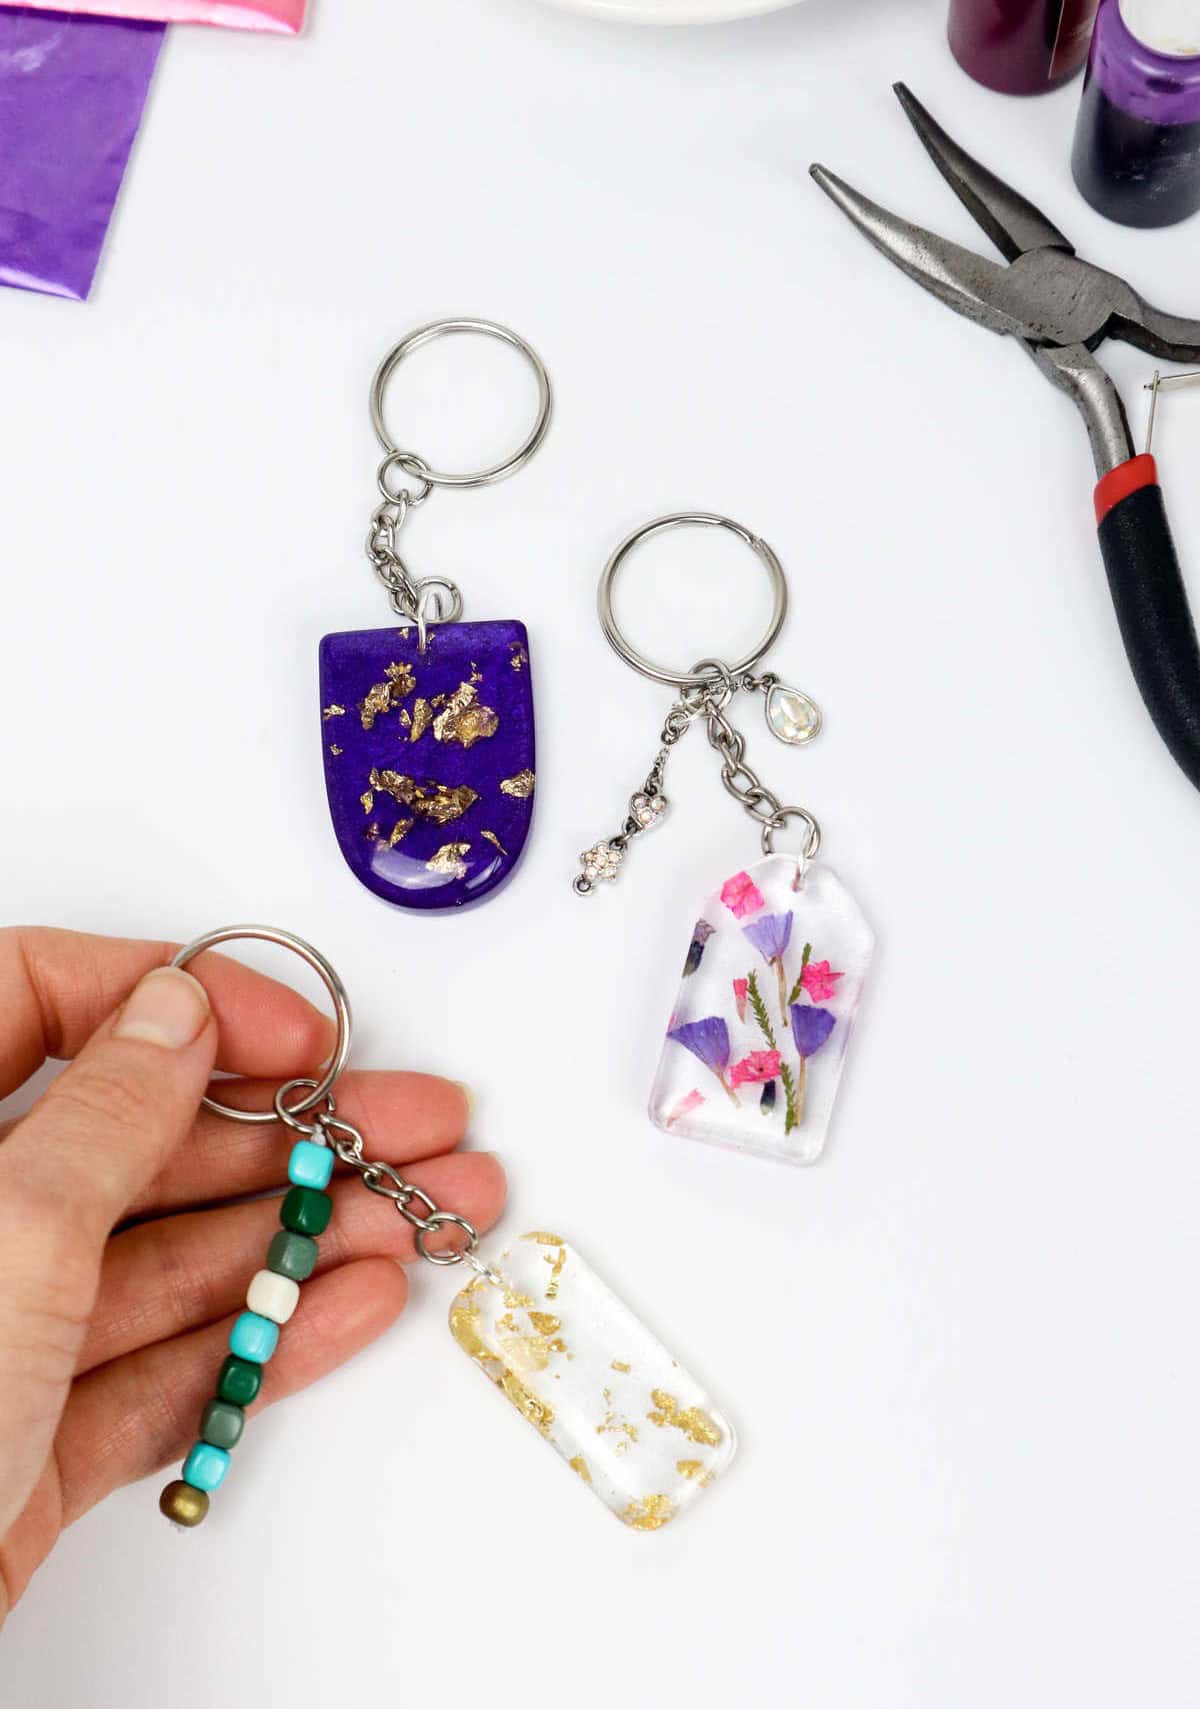
These include gold flakes, glitter powder, mica powder, resin pigment, dried flowers, and any other embellishments you might want to add. Finally, don’t forget to have some scissors, pliers, and tweezers on hand for trimming and shaping any excess material or beads. As an optional but fun addition, consider incorporating e-strung beads or e-charms into your design.
How to Make Resin Keychains
The pièce de résistance of this DIY project lies in customizing the keychain, where creativity knows no bounds. With an array of materials at your disposal, you’re free to unleash your artistic side and make it truly unique. So, let’s dive right into the first step and get started!
Step 1
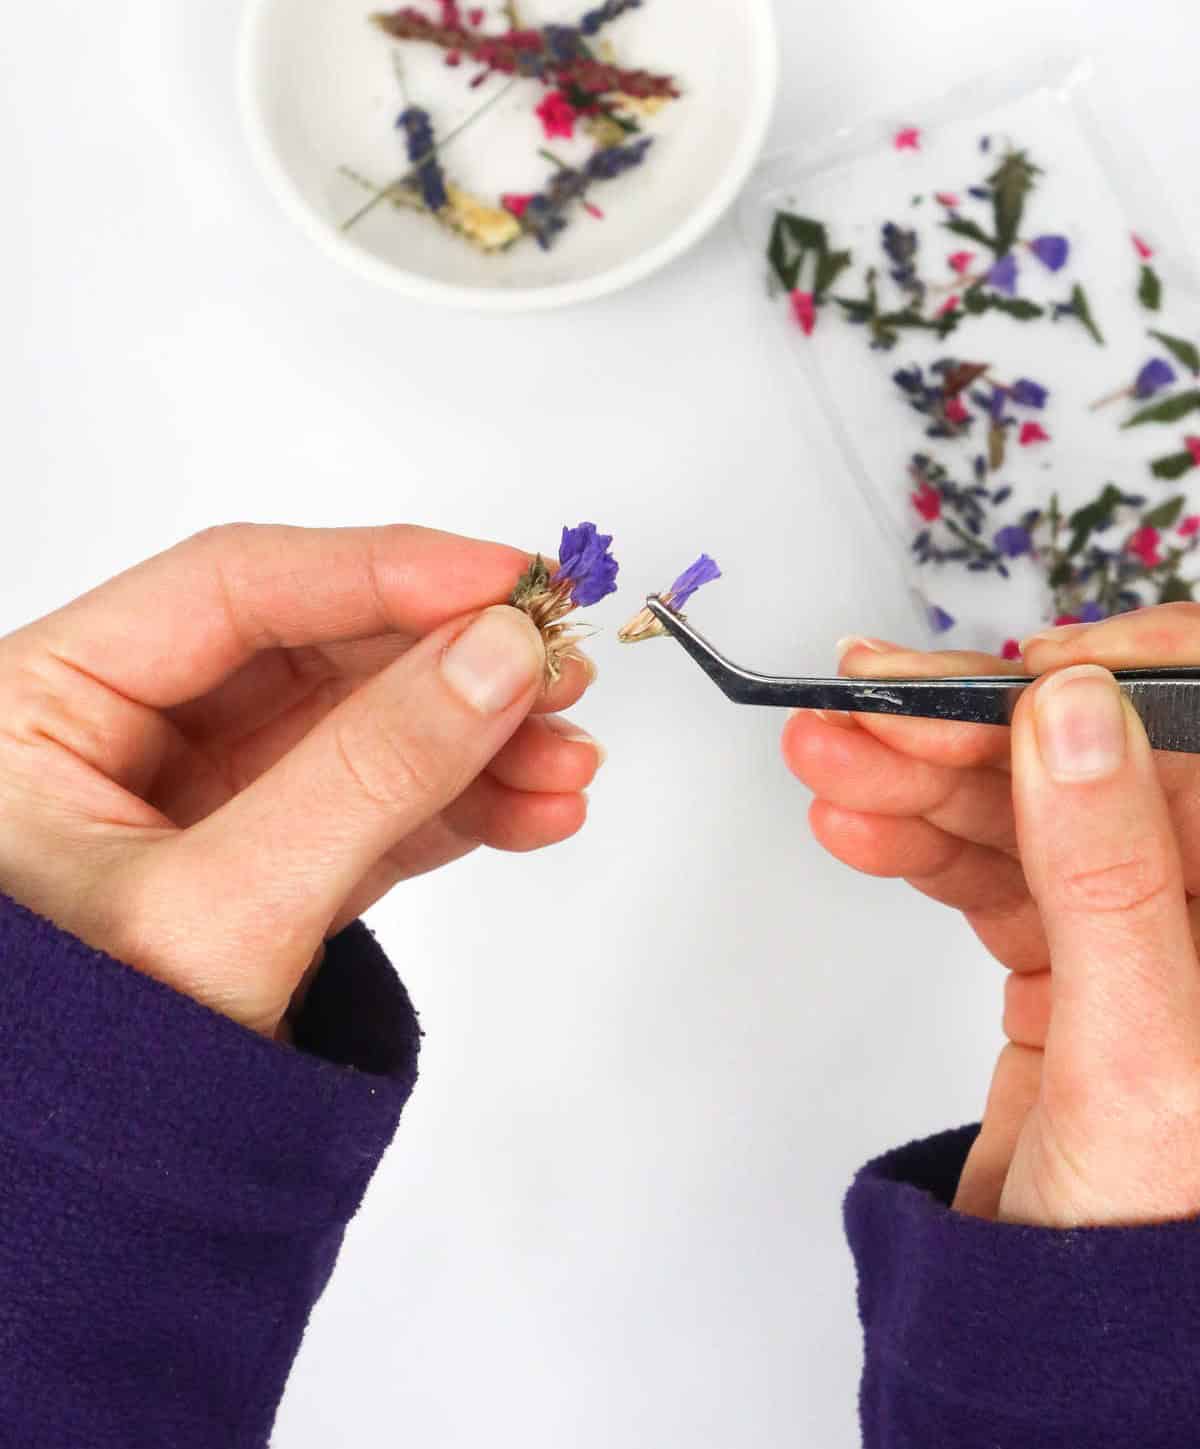
To visualize the final product of your keychain, begin by preparing your dried flowers. Arrange them in a way that allows you to experiment with different placements and combinations of flower types and decorative elements you plan to incorporate. This exercise will not only give you a sense of what your finished piece will look like but also help you save time in the long run, as once you mix the resin, you’ll have limited opportunity for adjustments.
After getting a feel for your flowers’ layout, put on your protective gear before diving into the resin work to ensure your safety while handling chemicals.
Step 2
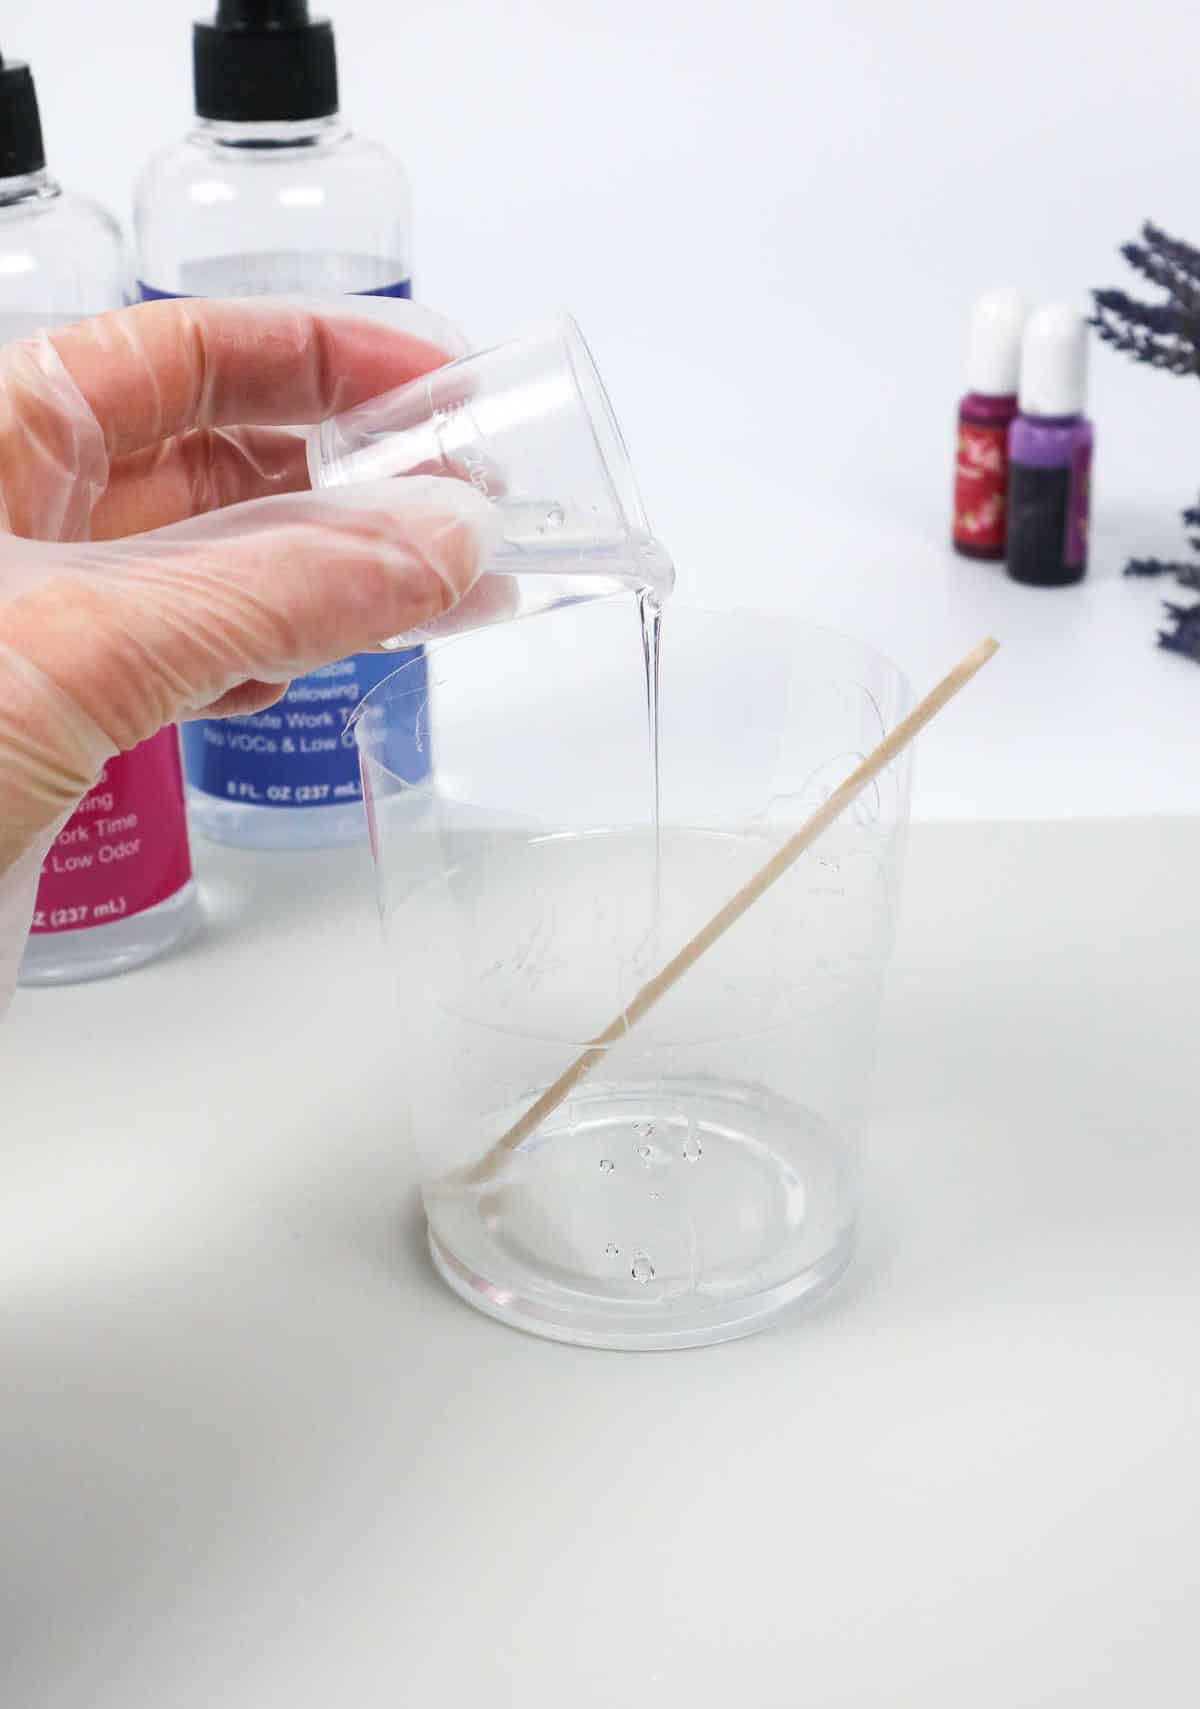
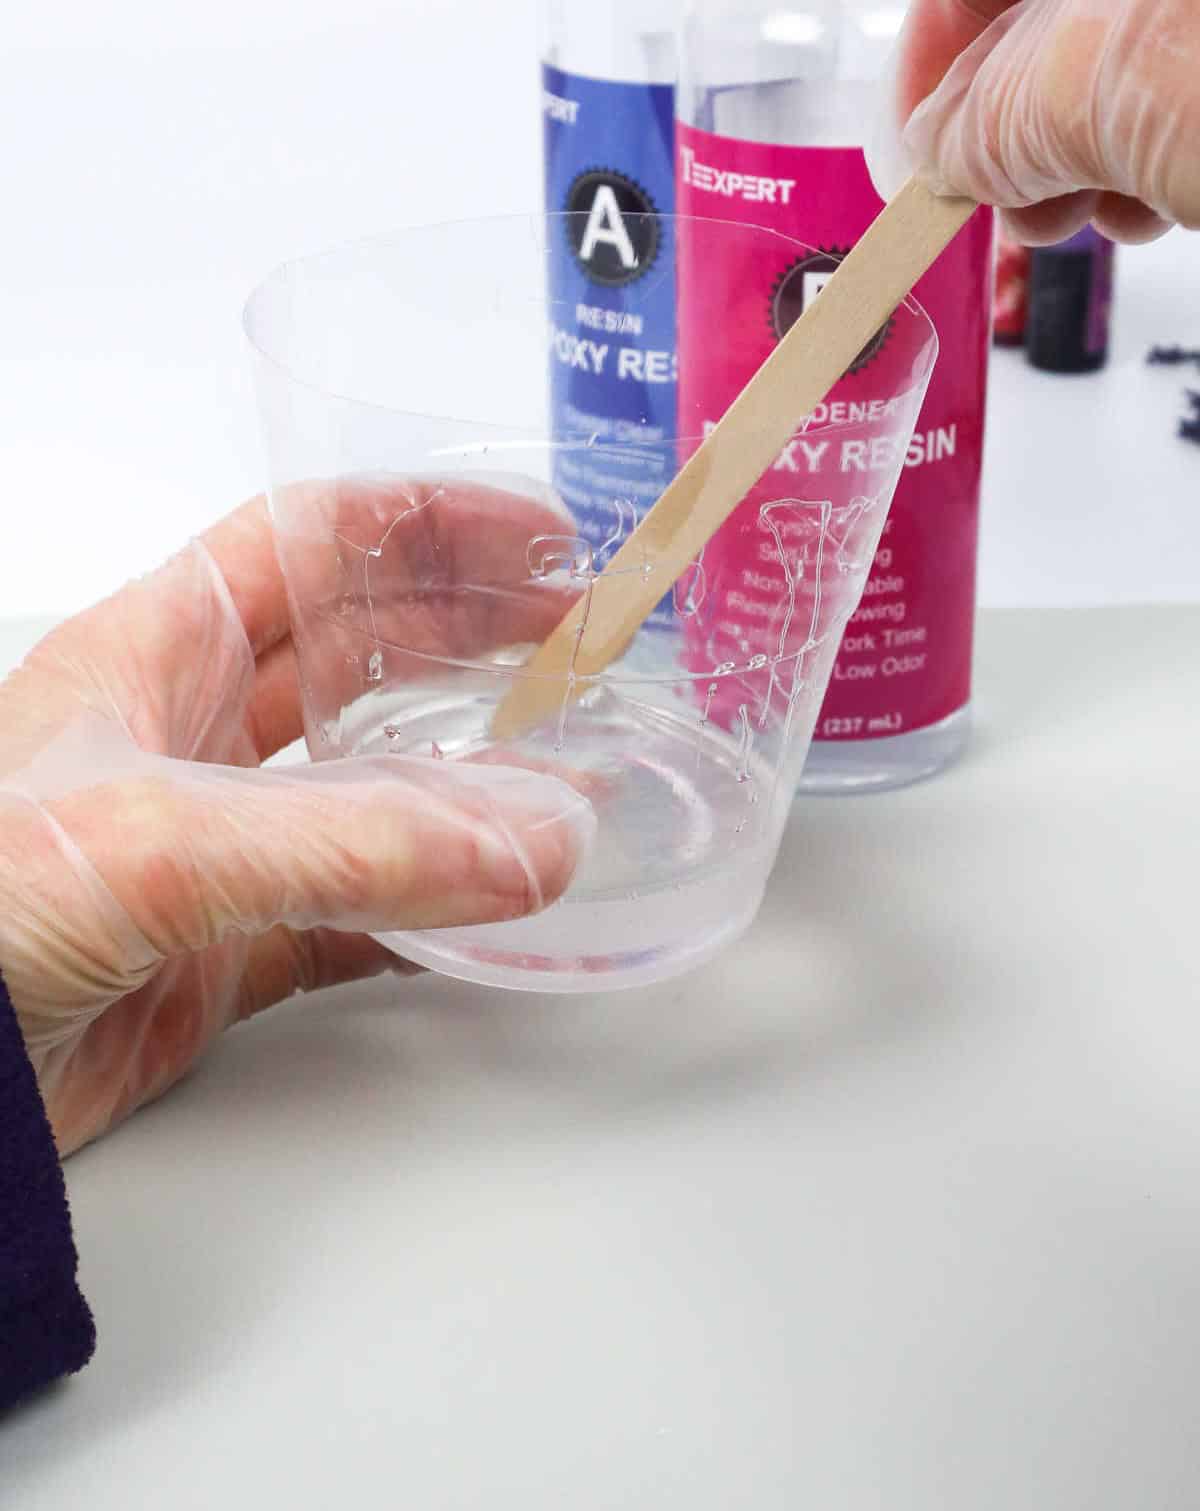
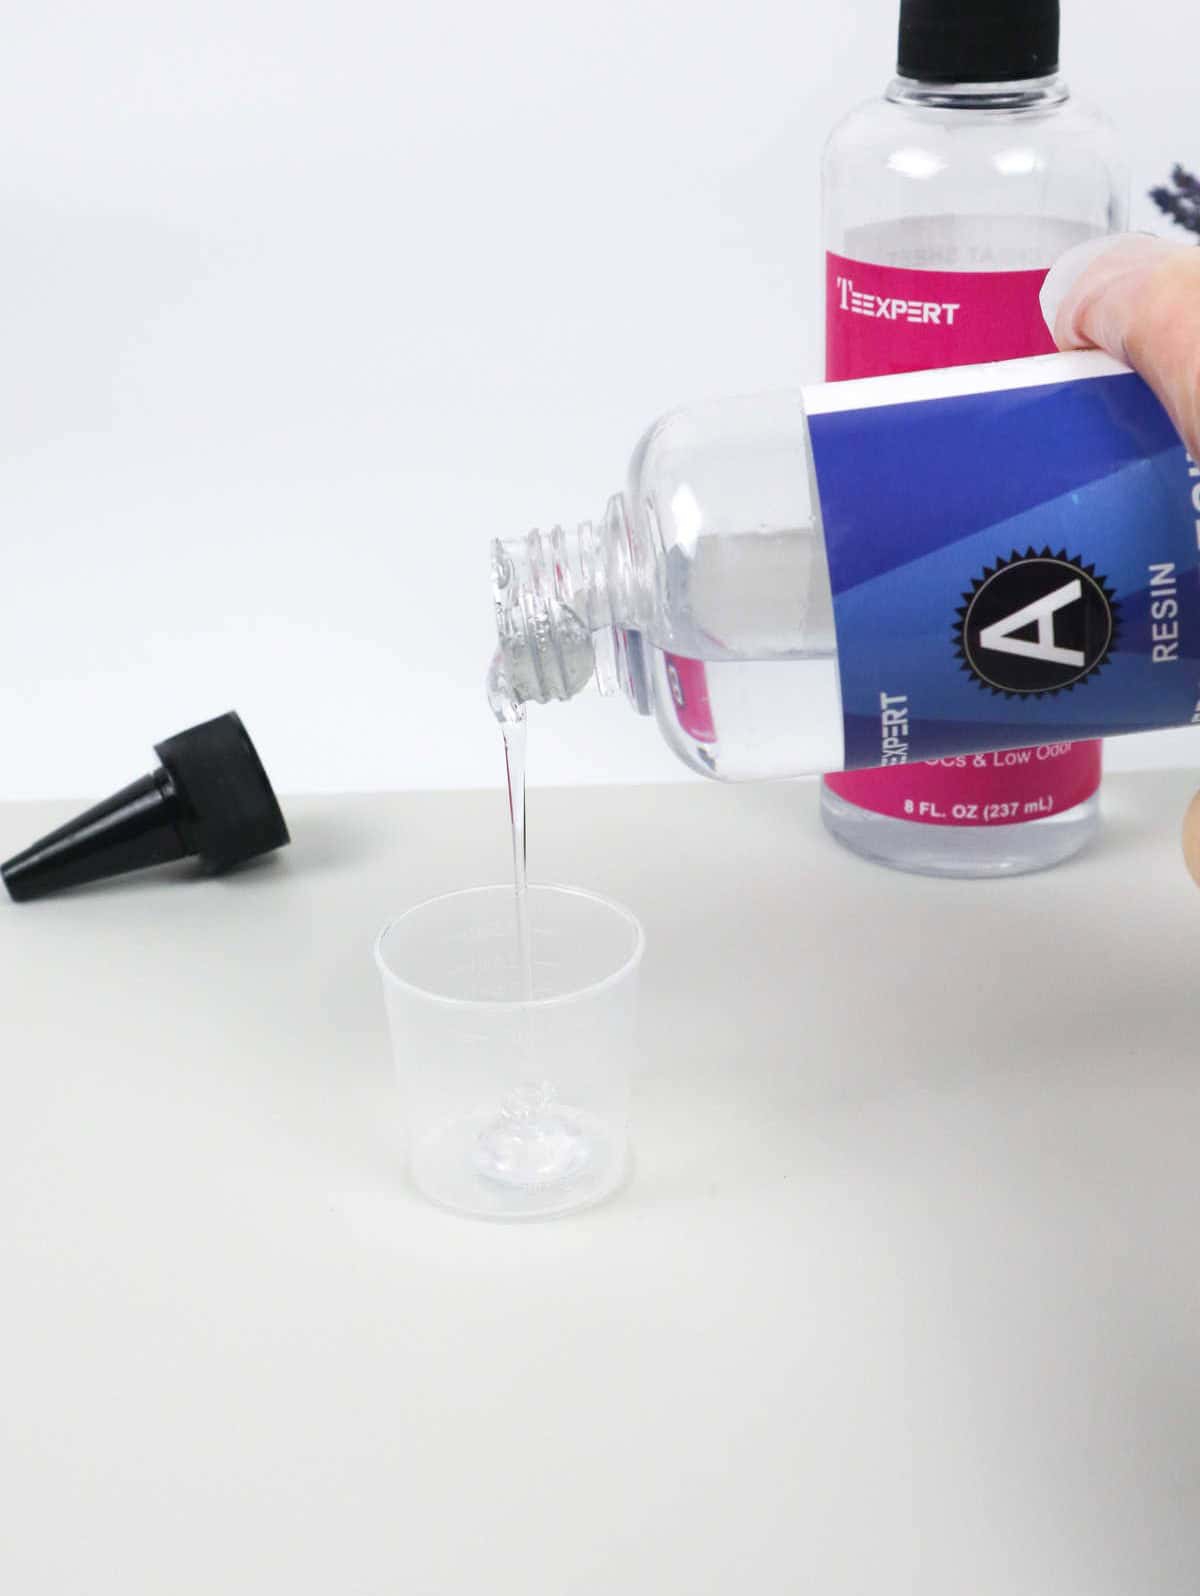
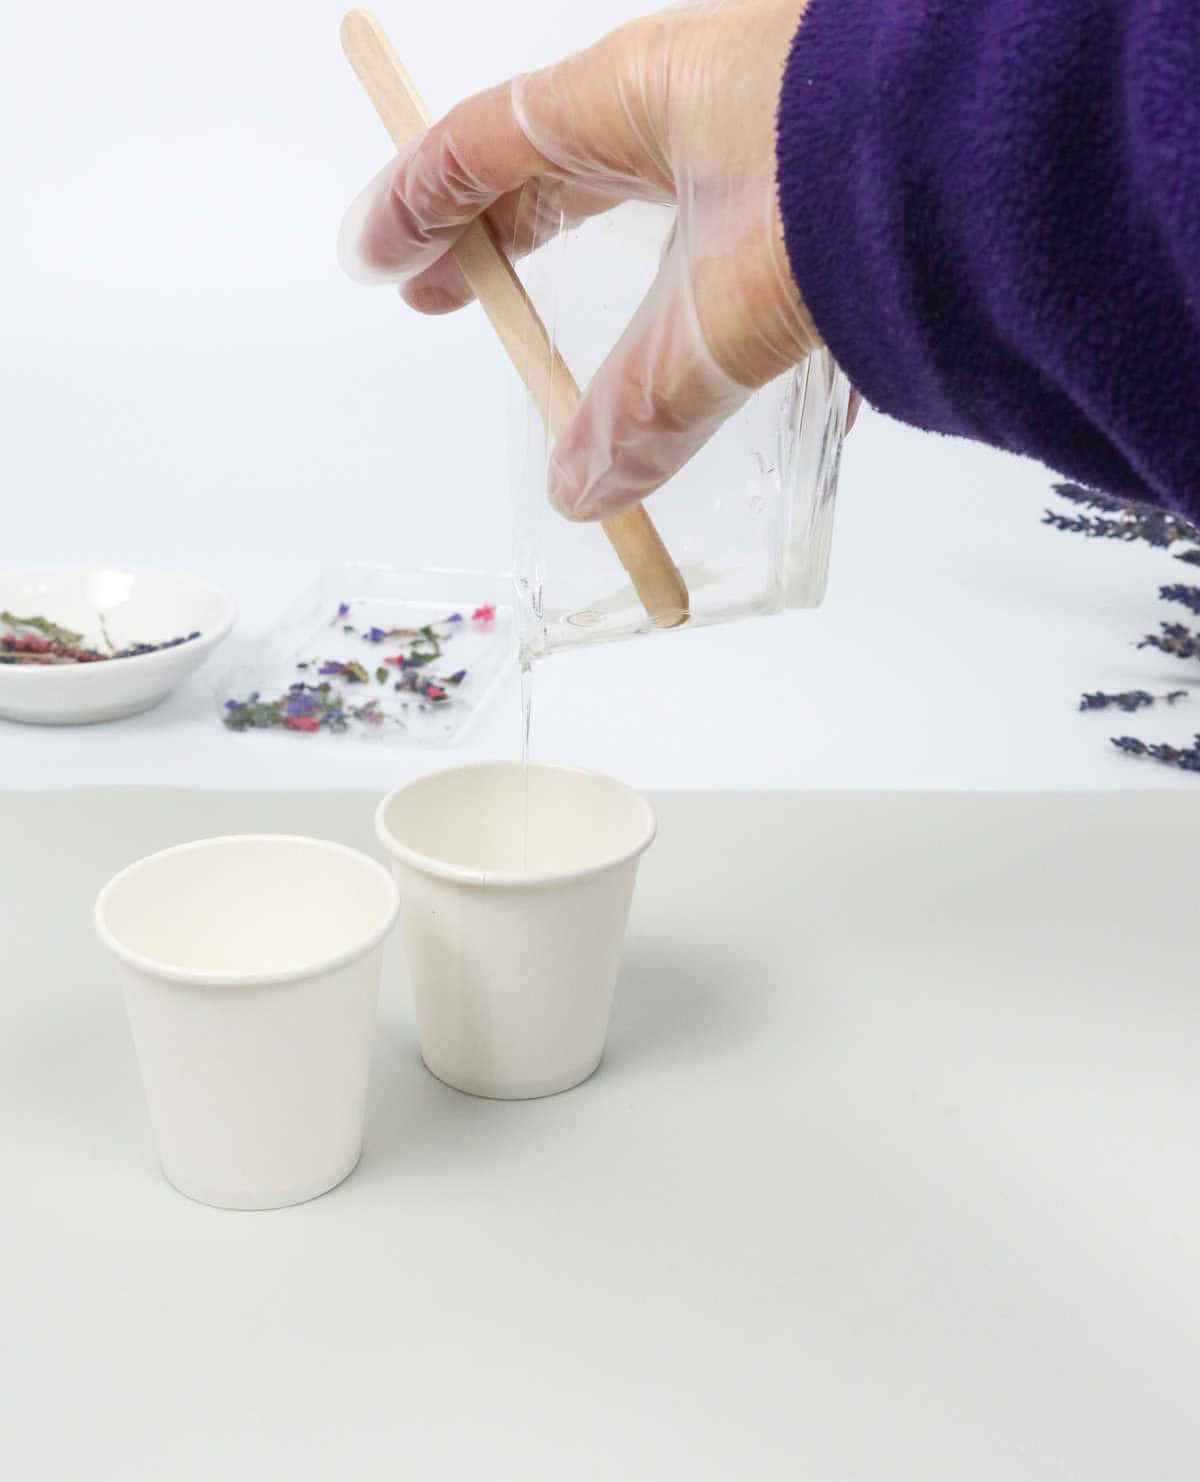
To combine resin and its hardening agent, carefully measure out equal parts – typically a 1:1 ratio – and pour them into a plastic cup. Be sure to check the instructions on the bottle for any specific guidance. Once the two substances are in the cup, you can use a craft stick to thoroughly mix them together. As you stir, you’ll likely notice air bubbles forming; this is a normal part of the process.
To ensure that the mixture sets evenly when it hardens, make sure to mix it well for about 2-3 minutes.
Step 3
To burst those pesky air bubbles once and for all, you have a couple of options. For a speedy solution, grab a heat gun or torch and carefully apply the gentle warmth to the affected area. Alternatively, you can place the material in a hot bath for around 3-4 minutes, allowing the warm water to work its magic.
Step 4
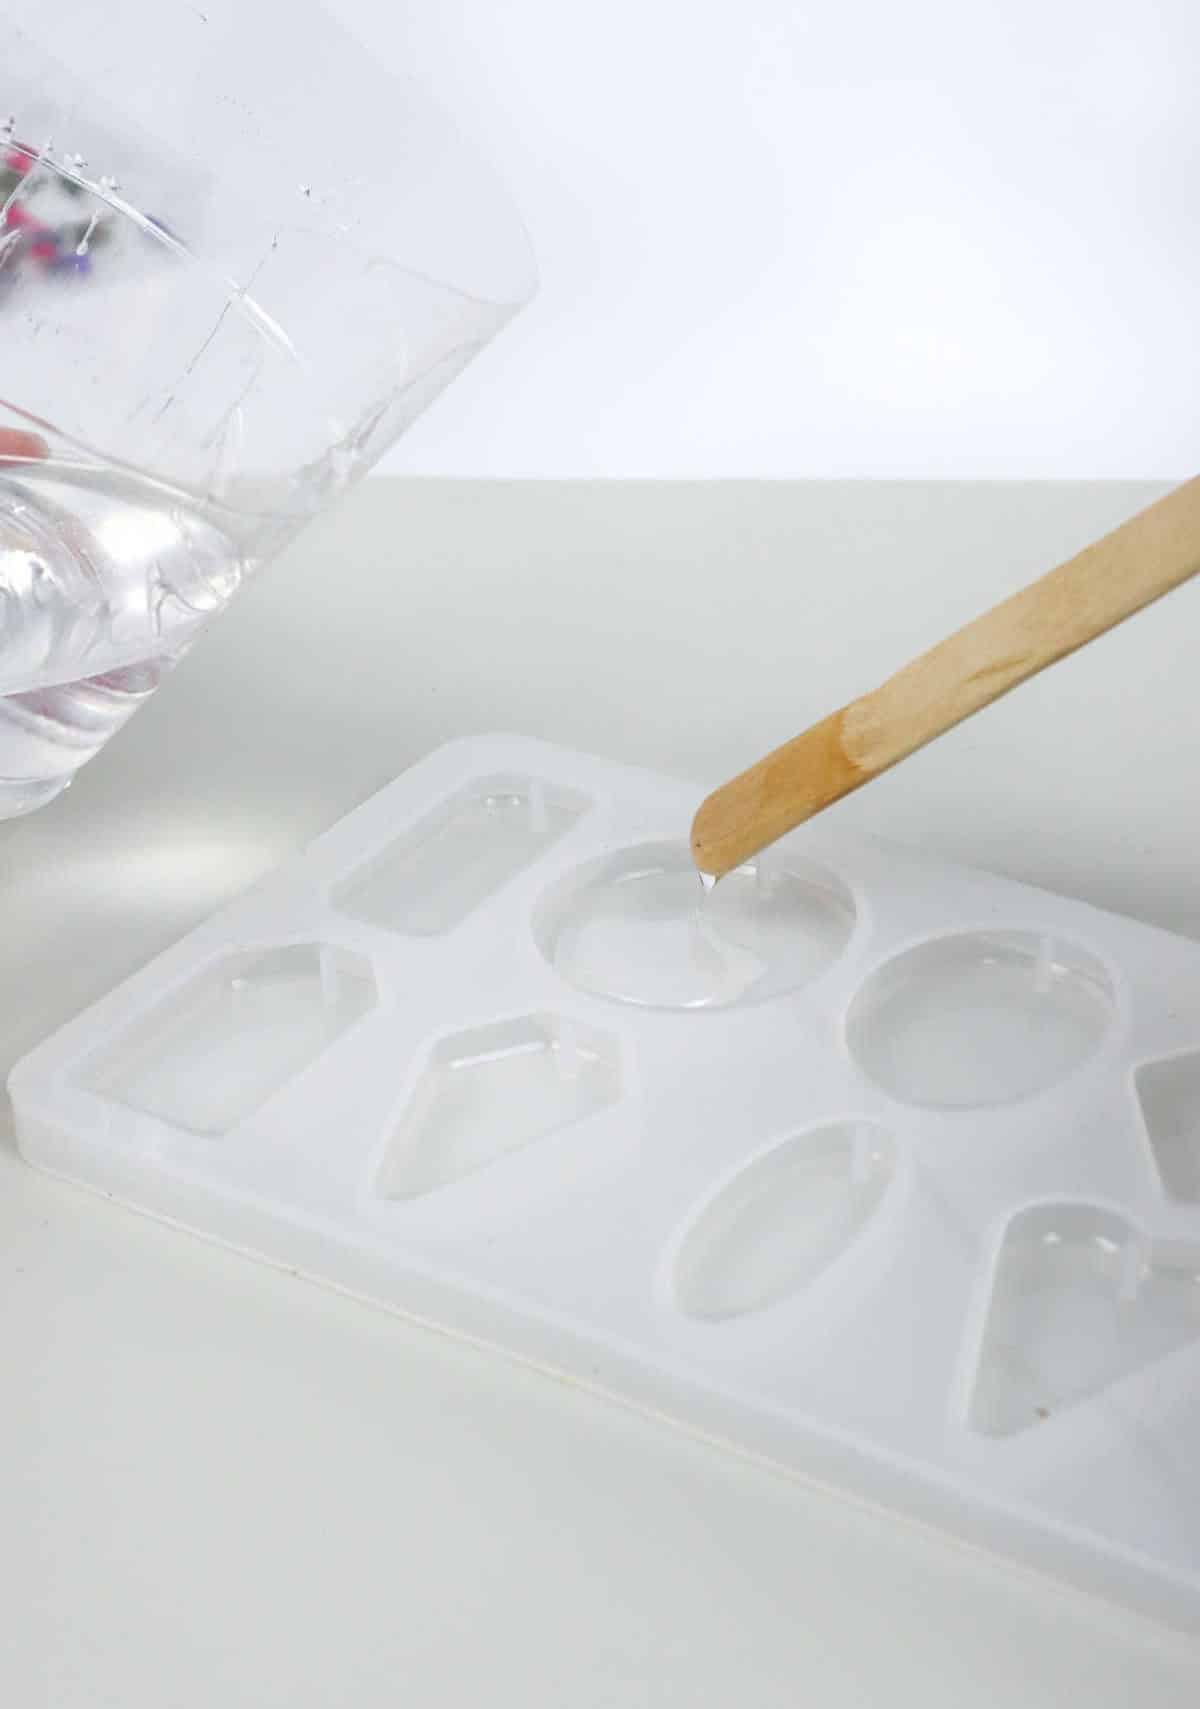
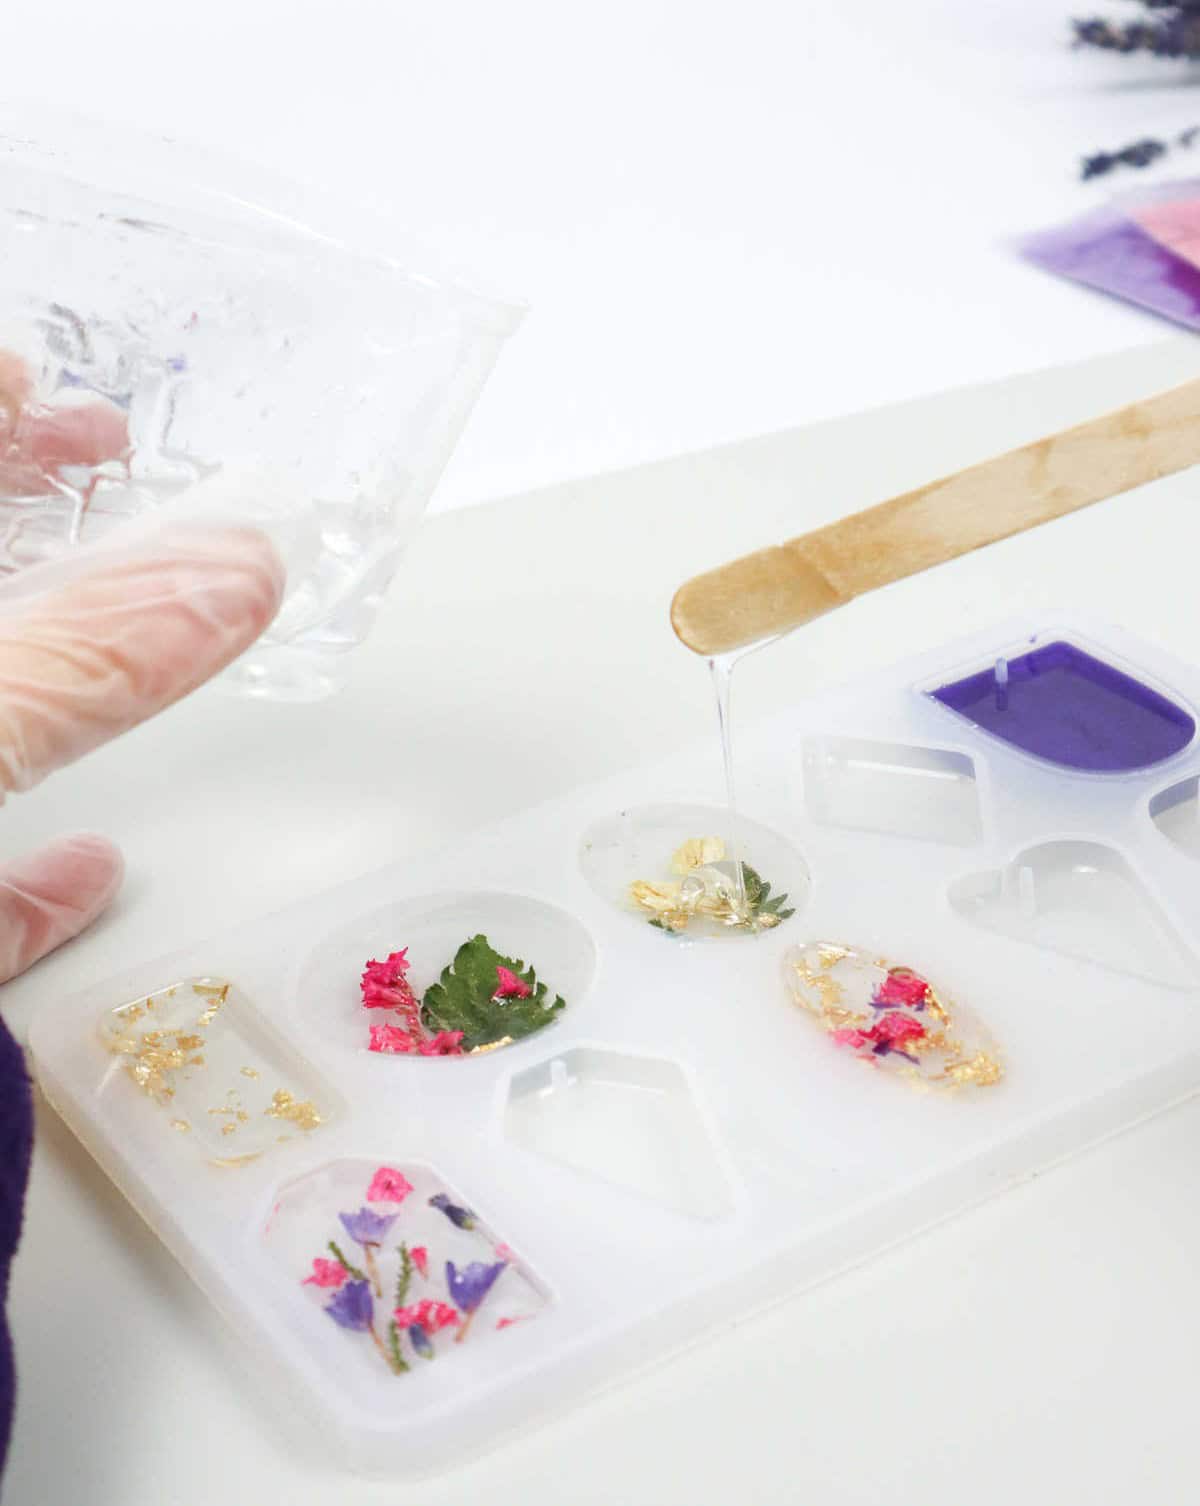
As we embark on crafting this keychain, it’s essential to start with the first layer. The resin will begin to harden and develop a tacky consistency, making it crucial to work efficiently. Begin by pouring the resin mixture into the molds, just as depicted below. If bubbles emerge during this process, utilize your heat gun to smooth out the surface, ensuring a flawless foundation for the next layers.
Step 5
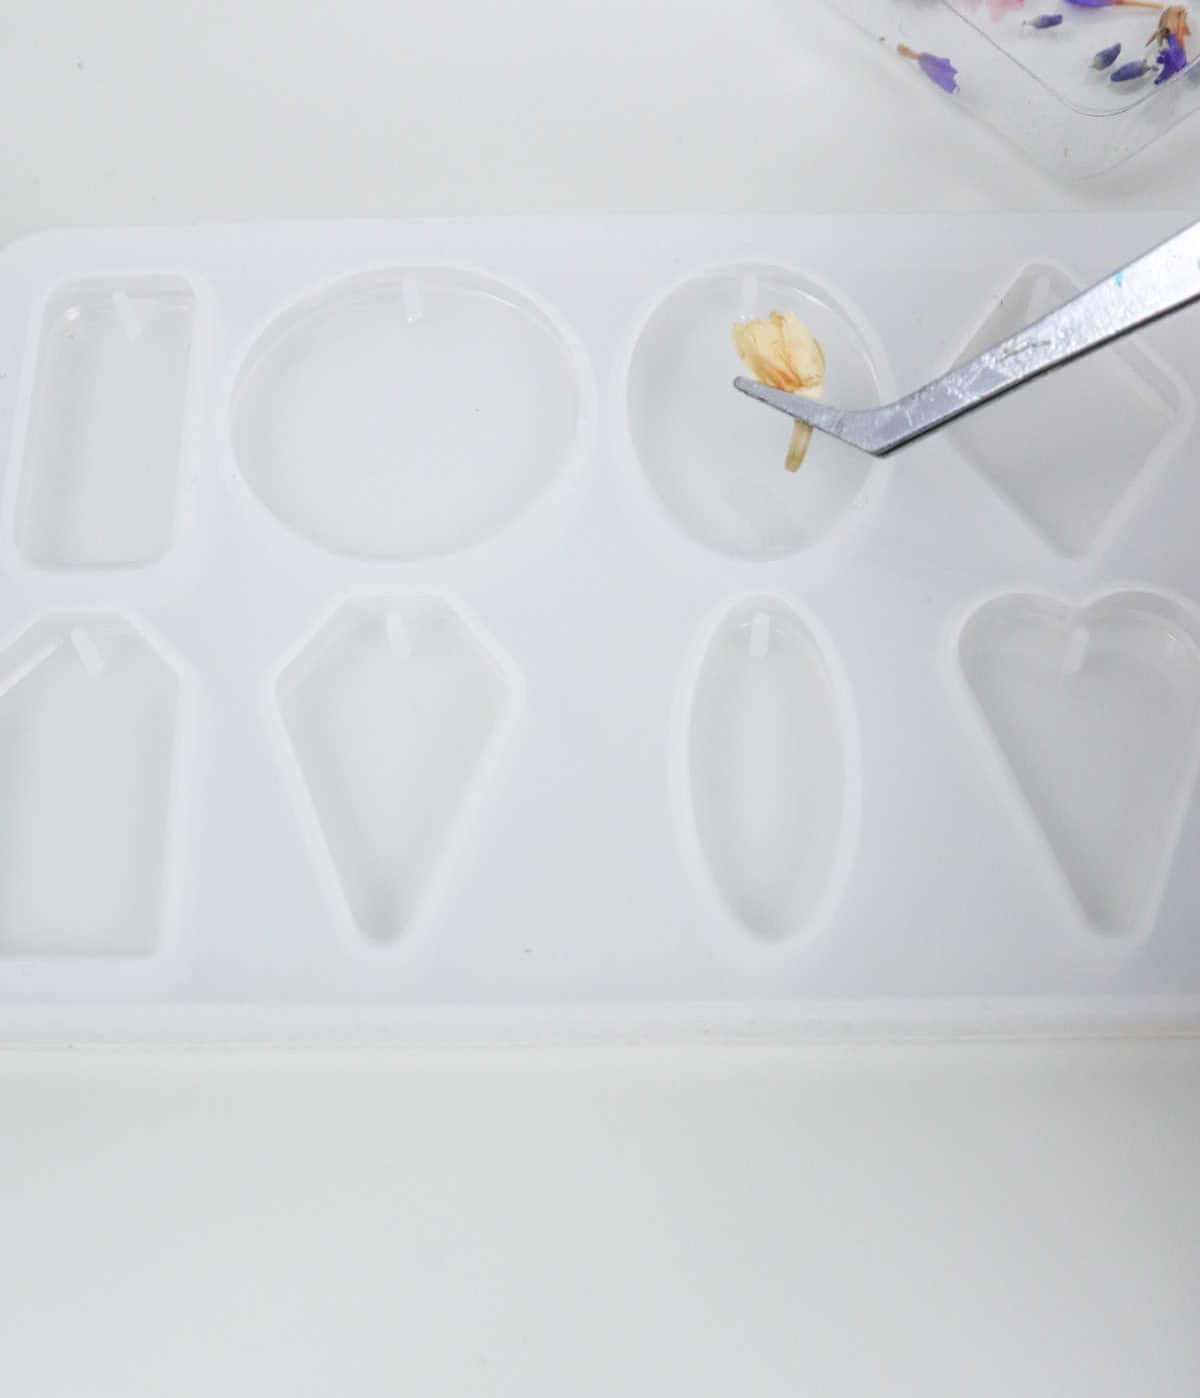
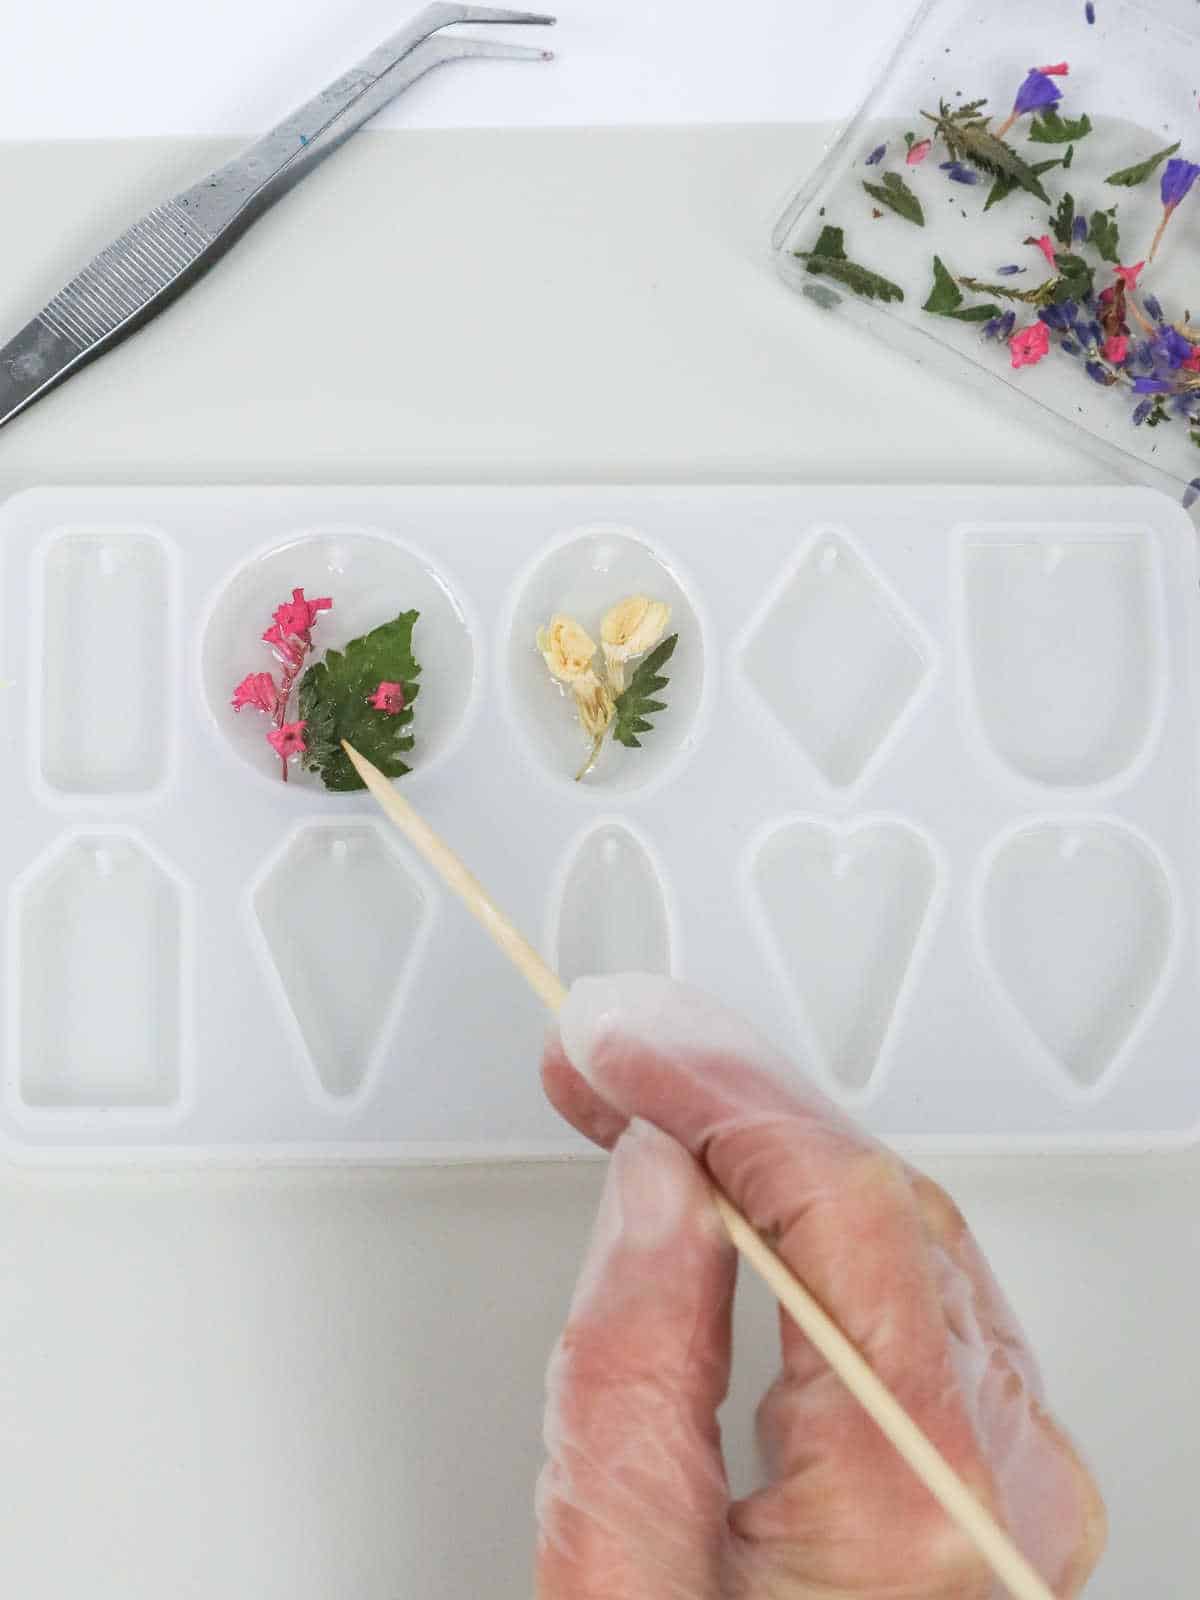
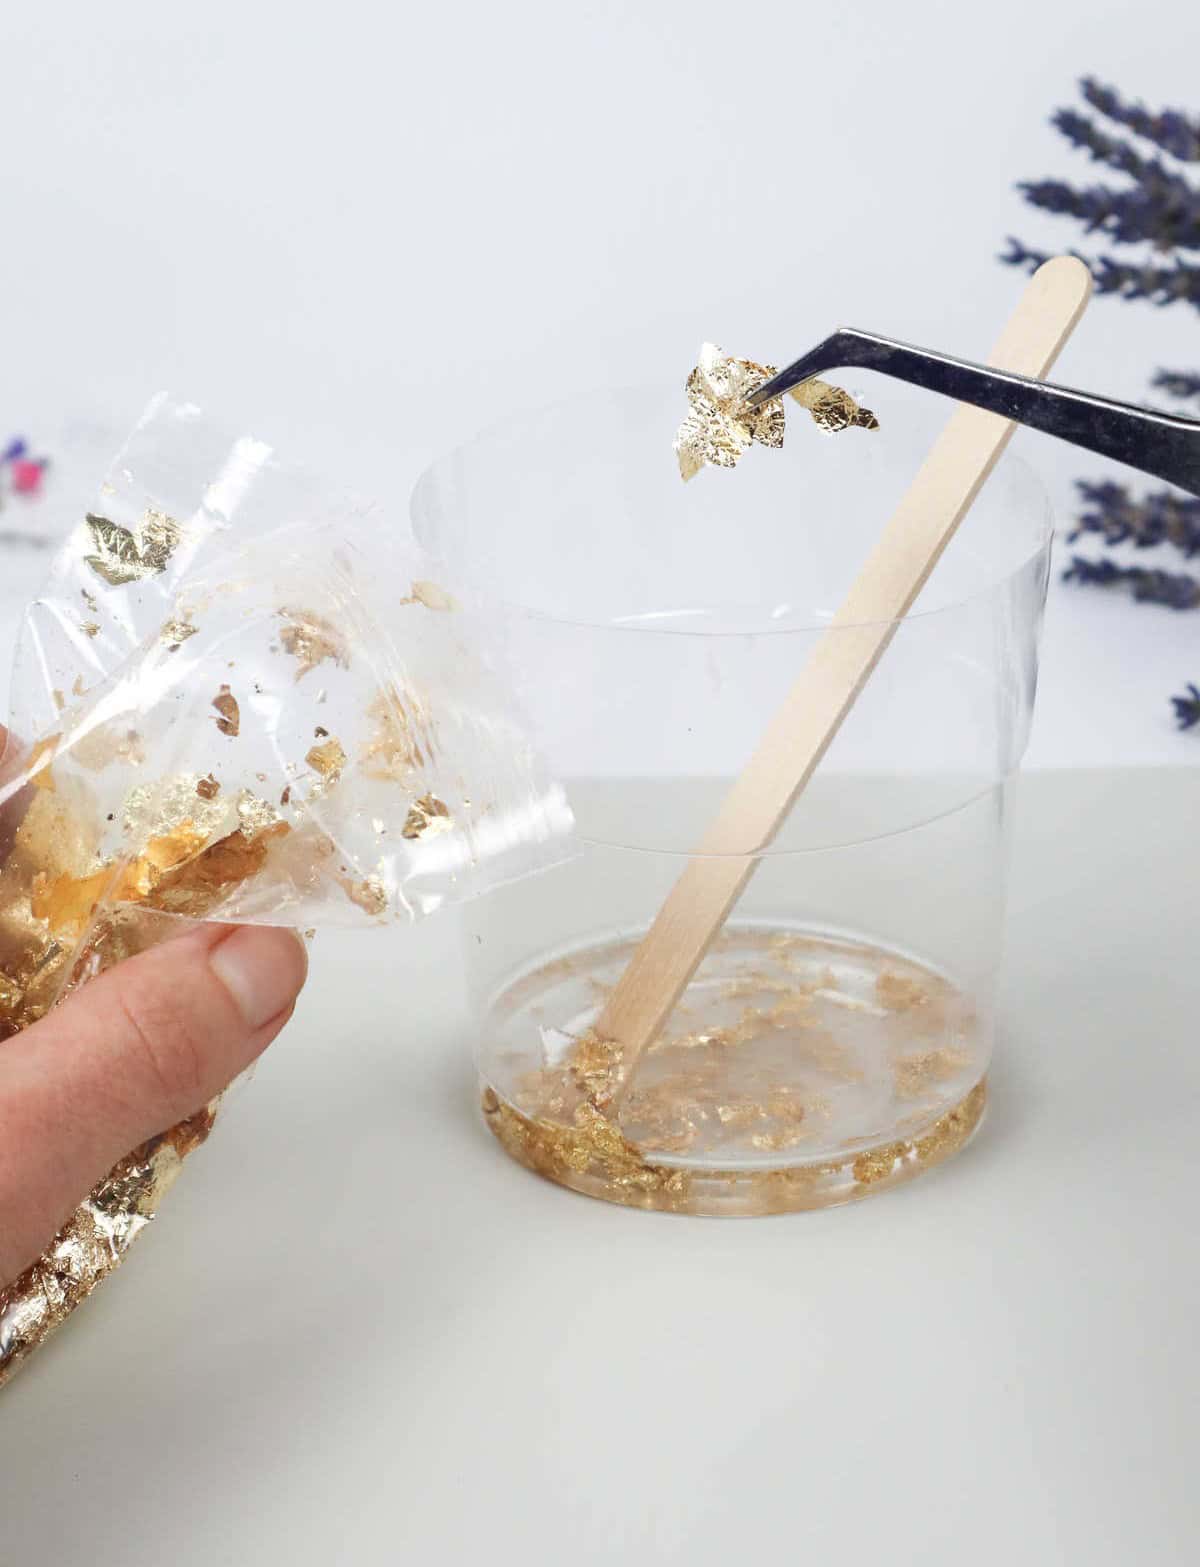
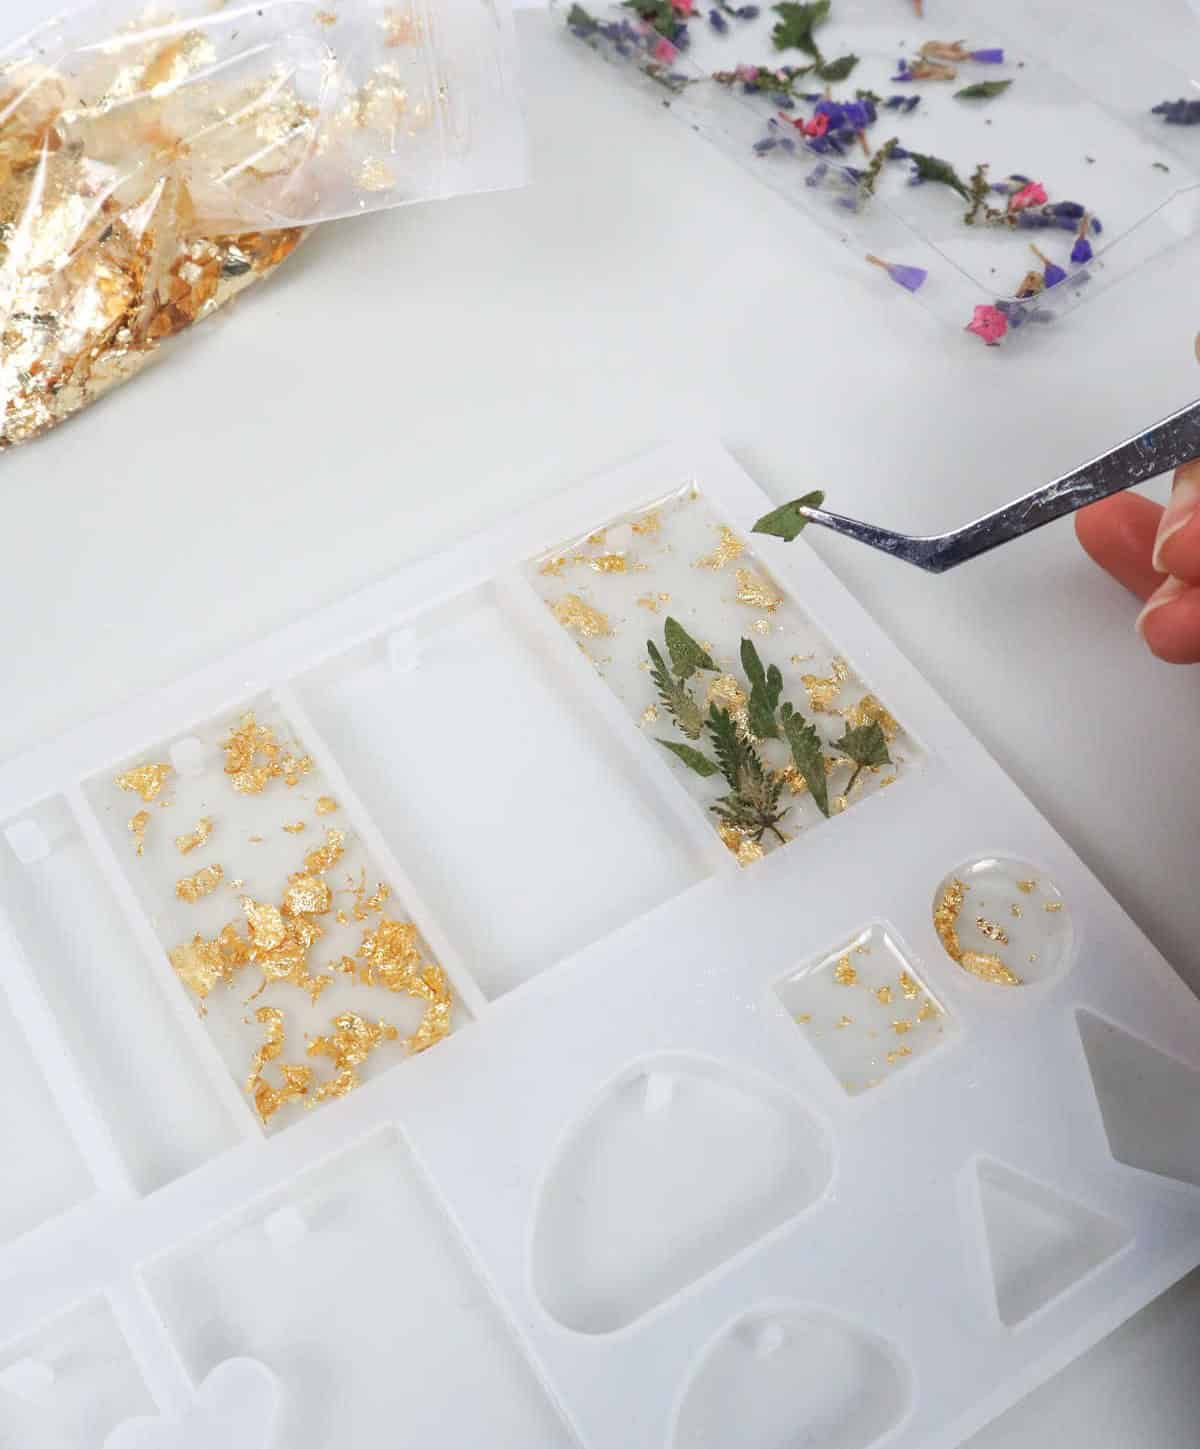
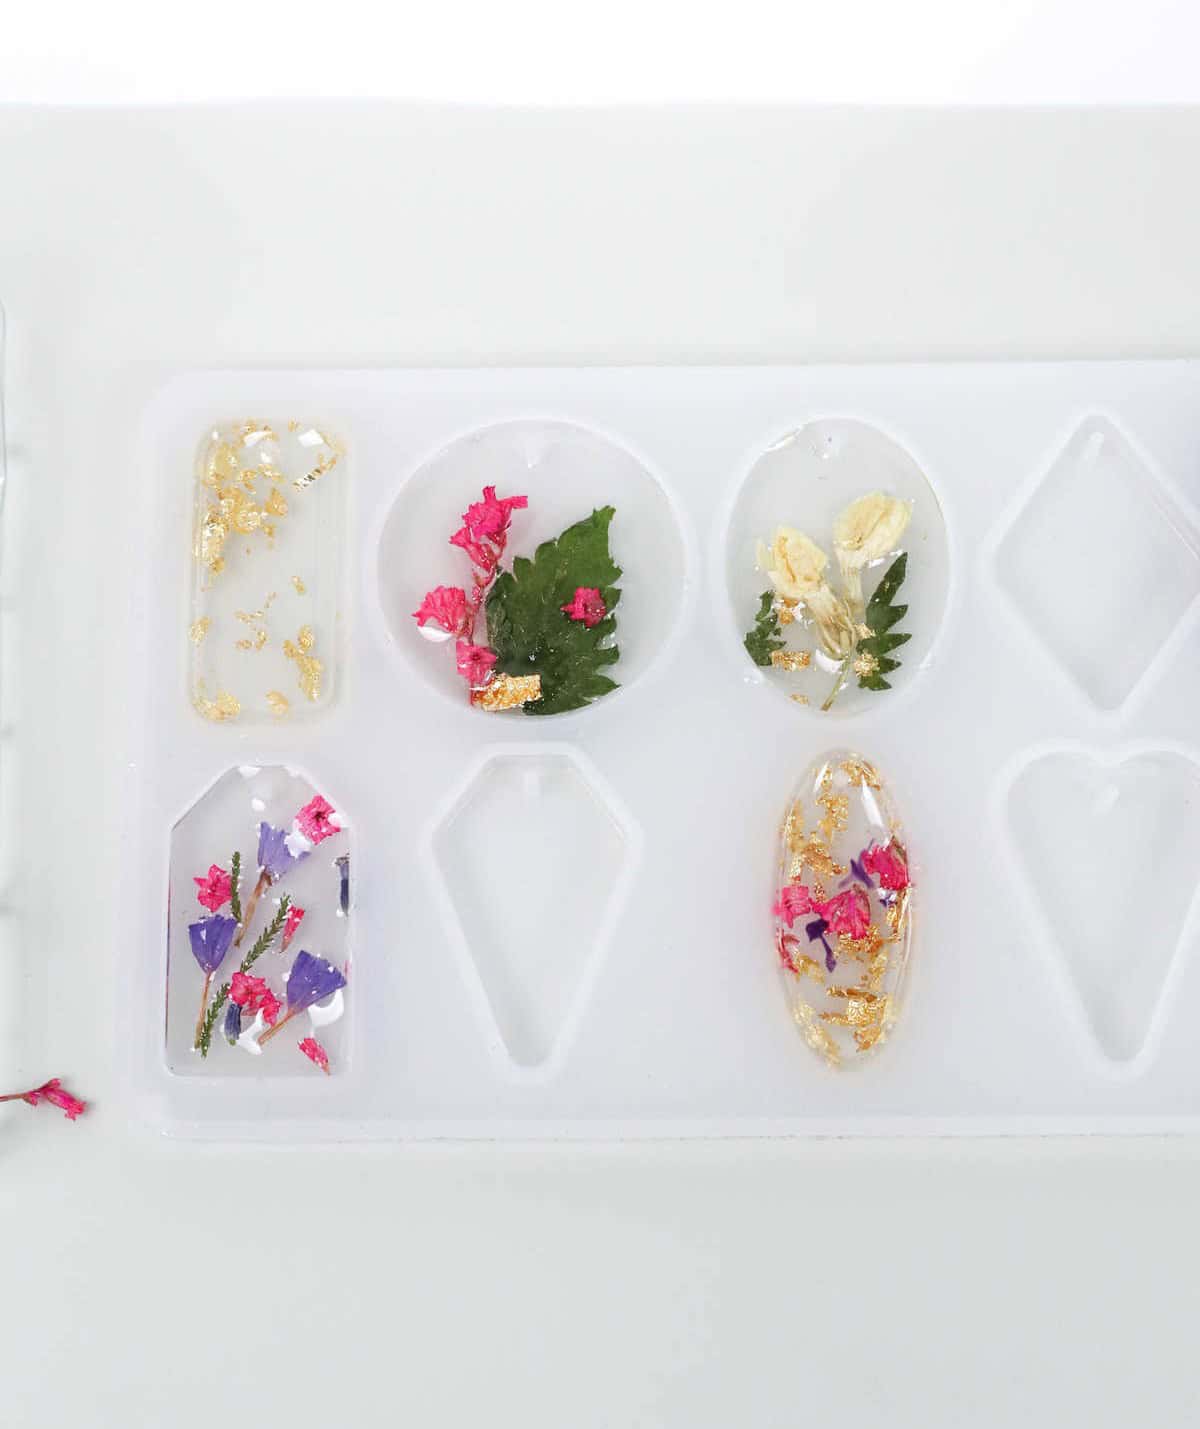
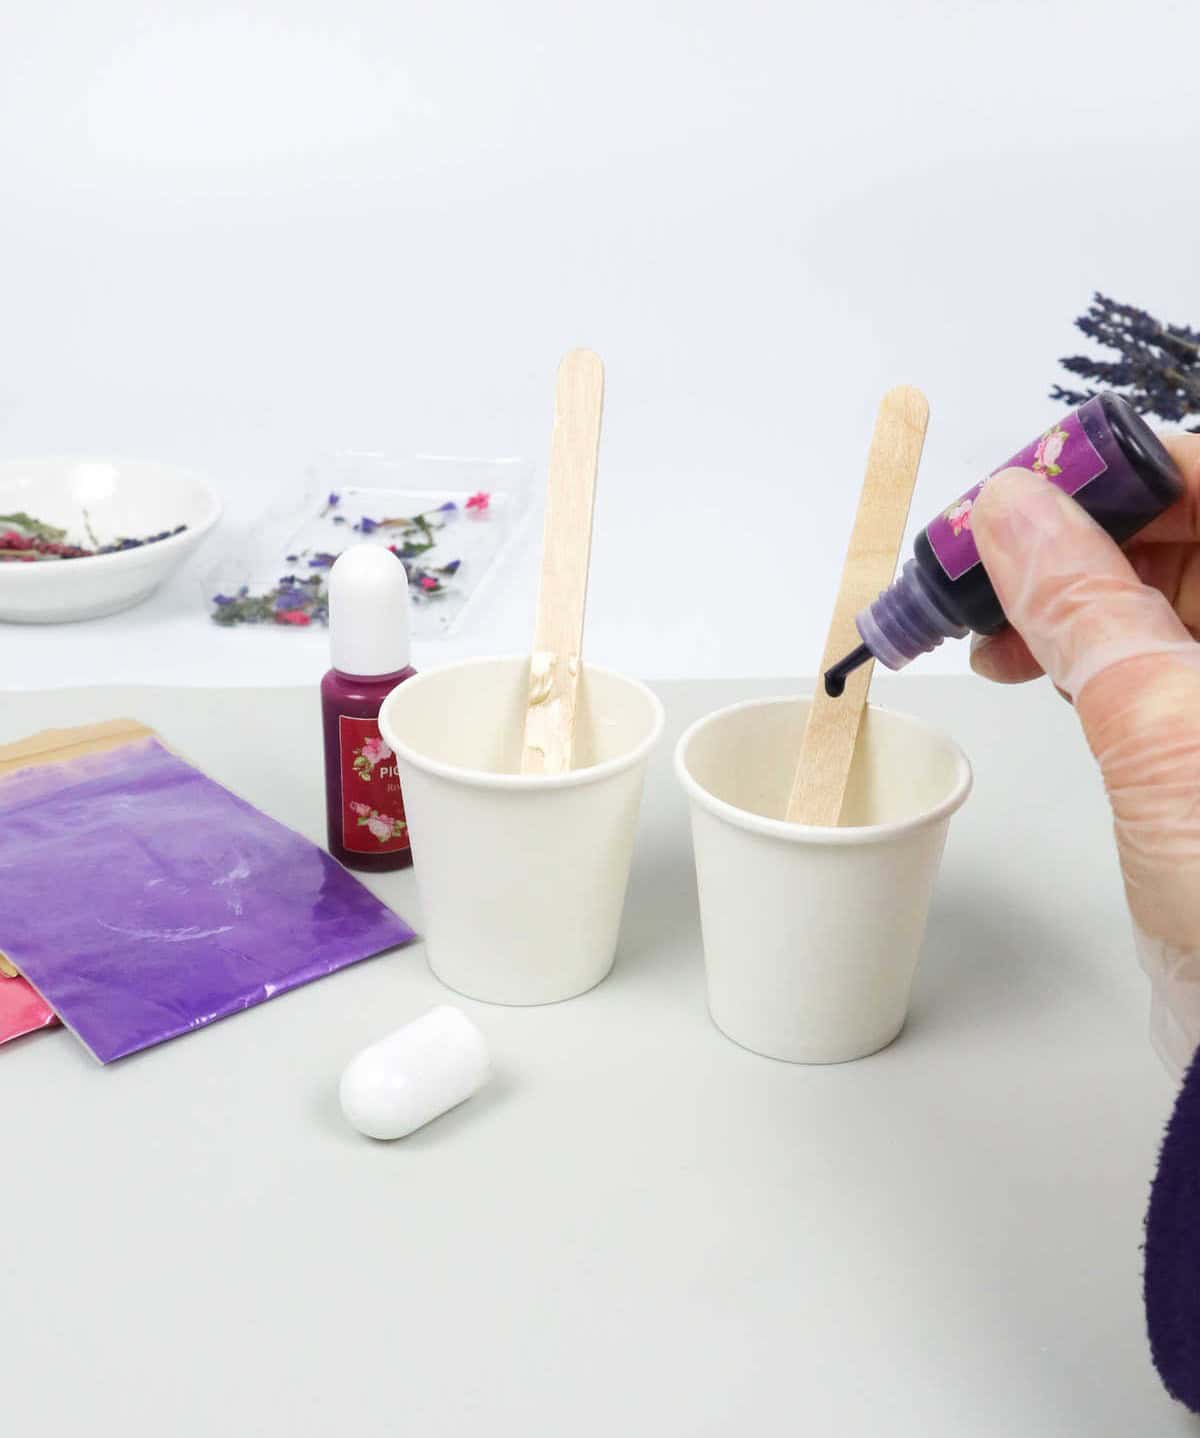
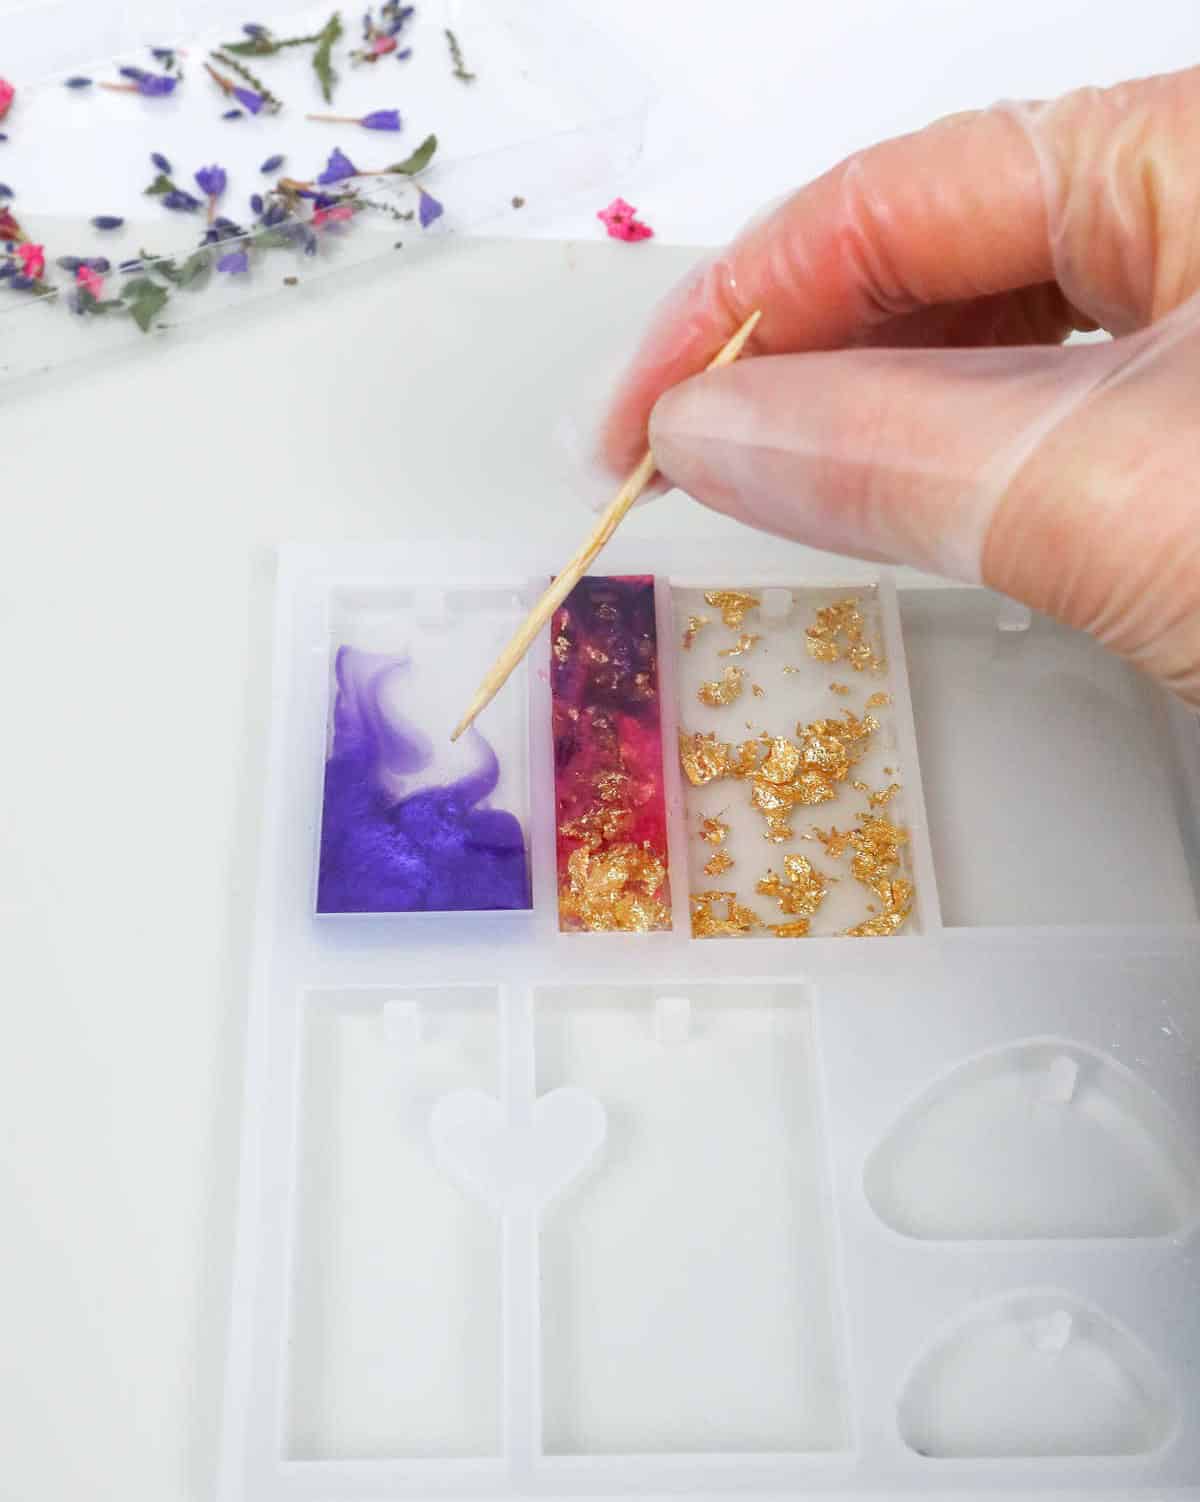
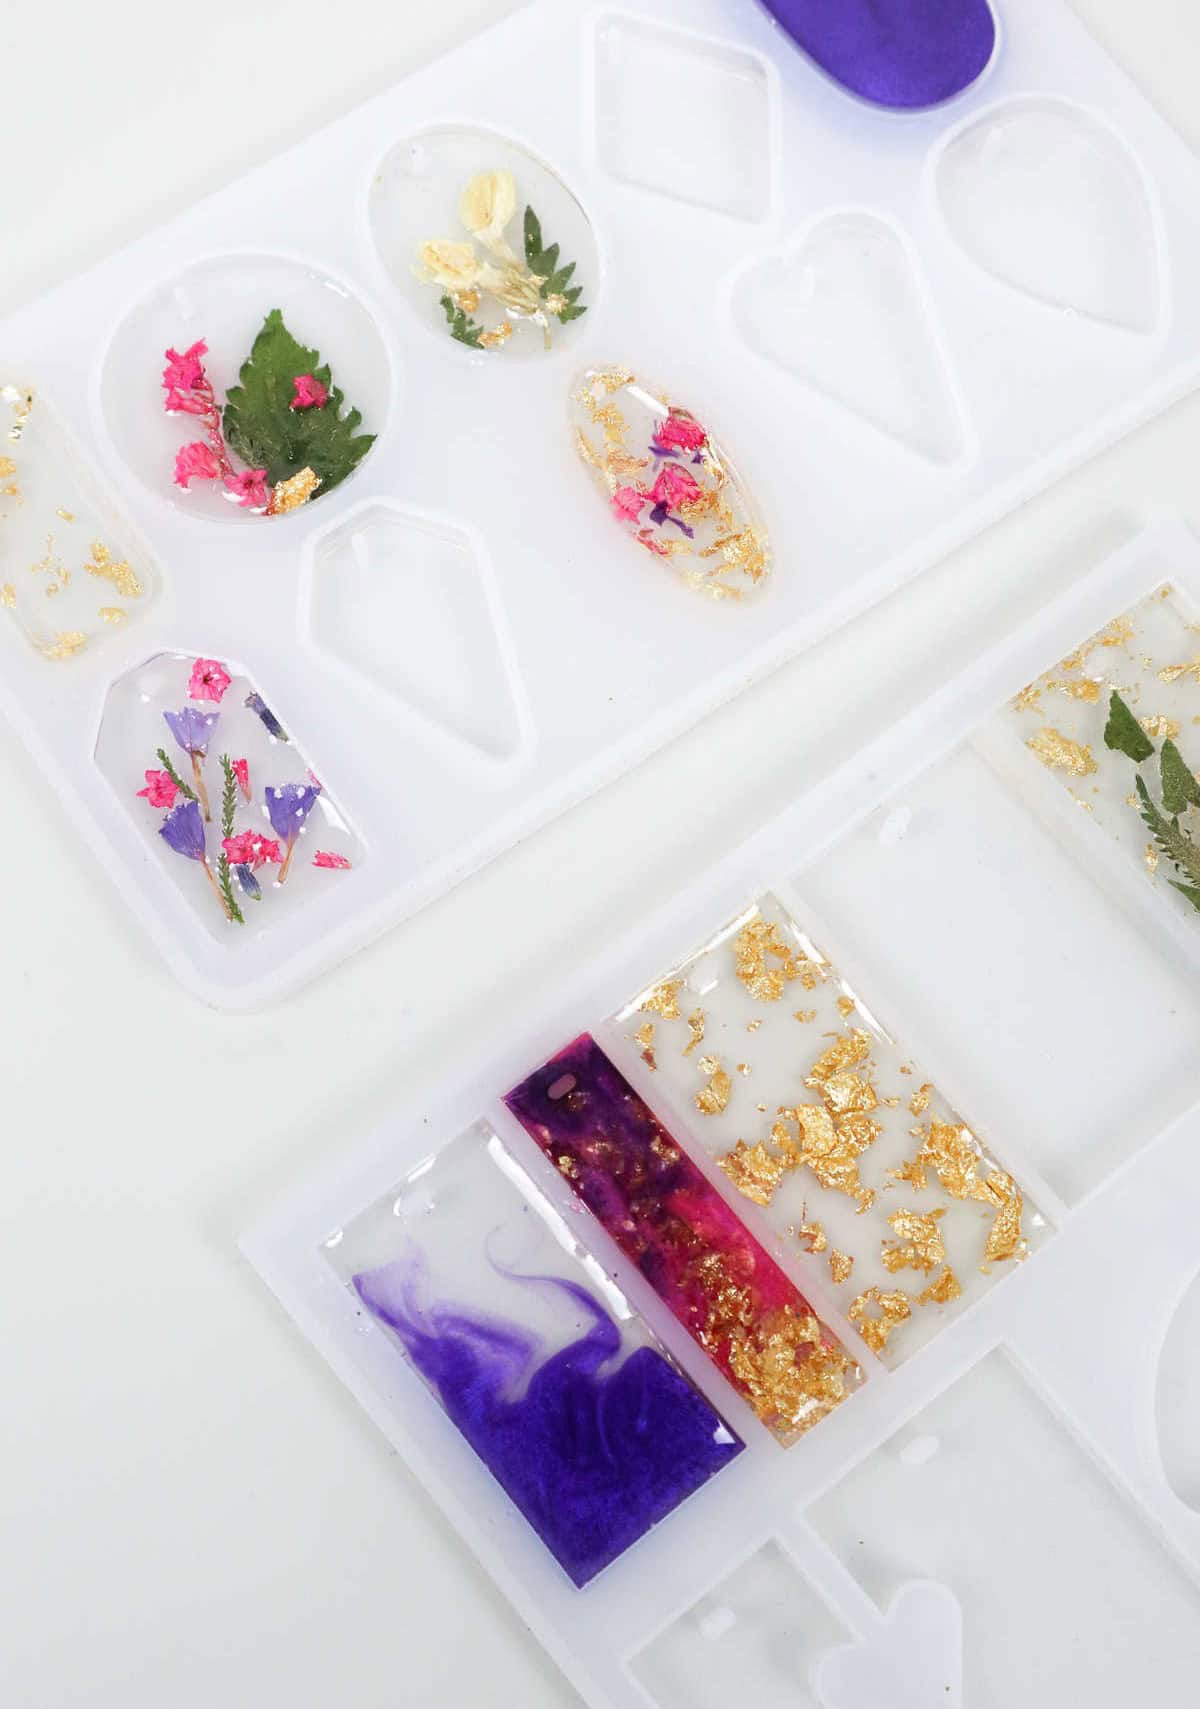
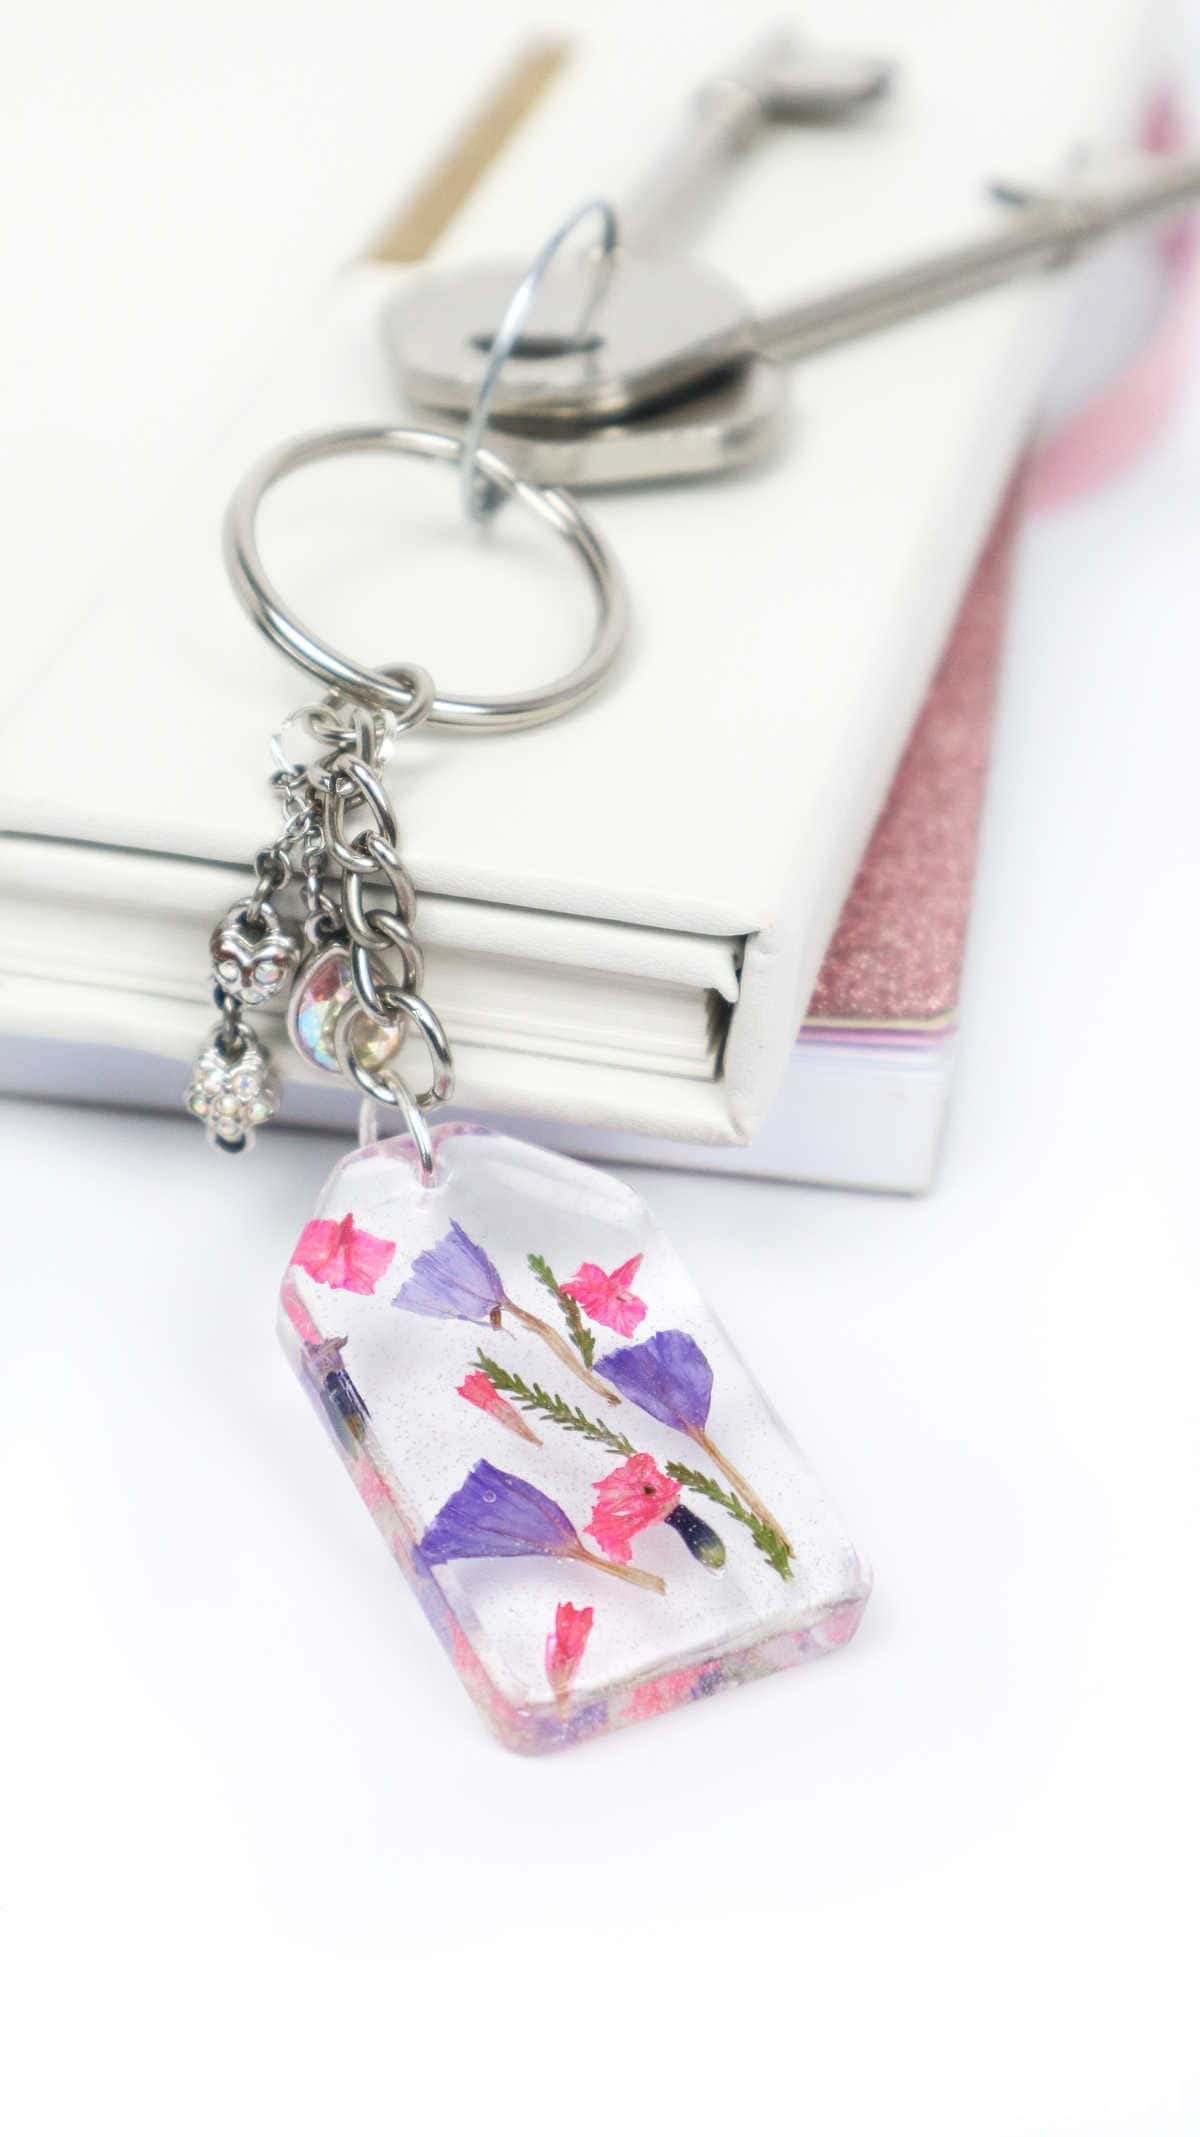
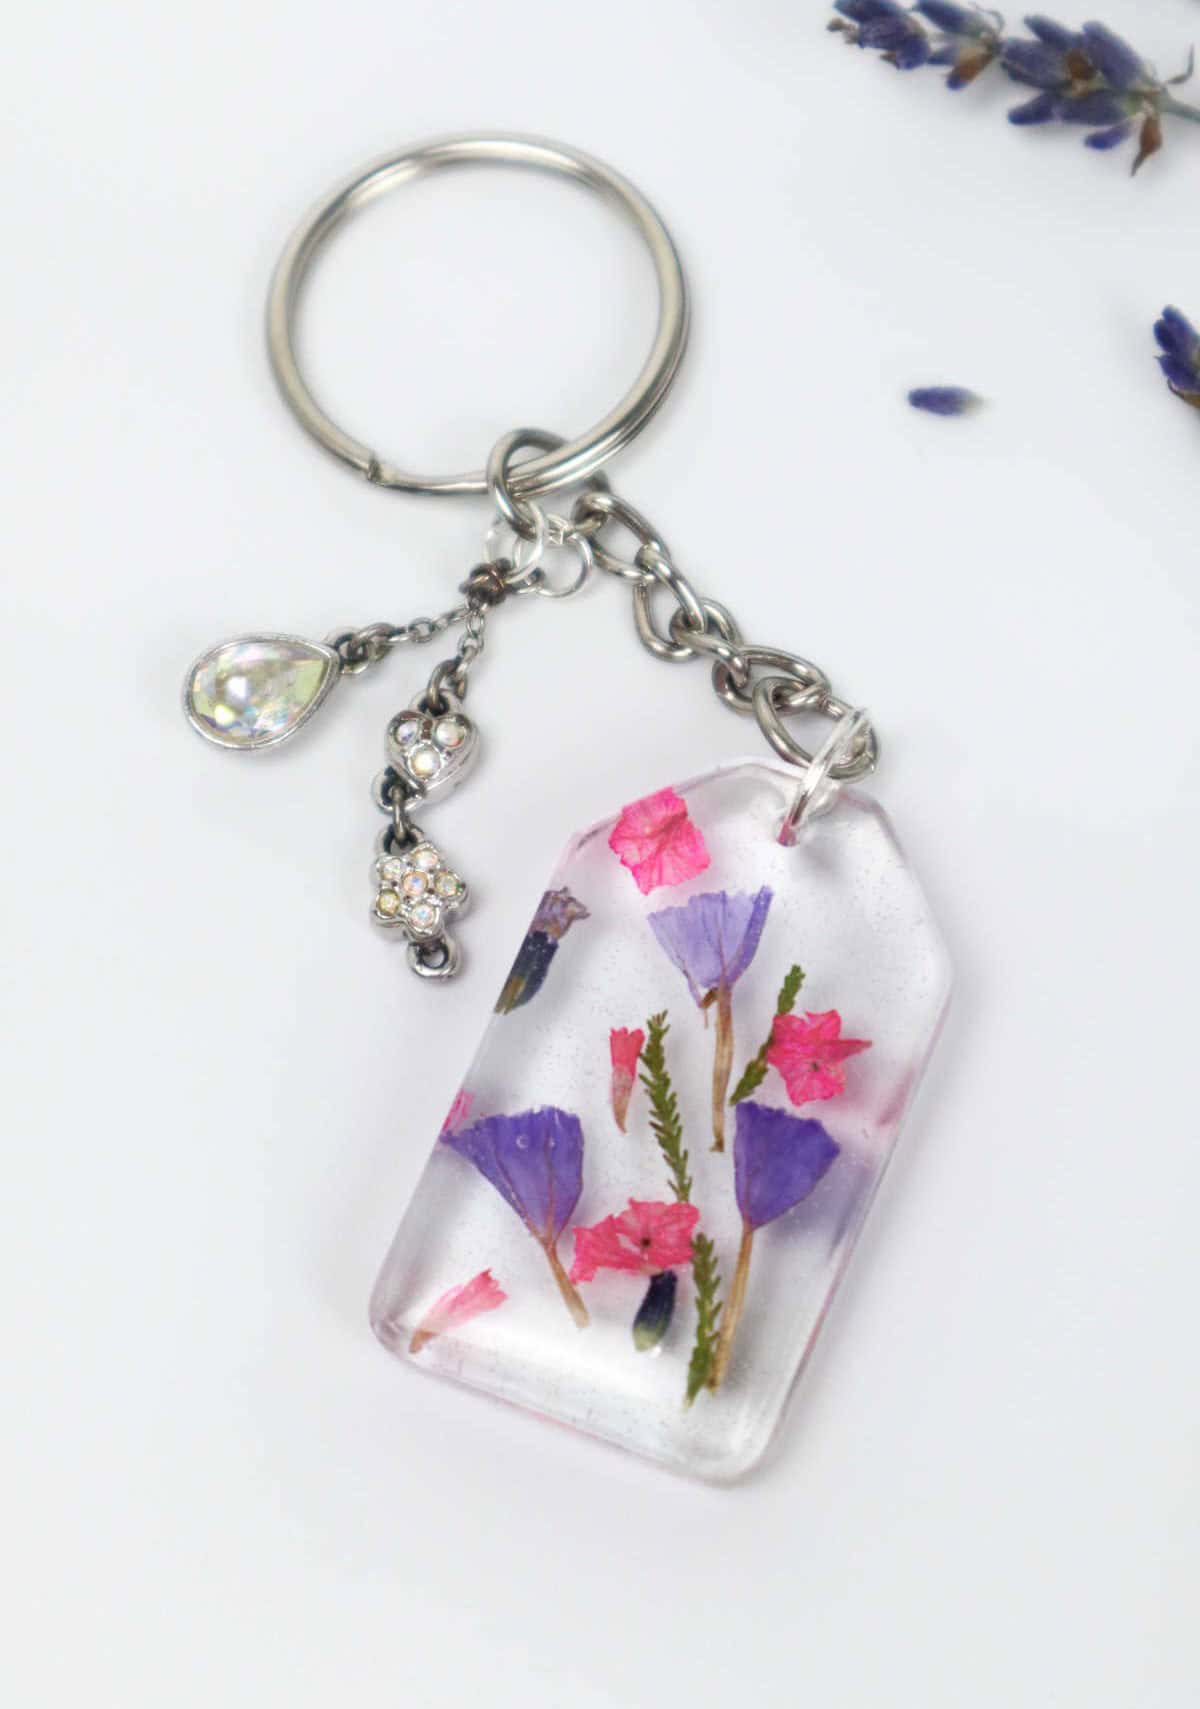
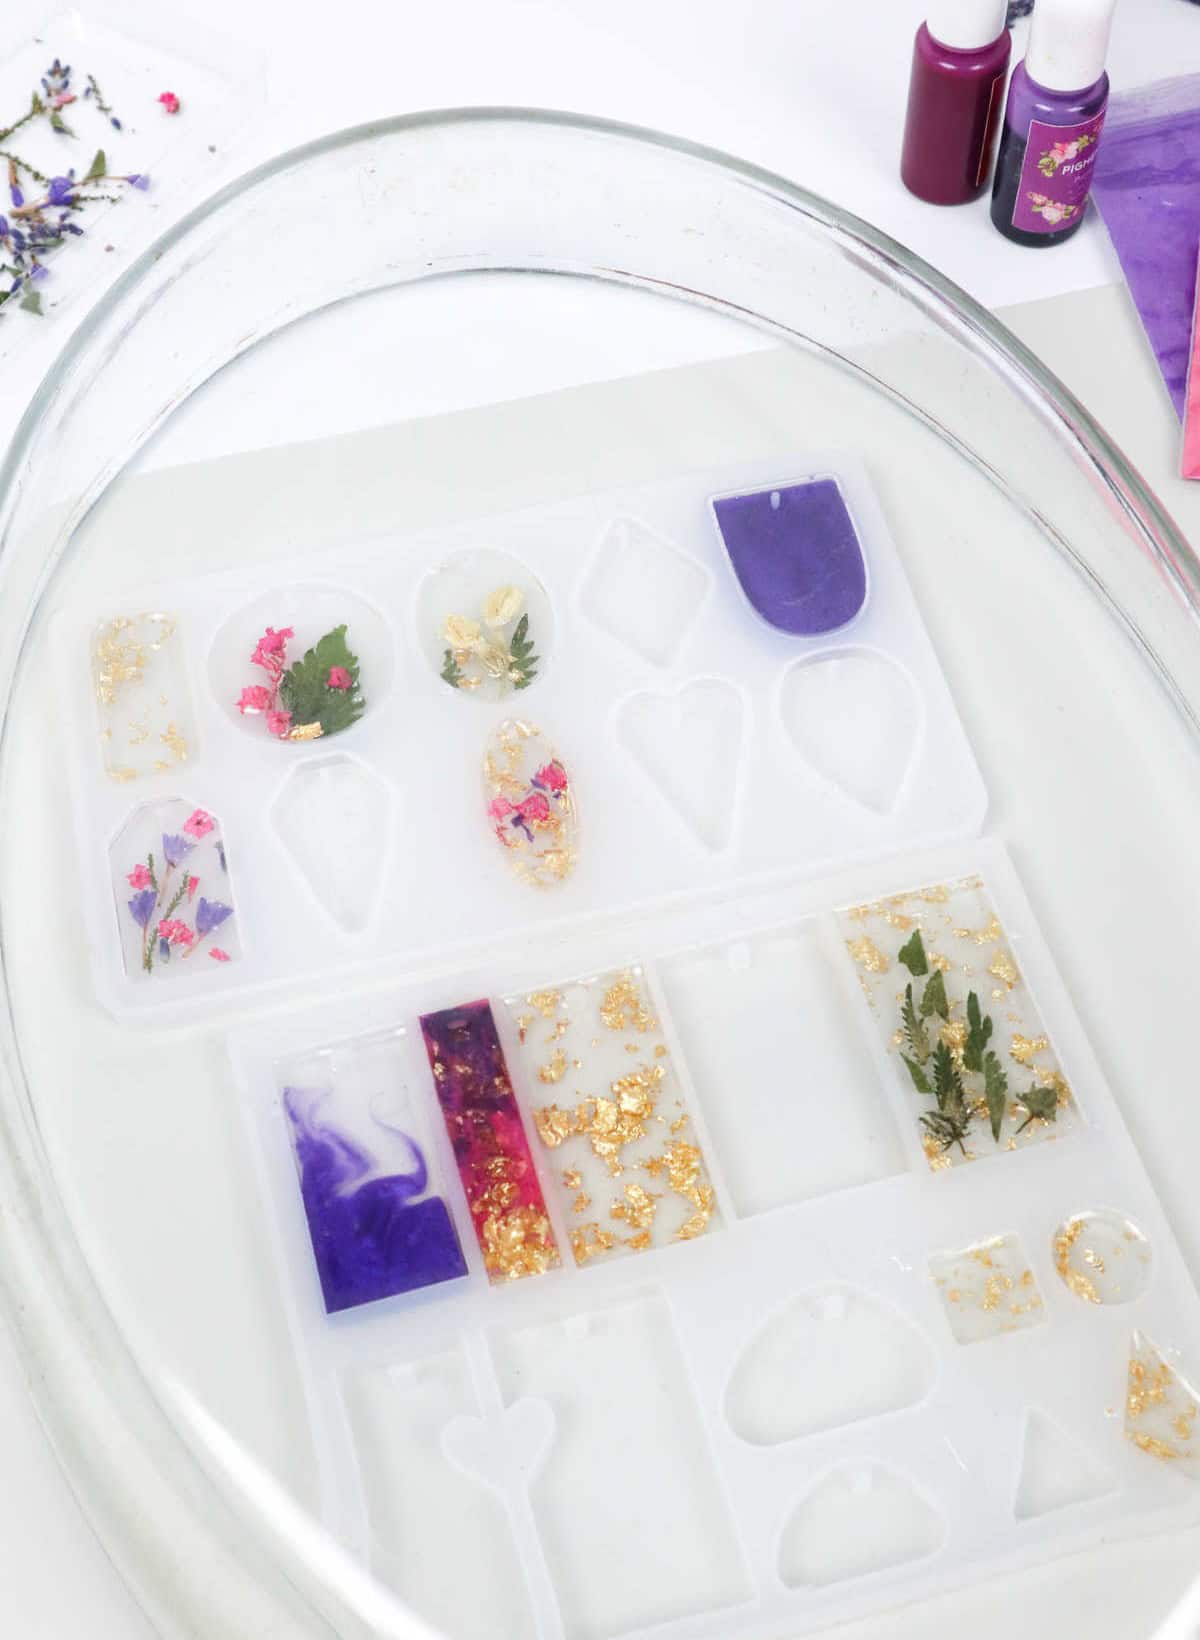
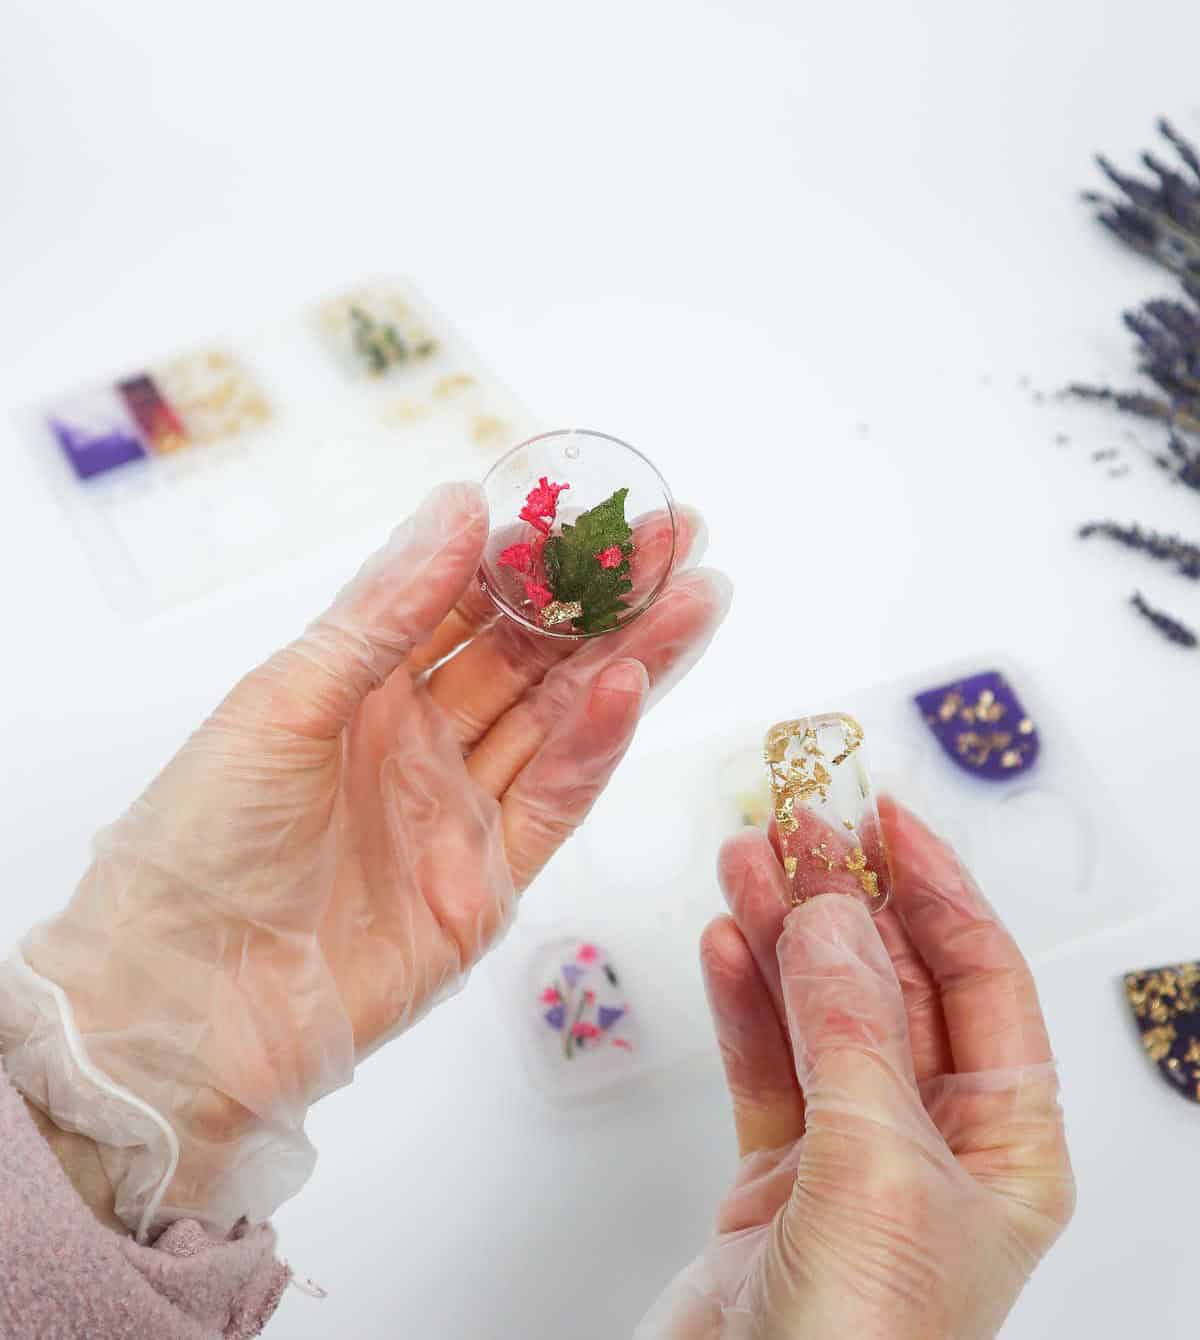
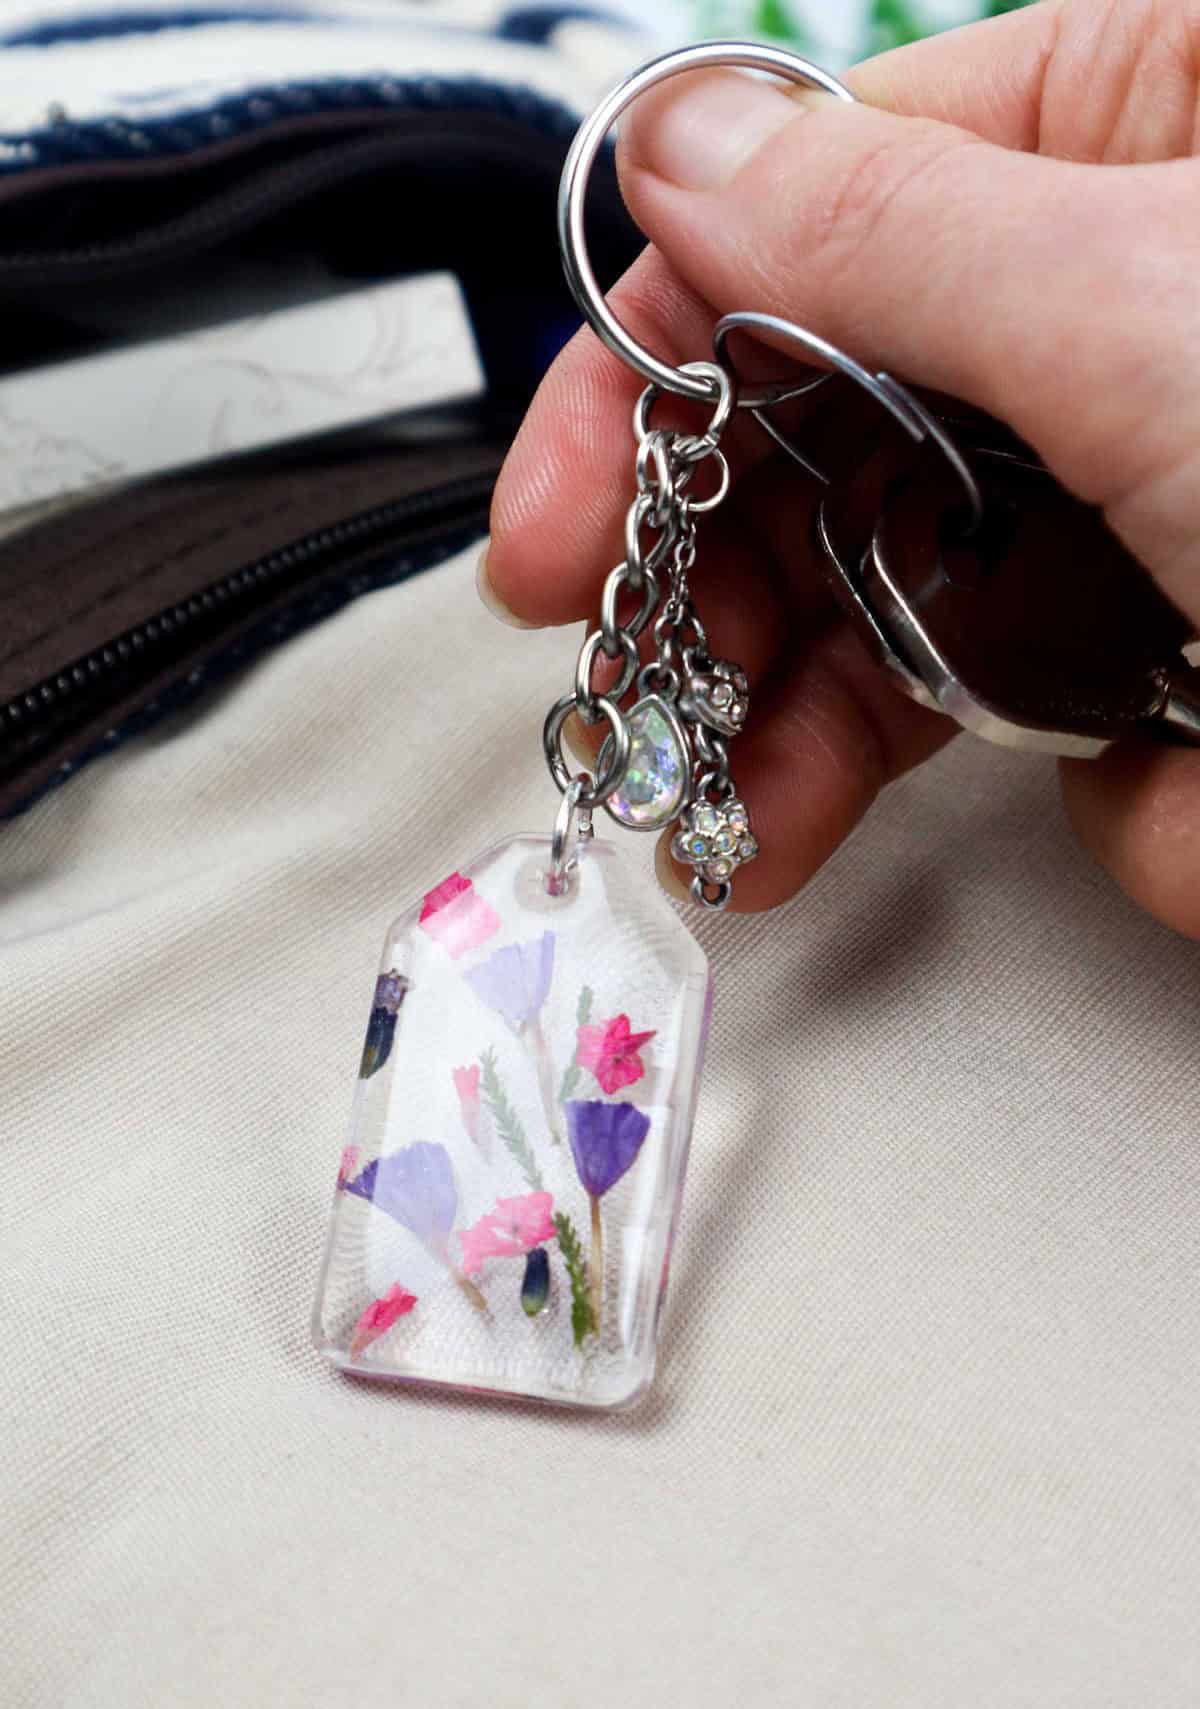
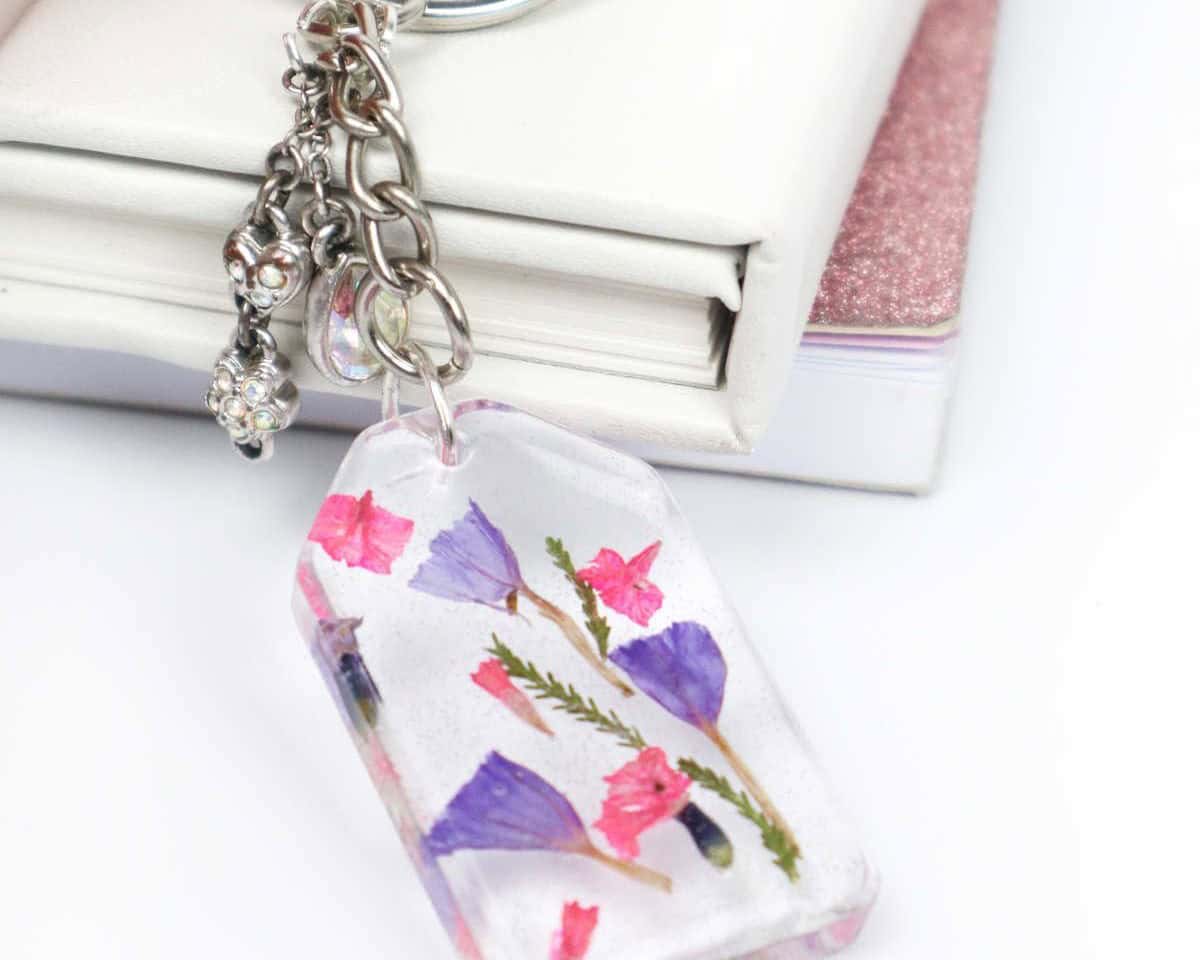
To complete the net layer of your resin keychain, employ a pair of tweezers to carefully place the flowers on top of the resin surface. Since these delicate petals won’t sink into the resin, you’ll need to cover them with a third layer of clear resin. To facilitate the process, use a stick or tweezers to gently position the flowers. This is an excellent opportunity to add additional embellishments like small flecks of gold foil, leaves, and other decorative elements.
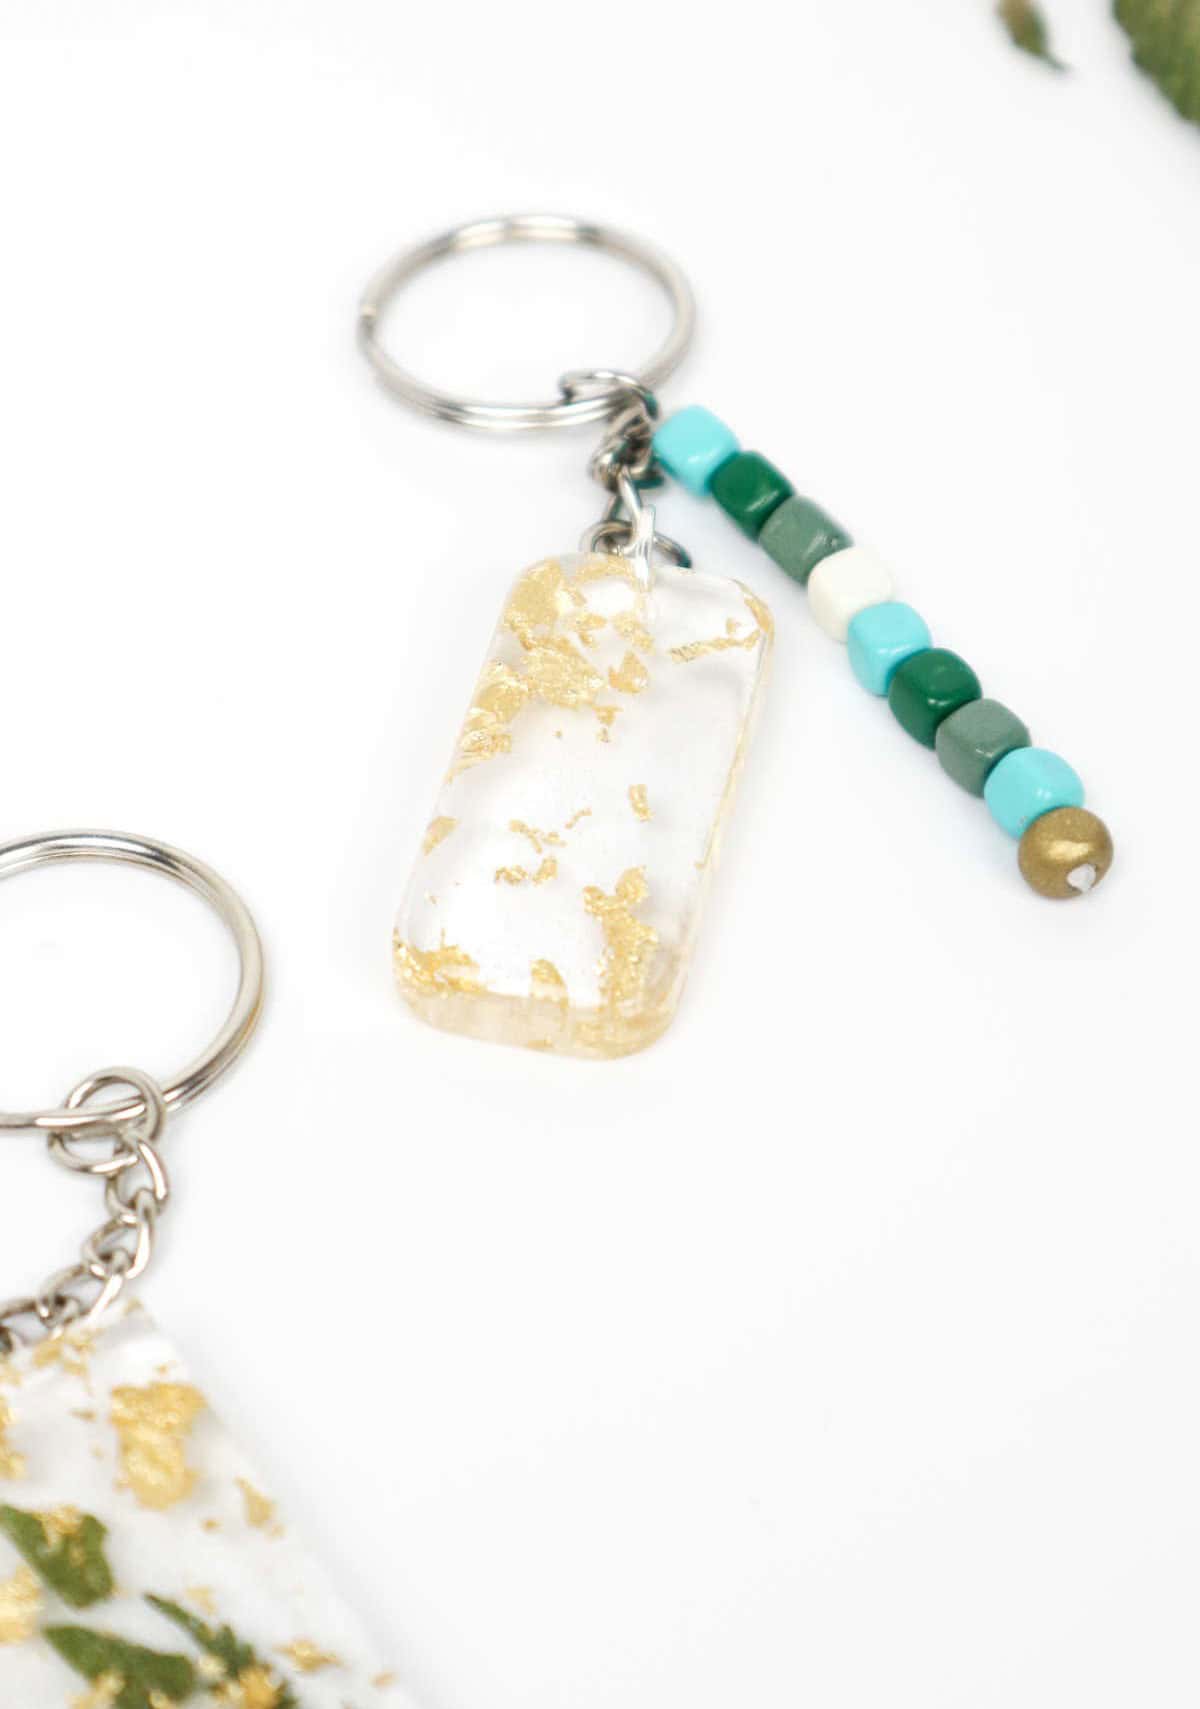
Once you’ve achieved the desired arrangement, your keychain will already be taking shape, with a visually appealing layer 2 in place. The beauty of this step lies in its experimental nature – feel free to mix leftover resin with colored mica powder, glitter, or gold foil, and then stir the concoction with a craft stick or skewer for a unique design. If you opt for colored dye, use a stick to create swirling patterns and blend the color in an artistic and personalized way.
Step 6
Allow the layer to fully set or cure for approximately 6-8 hours before proceeding. To ensure protection from external contaminants, simply cover it with a container and let it sit undisturbed, ideally overnight, allowing the curing process to run its natural course.
Step 7
As the first layer of resin solidifies, it’s time to move on to the third layer. To do this, simply mix up another batch of resin and prepare for application. Next, carefully pour the new layer over the flowers, ensuring complete coverage. If necessary, use a stick or heat gun to gently stir away any bubbles that may have formed during the pouring process.
Step 8
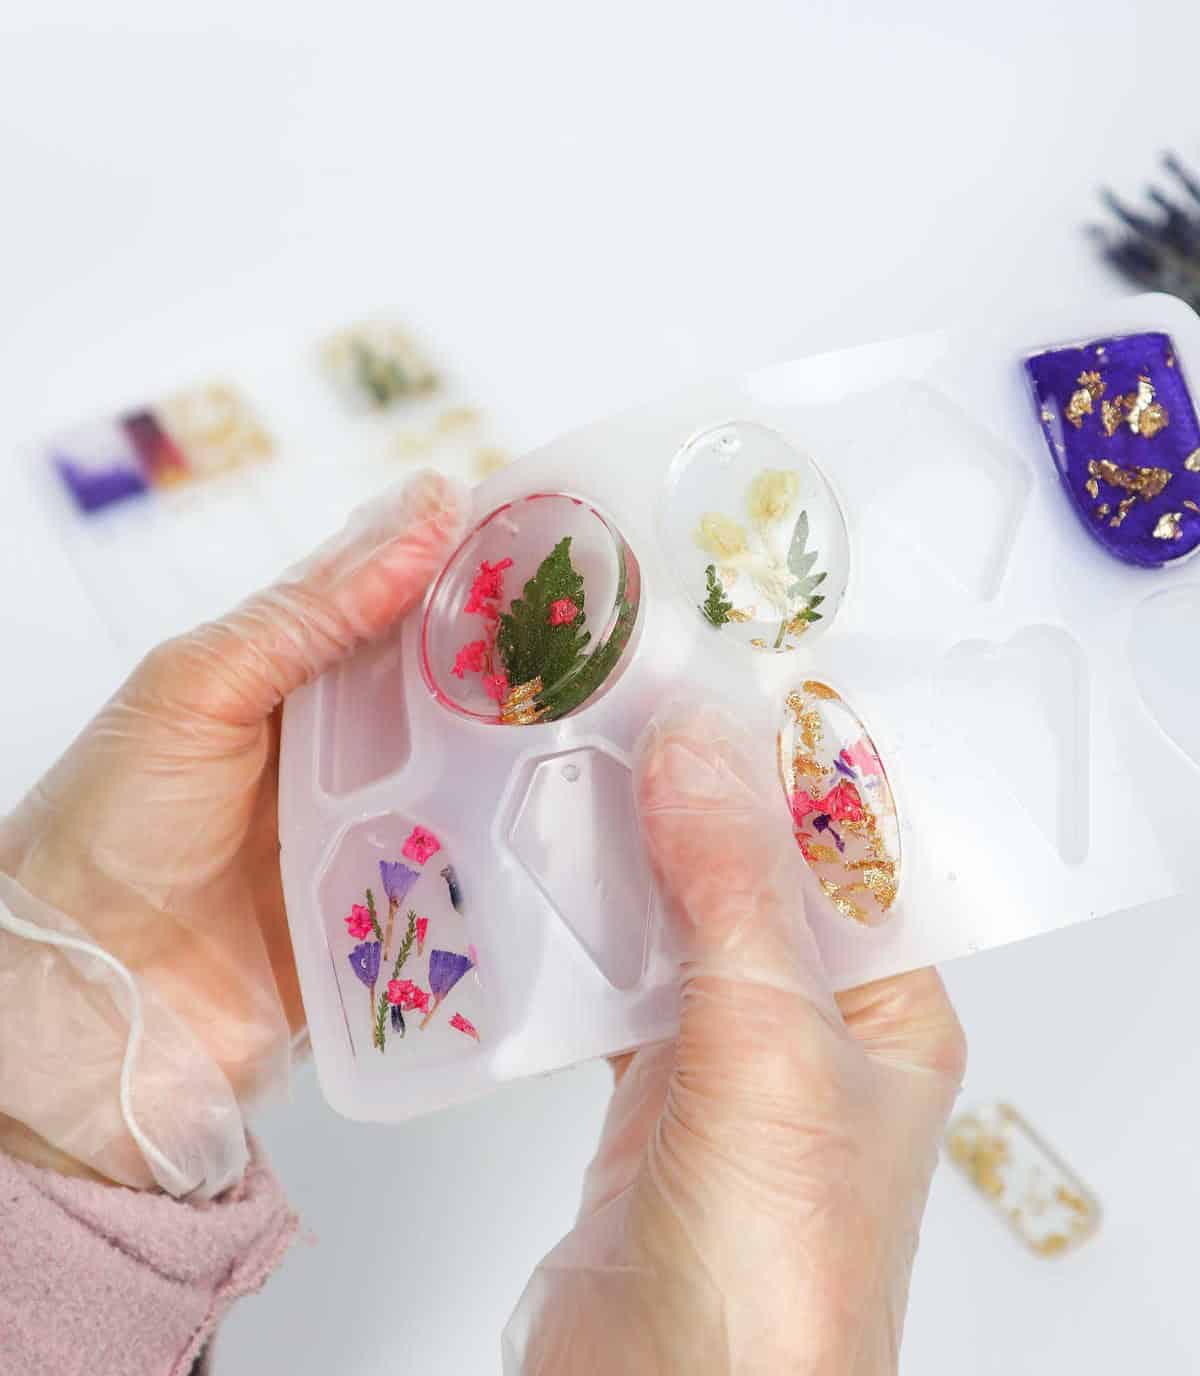

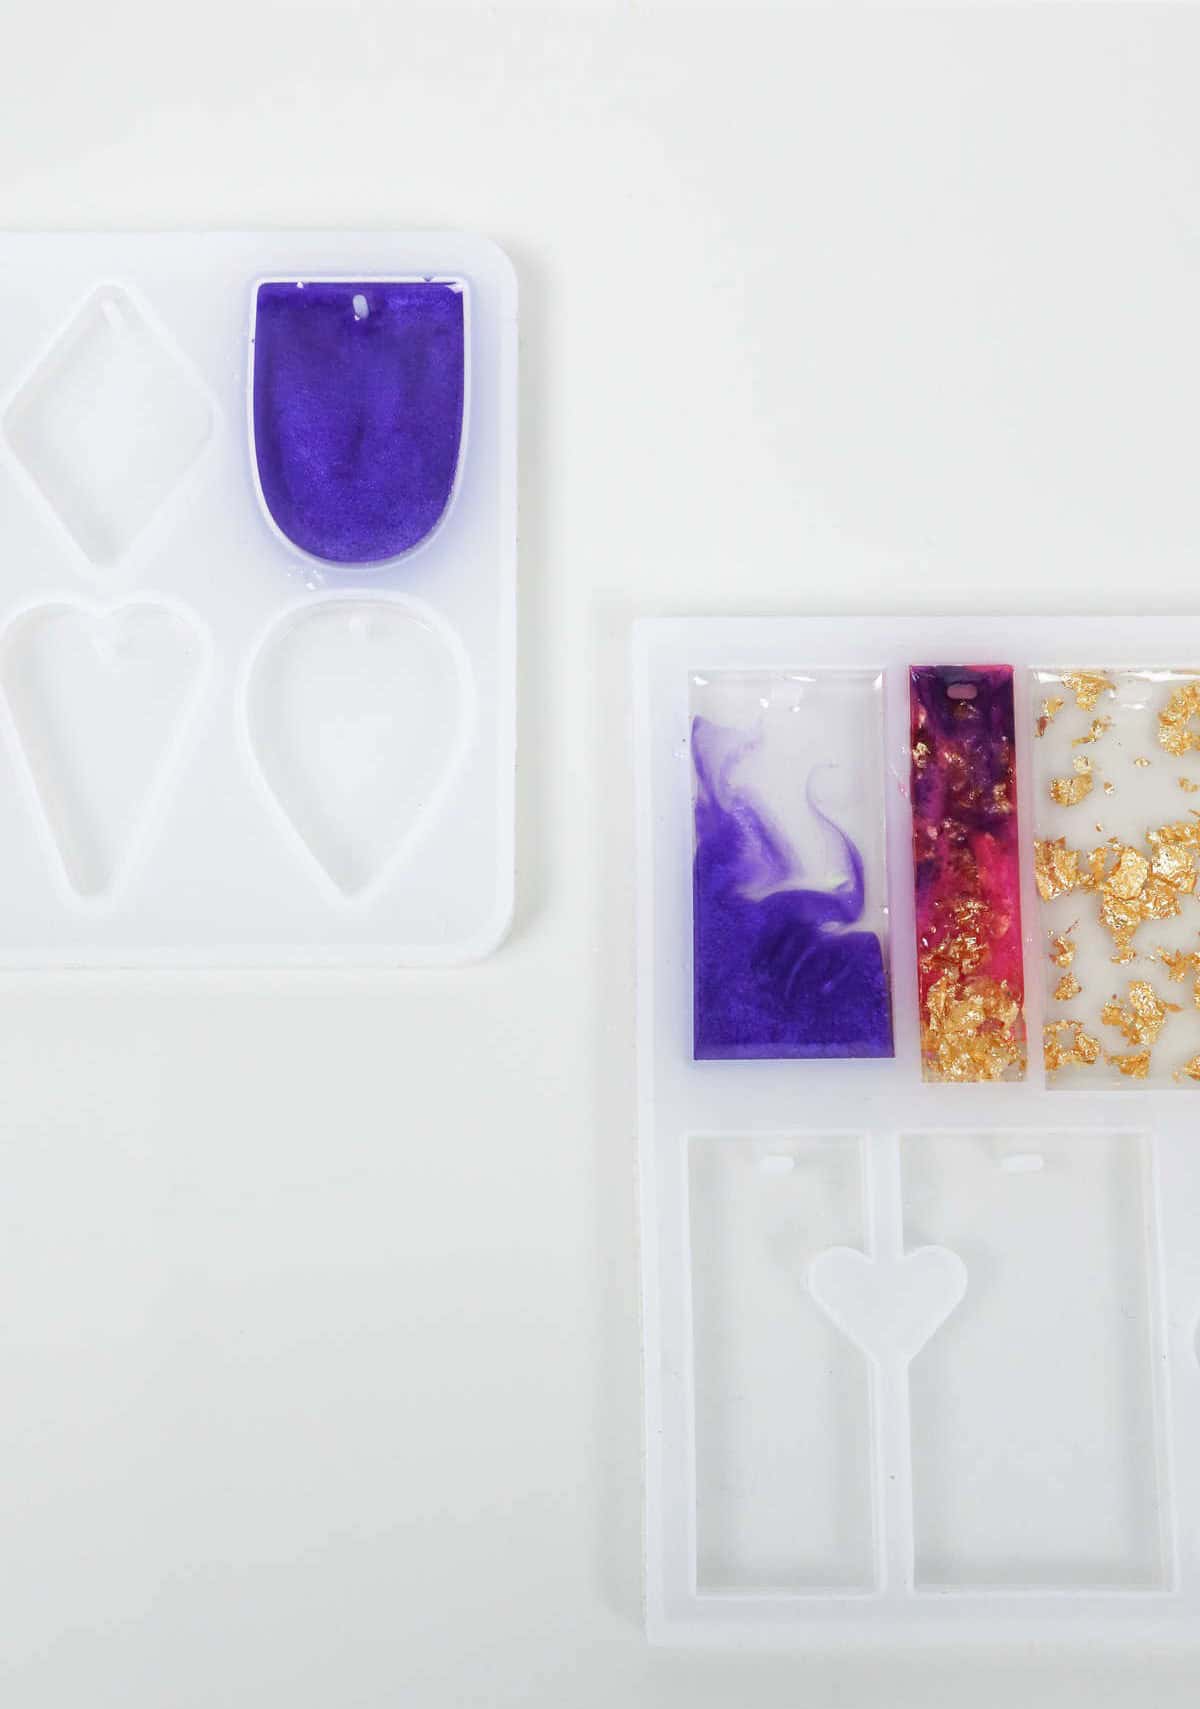
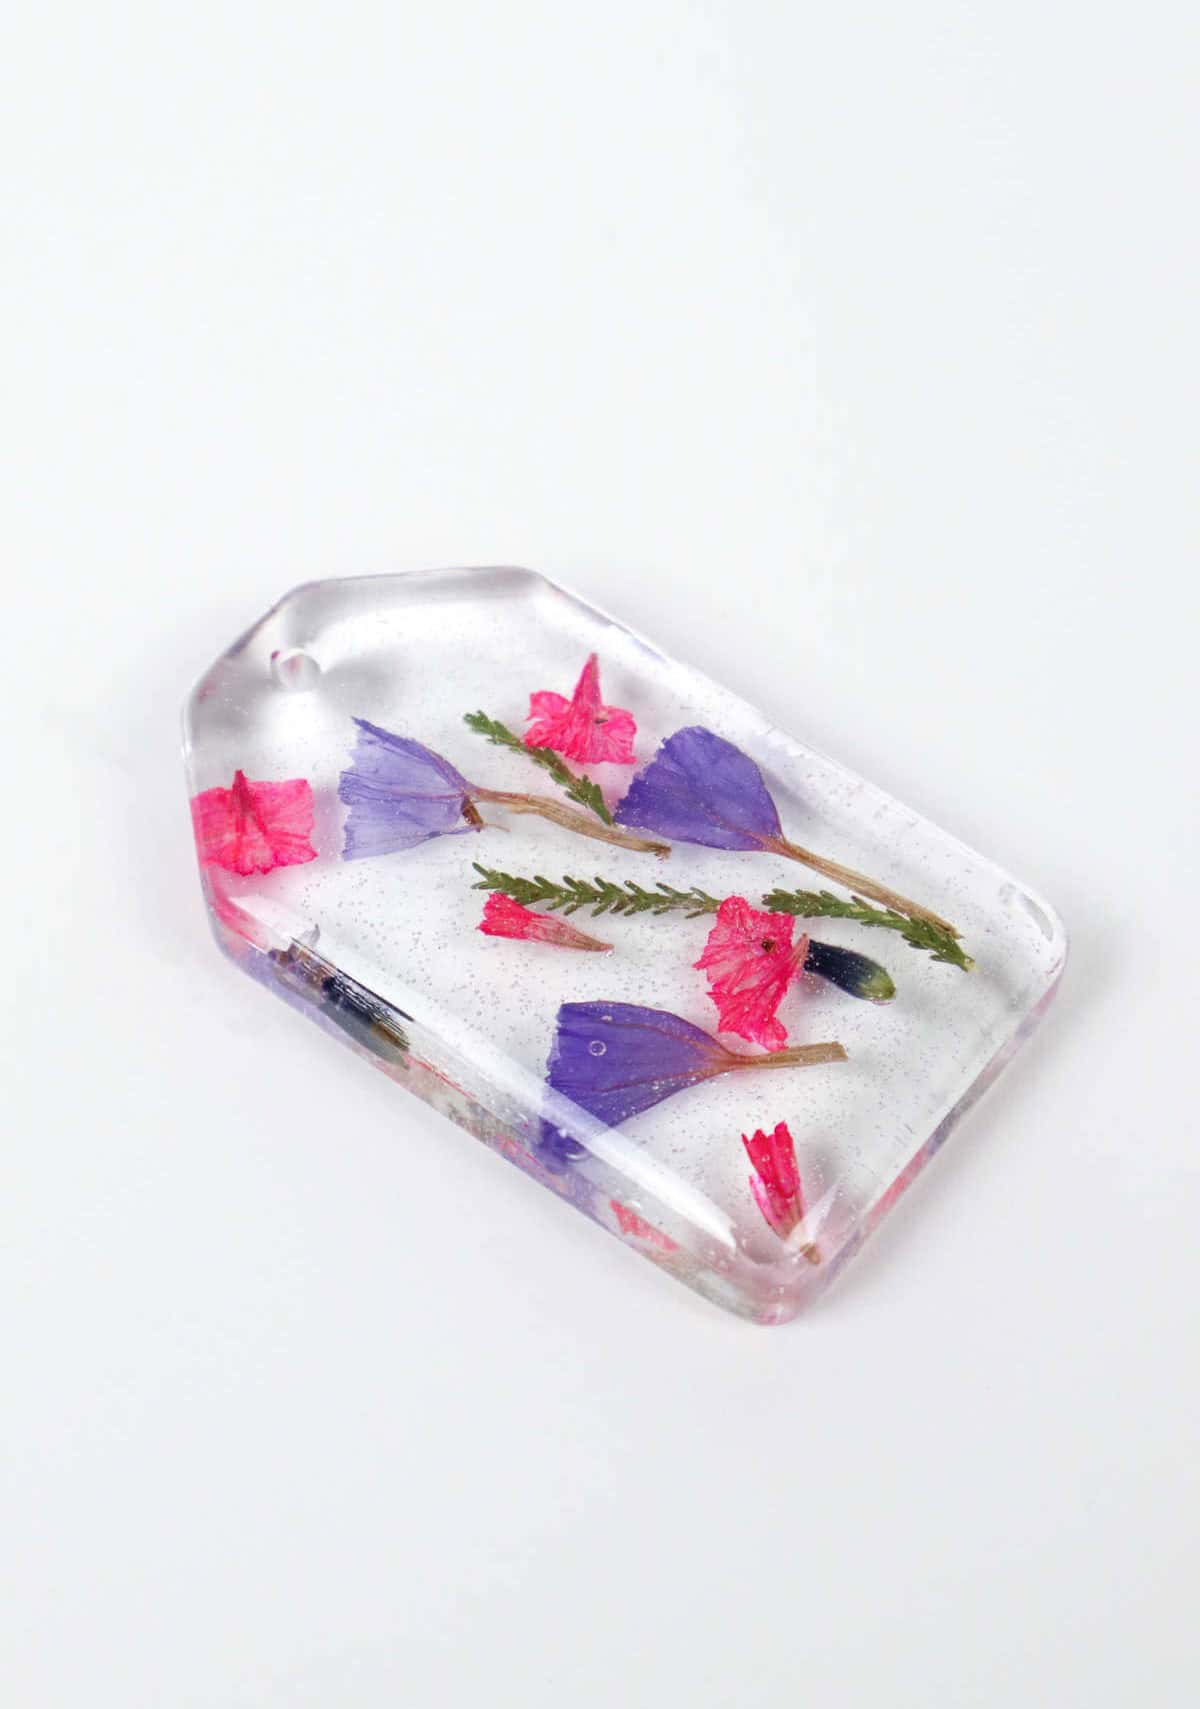
After the keychains have had time to solidify in their molds, let them sit under a protective cover for 24-48 hours to allow the material to fully cure. Once you’re satisfied with the shape, simply pop them out of the silicone molds. If any imperfections or rough spots appear on the surface during this process, don’t worry – they can be easily smoothed out using a nail file or some fine-grit sandpaper. Gently scrub and file away these minor irregularities to reveal a smooth finish.
Step 8
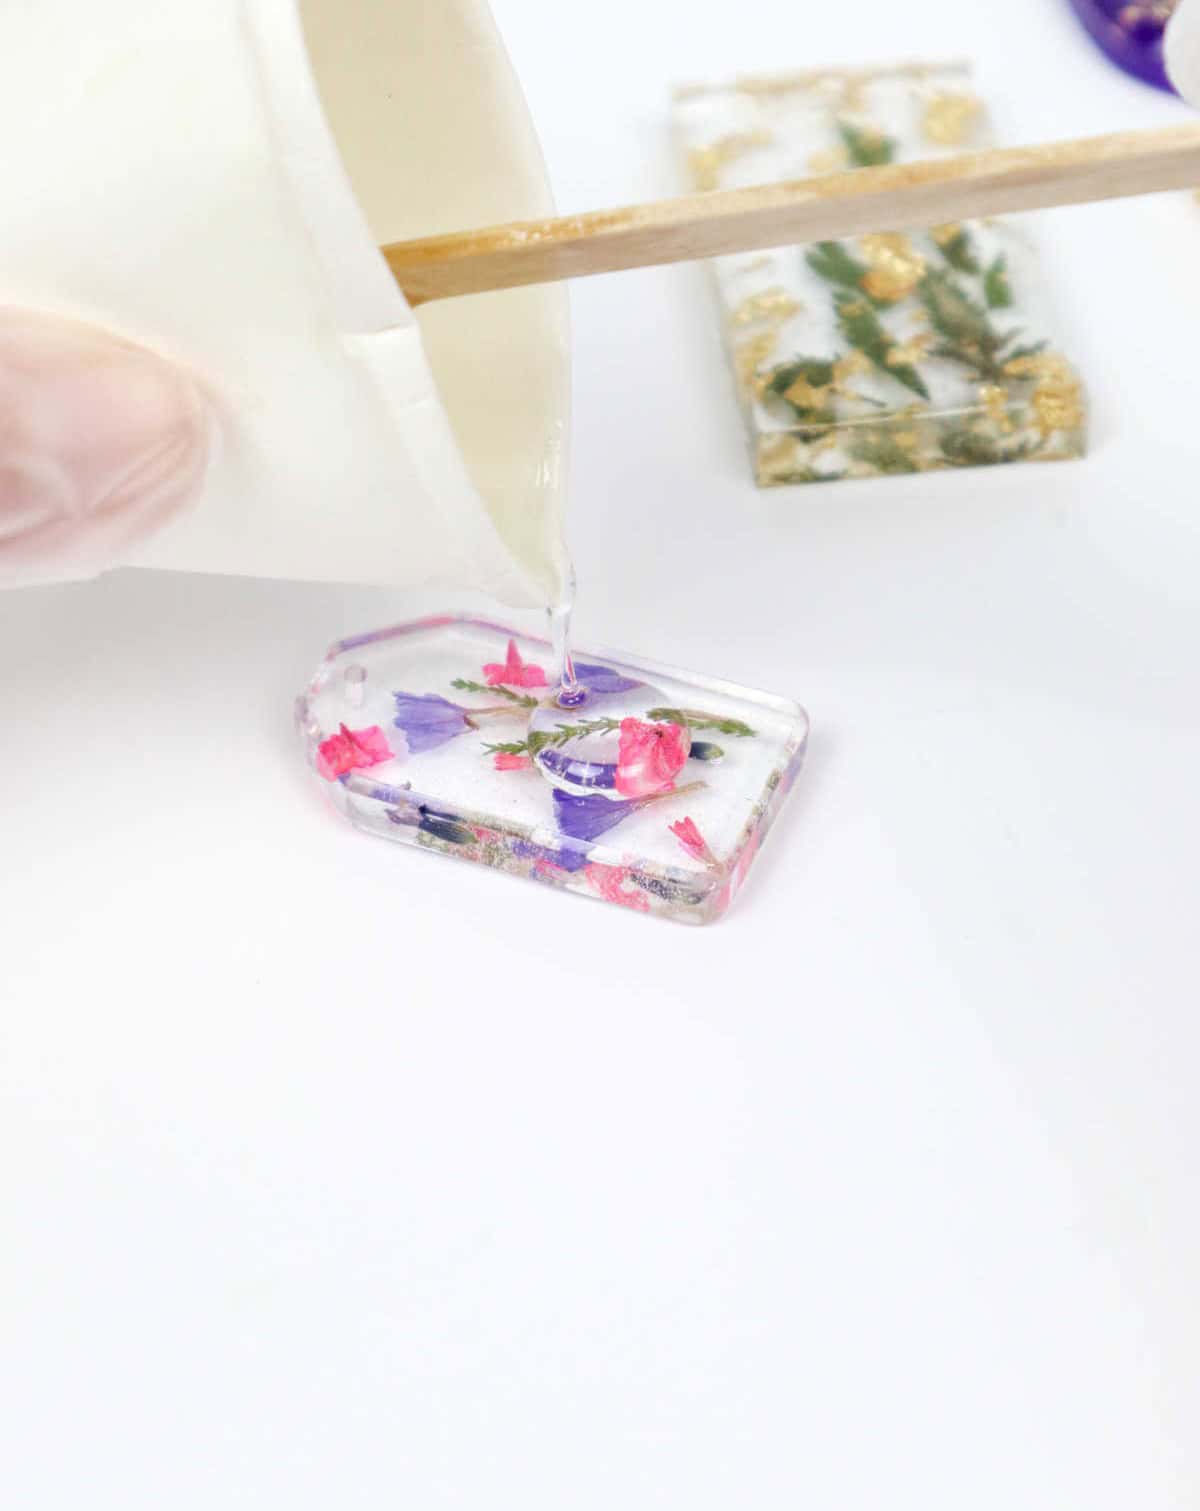
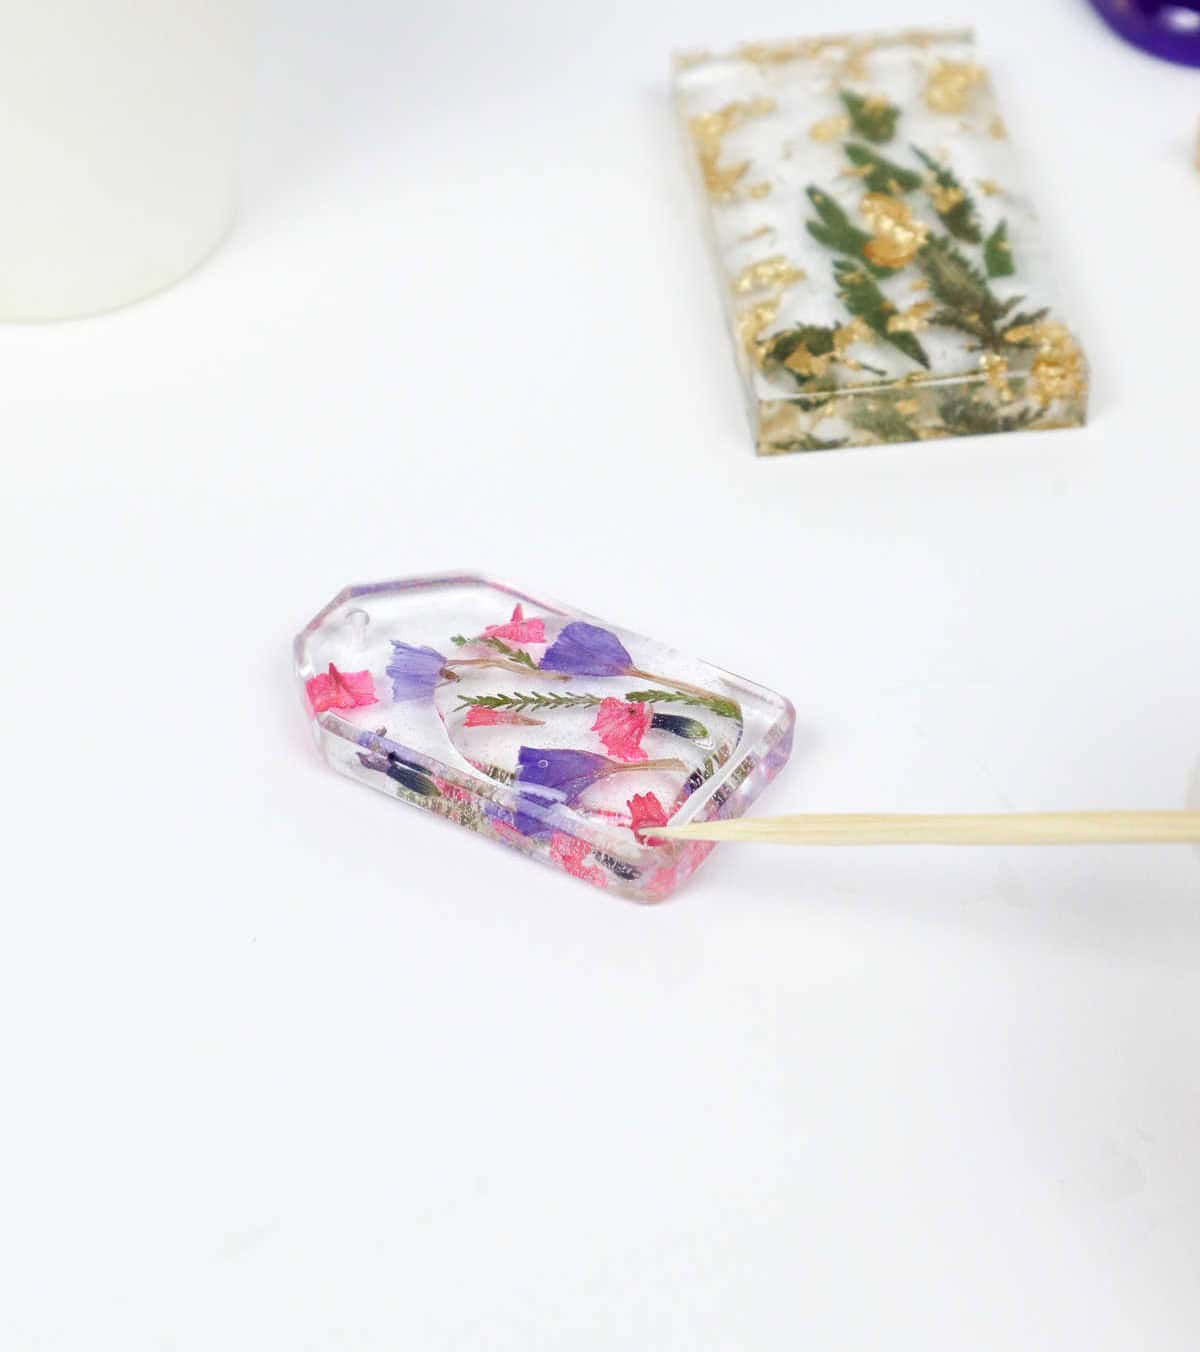
To take your DIY resin keychain project to the next level, consider adding a small domed surface on top. To do this, you’ll need to mix another batch of resin, but this time, allow it to thicken to a slightly tacky consistency. Pour just enough over the surface to cover it without overflowing or running over the edges. Use a toothpick to spread the resin evenly and shape the surface as desired, being careful not to cover the hole where the jump ring will be inserted.
Allow the mixture to cure for at least 12-14 hours before pushing the keychain and jump ring through the hold. Once it’s fully set, your DIY resin keychain is complete!
Other Crafts You Might Like
For crafty entrepreneurs, making and selling unique items can be a lucrative venture. With so many creative options available, it’s no wonder why so many people turn to DIY projects as a way to monetize their skills. From simple dollar store crafts that require minimal investment to more complex upcycling ideas that showcase one’s creativity, the possibilities are truly endless.
When looking for inspiration, consider exploring macrame keychains, cute crafts specifically designed for teenagers, or even tackling larger DIY projects that can be sold online or in-person. Whatever your passion may be, there’s a craft out there waiting to be made and sold.
How to Make Resin Keychains
Looking to create unique and personalized accessories? Crafting your own DIY resin keychains is a fantastic way to do so, making them perfect for gifting or personal use. With a total preparation time of just 15 minutes and an active crafting time of 45 minutes, these projects are ideal for those with limited time or experience. Plus, the additional curing time of 14 hours allows you to multitask while your creations set.
Whether you’re looking for a thoughtful gift or a fun activity to enjoy with friends, DIY resin keychains offer endless possibilities and opportunities to get creative.
Equipment
When crafting with resin, having the right materials can make all the difference. A collection of essentials includes gold flakes for adding a touch of luxury, glitter powder and mica powder to infuse sparkle and shine, as well as resin pigments to create unique color combinations. To add natural charm, dried flowers can be incorporated into the design. For precise cuts and adjustments, scissors, pliers, and tweezers are must-haves.
Materials
The essential toolkit for working with epoxy resin consists of several key components. Firstly, you’ll need the epoxy resin and hardener mixture itself. This will form the foundation of your project. In addition to the resin and hardener, you’ll also require some small plastic cups or containers to mix and pour the material into. A big plastic cup can come in handy for mixing larger quantities as well. For precise application, toothpicks and wood skewers are useful tools to have on hand.
If you’re creating complex shapes or designs, silicone molds will allow you to achieve a high level of detail. To manipulate and shape the resin, spatulas are an essential part of your toolkit. A heat gun can be used to speed up the curing process or remove air bubbles from the mixture. Finally, blank keychains and personal protective equipment like face masks and gloves can help prevent accidents and ensure a safe working environment.
Instructions
Before diving into these DIY resin keychain projects, make sure you have all your necessary supplies and don’t forget to protect yourself with the right gear. The first step is to design your arrangement of dried flowers and plan out your overall aesthetic. With a limited time frame once the resin mixture is prepared, take a few moments now to visualize your final product. Mix equal parts resin and hardener in a plastic cup until they’re thoroughly combined using a stirrer or stick.
To eliminate bubbles, you can use a heat gun or torch, or simply let the mixture sit in a warm bath for 3-4 minutes. Pour some of the resin into your molds and pop any bubbles that appear using a heat gun. Next, carefully place your flowers and decorative elements – such as gold foil, mica powder, glitter, leaves, and more – into position using tweezers.
You can also add colored dye or mica powder to tint the entire resin mixture or create unique patterns by adding small amounts of color and swirling them in. Allow this initial layer to cure for 6-8 hours. Once that’s complete, prepare a second batch of resin with any desired additives – such as foil, color, or texture – and pour it evenly over the surface. Let this additional layer cure for 24-48 hours.
For a domed finish, mix a small amount of resin, let it become tacky, then apply just enough to create a domed effect. Use a toothpick to smooth out any edges and avoid covering the hole. Allow this final layer to cure for an additional 12-14 hours under a protective cover before inserting your keychain jump ring and enjoying your finished DIY resin keychains.