For those new to the world of sewing, it’s easy to get overwhelmed by the vast array of techniques and tools available. But fear not! With these simple yet effective hacks, you’ll be surprised at just how quickly and effortlessly you can tackle any sewing project. From basic to complex, sewing doesn’t have to be a daunting task. In fact, with just a few simple tricks up your sleeve, you can achieve professional-looking results without breaking the bank or investing in fancy equipment.
Hem Jeans Easily
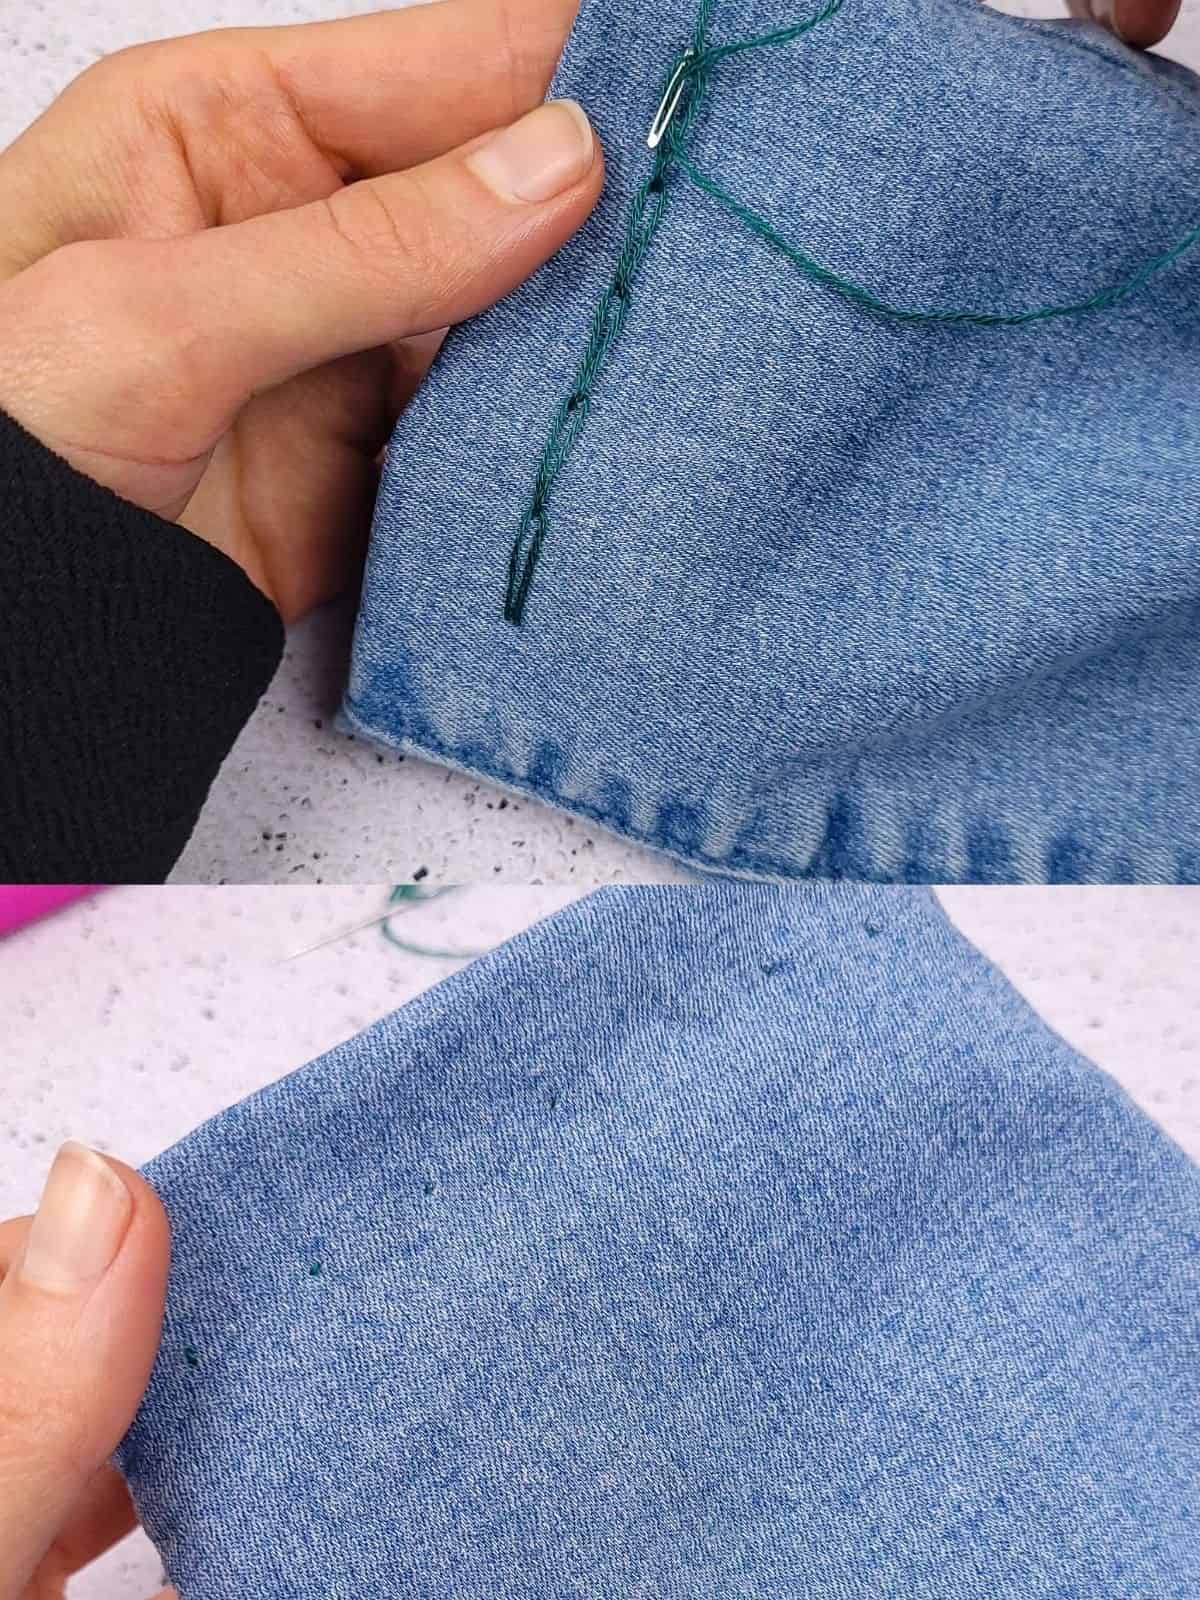
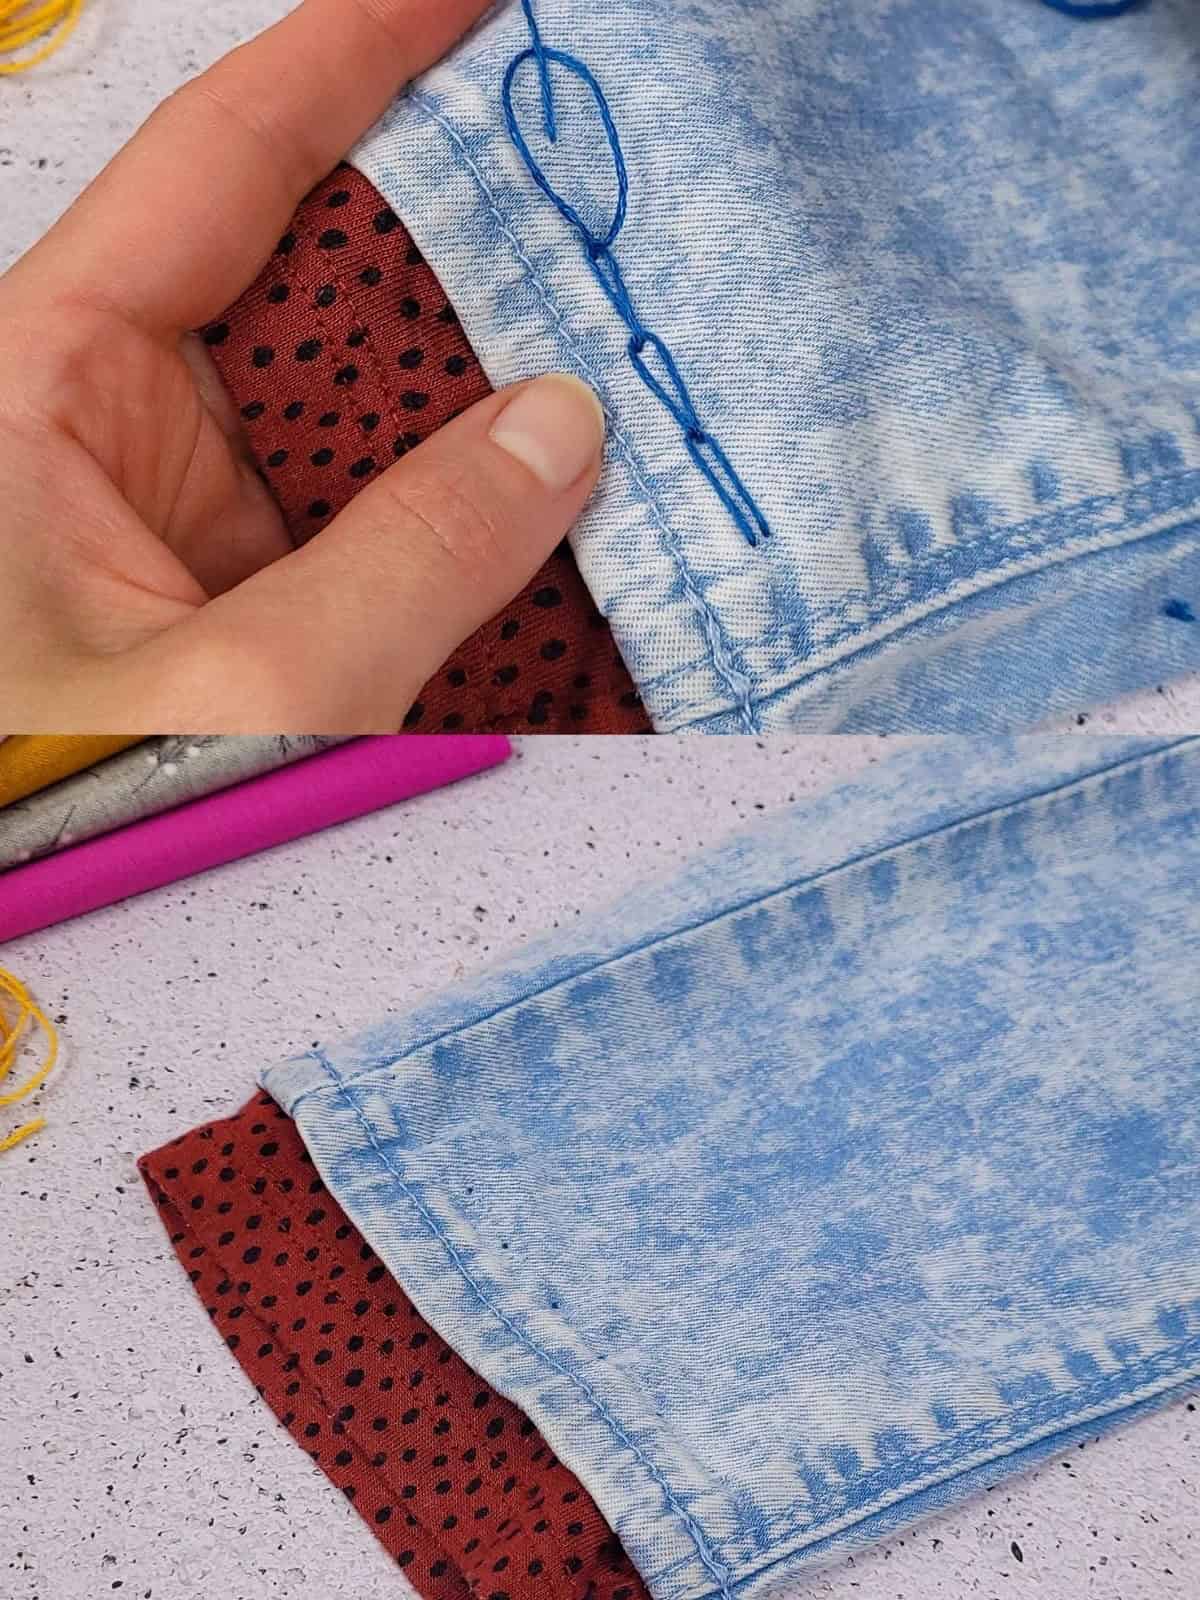
The perpetual frustration of jeans slipping down the ankle is a common fashion annoyance many of us can relate to. However, with a clever trick up your sleeve, you can easily elevate those hemlines and keep your pants in place. The key lies in an invisible hem stitching technique that creates a seamless finish.
To begin, simply thread your needle through the last stitch and gently pull it through.
As you do so, you’ll notice the thread effortlessly moves to the back of the fabric, leaving behind a smooth and streamlined hemline.
This simple yet effective hack is sure to revolutionize the way you tackle hemming your jeans, and with practice, you’ll be a pro in no time!
Fix Clothing Holes with a Cute Flower
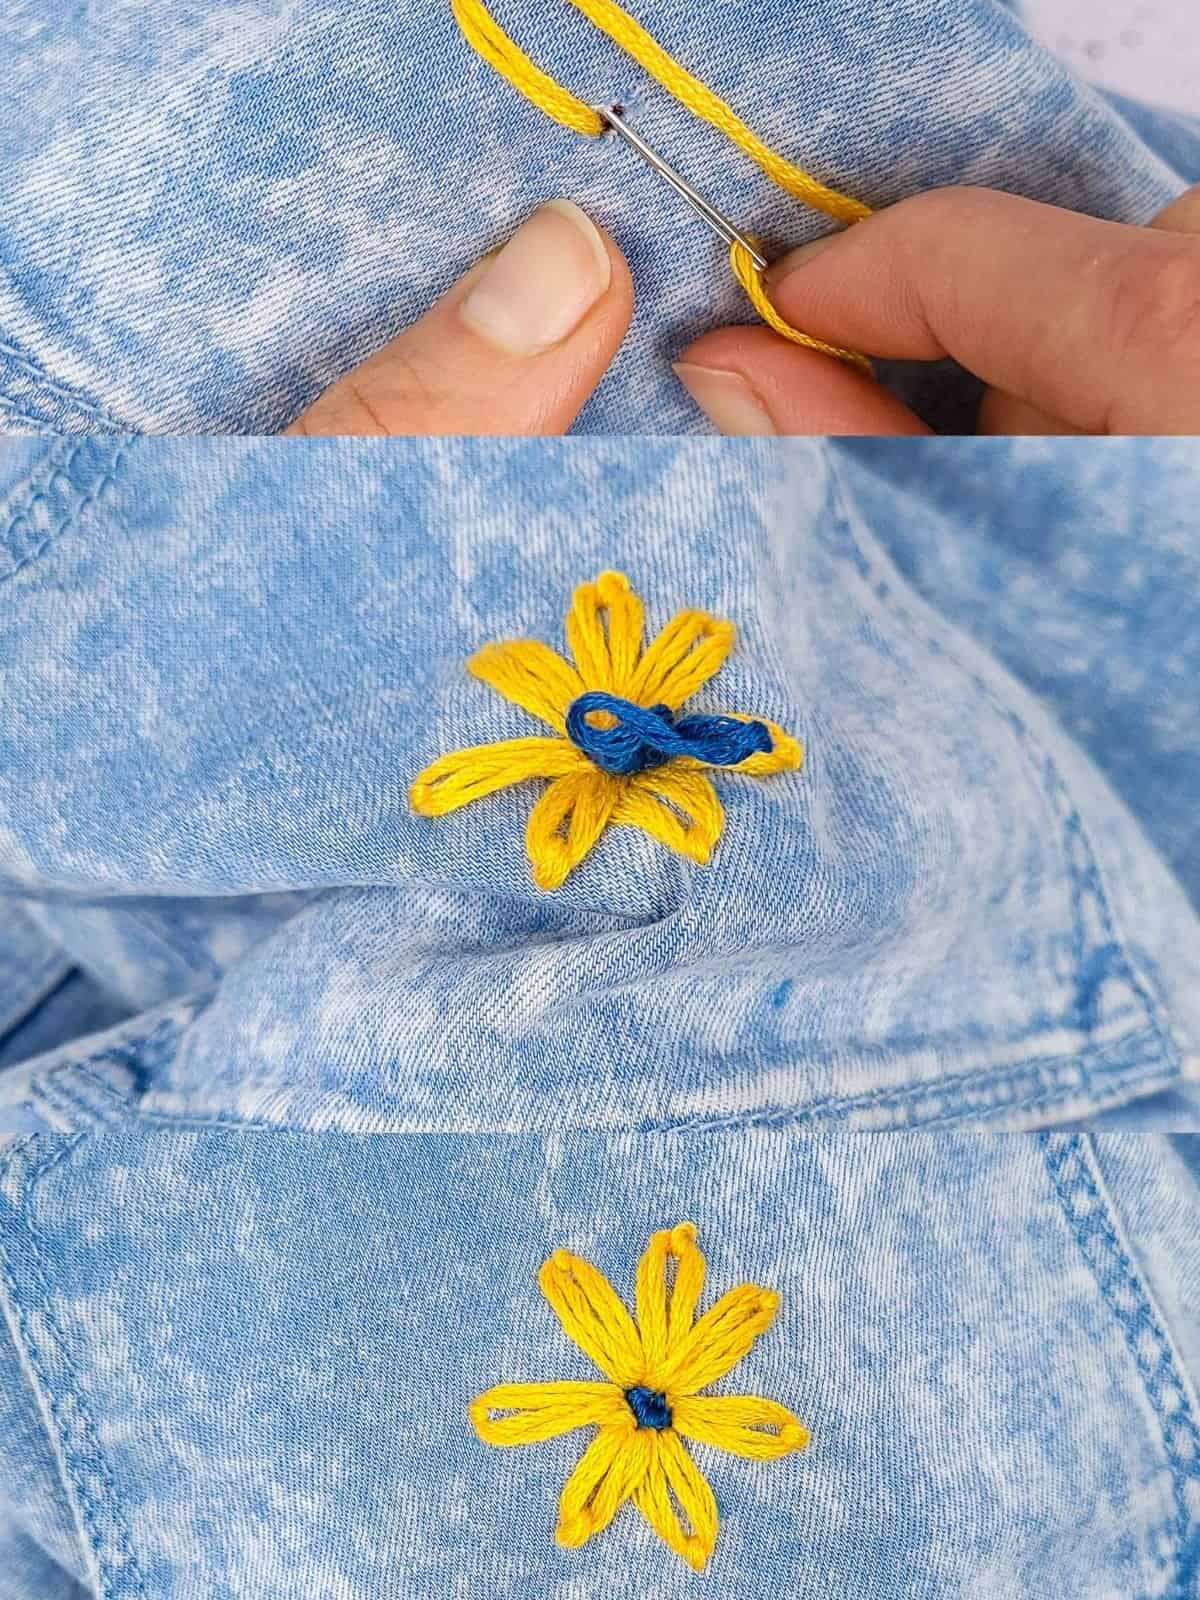
When pesky holes appear on your favorite jeans or jacket, rather than letting them ruin the overall look, why not turn them into a fashionable feature? Grab your needle and thread, and sew on a charming little flower around the hole. Not only will you be mending the tear, but you’ll also add a touch of whimsy to your outfit. The best part is that it’s an opportunity to let your unique personality shine through as you experiment with different colors and designs.
It’s a great way to breathe new life into old clothes, and who knows, you might just start a new fashion trend!
Use Clear Nail Polish to Protect the Thread
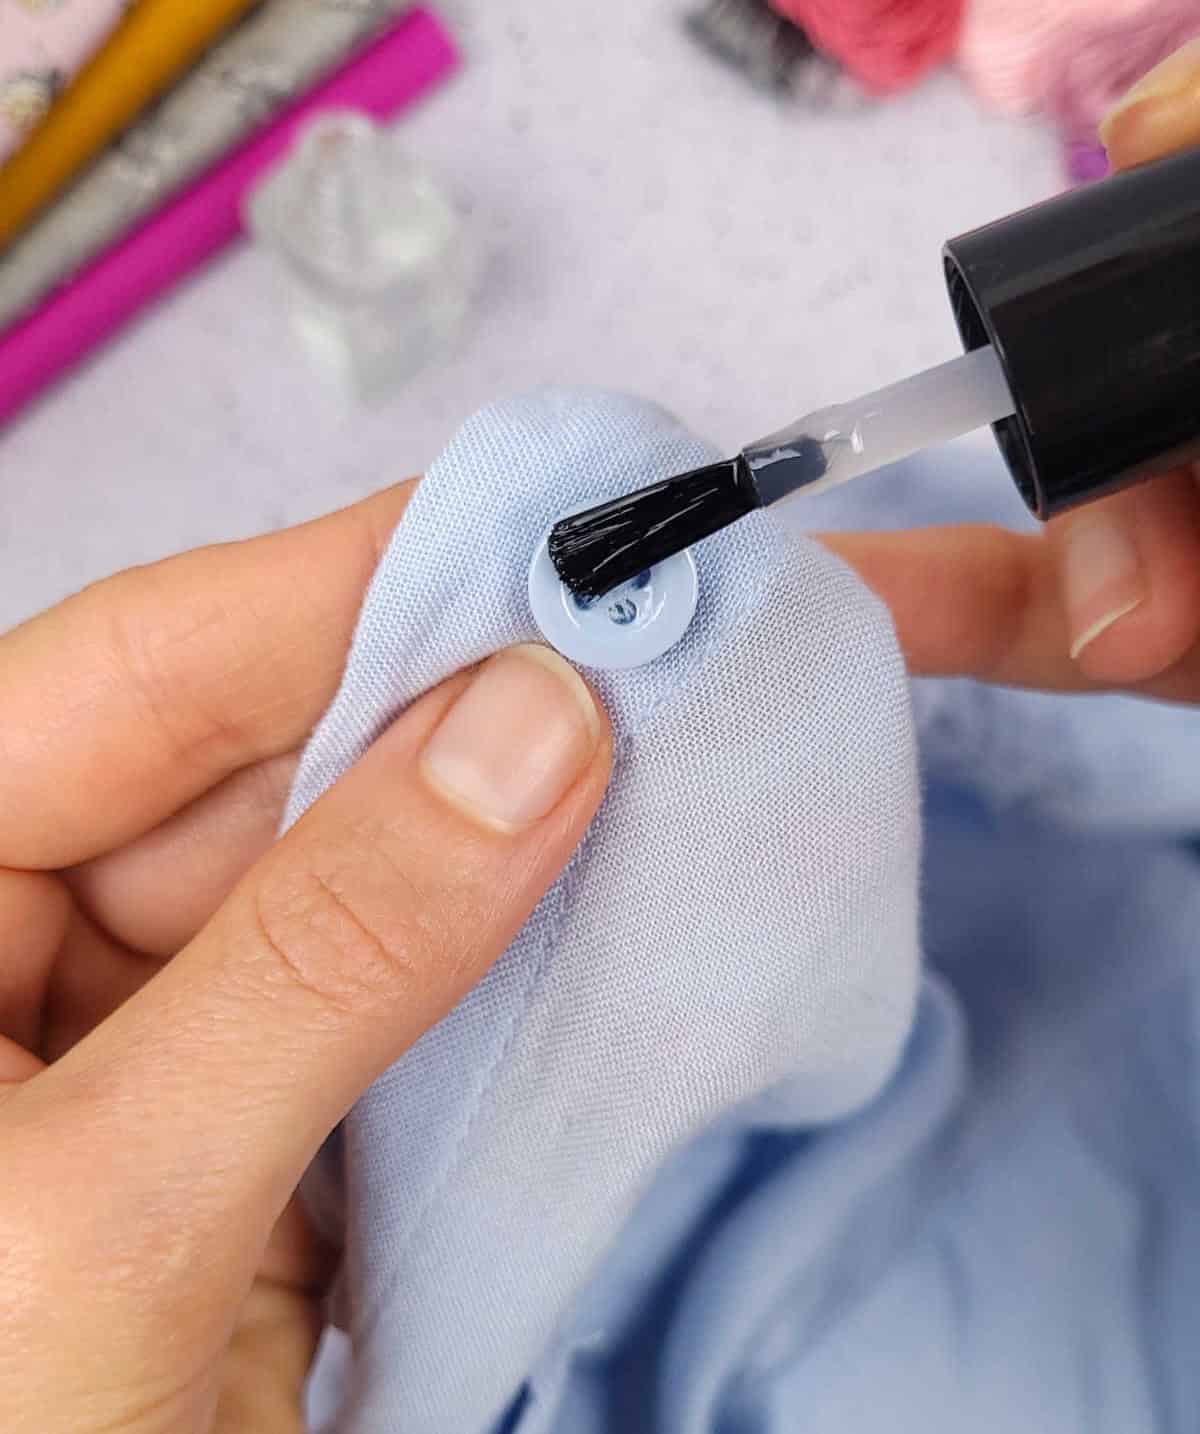
When it comes to securing threads in place using clear nail polish, it’s crucial to exercise caution. A thin layer or two applied directly onto the thread can effectively prevent fraying and keep the area clean. However, the key to success lies in where you apply the polish. If used strategically over a button thread, this hack can significantly extend the lifespan of that fastener.
On the other hand, applying it directly to fabric could lead to unintended consequences – such as damage or discoloration when the polish hardens – so it’s essential to carefully consider your approach and avoid any potential pitfalls.
Start Your Sewing Without a Knot

If you’re tired of wrestling with the pesky first knot or simply dislike the messy tangle of thread at the back of your fabric, there’s an easy way to bypass it. To get started sewing without the hassle of the initial knot, begin by folding your thread in half and then looping both ends through the eye of the needle. As you insert the needle into your fabric, you’ll notice a looped end. Simply pull the needle through the loop, give it a gentle tug, and voila!
You’ll have a neatly secured knot without the frustration of wrestling with that first pesky knot.
Prevent Fraying When Threading Needles
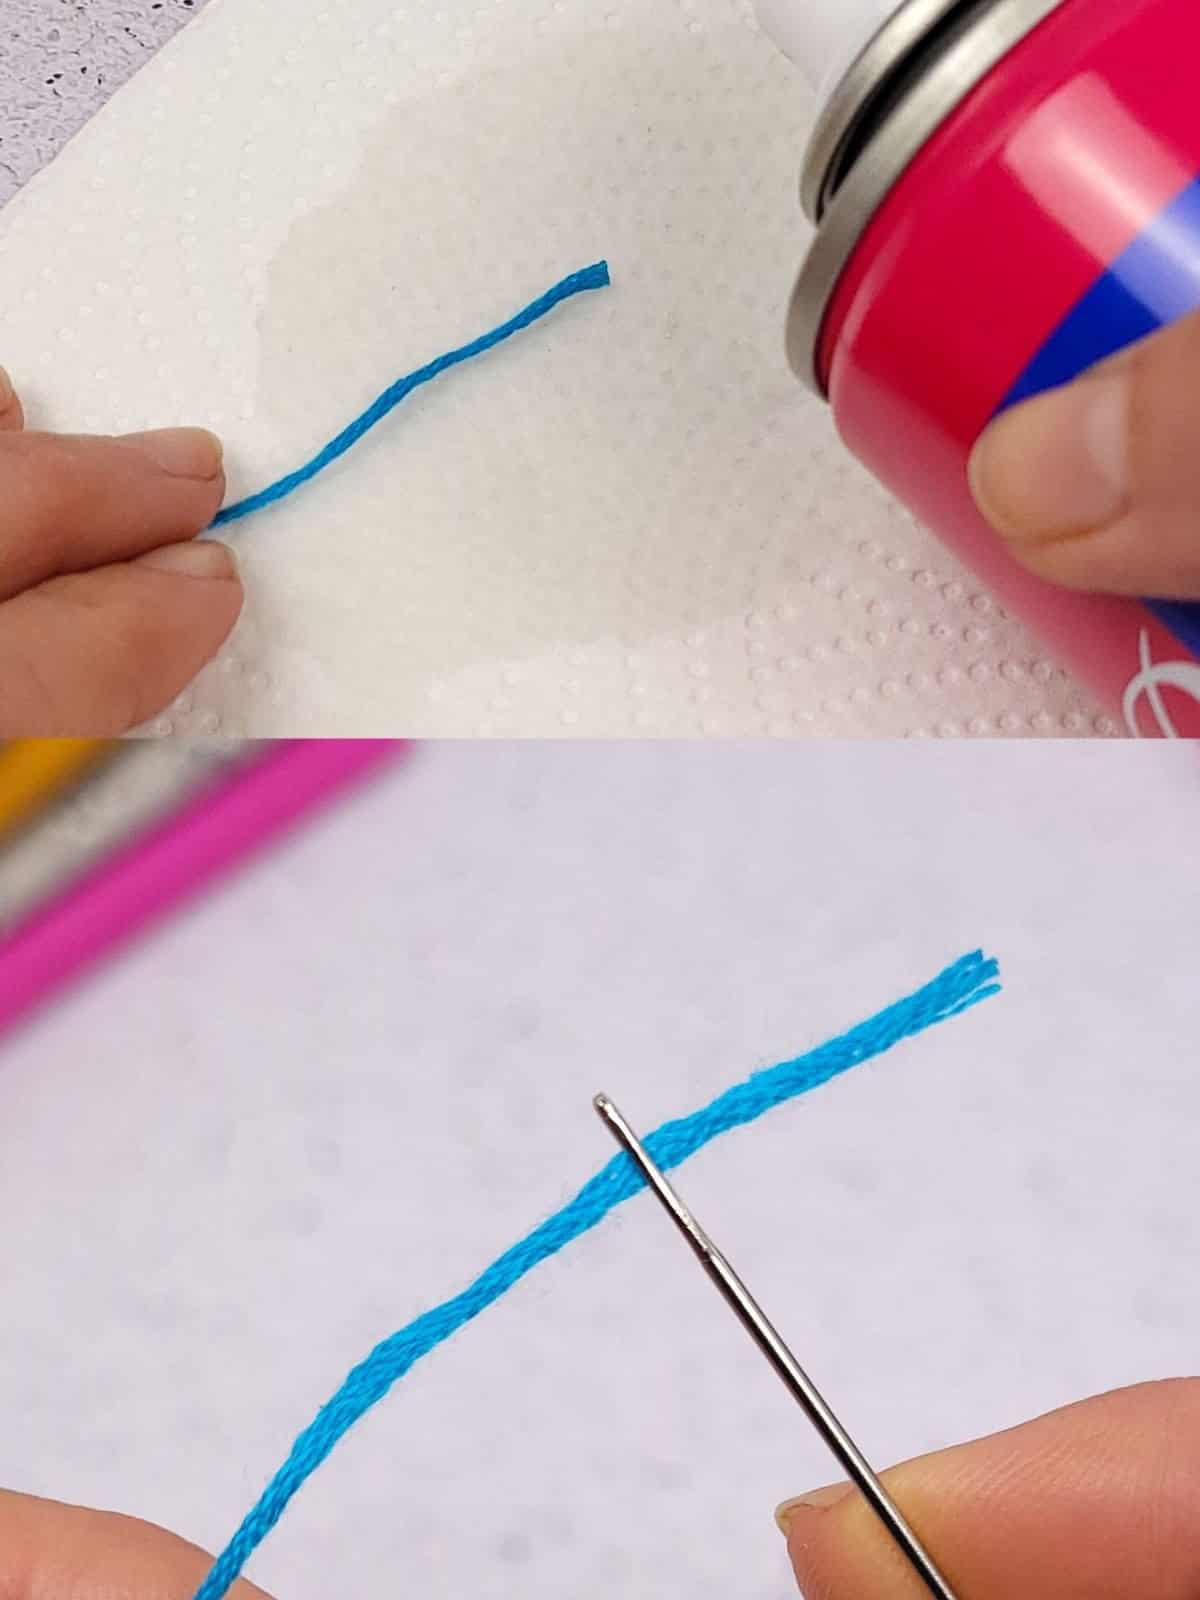
The arduous process of preparing for sewing is often plagued by seemingly insignificant yet crucial steps. For many, threading a needle can be an exercise in frustration, particularly when it comes to keeping the thread from fraying. One common solution involves applying a setting agent to prevent this issue. A simple hairspray or beeswax coating can work wonders in reducing thread splintering and making the process much more efficient.
By taking a few extra moments to treat your thread ends, you’ll be well on your way to minimizing the hassle associated with needle threading and maximizing your sewing time.
Create a Perfect Ruffle on a Shirt
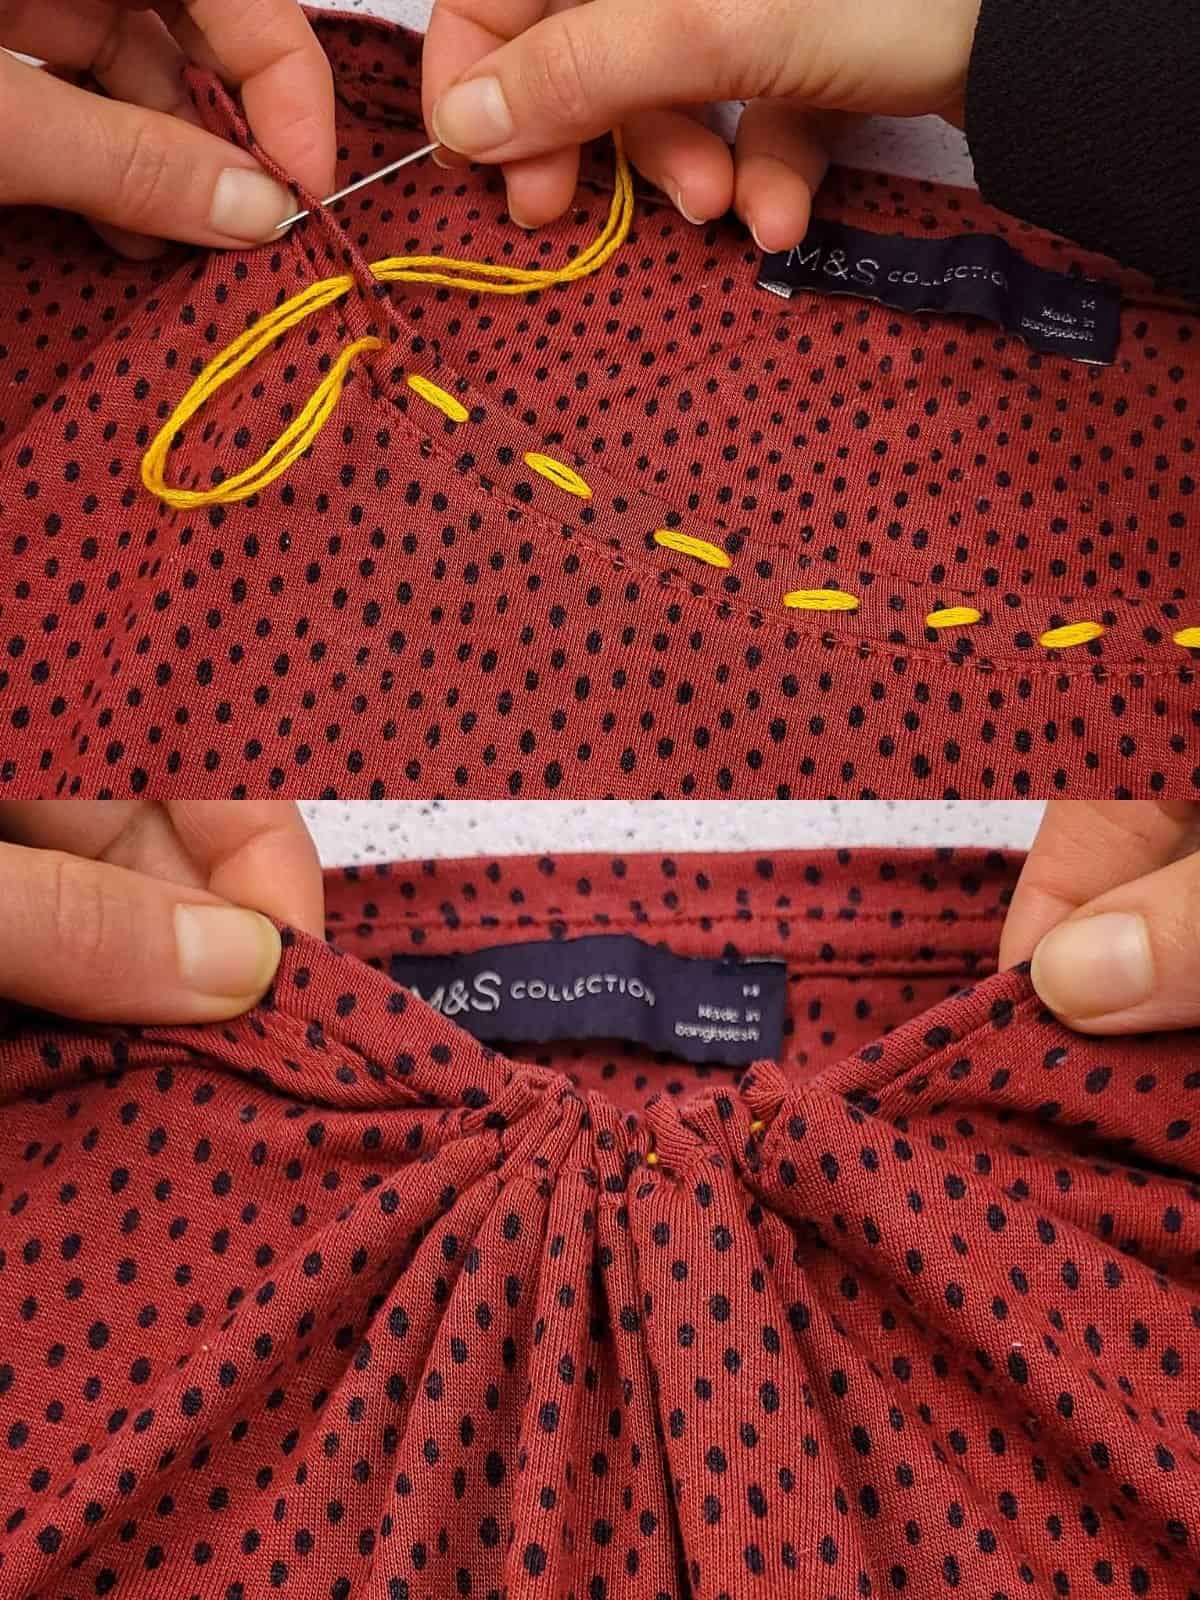
There’s an undeniable charm to ruffles that makes them a go-to solution when revamping an unassuming blouse. With minimal effort, you can breathe new life into an old favorite by simply bunching up the fabric around the neckline using just a needle and thread. The resulting pleats or ruffles add a playful touch that instantly elevates the overall look.
Next time you’re looking to give your wardrobe a boost, consider giving ruffles a try – pair it with a pencil skirt and you’ve got a chic work outfit in the making.
Make Sleeves Longer
The perpetual frustration of a sleeve riding up your wrist is all too familiar. It’s a common issue when the sleeve is just a tad too short. But fear not! A simple hack can breathe new life into your shirt and give you the extra length you crave. By repurposing fabric scraps, you can create a trendy border that adds visual interest to your outfit. To get started, take precise measurements of your sleeve’s circumference and cut out a strip of fabric to match.
Next, recall the clever disappearing hem stitch you learned earlier and apply it here to seamlessly attach the new fabric to your shirt.
Ruffle Your Sleeves

When it comes to sleeves that are too loose or boring, there’s a clever trick to add some visual interest without altering the overall design. Rather than attaching a new piece of ruffled fabric, you can simply use a needle and thread to create a knot that gathers the fabric around it. This technique not only adds a decorative touch but also adjusts the sleeve’s volume to a more flattering fit.
To achieve this look, start by inserting your needle into the fabric at a chosen point, then pull the thread gently to create a small ruffle. The result is a neat and tidy way to add some texture and visual appeal to your sleeves without making any major alterations.
Sew with Finger as a Stitch Guide
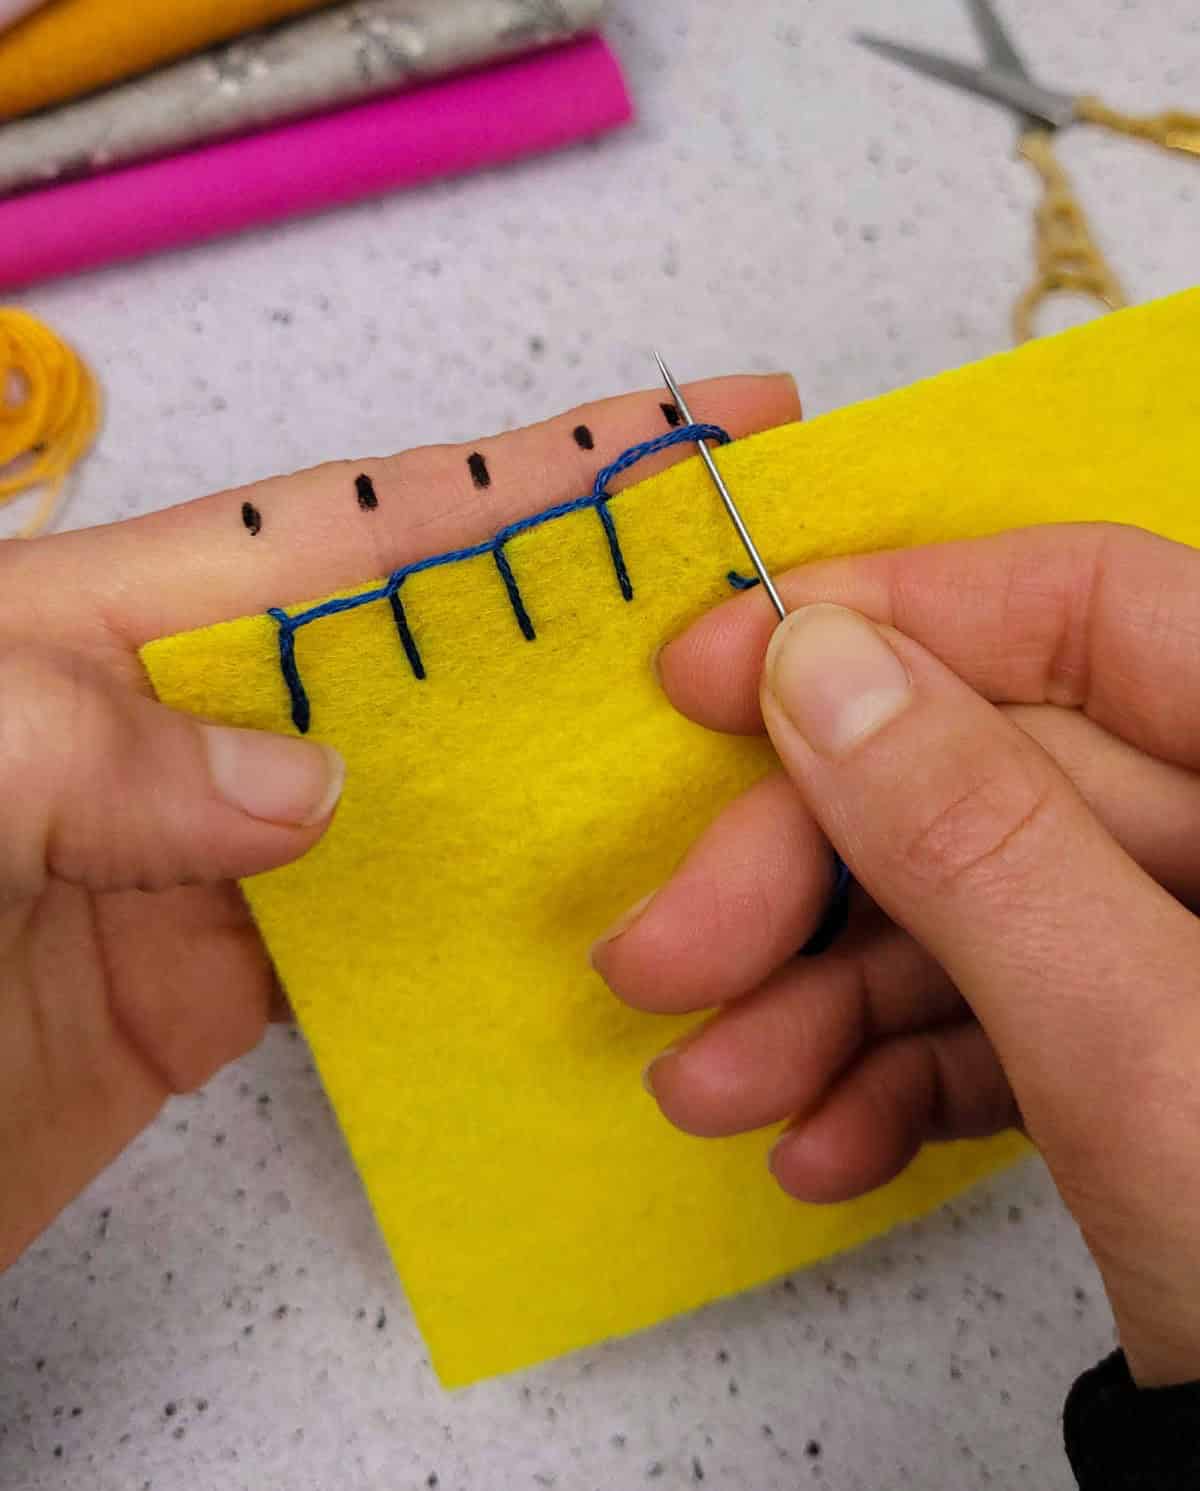
When it comes to achieving consistent stitch length and distance, many seamstresses face a common challenge. To overcome this hurdle, it’s essential to develop a reliable method for spacing out your stitches evenly. This small detail can greatly impact the overall finish and quality of your garments.
To get started, simply mark three to four points on the outer side of your non-dominant index finger using a black marker (make sure it’s not permanent!).
As you sew, use this visual guide to help you maintain even spacing between your stitches. This simple trick can make all the difference in ensuring a professional-looking finish.
Sharpen Scissors with Aluminum Foil
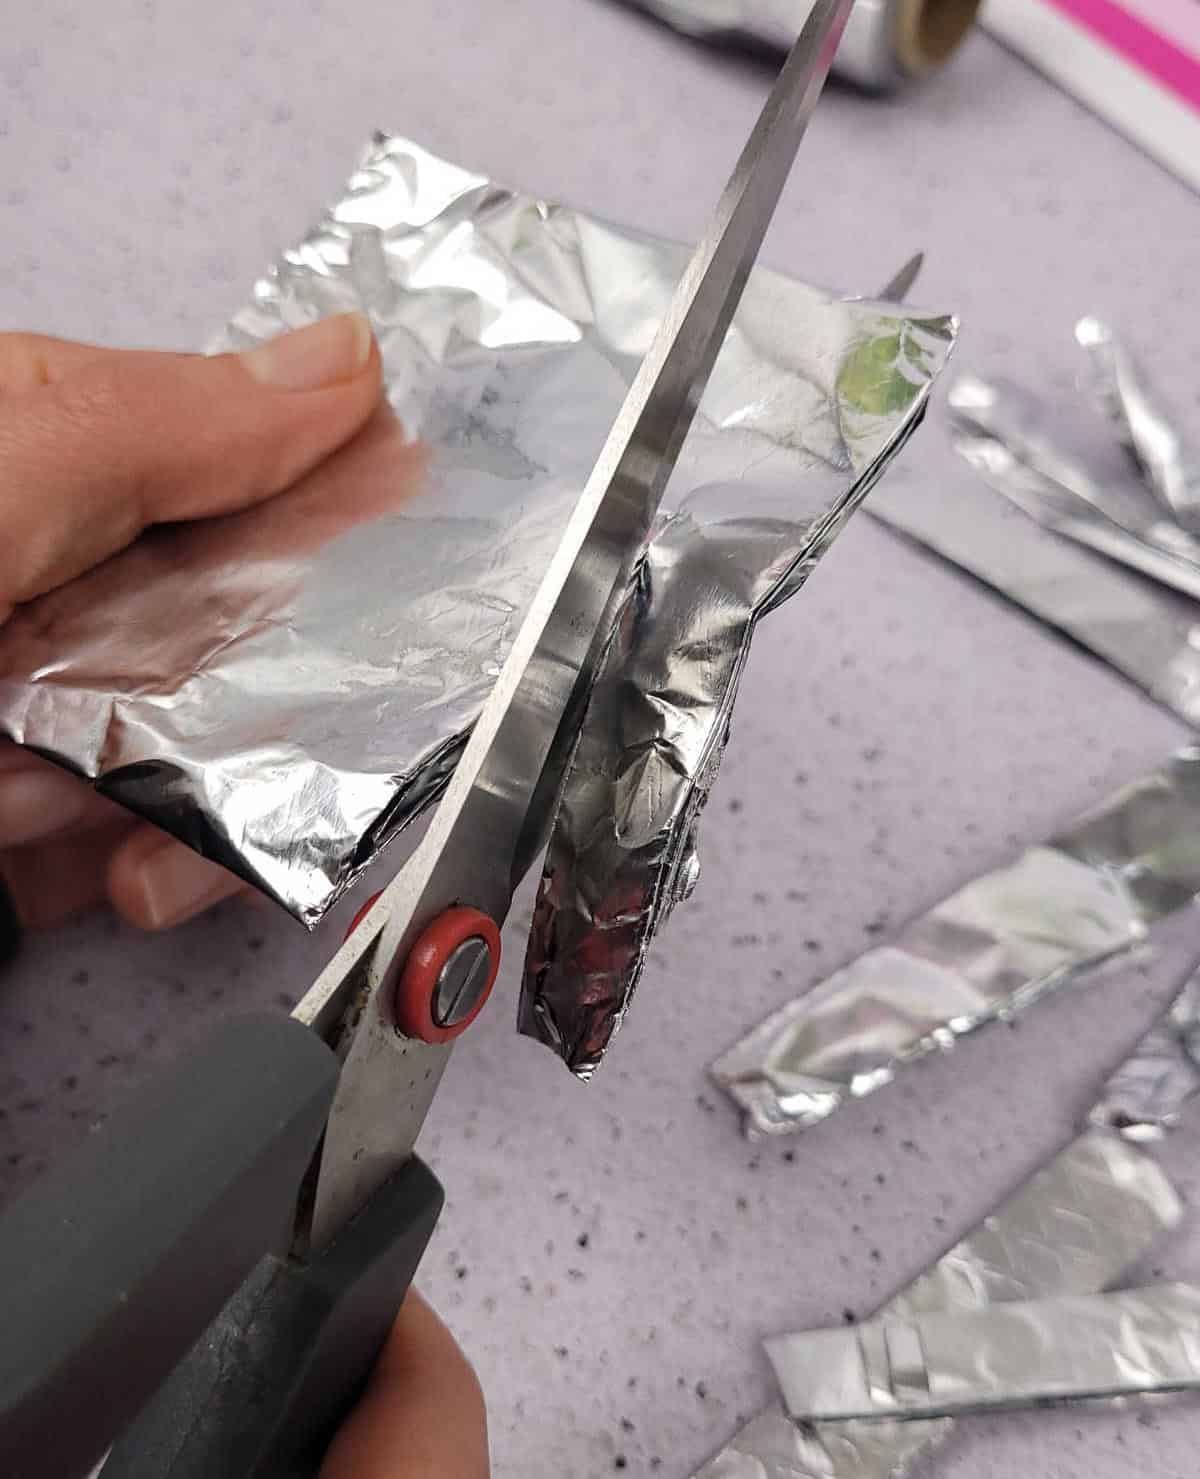
Sharpening your scissors doesn’t have to involve a trip to the store for new blades. A simple and effective hack is to use aluminum foil to not only sharpen but also improve their performance. To do this, simply grab a length of foil and fold it several times to create a thick surface area. Then, use your scissors to cut through the folded foil, effectively sharpening the blades and removing any dirt or grime that may be affecting their cutting ability.
This hack not only saves you money but also gives your scissors a new lease on life.
Use Washi Tape as a Sewing Guide
When working on a sewing project, maintaining straight lines can be a challenge. Fortunately, a simple solution exists. By utilizing washi tape, you can achieve precise stitching without exerting excessive effort. The end result is a polished appearance that requires minimal additional work.
Use Painter’s Tape to Help Sew Straight
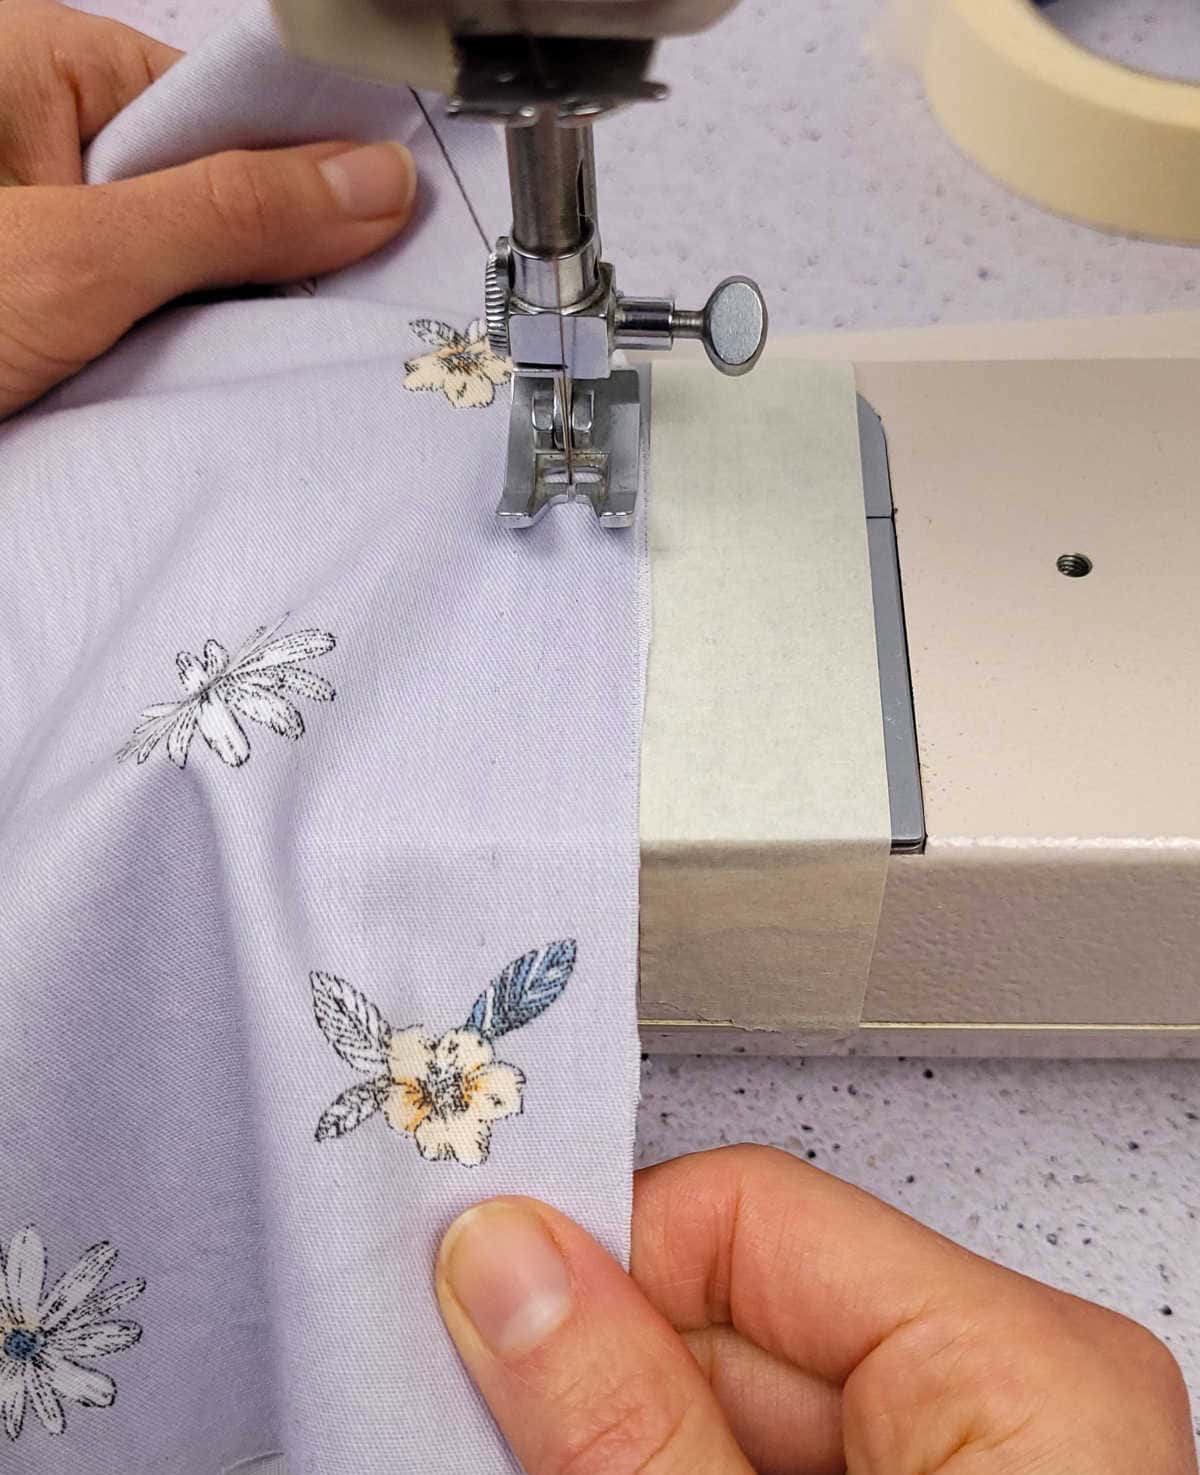
When it comes to sewing a straight line, a ruler or measuring tape can be helpful tools. However, keeping them in place as you maneuver the sewing machine can be a challenge. That’s why I’d like to introduce you to a clever hack that makes sewing a breeze. Simply take a strip of painter’s tape and apply it along the desired sewing line, ensuring the edges are precisely aligned and straight.
Once the tape is in place, simply line up your fabric against the edge of the tape and start sewing for perfectly straight stitches all the way! This simple trick can save you time and frustration in the long run, so give it a try and see the difference it makes.
Easily Shorten the Zipper
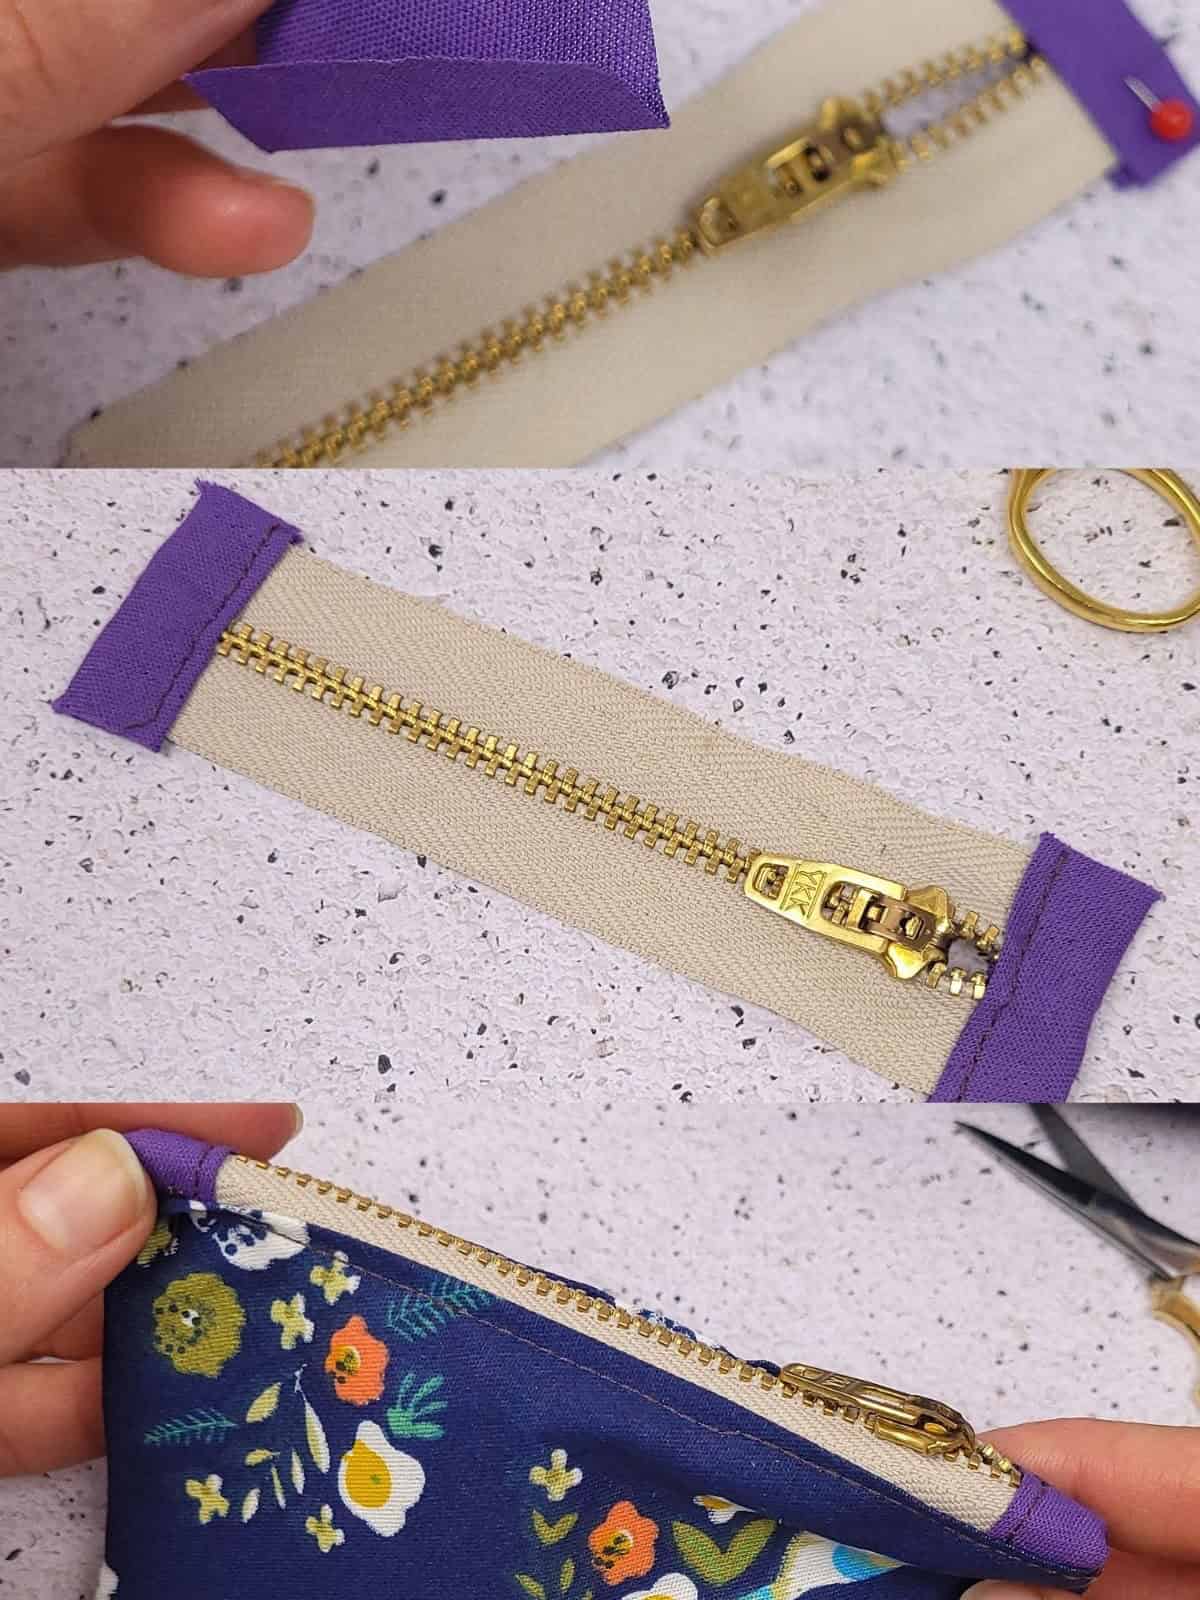
Transforming a zipper’s length can be an intimidating prospect, but with the right tools and a simple technique, the process becomes surprisingly straightforward. To begin, carefully measure the desired zipper length and extend that measurement by about an inch. Next, remove the teeth from your scissors up to this marked point. With the teeth safely stowed, use the scissor blades to snip away the fabric attached to the zipper, effectively shortening its overall length.
The next step involves sewing the newly trimmed ends together and discreetly tucking them into their final resting place within your pouch or garment, bringing your zipper modification project to a satisfying close.
Use Bar Soap to Help Pins Glide Through the Fabric
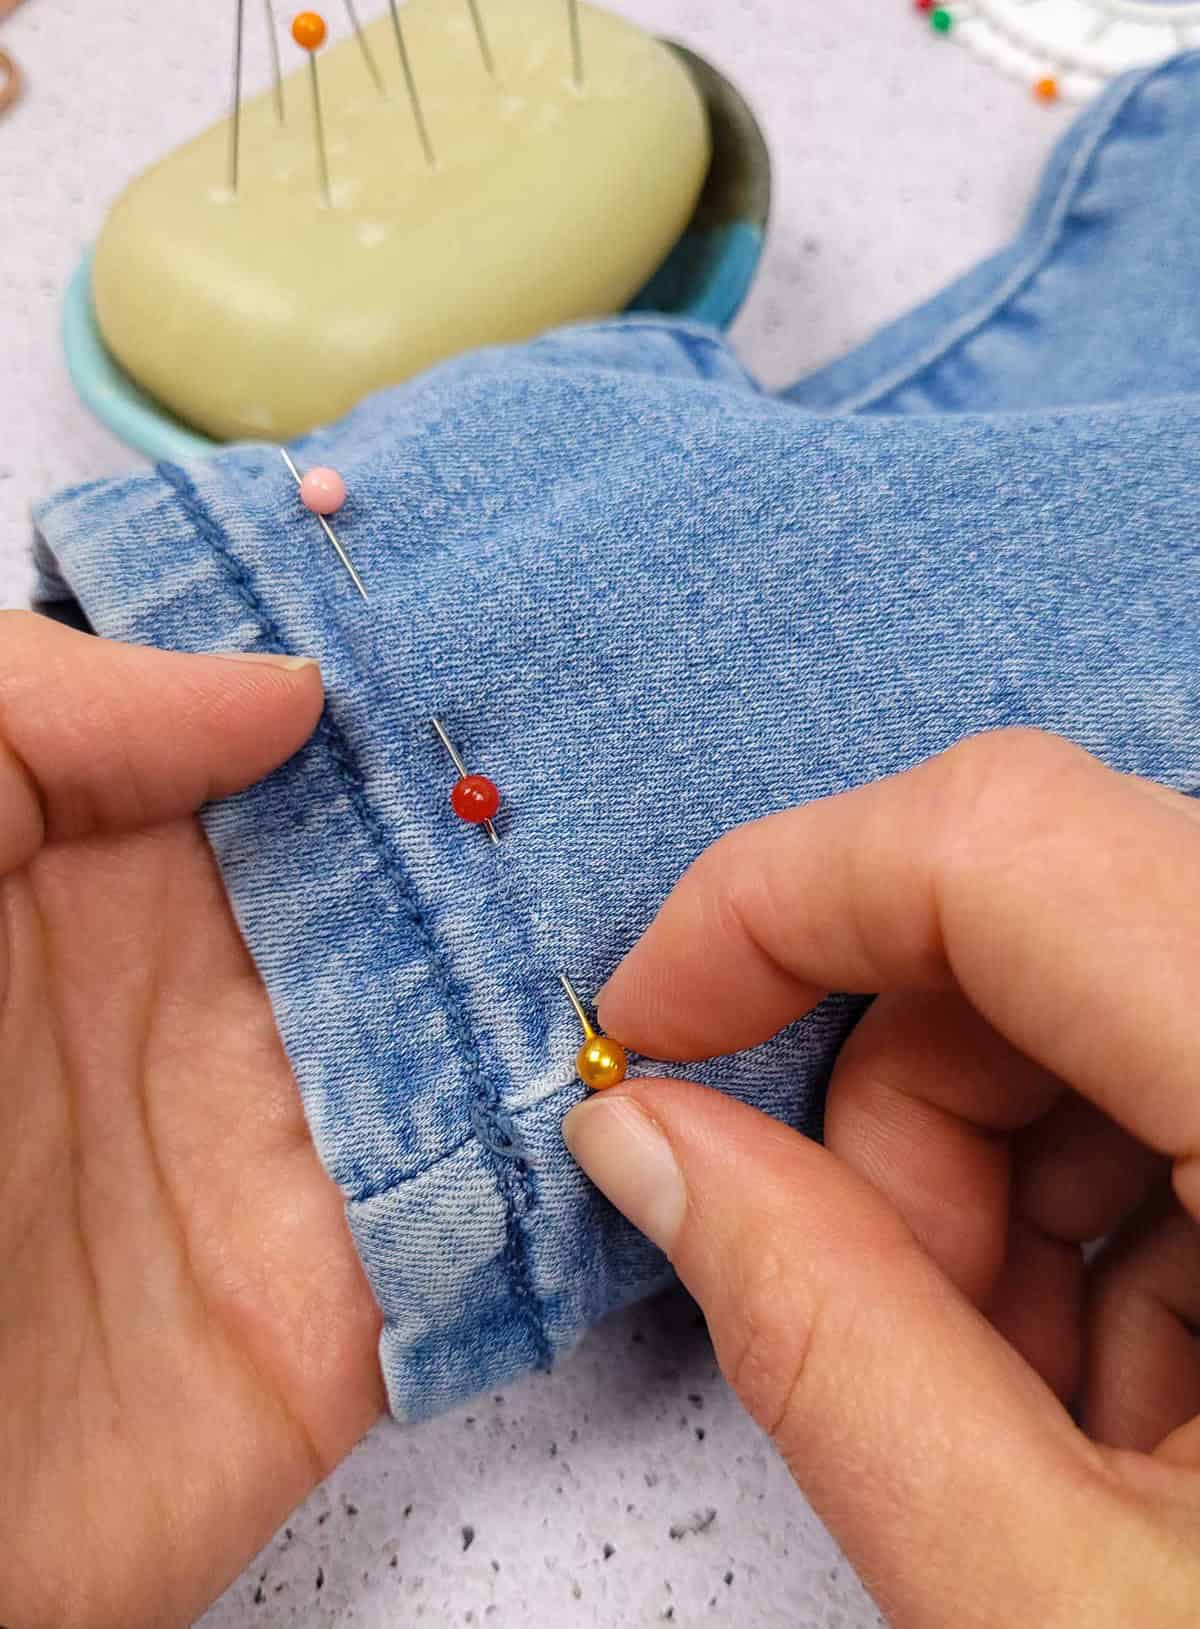
This ingenious hack has left me in awe. Who would have thought that a simple bar of soap could be so versatile when it comes to sewing? The soap’s unique properties make it an invaluable asset in the sewing process. Not only can it serve as a makeshift pin cushion, but it also provides an added benefit – making it easier for pins to penetrate thicker fabrics with ease.
The soap’s coating on the sharp tip of the pin allows it to glide effortlessly through even the coarsest and thickest of materials, streamlining insertion and removal. This hack is a game-changer for any sewer looking to simplify their process.
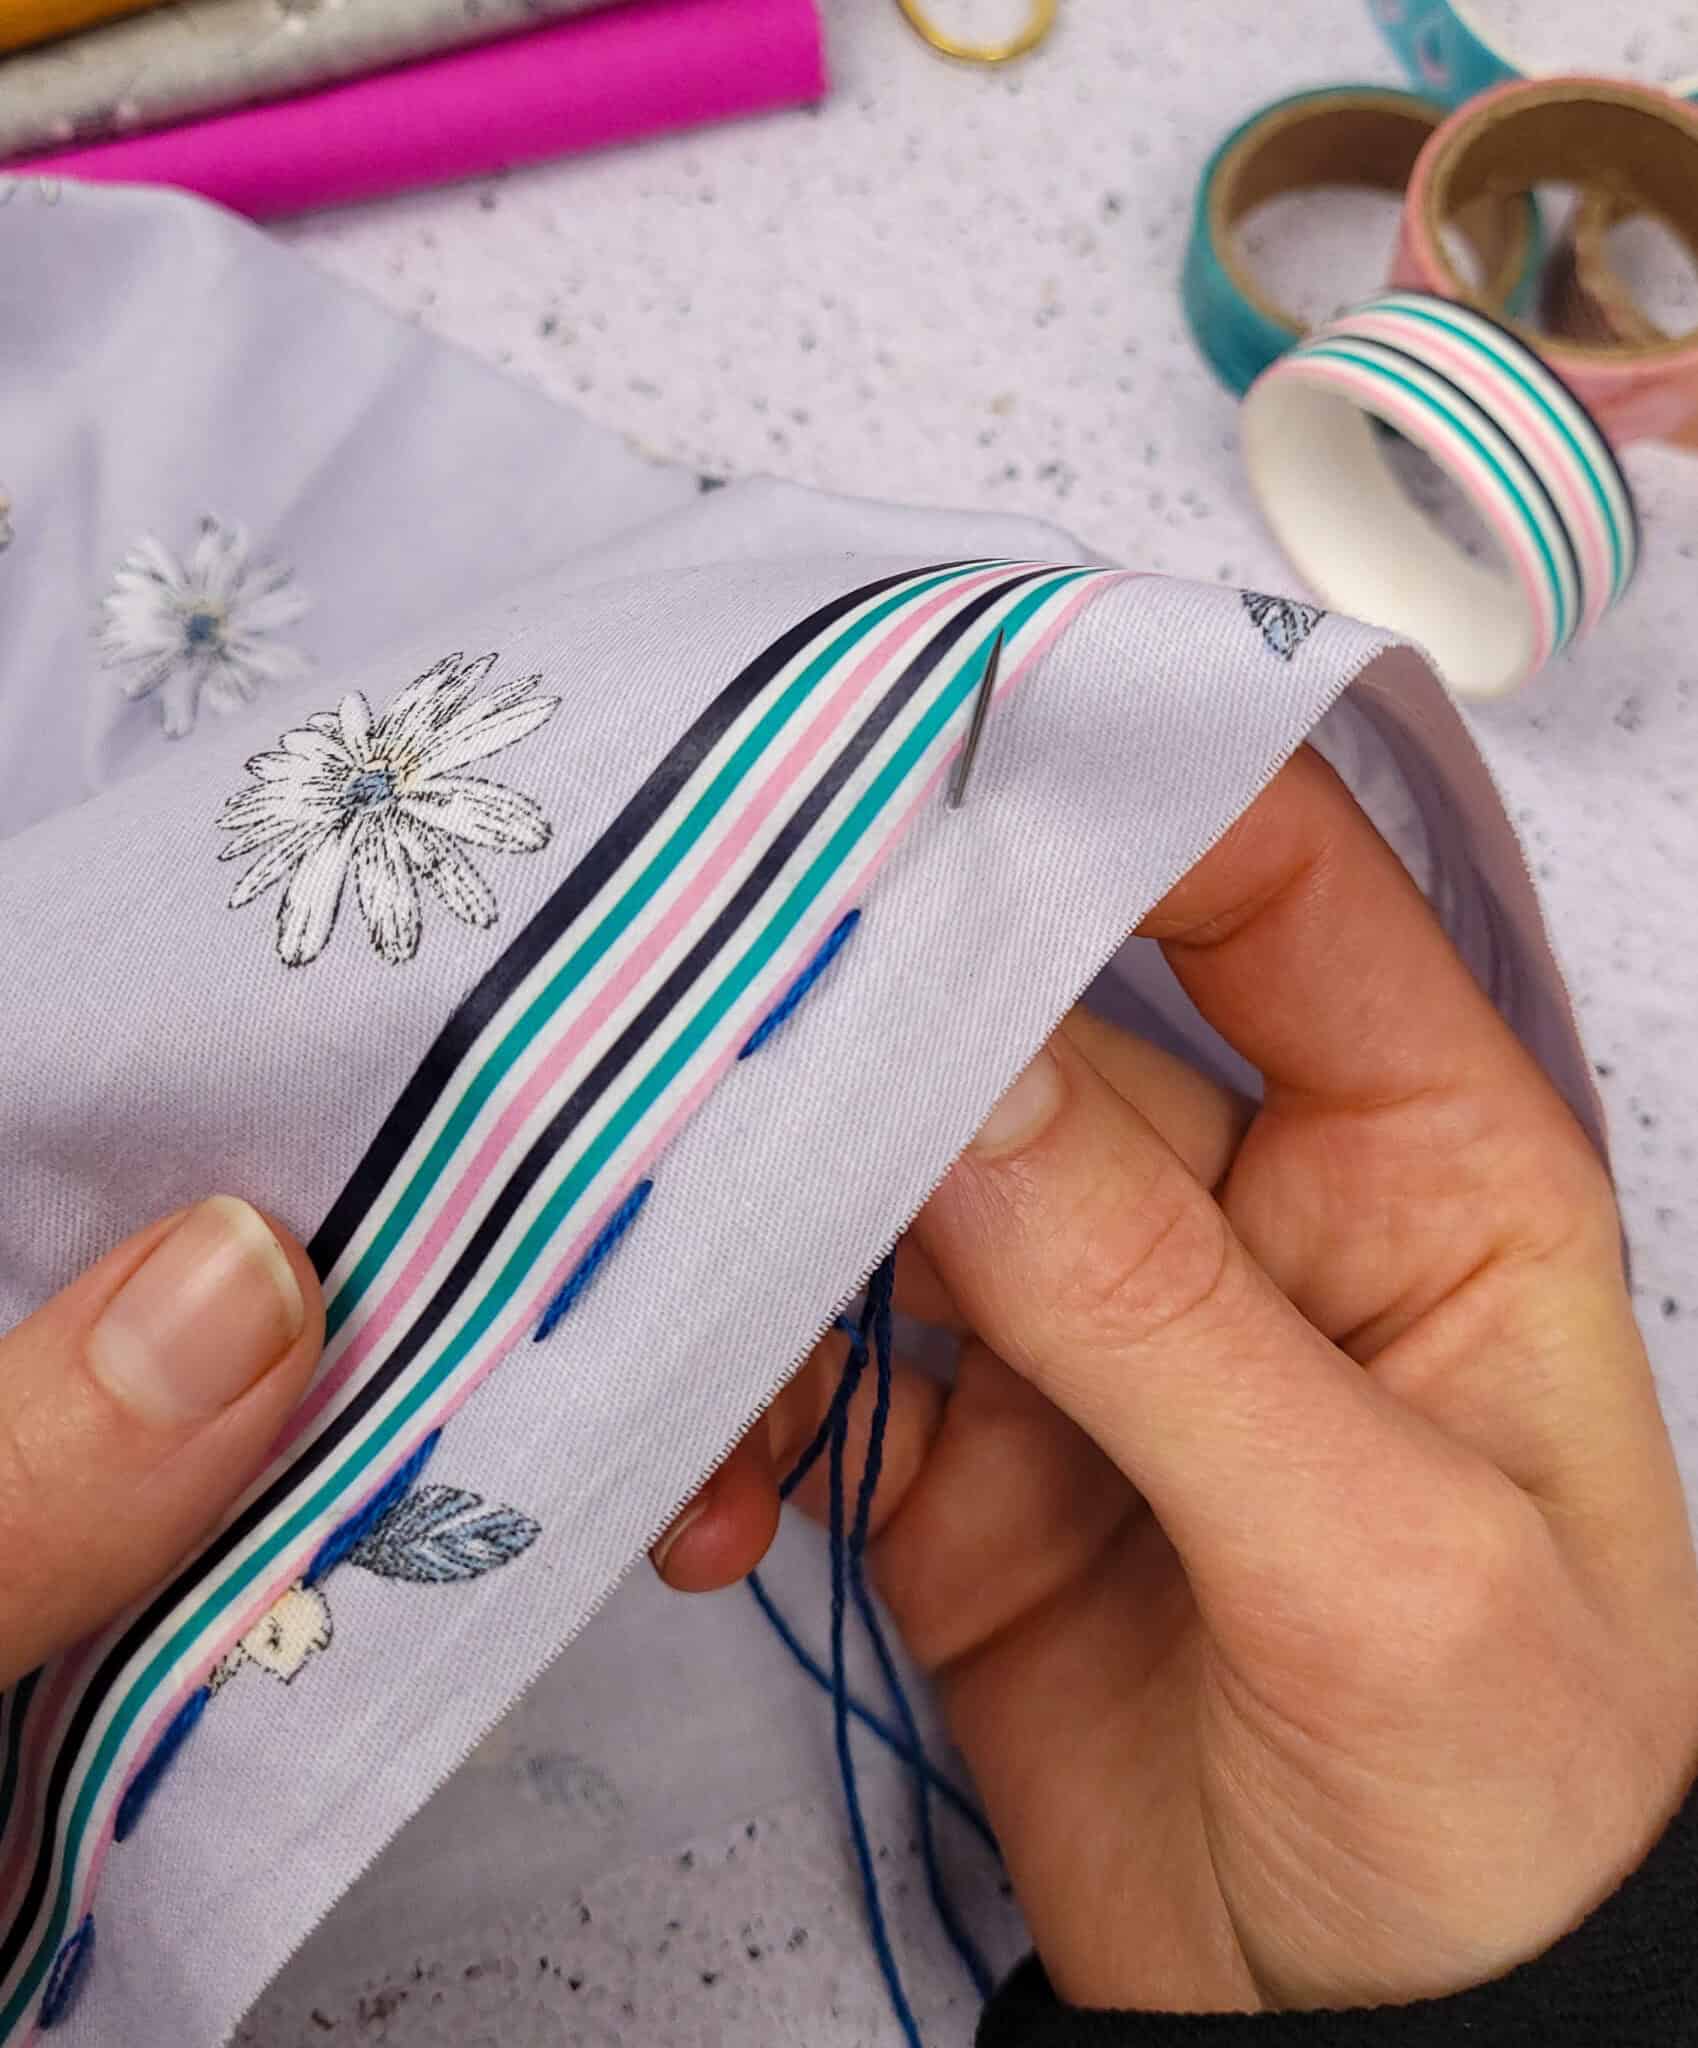
Hem Jeans with a Pattern
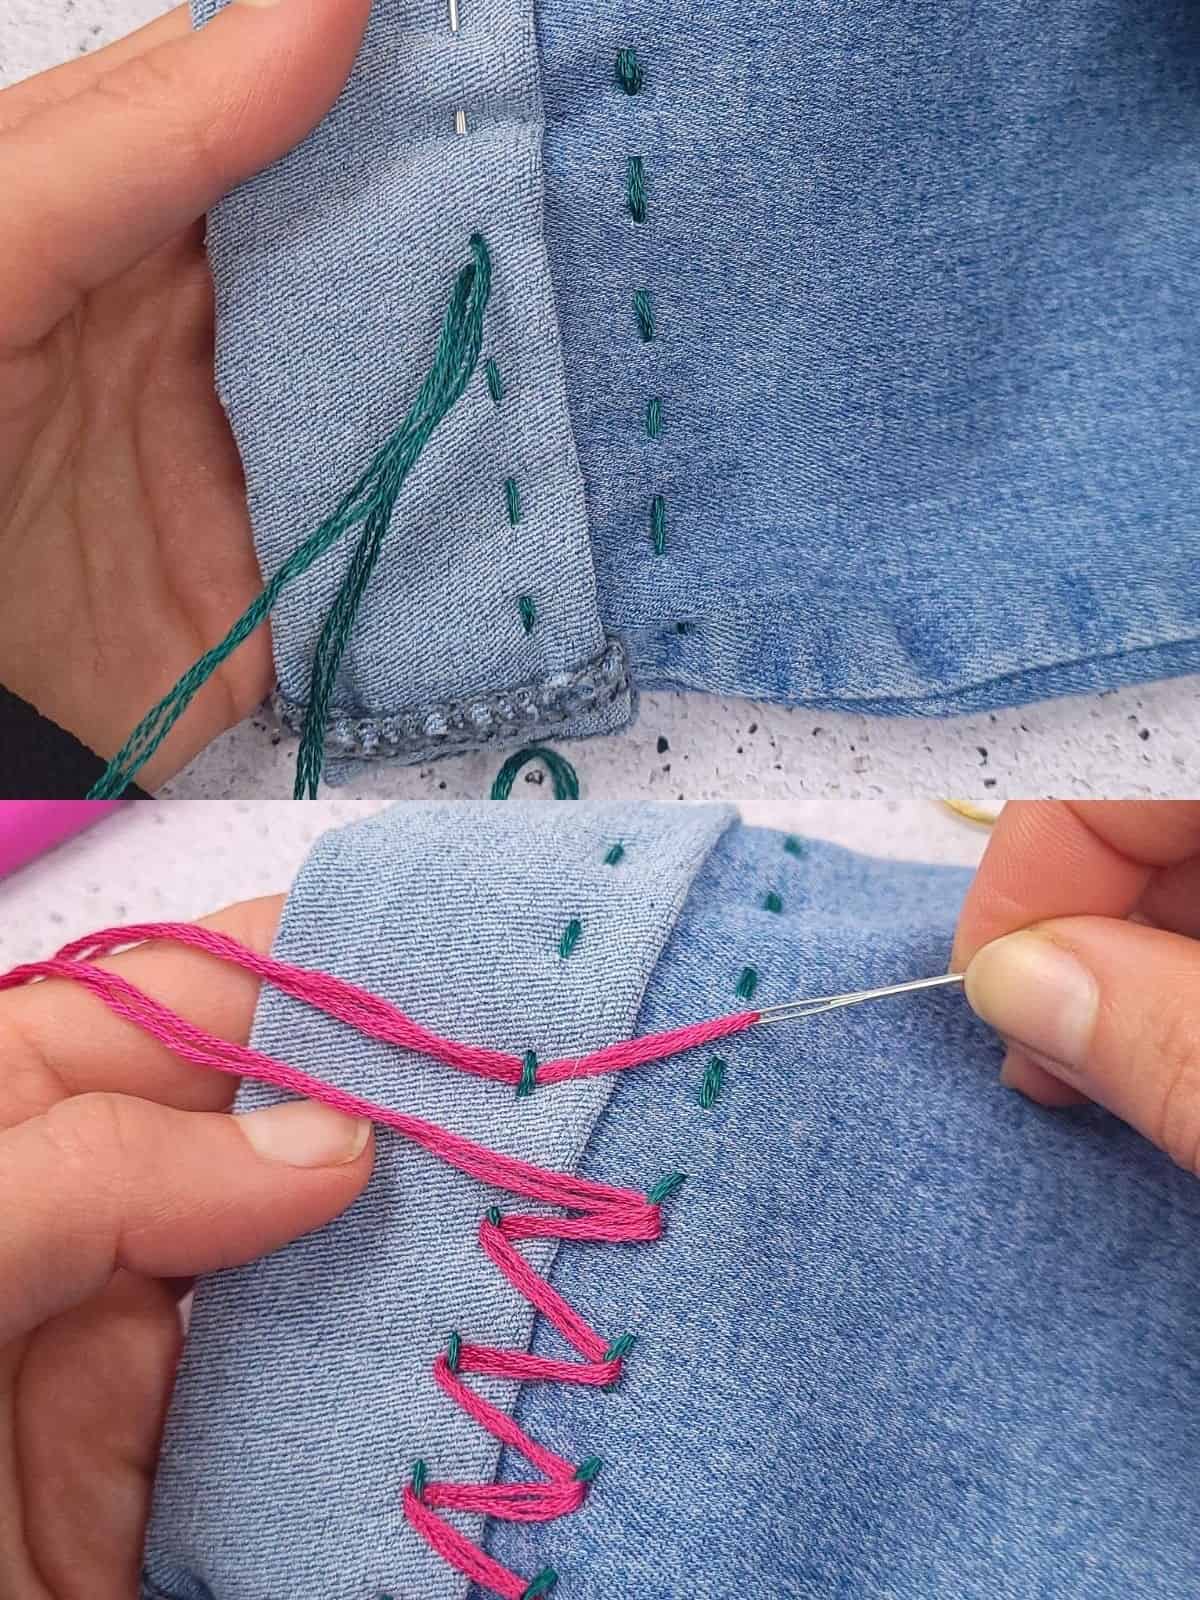
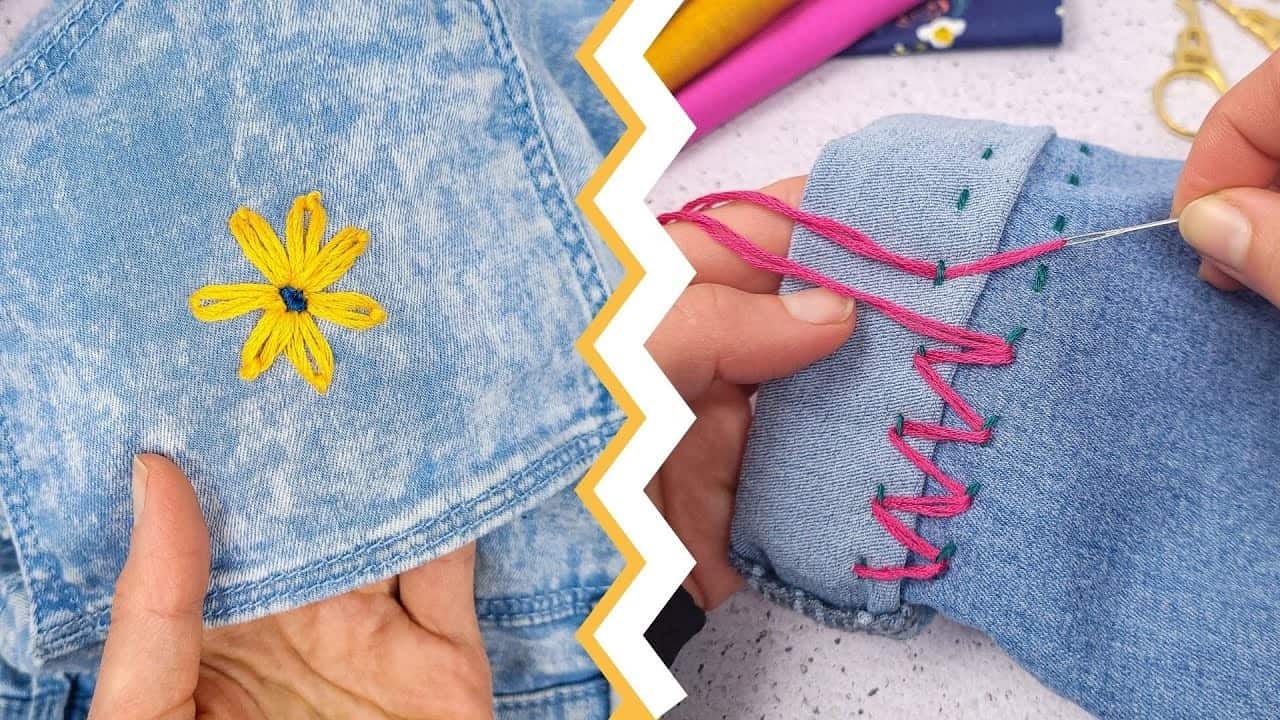
Take a departure from the invisible stitching approach by embracing creative expression. If you don’t mind if the thread is visible, consider using contrasting colored thread to add a personalized and quirky touch to your jeans’ hemline. A simple yet effective option is to sew a zig-zag pattern with a laced design all the way across, giving your pants a truly one-of-a-kind look.
Turn T-Shirt into a V-neck
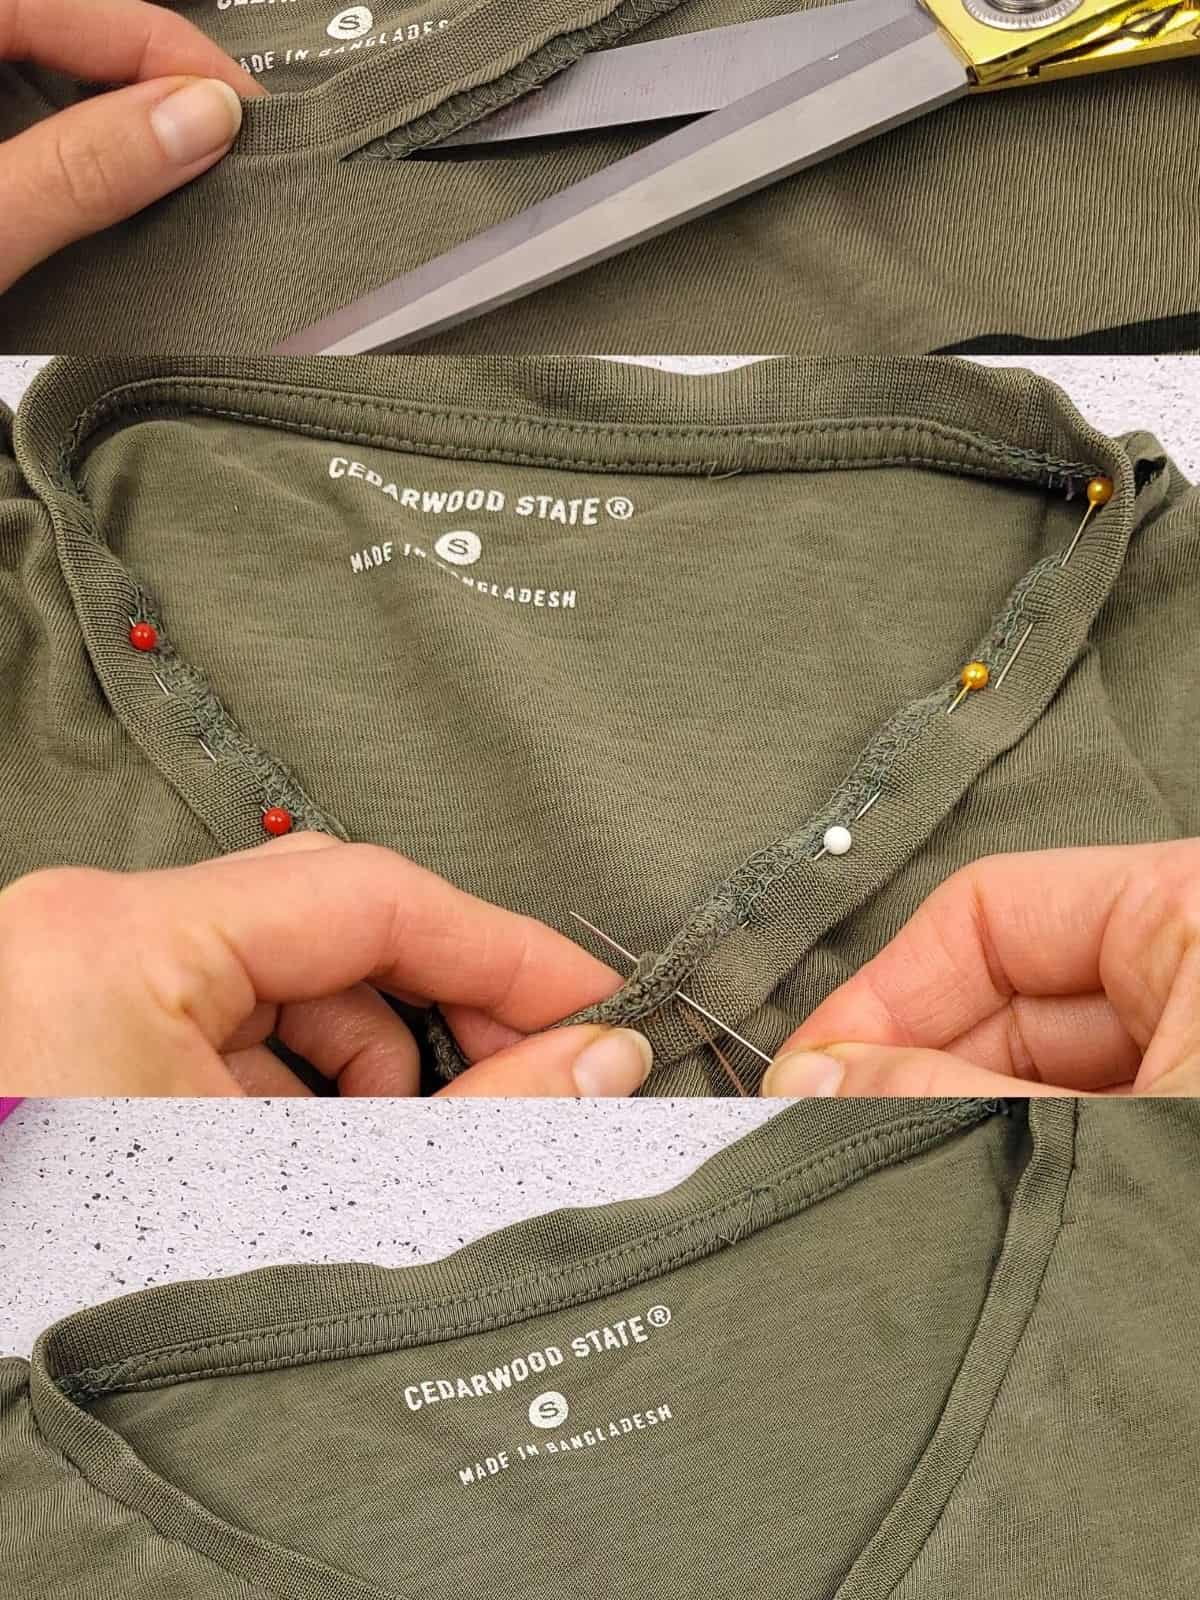
There’s nothing quite like having a stash of old tees lingering in the back of your closet – they’re either begging to be donated or discarded altogether. But, what if you could give them new life instead? By harnessing some clever sewing skills, you can transform those plain old round-neck tees into stylish V-necked ones. The trick is simple: all it takes are a few trusty sewing pins to keep the neckline in place as you sew around it.
Start by gently pulling the neckline back about a centimeter, creating a rough V-shape. Fold the fabric over and press it flat, then insert the pins into the fold. Finally, simply sew along the neckline to transform your tee into a chic V-necked number.
Patch Big Holes in Your Clothes
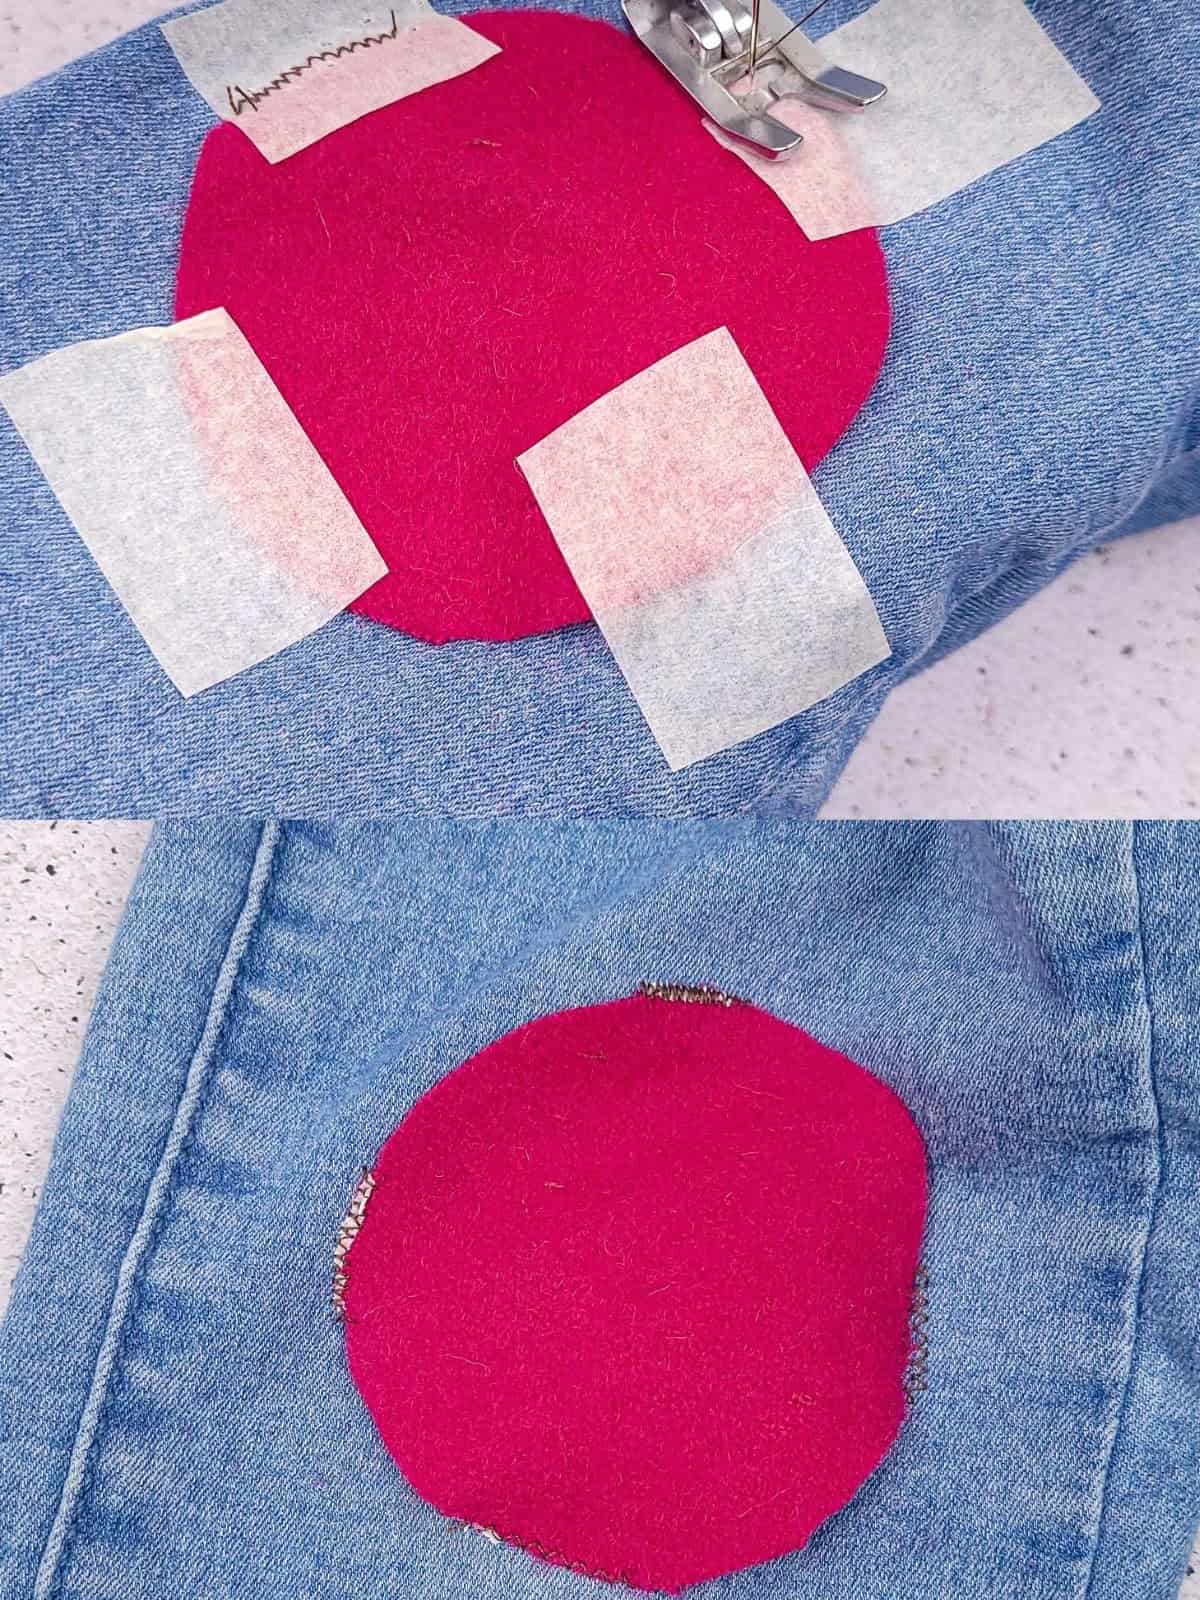
When holes in your clothes are too large for sewing a decorative touch, patches provide a practical solution. Unlike covering holes with an oversized floral embellishment, which would be visually jarring, patches offer a seamless way to mend tears and add a pop of personality to your outfit. By incorporating new colors, textures, and designs through the selection of different fabrics, you can breathe new life into existing clothing.
Feel free to choose from a variety of patch options or repurpose scrap fabric from previous projects to give your garments a unique twist.