While the idea of tie-dye may have originated in the 1960s, its popularity endures to this day. With just a few simple steps and some creativity, anyone can create their own unique and eye-catching designs on their clothing. In fact, the beauty of tie-dye lies in its ability to be tailored to one’s personal style. So, if you’re looking for a fun and easy DIY project that allows you to express yourself through fashion, then look no further than this tutorial.
With tie-dye, you can create shirts that are as vibrant and playful as the summer season itself.
Supplies You’ll Need to Tie Dye a Shirt
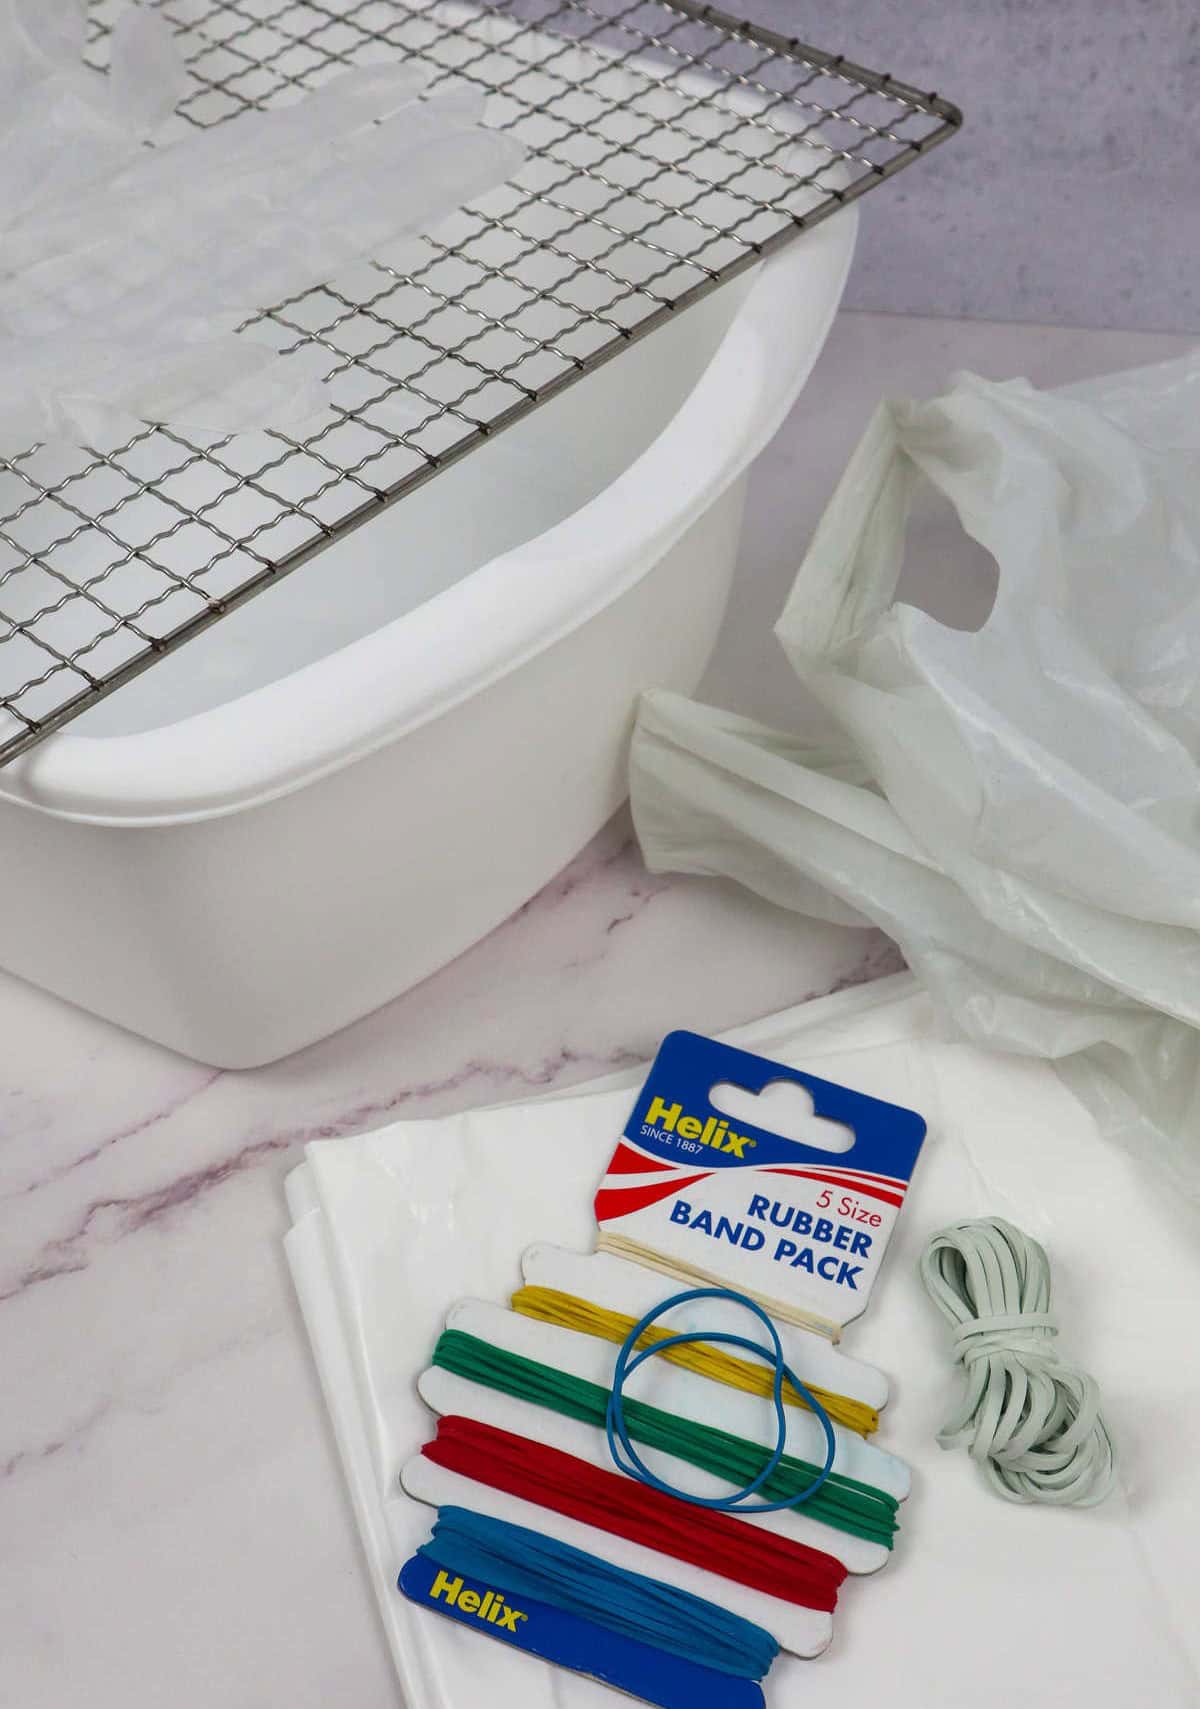
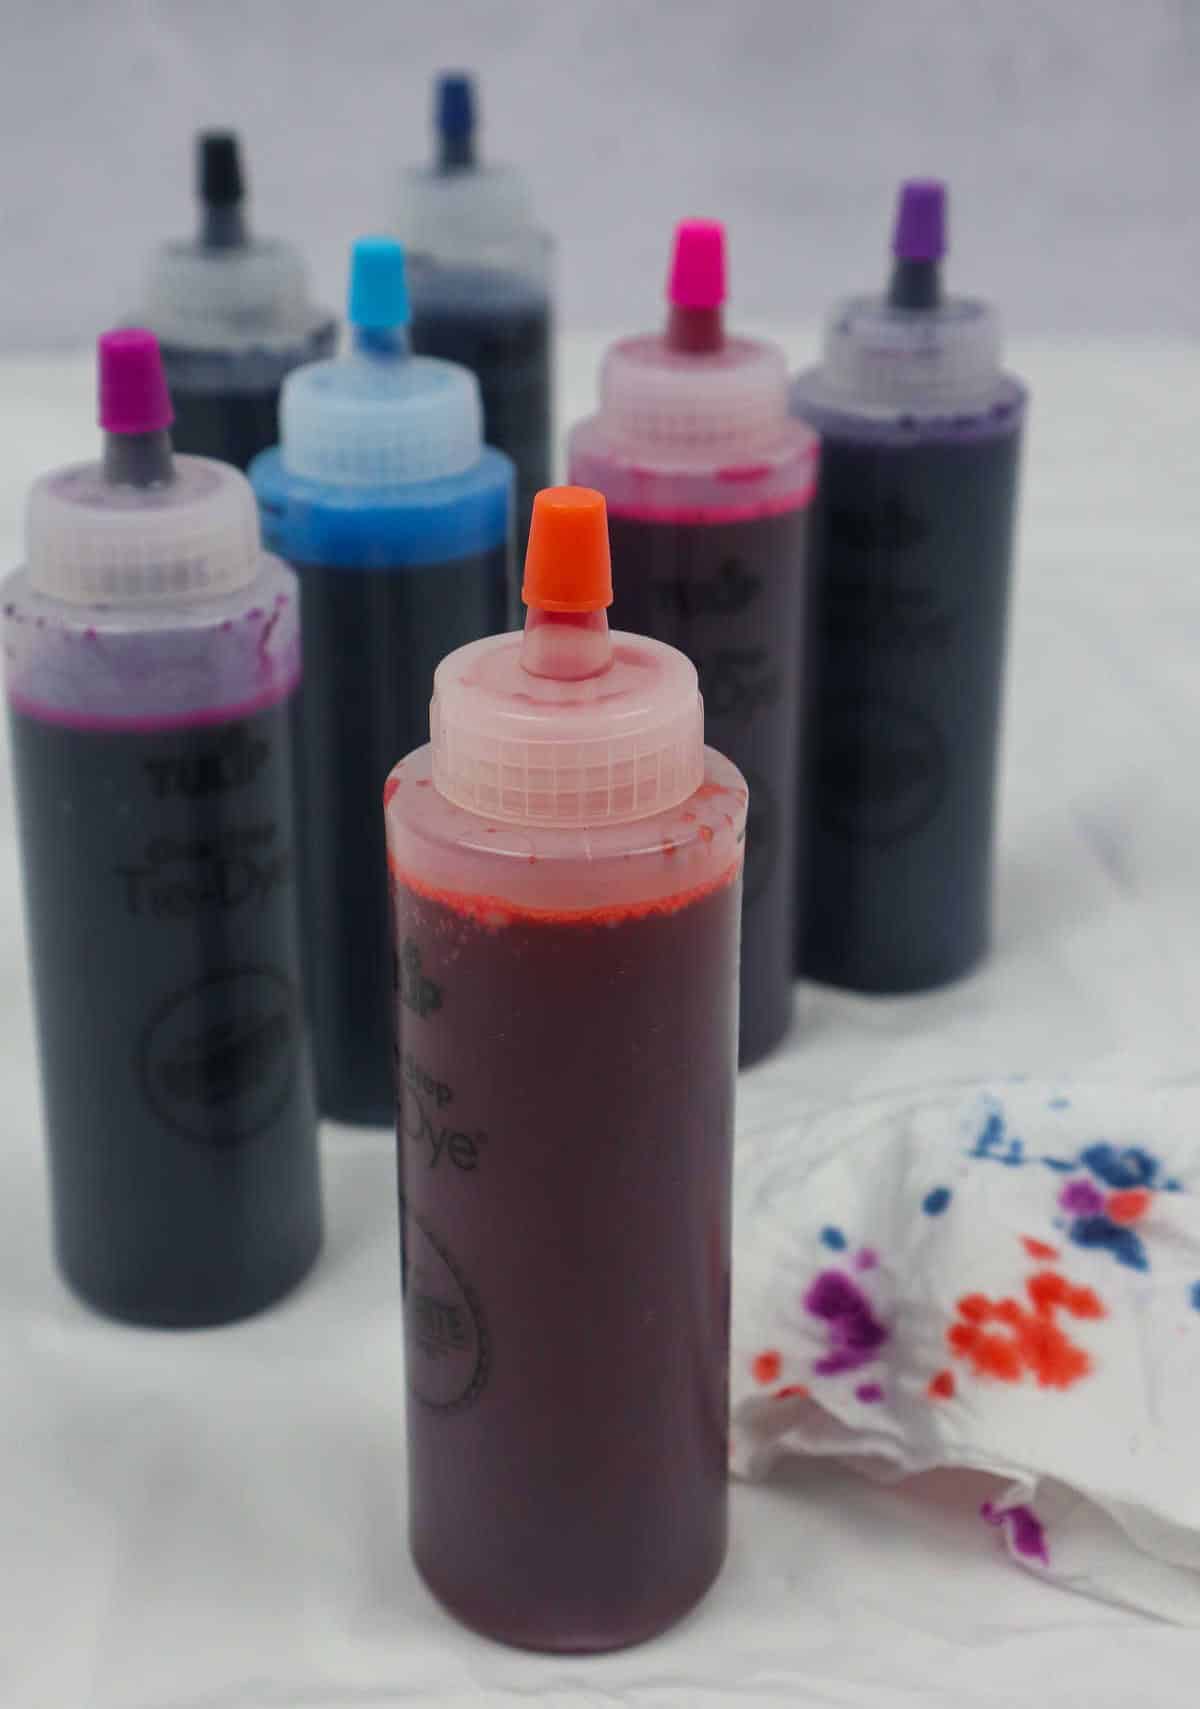
To embark on this creative journey, you’ll need a few essential items. Start by gathering: rubber bands for achieving those signature knots, latex gloves to protect your hands from stains and mess, a plastic dust sheet to contain any spills or over-dyeing, plastic bags for easy clean-up, and an oven rack (if needed) and washing up bowl (if you plan on doing some serious tie-dye experimentation).
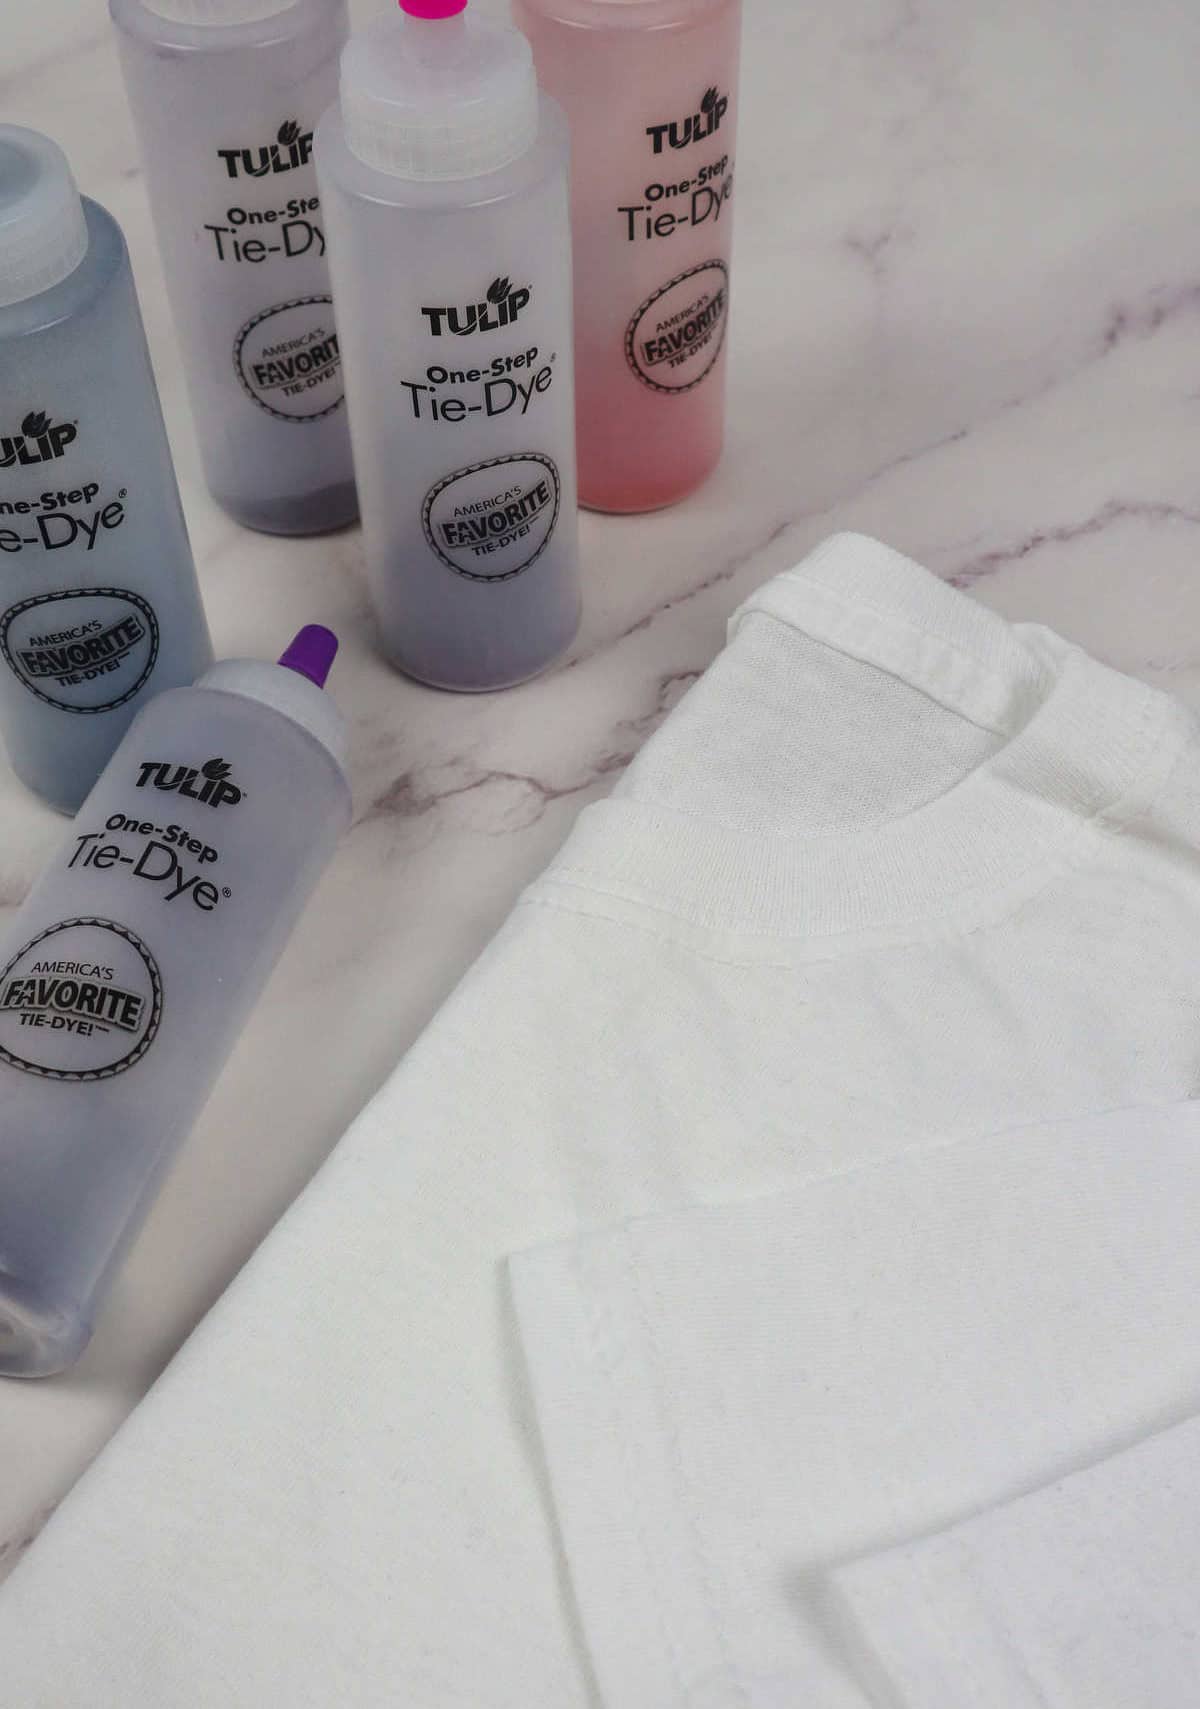
Don’t forget a plain white piece of clothing to test the dye’s effects, as well as a tie dye kit containing all the necessary chemicals and instructions to get started.
How to Tie-Dye T-Shirts
Beyond the classic tie-dye method lies a world of creative possibilities. Each unique technique yields distinct results, making every attempt an exciting adventure. Here are three innovative ways to transform a plain tee into a one-of-a-kind masterpiece: Simply dampening the fabric with cold water beforehand can significantly enhance the dyeing process, allowing for vibrant colors and subtle nuances. This thoughtful step can even evoke the soft, watercolor-inspired hues you desire.
Method 1
Step 1
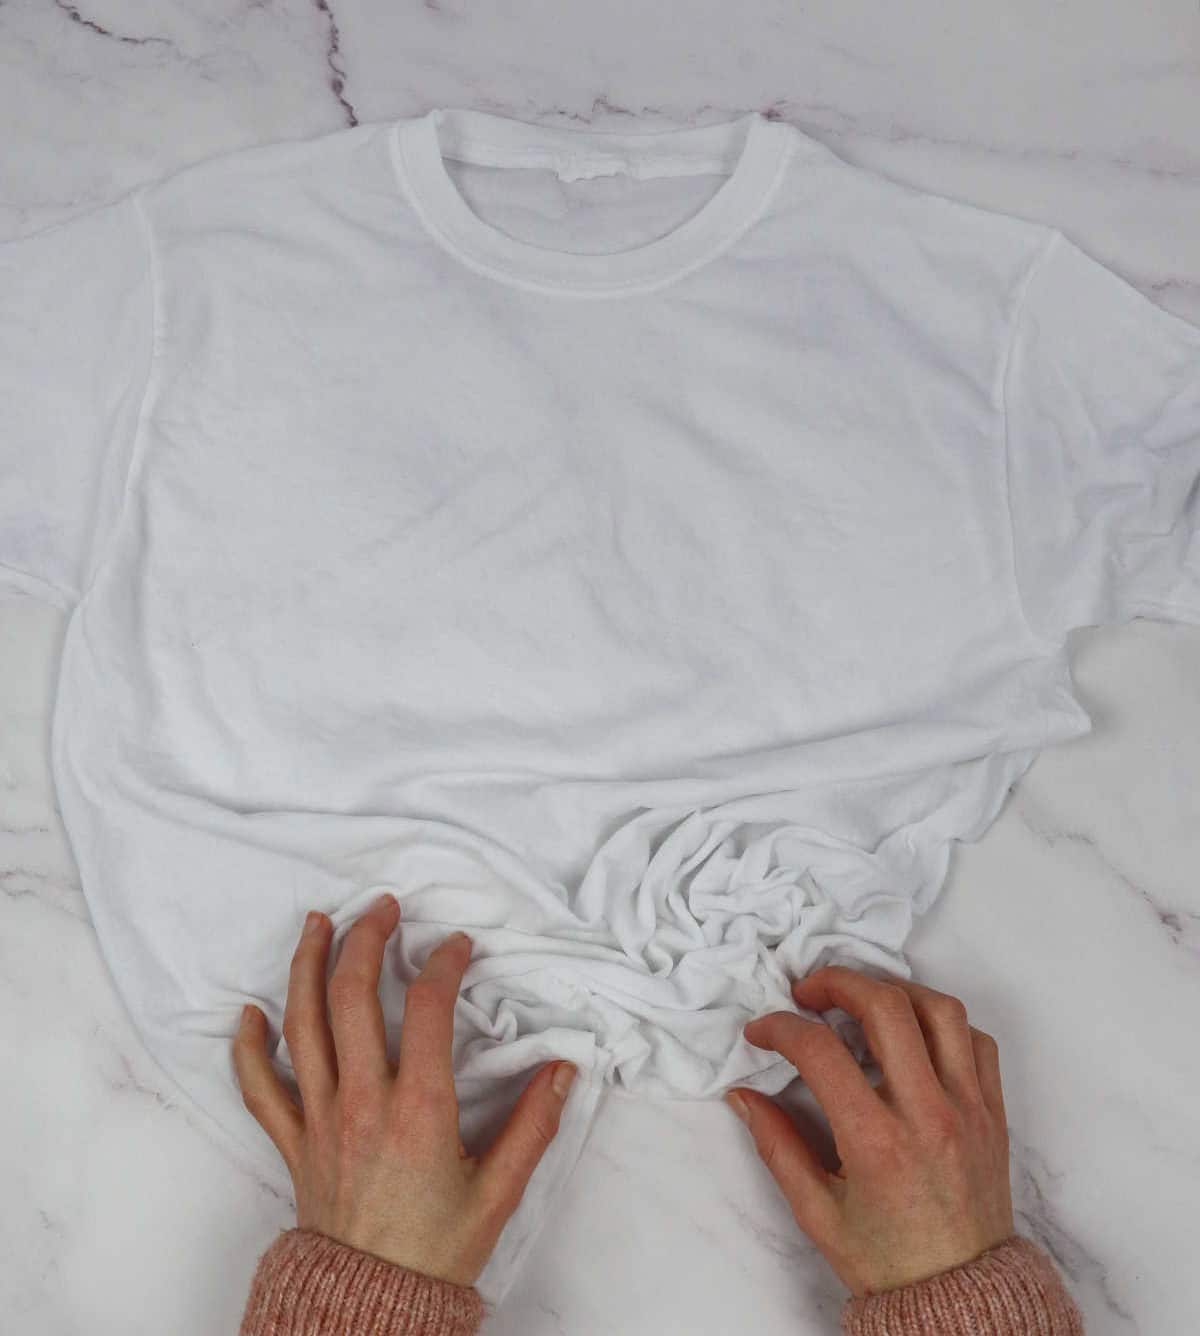
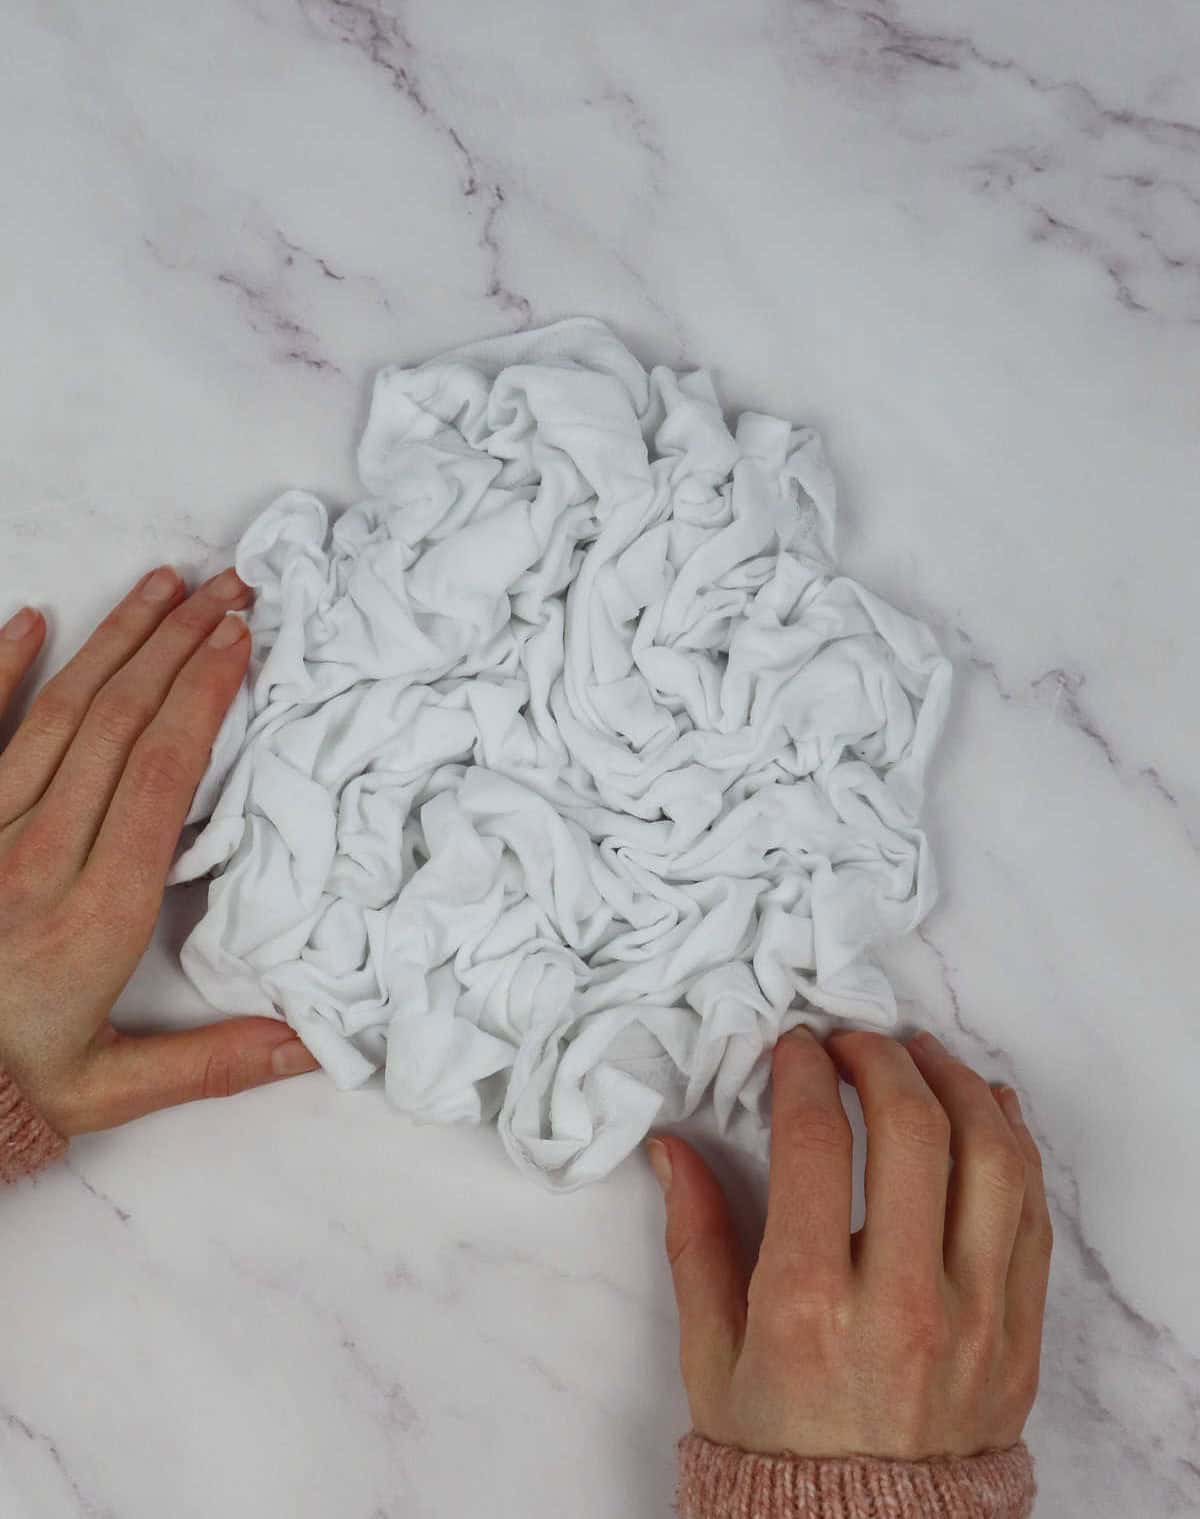
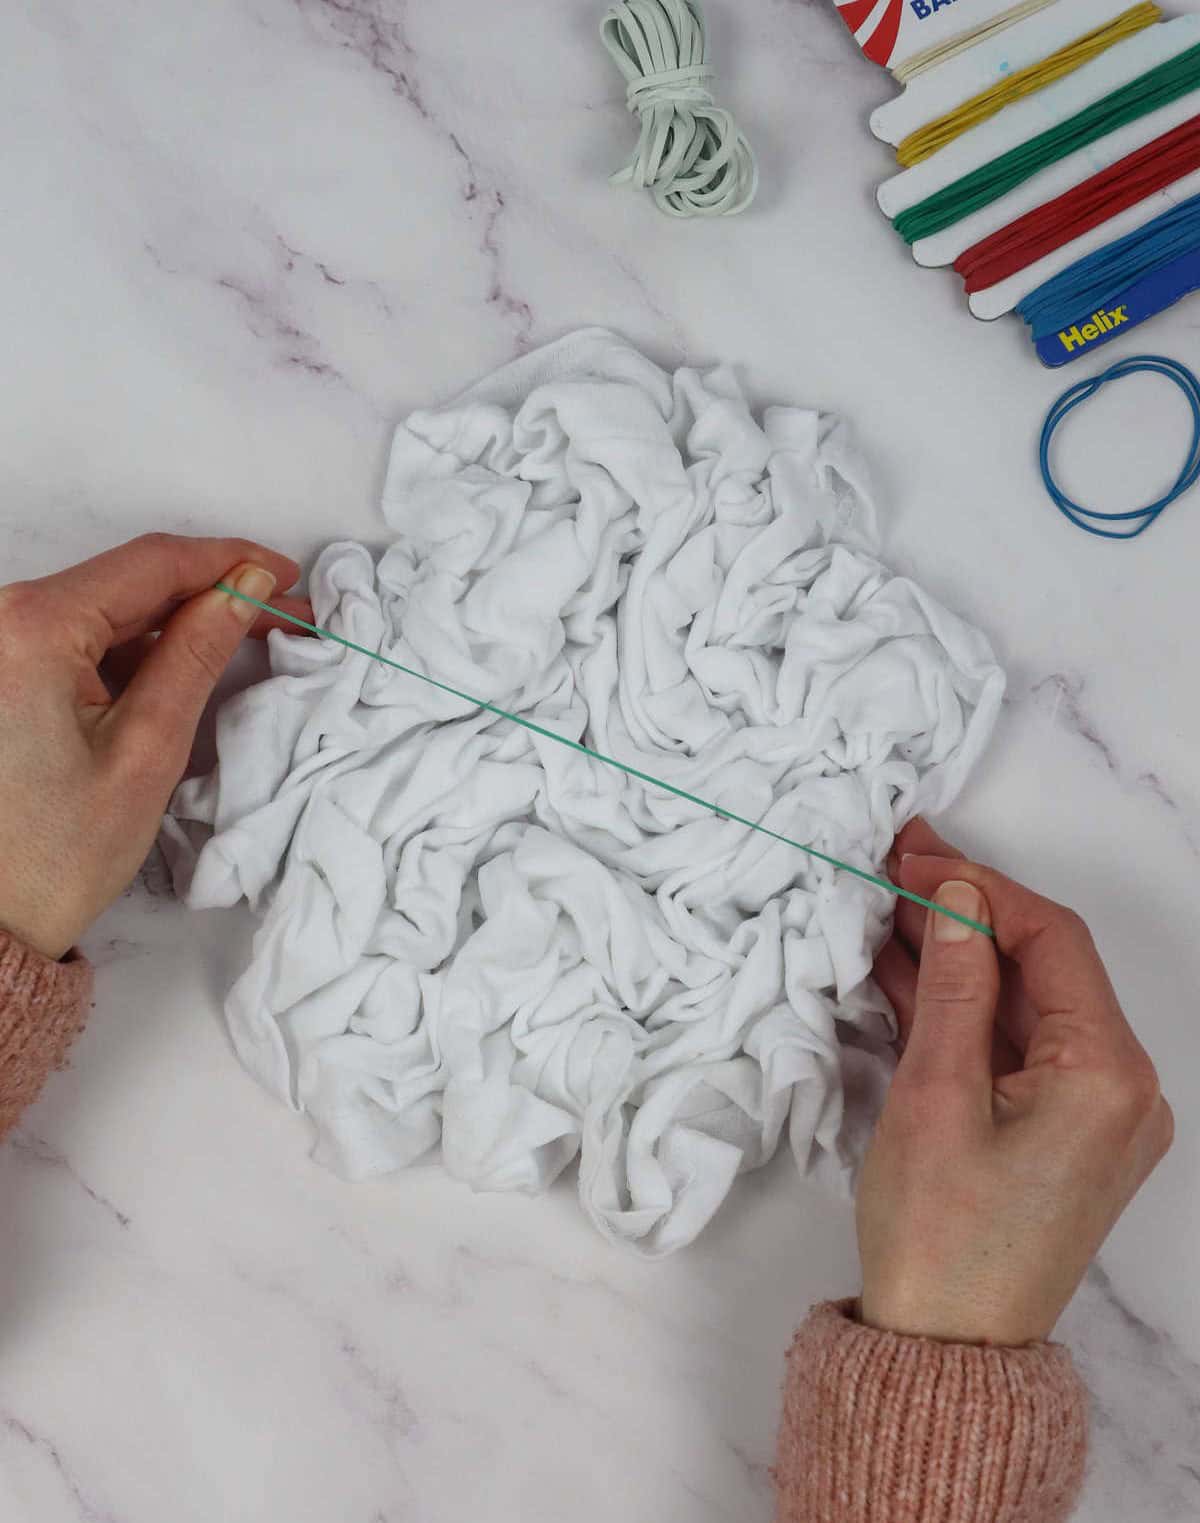
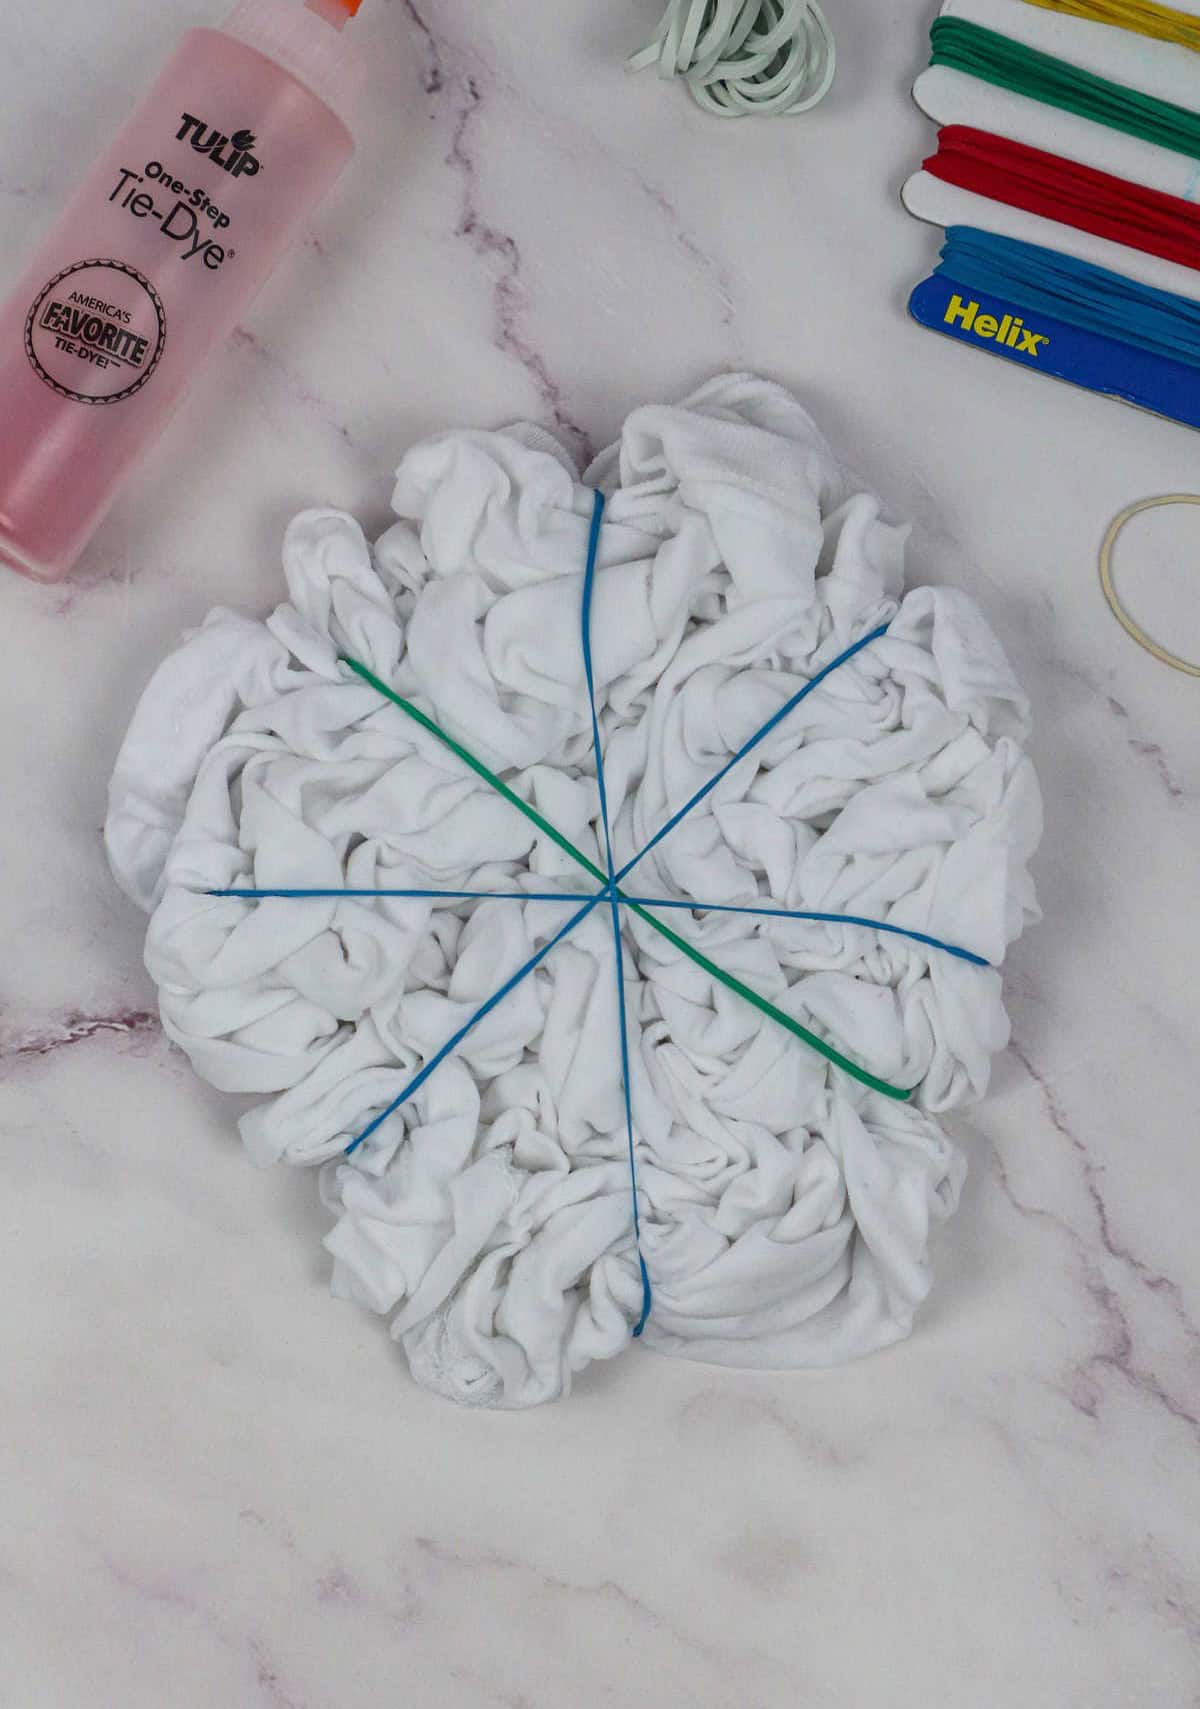
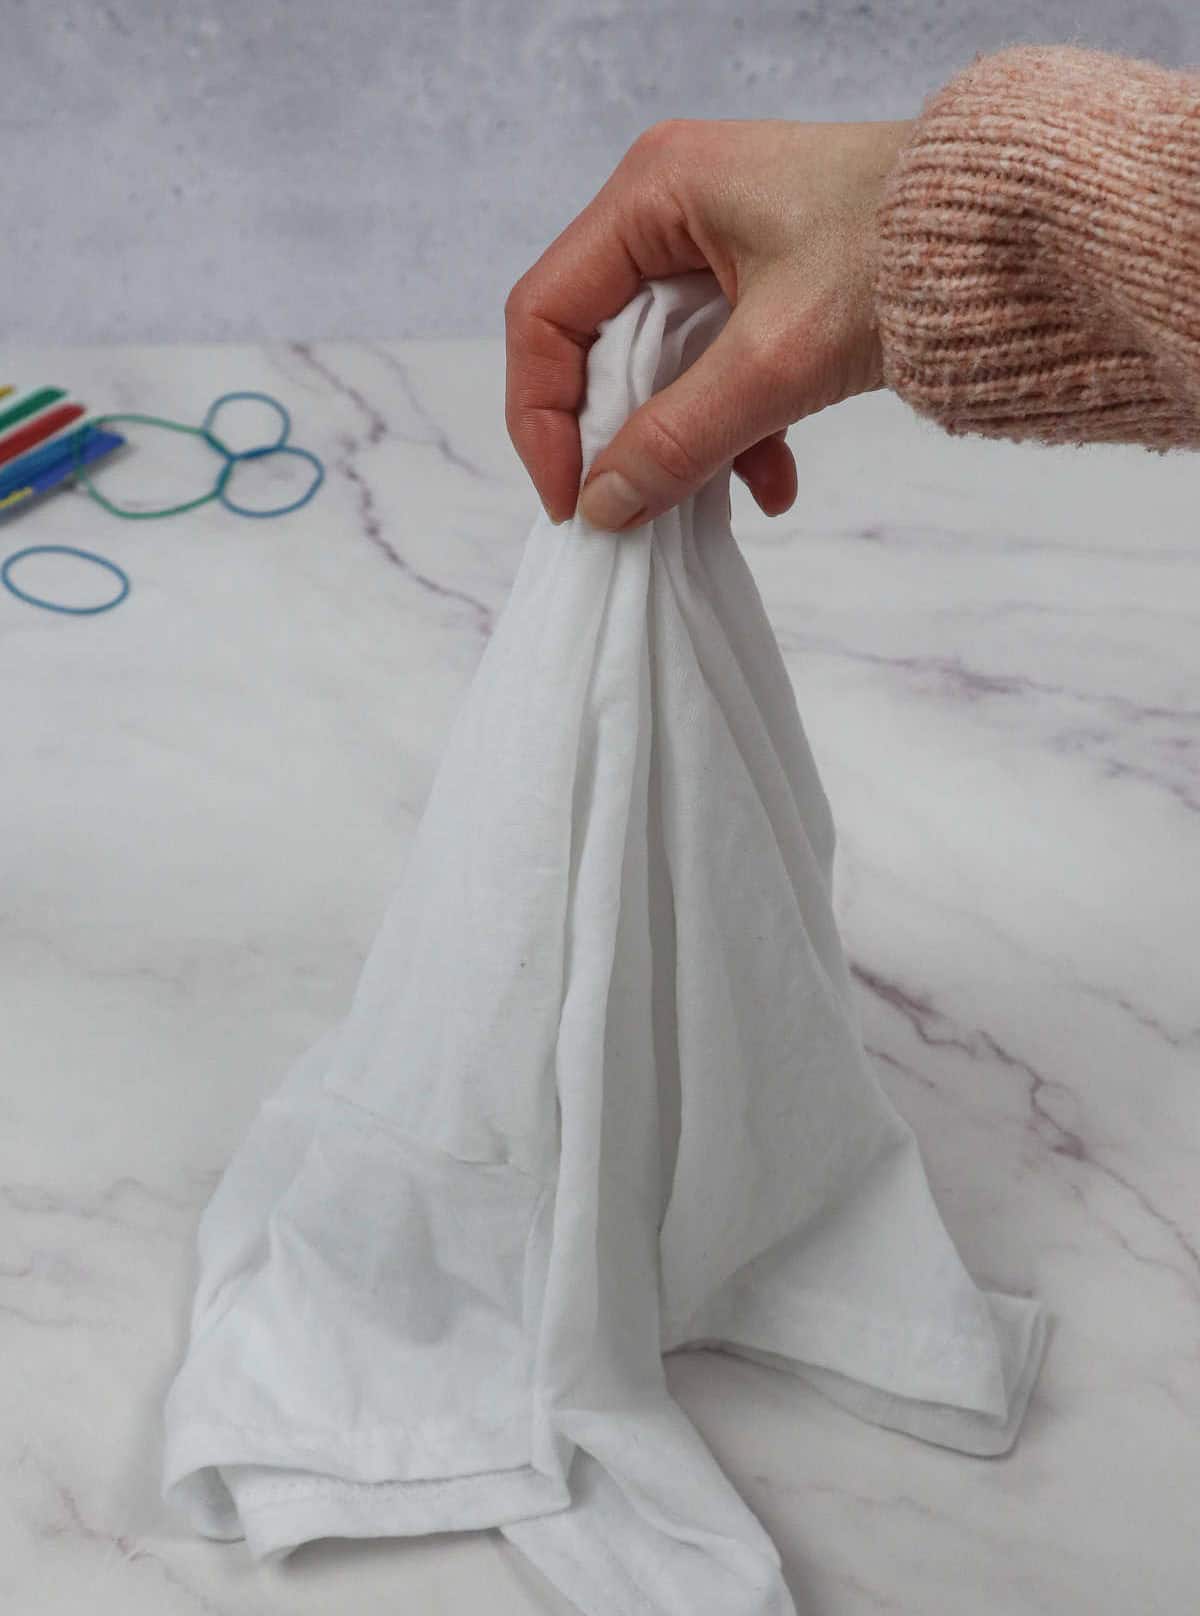
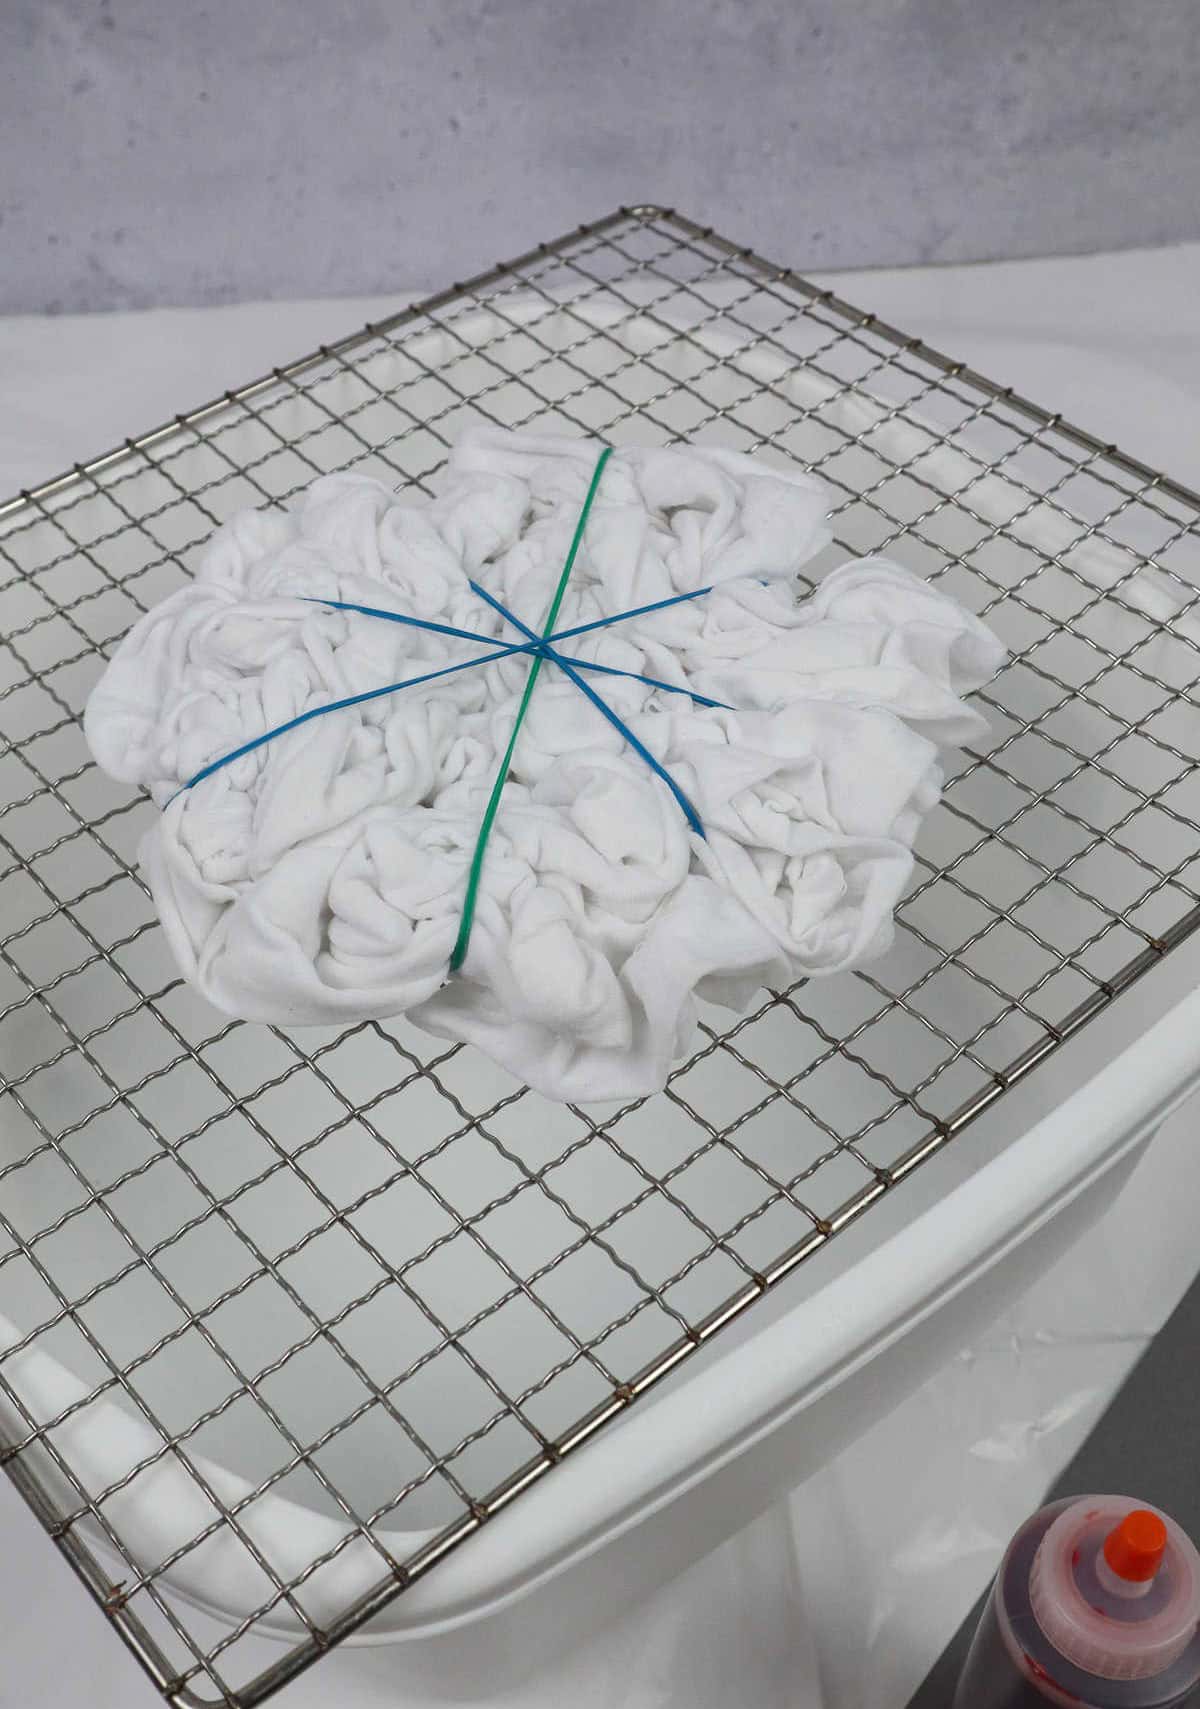
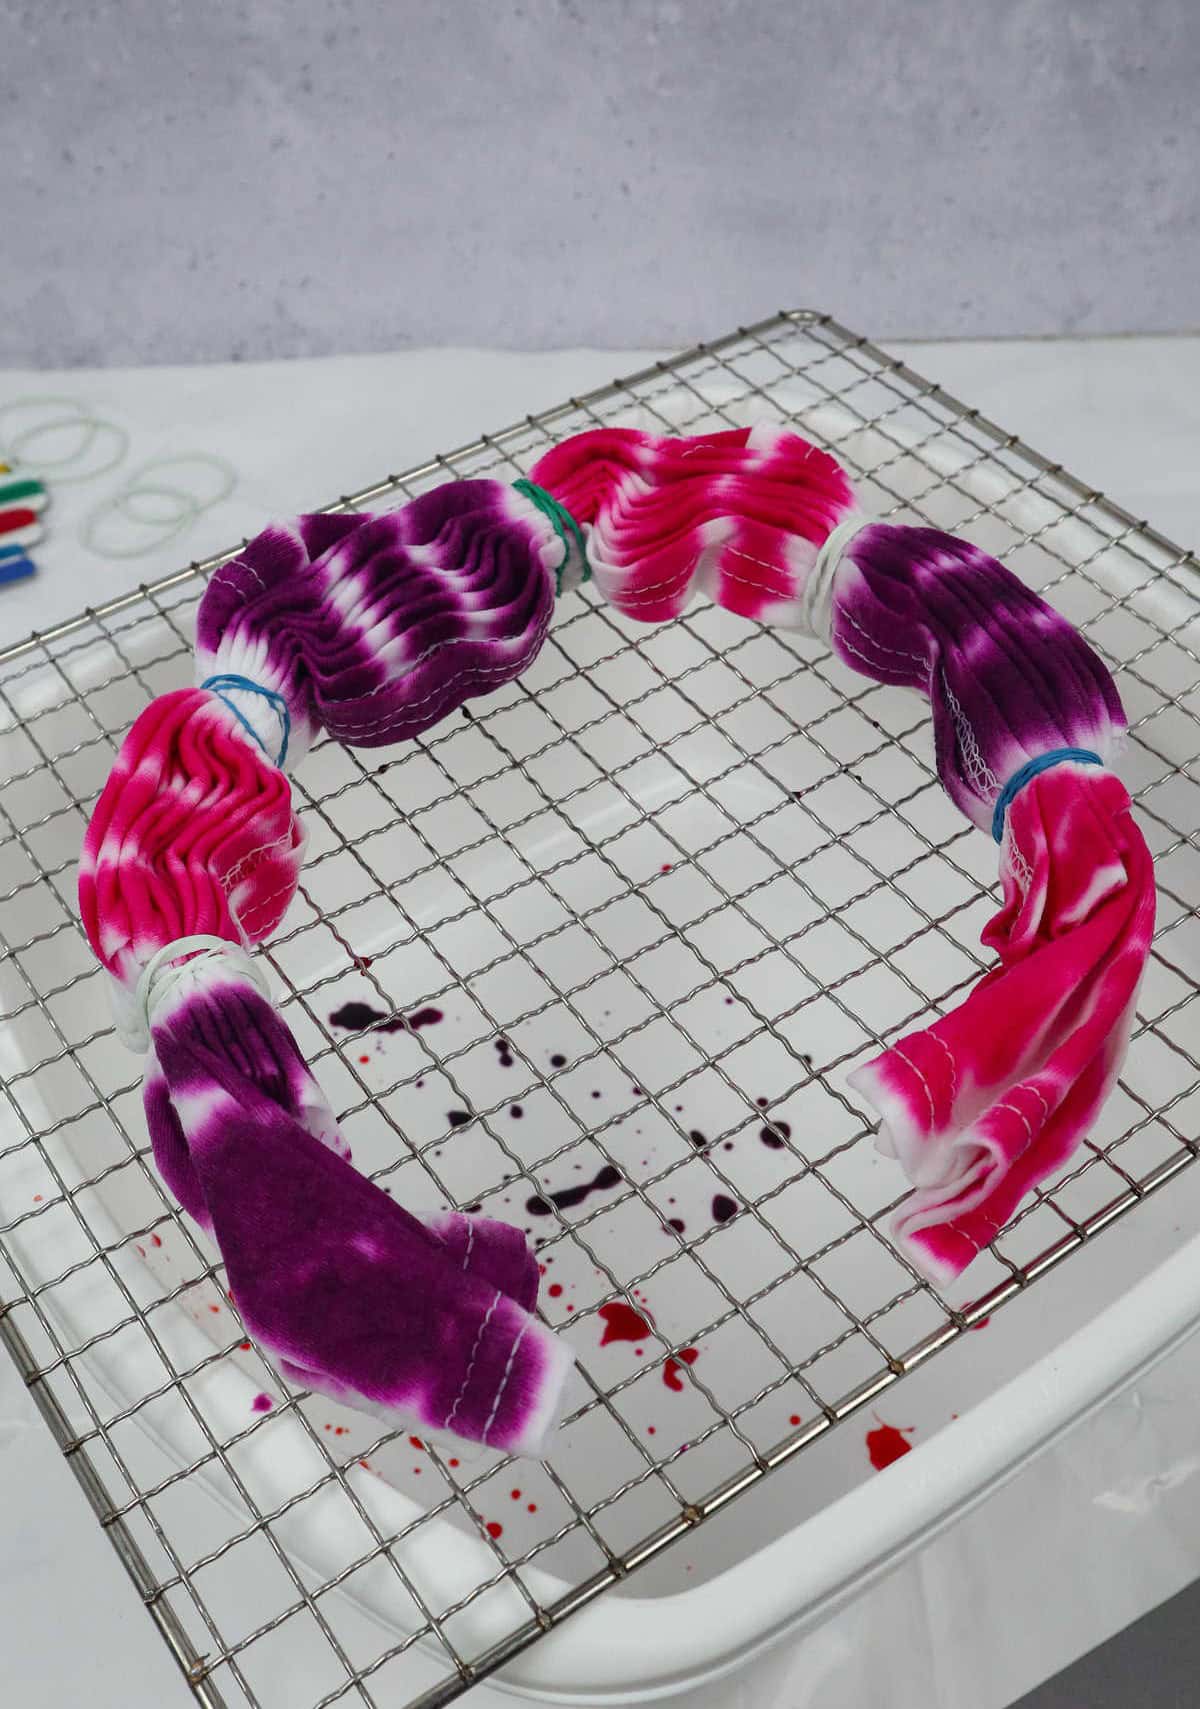
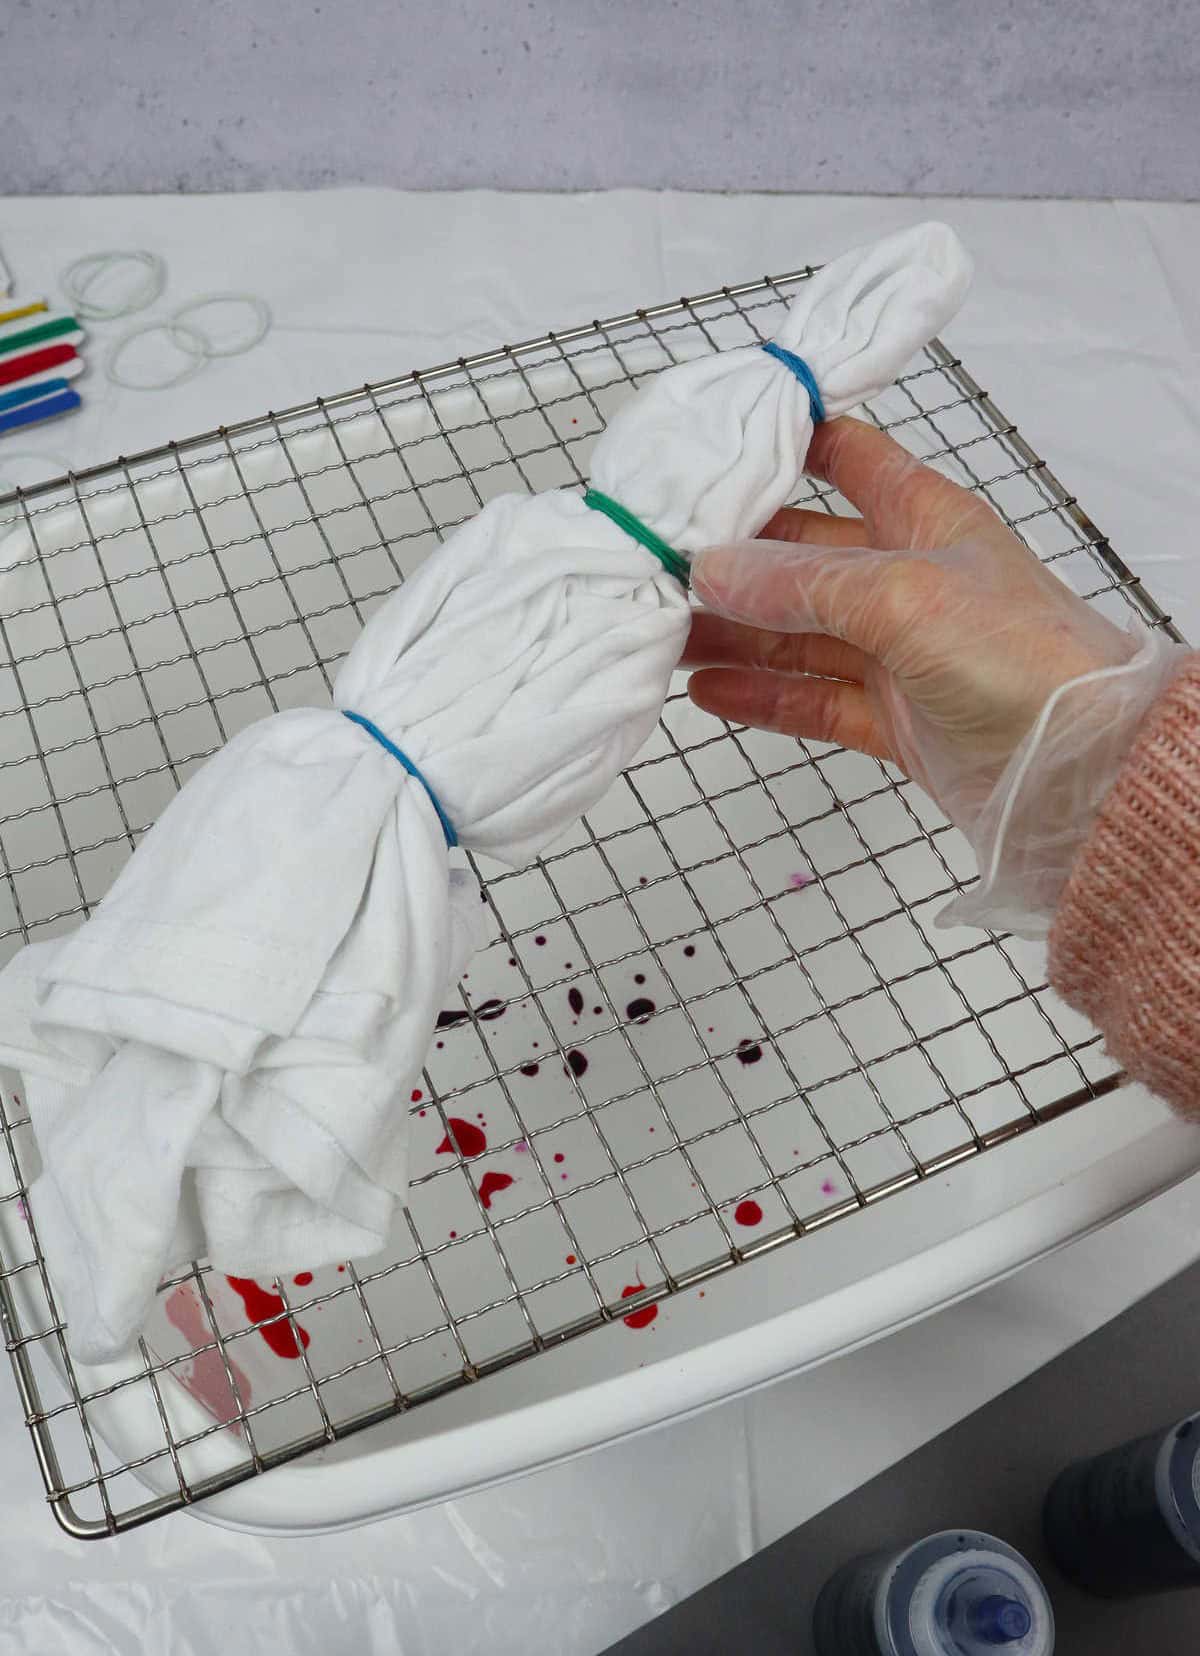
To achieve the scrunch or crumble effect, you’ll need to create random folds and gathers by scrunching up the fabric. This is where the creative part comes in – simply fold and gather the fabric at will, allowing your imagination to guide the process. Once you have your desired pattern established, secure the shirt with tight elastic bands, making sure they’re snug against the fabric. The tighter the bands, the more defined your design will be.
Method 2
Step 1
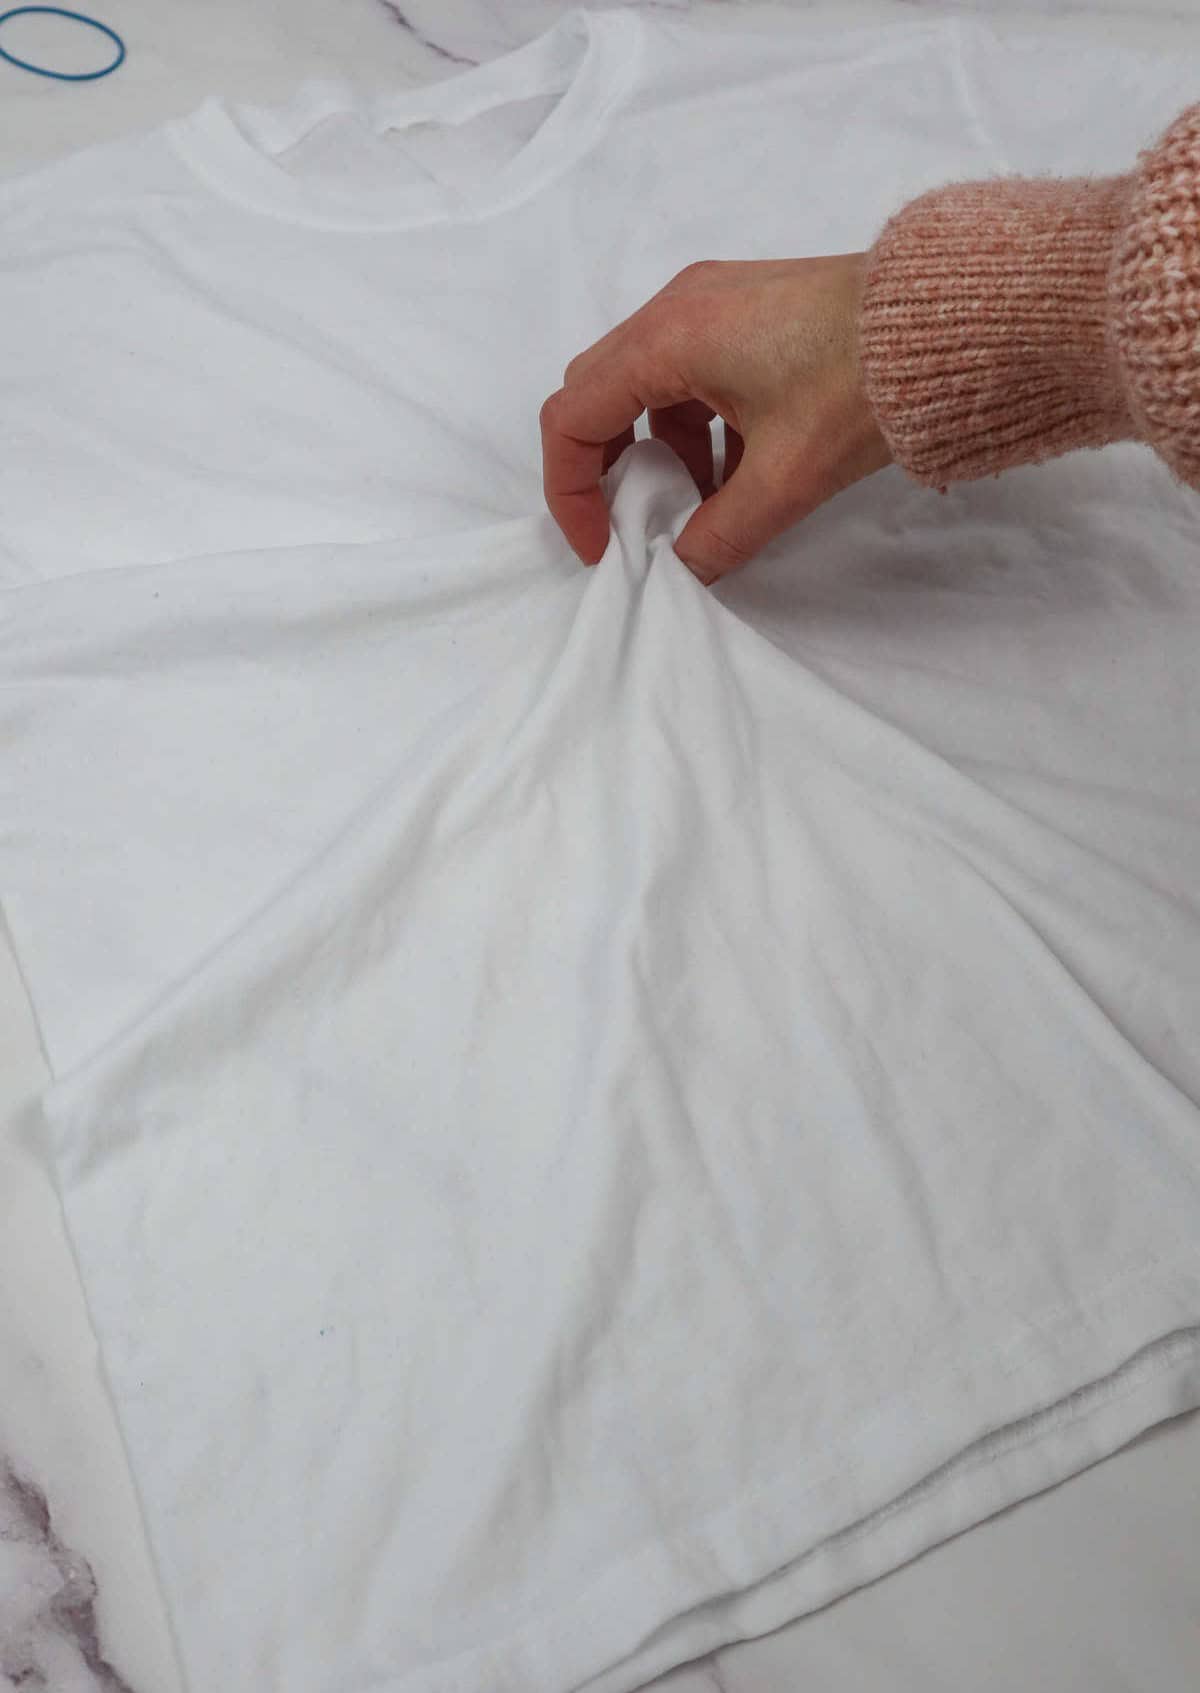
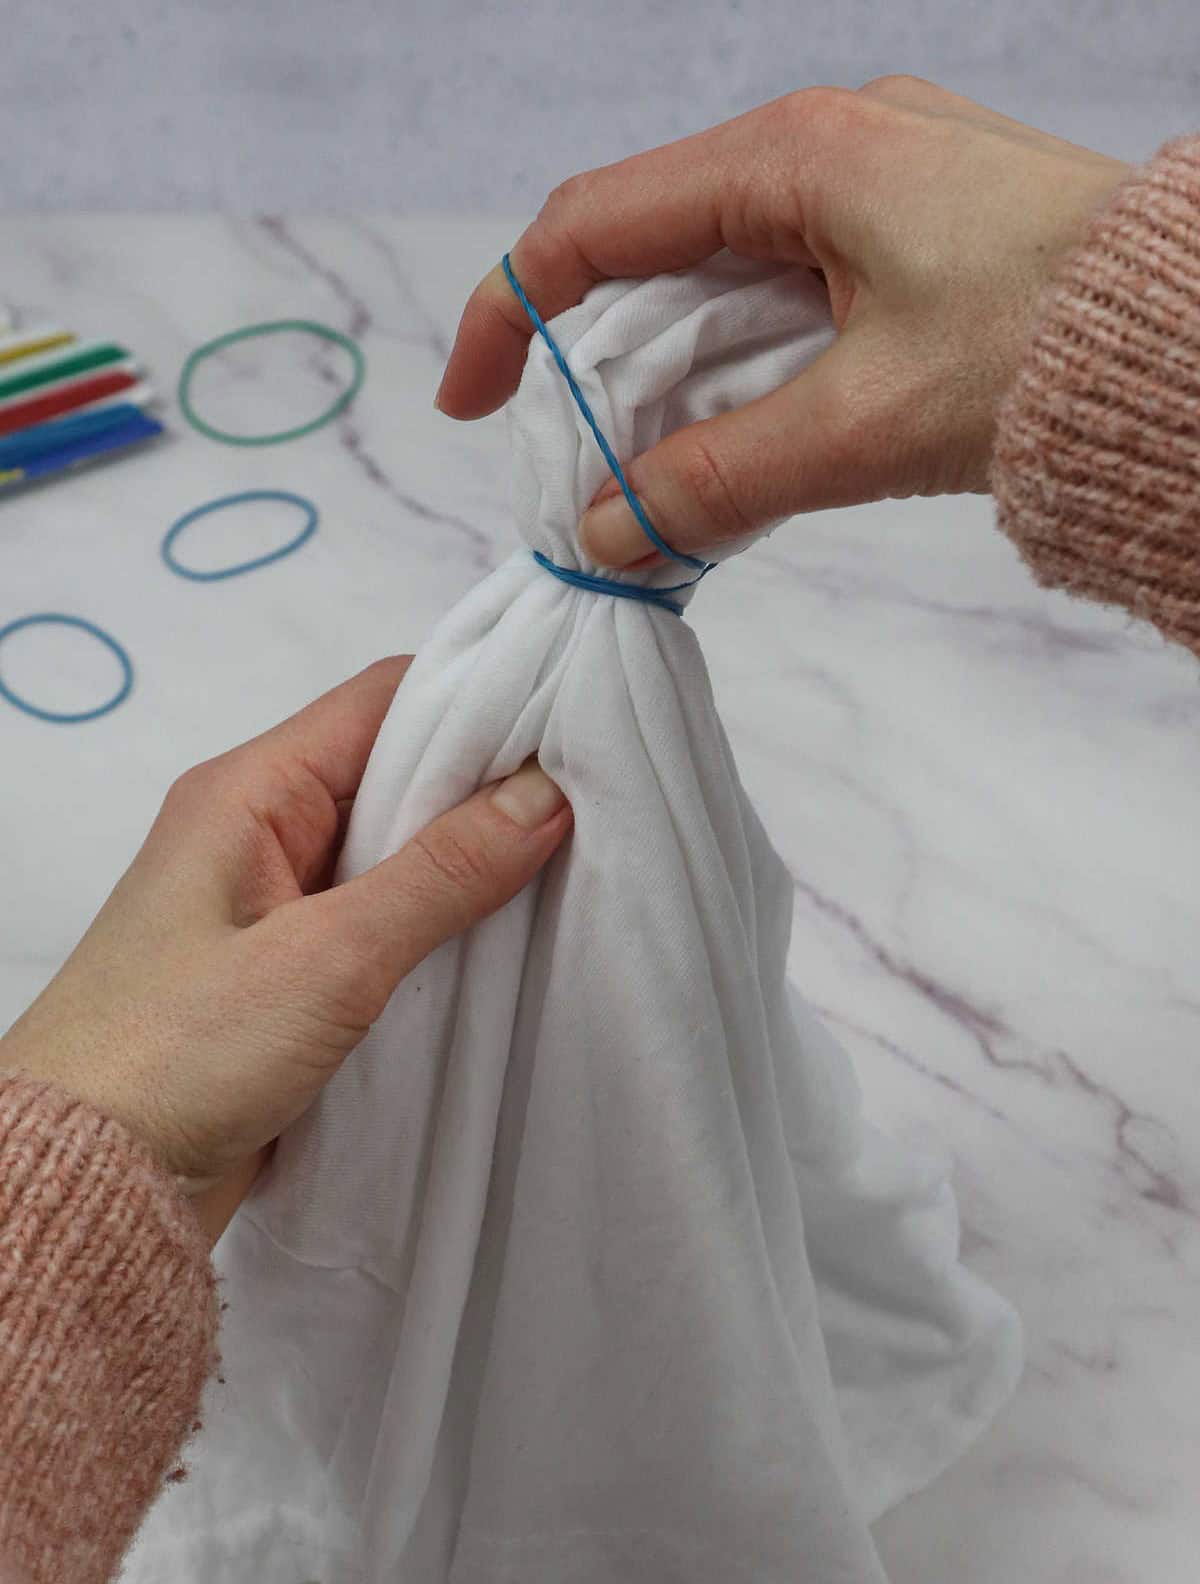
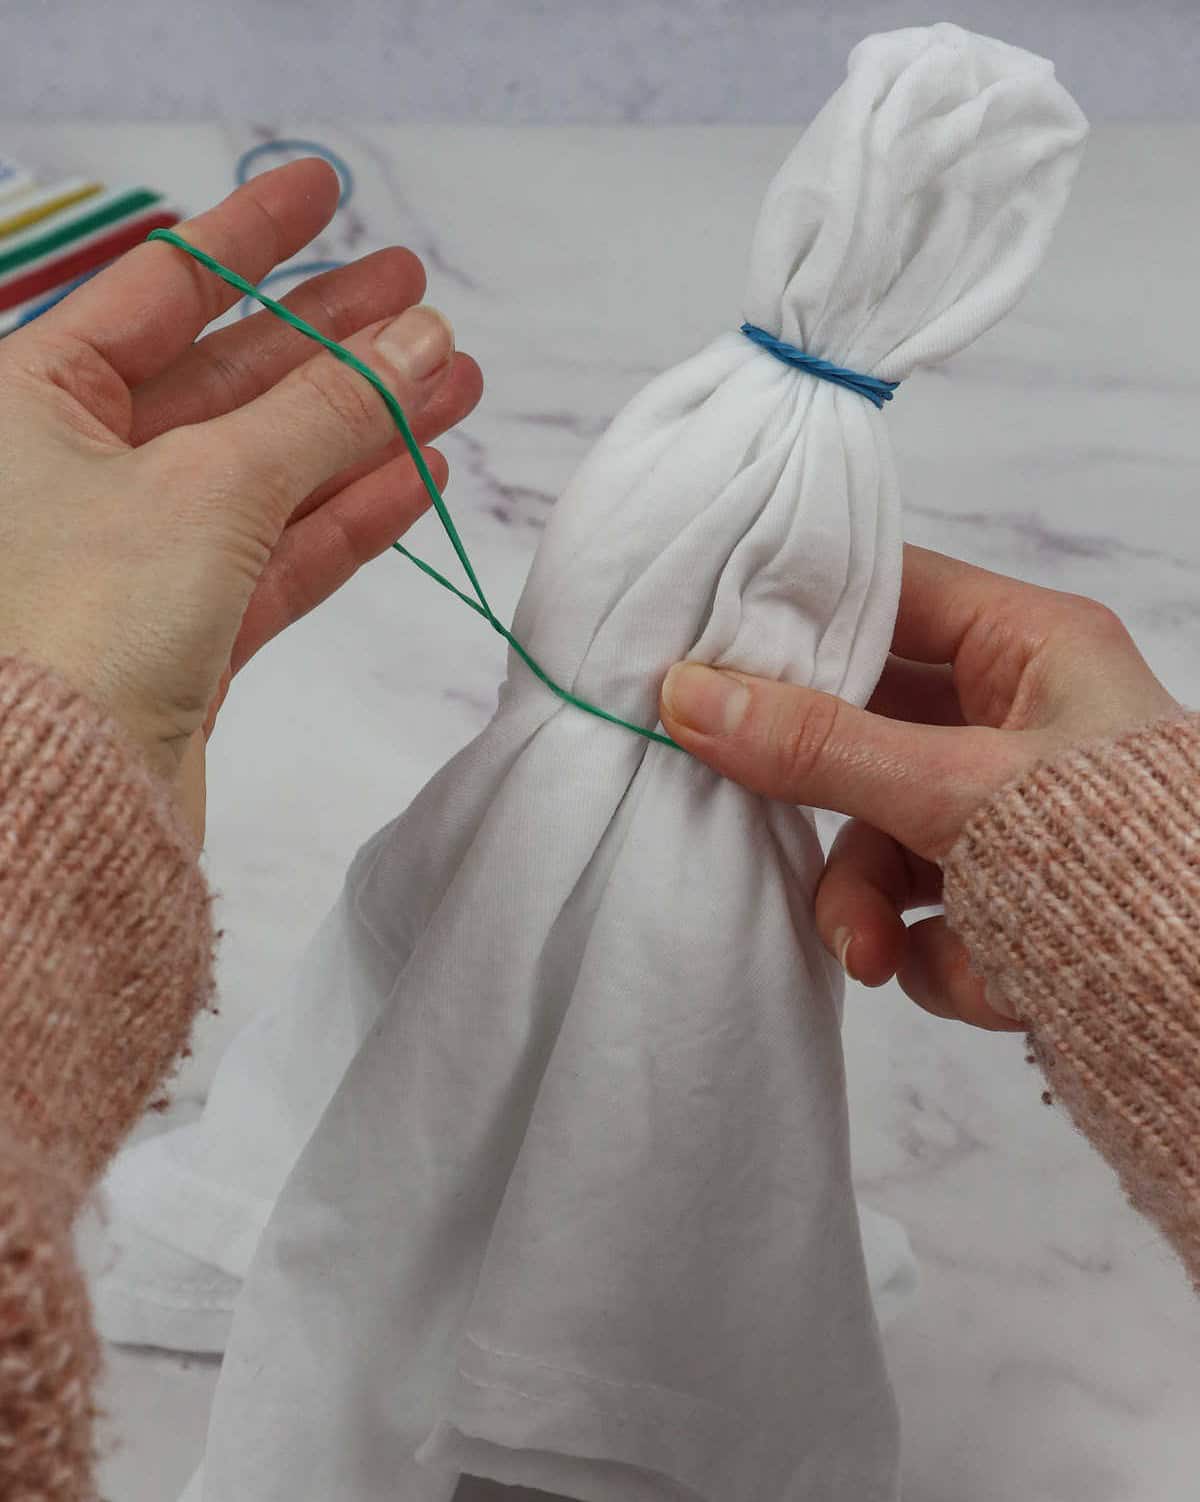
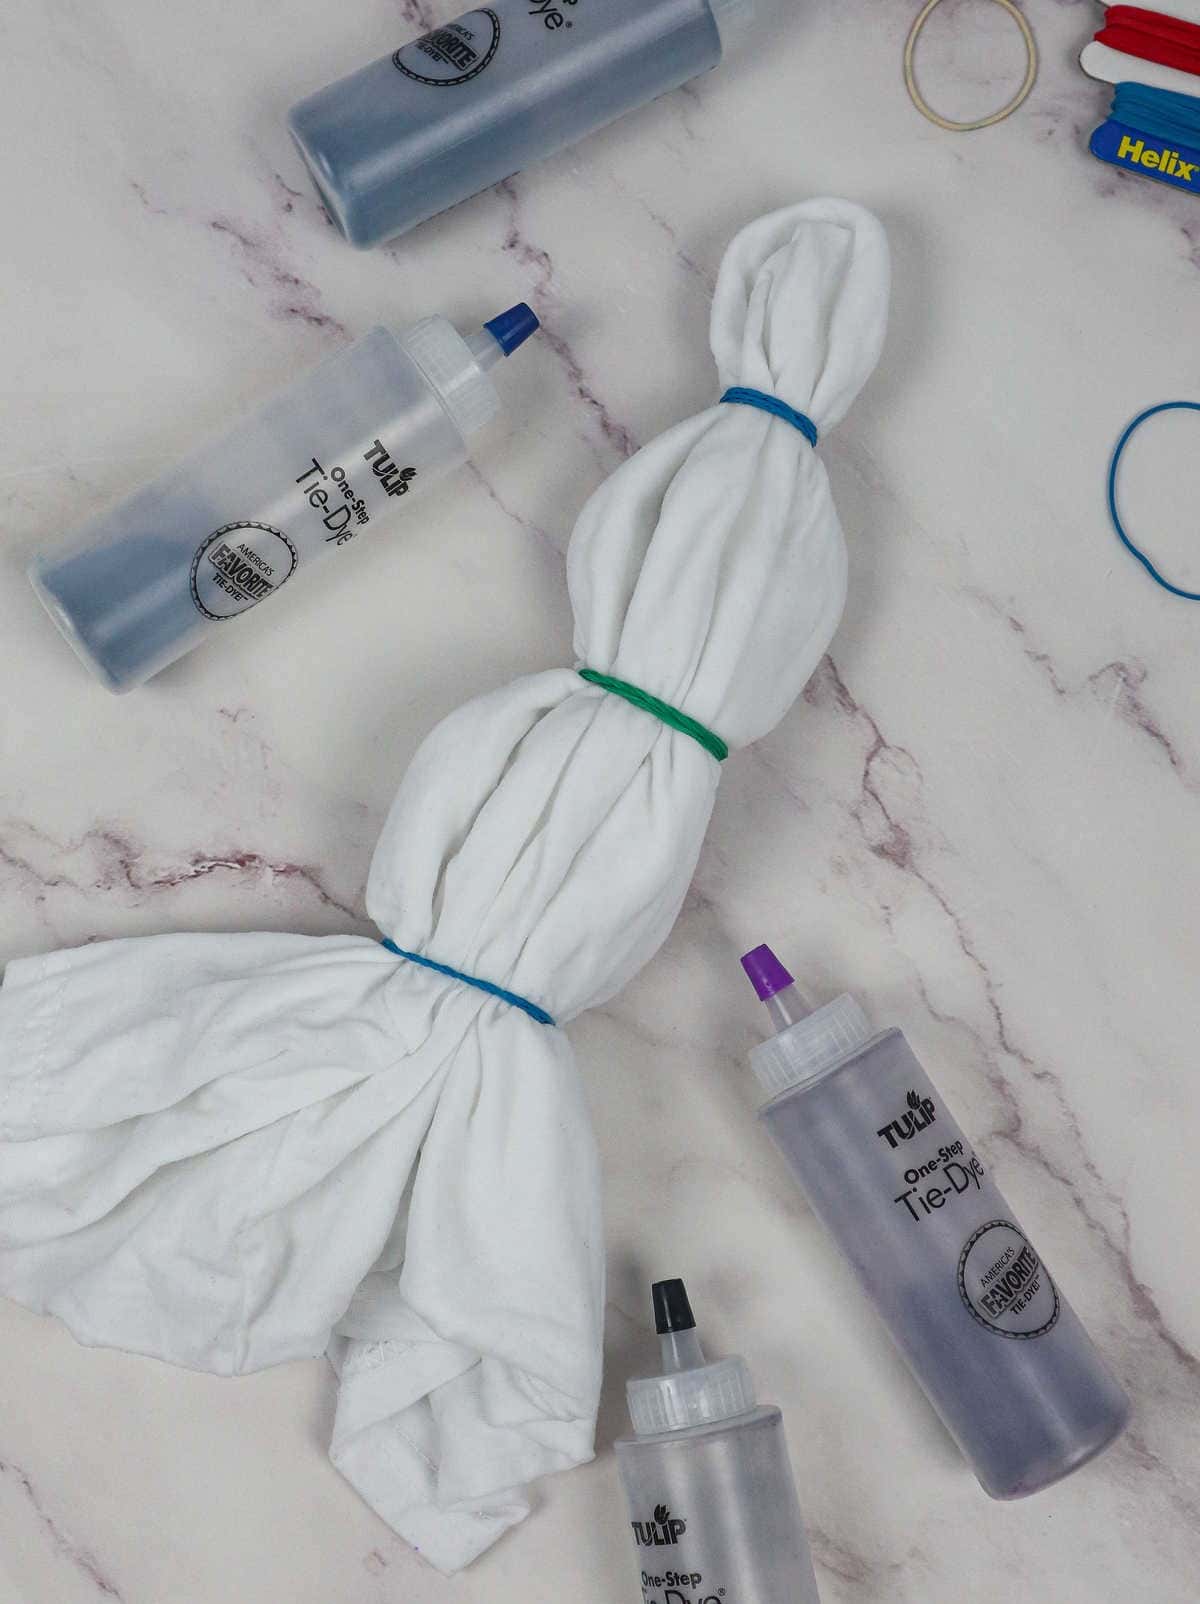
The ‘bulls’-eye’ method gets its name from the central focal point of the tee, where you create a small fold by pinching, pulling, and twisting the fabric to form a neat pleat. To secure this fold in place, wrap an elastic band around it tightly, forming a knot.From here, add additional elastics at intervals, each one tied just below the previous one. The number of elastics you use will depend on your desired color pattern, with more bands creating a bolder, more vibrant look.
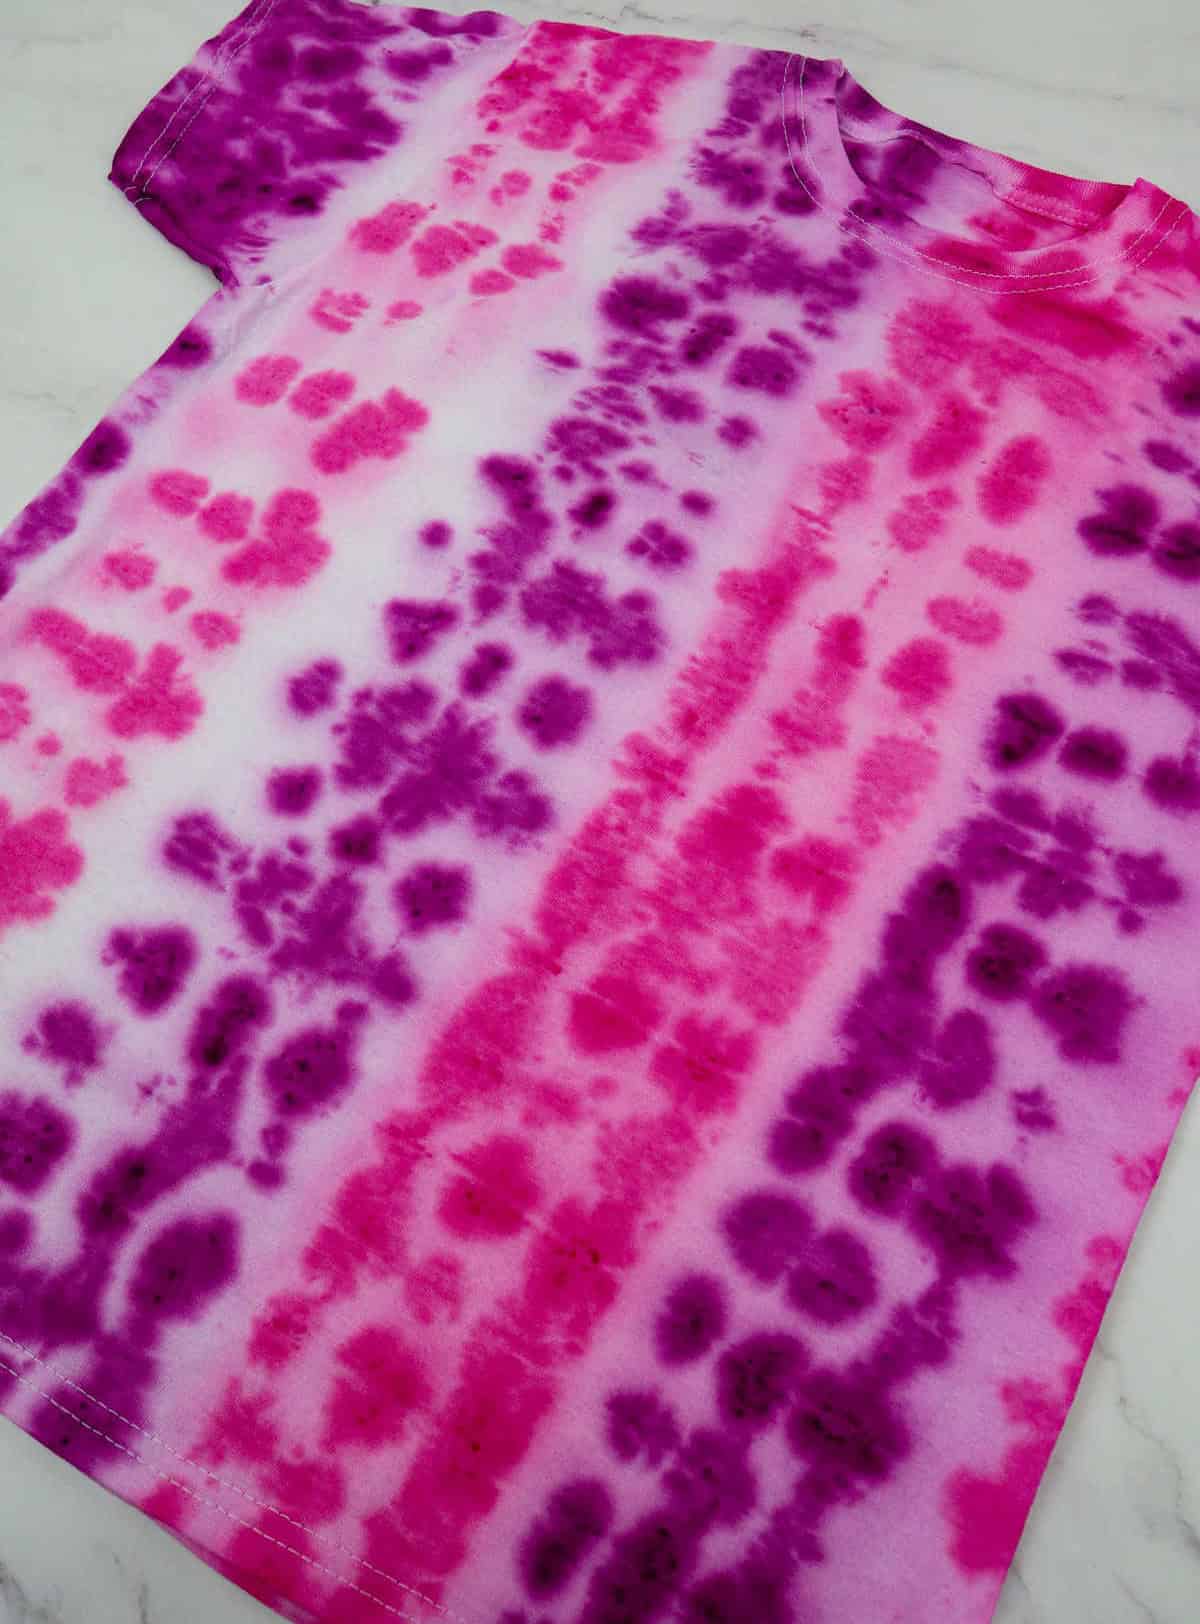
Method 3
One of the most intriguing approaches to achieving a striped effect is the stripes method, which is just as impressive as its counterparts.
Step 1
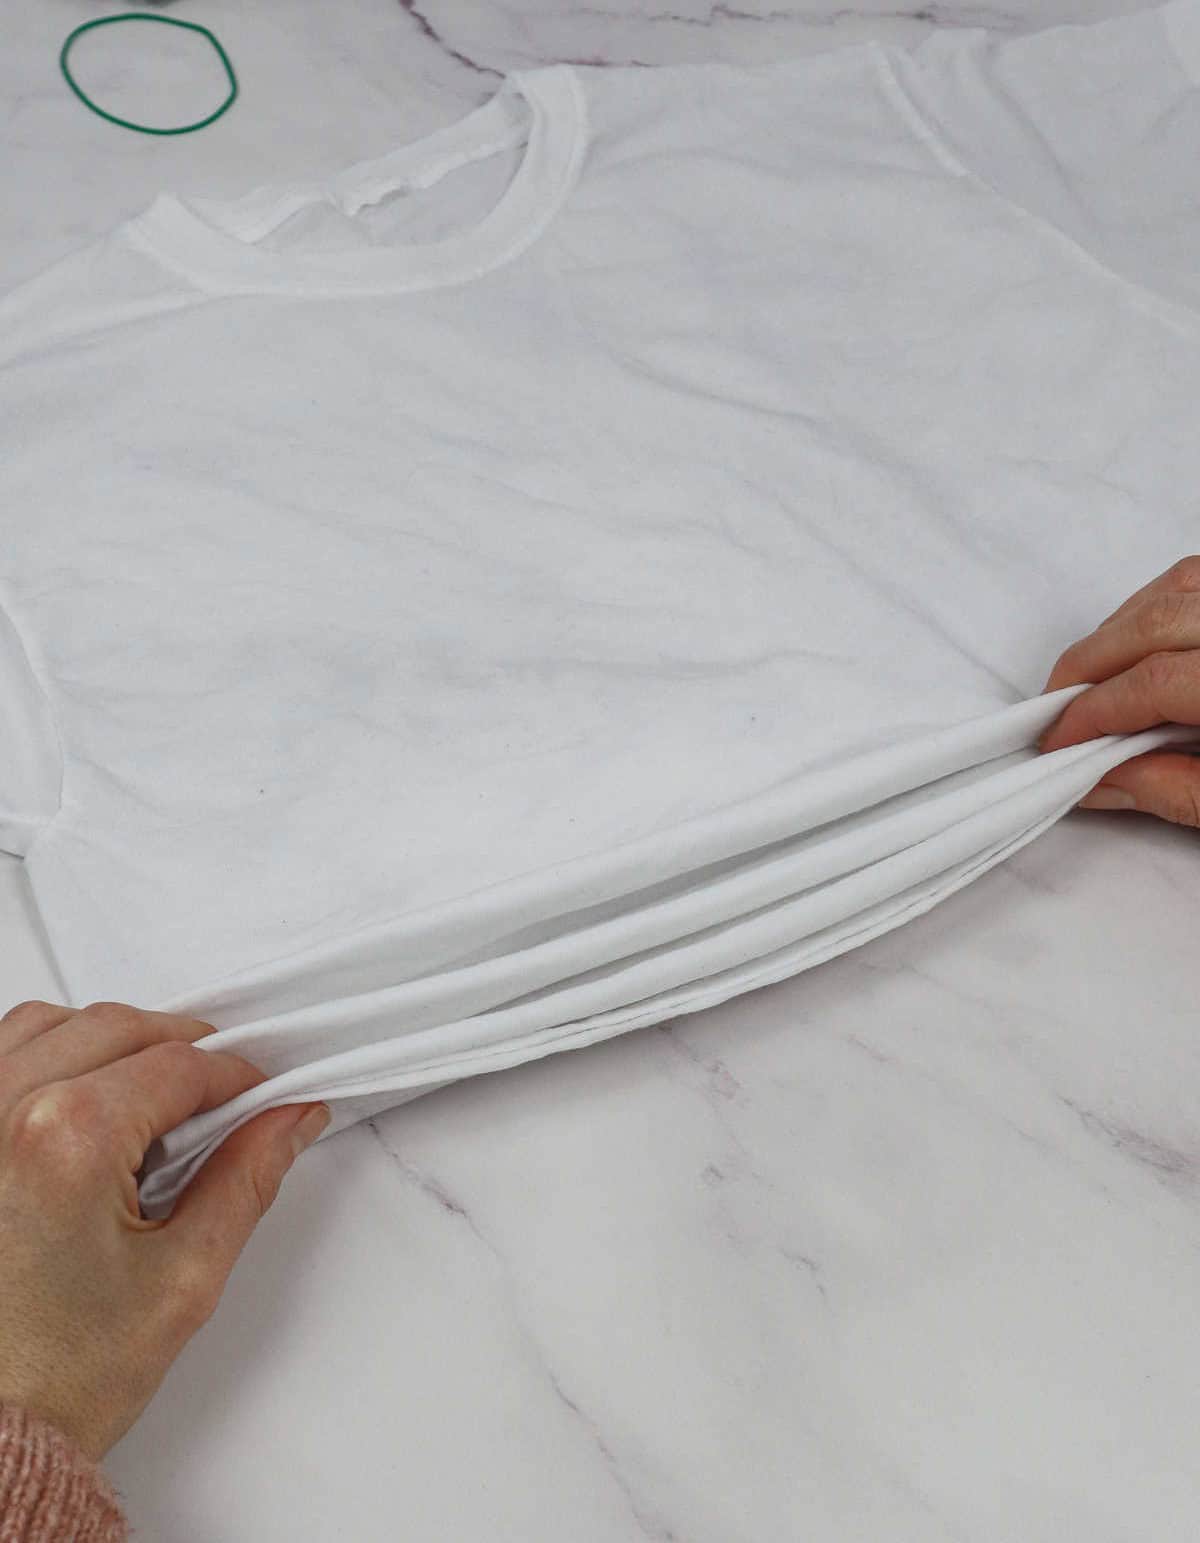
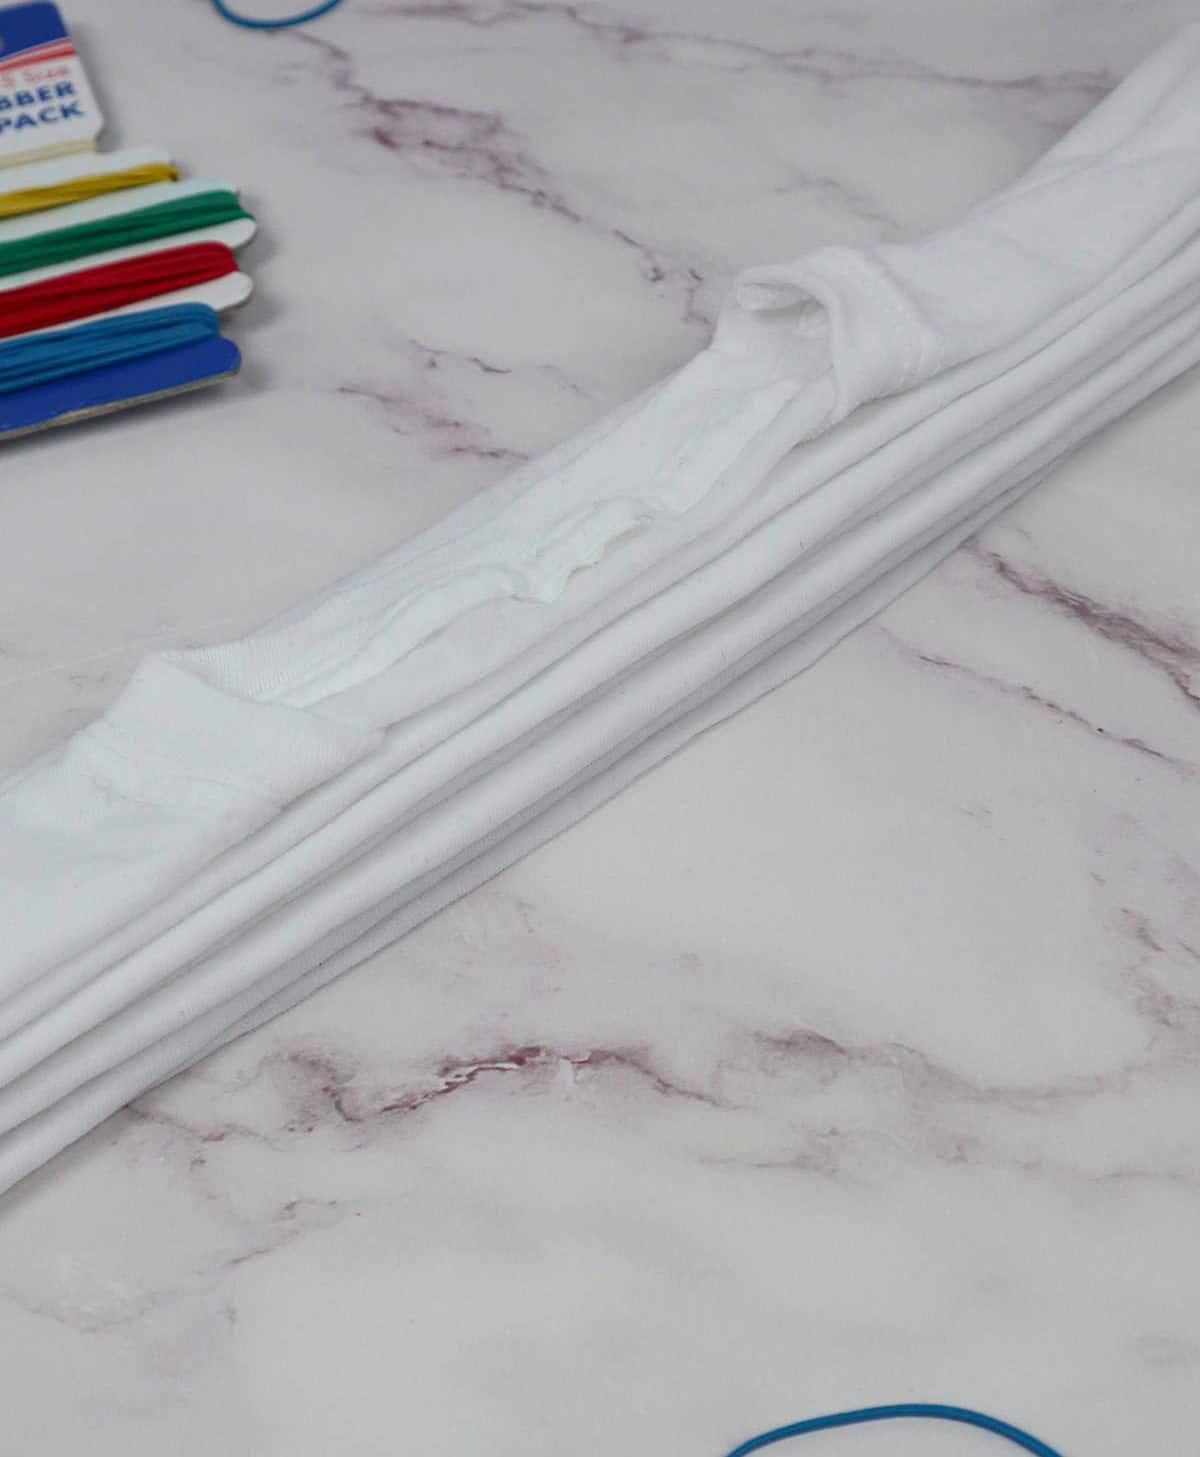

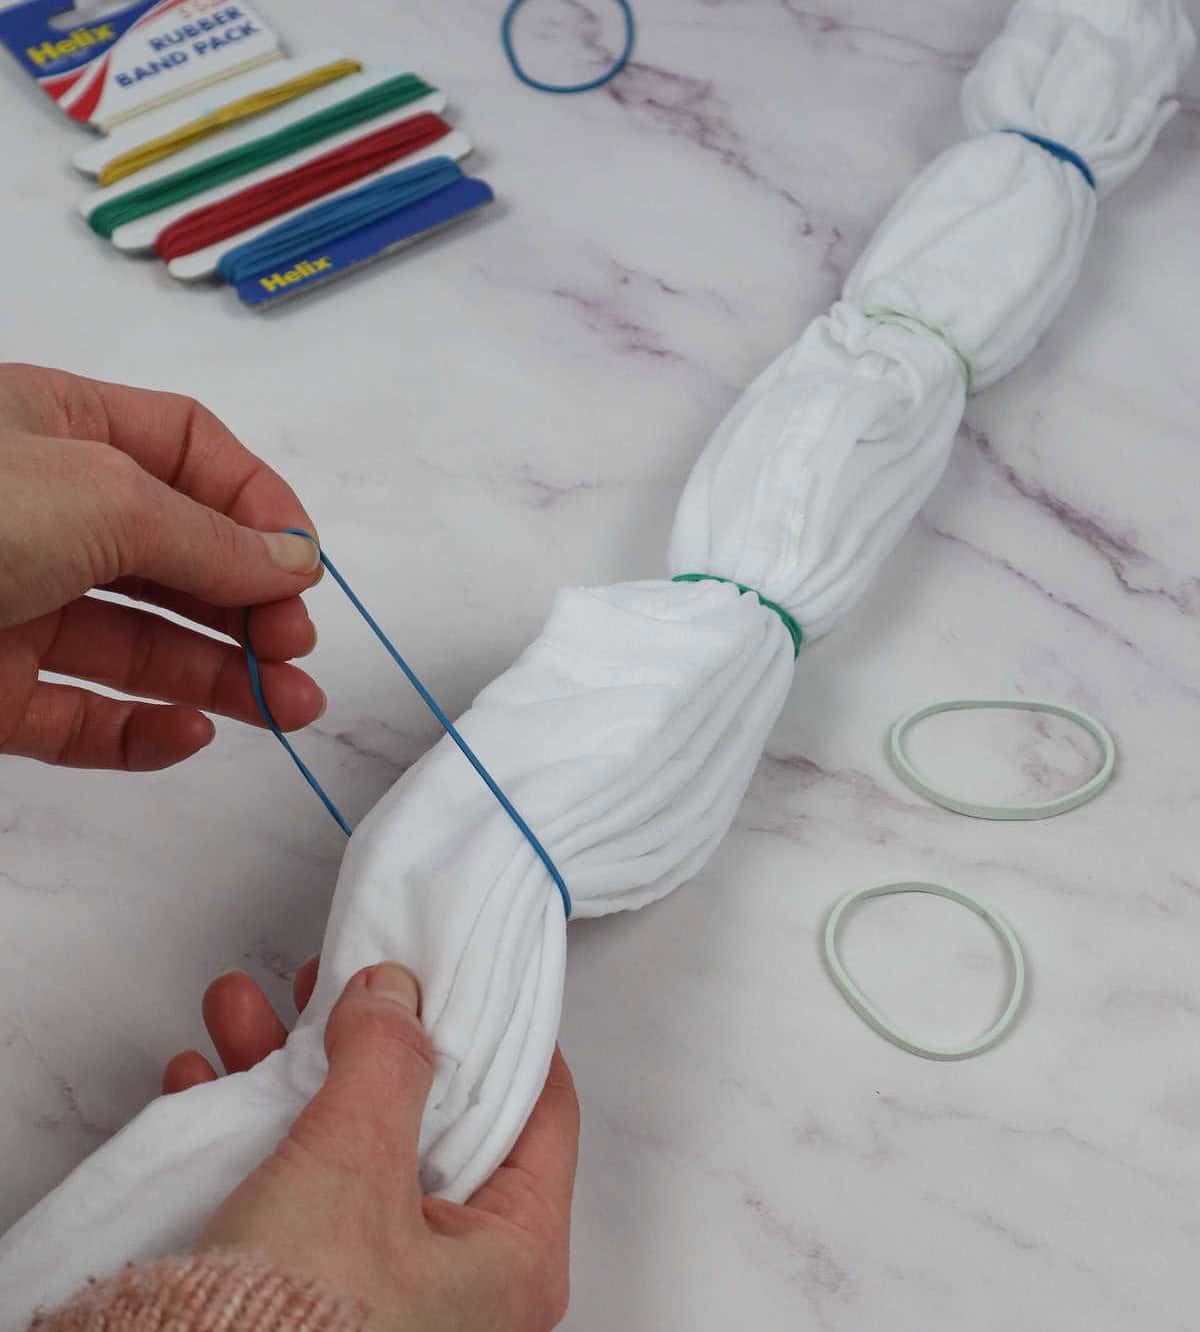
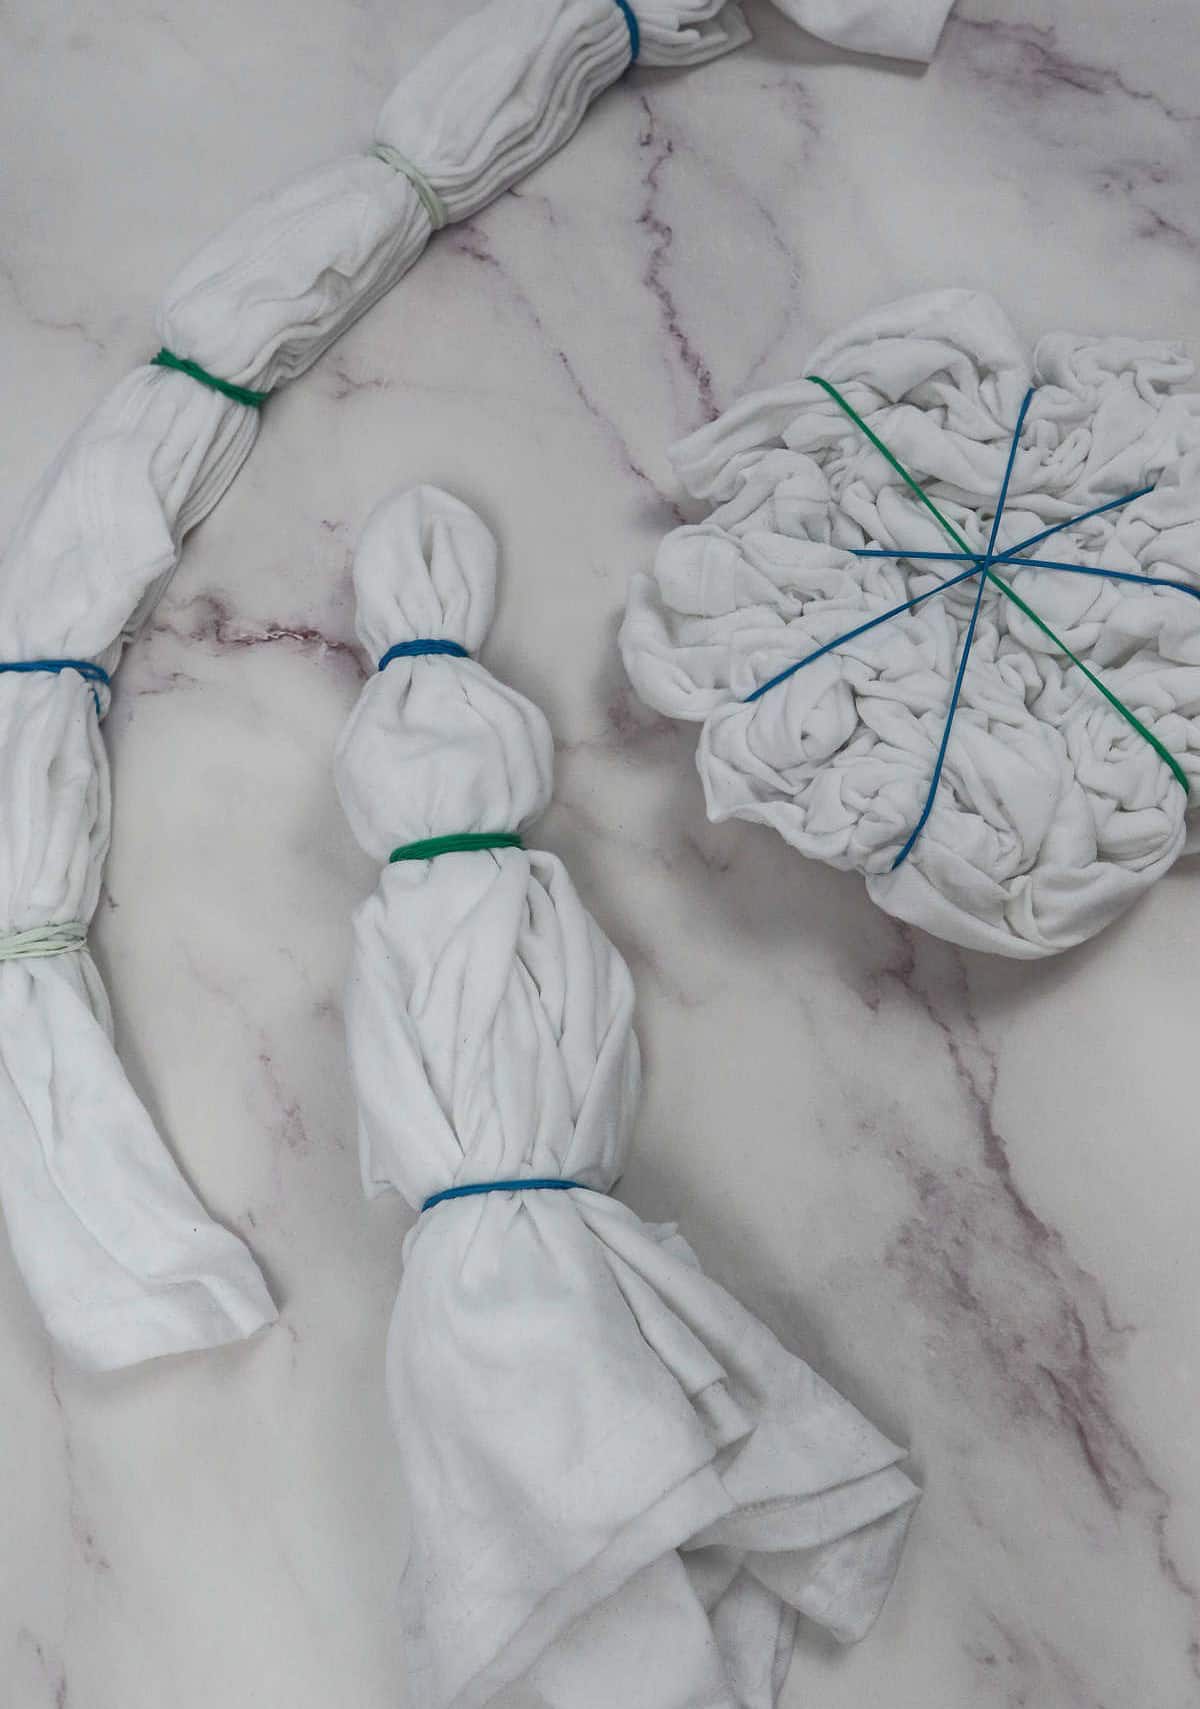
To begin, place the t-shirt flat on a work surface. If you’re familiar with creating paper fans by making accordion folds, you’ll be doing something similar here. Starting from the base of the tee, make parallel folds as you move up the fabric, folding it in towards yourself. When you reach the neck, secure the folds with elastic bands, spacing them evenly along the length.
Dying the Shirts
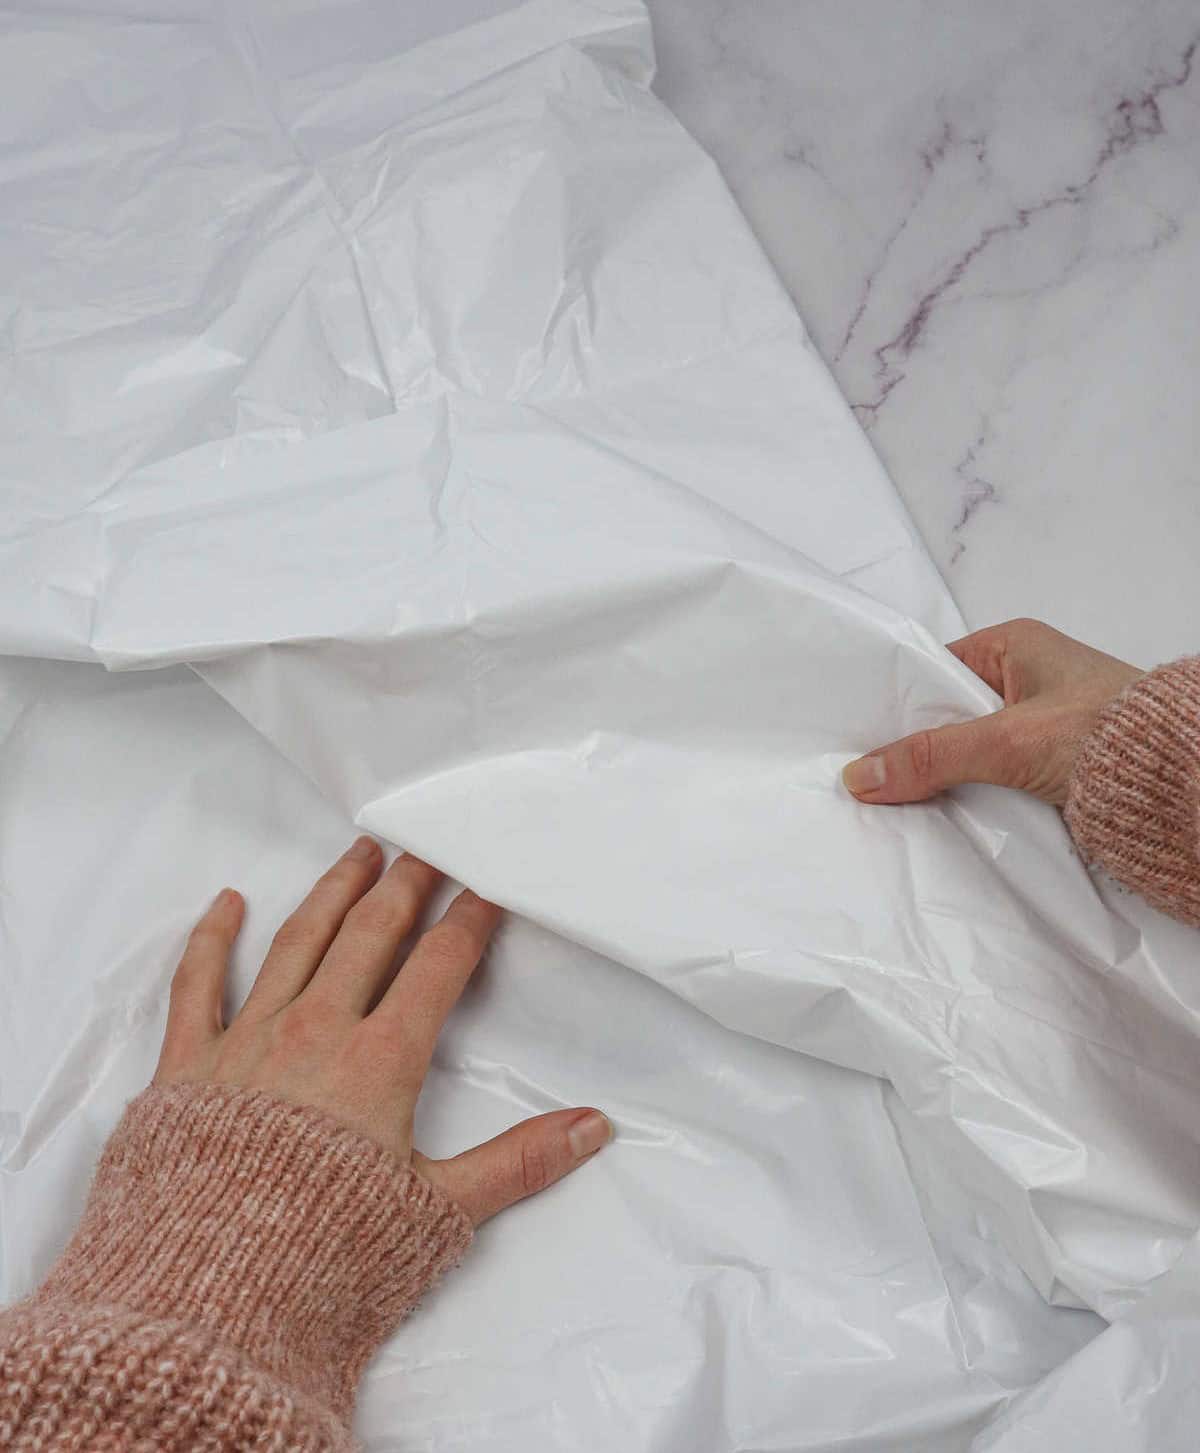
To ensure a mess-free experience, begin by laying down a plastic sheet on your workspace to contain any potential spills or stains. Additionally, don’t forget to don protective gear including gloves for your hands and a smock to cover your clothing, safeguarding them from accidental splatters and splashes.
Step 1
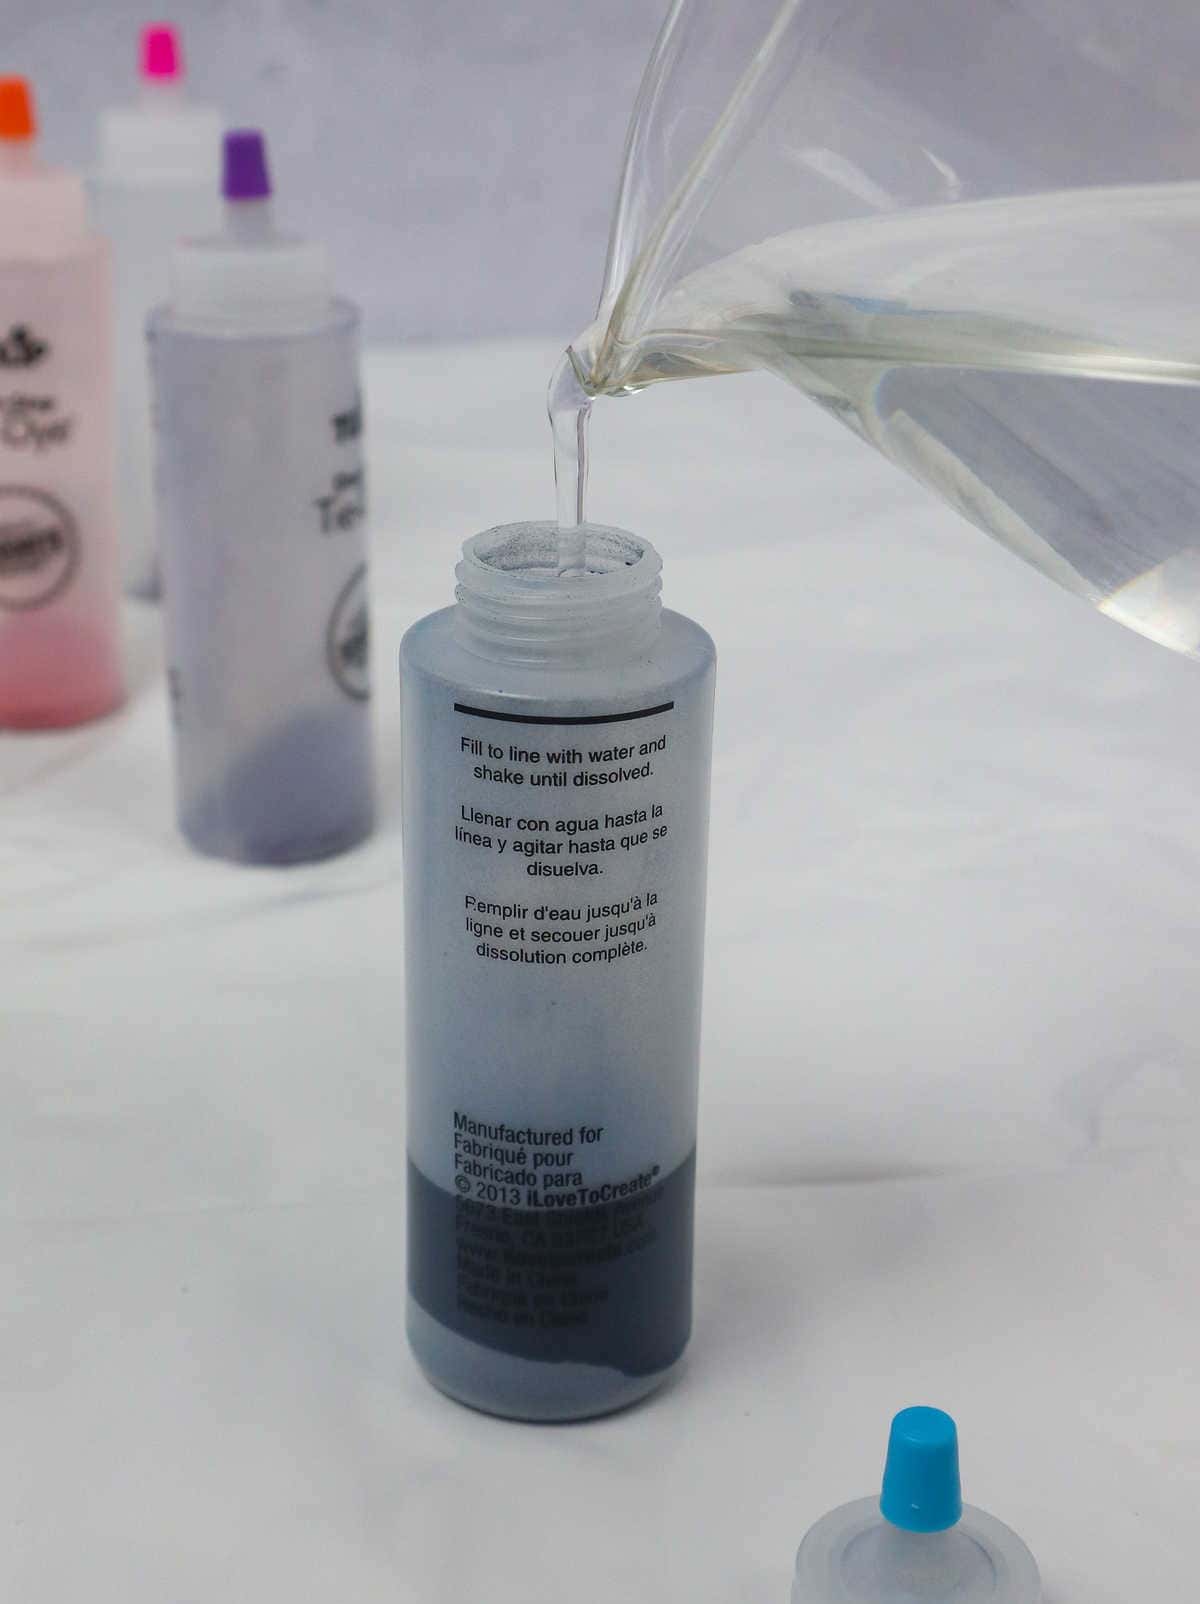
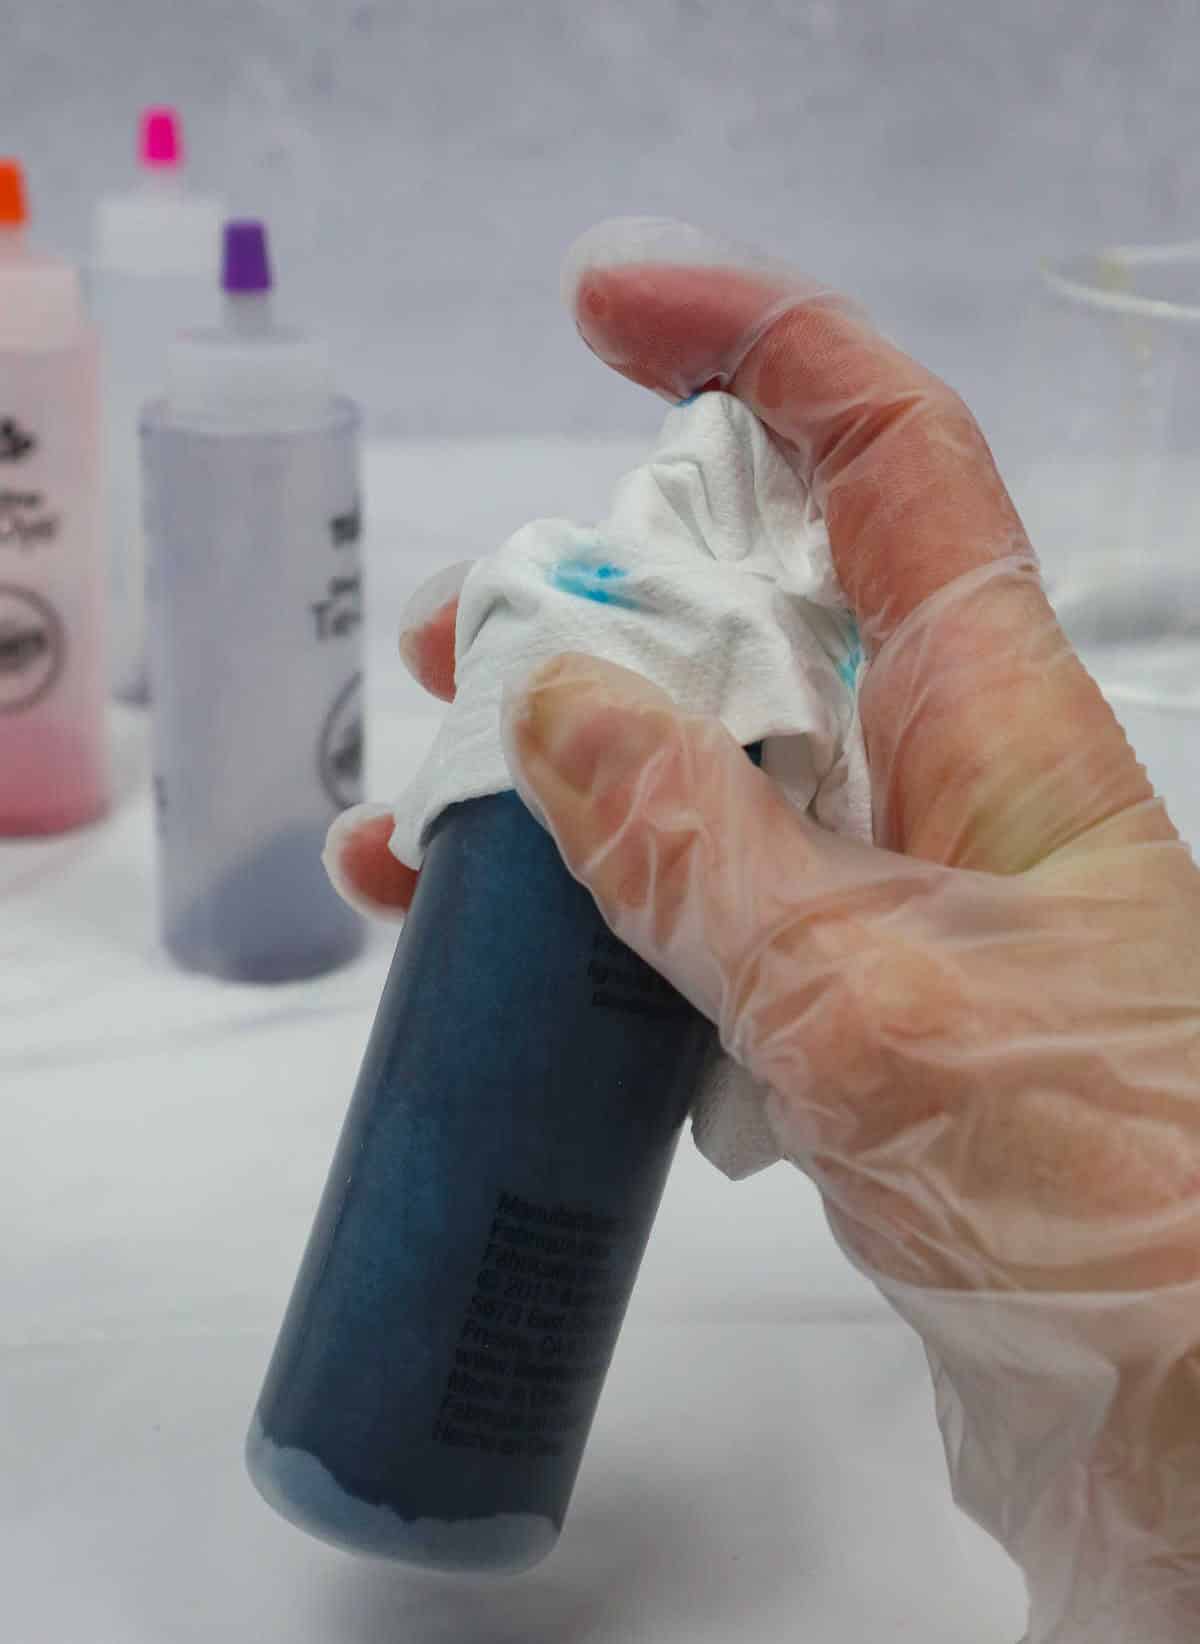
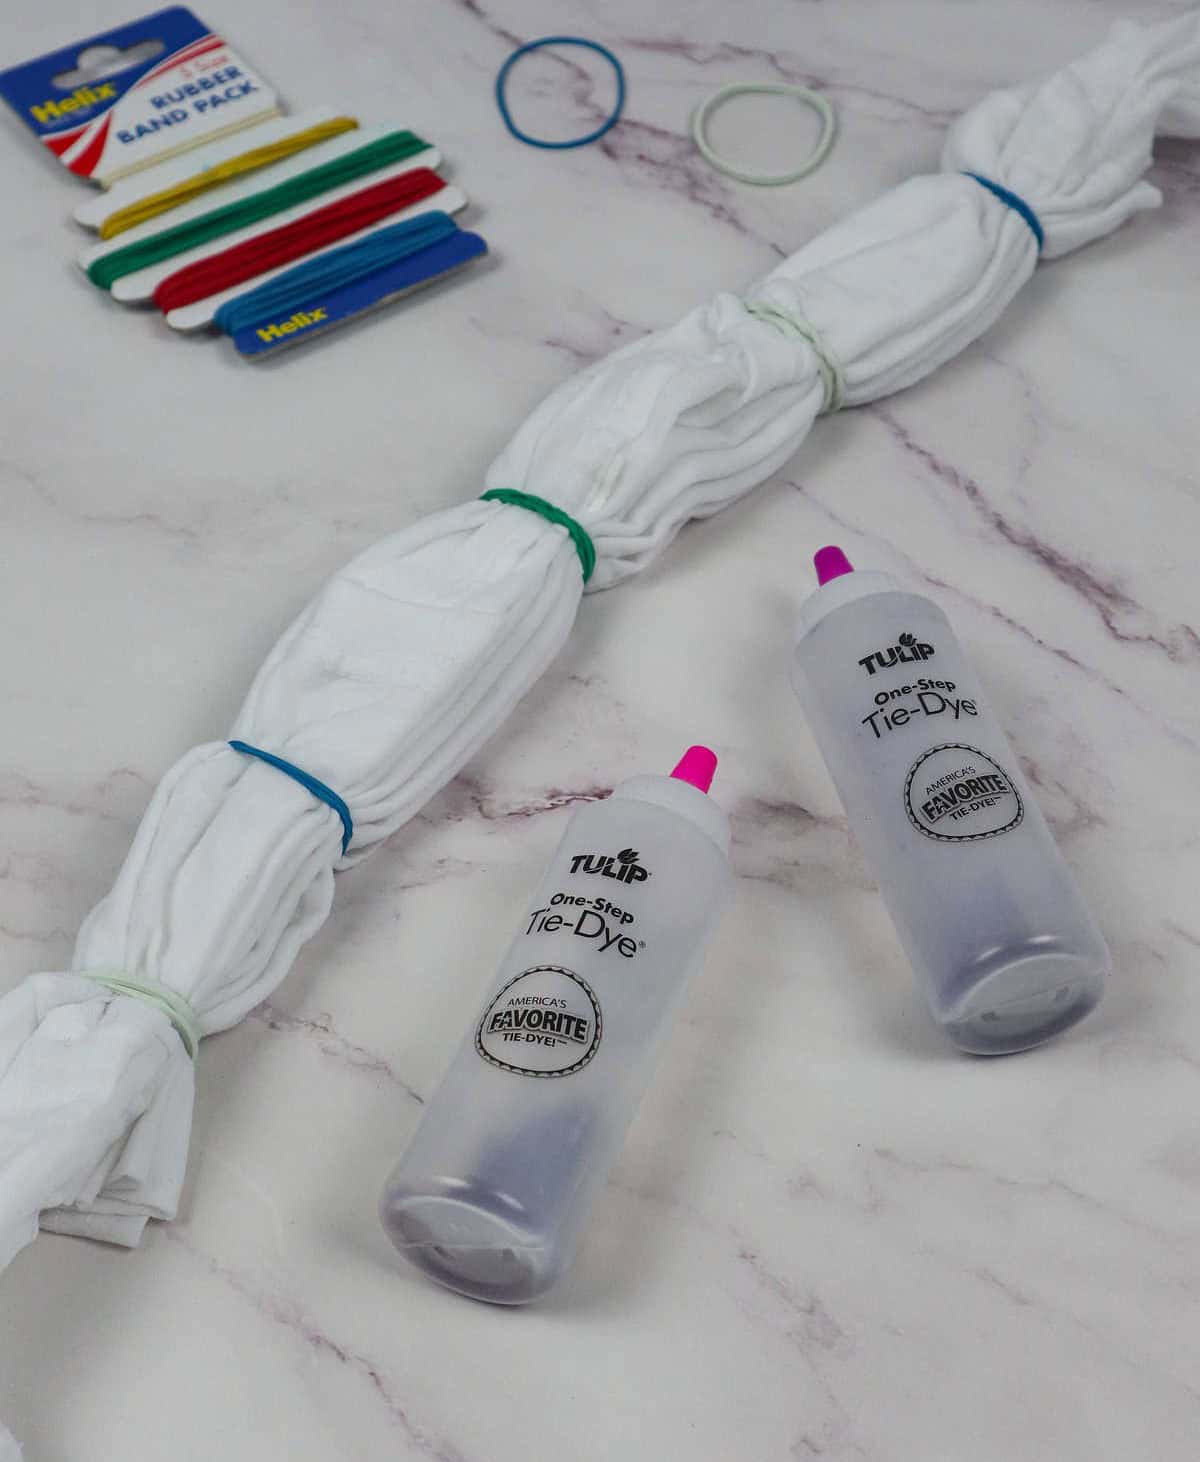
To begin preparing the dyes, first determine which kit you’re working with, as the process may differ. For this specific dye, simply combine the concentrated dye with water, stirring thoroughly to ensure a well-mixed solution – just be sure to close the lid before doing so, as we wouldn’t want any accidental spills! Additionally, consider incorporating soda ash or carbonated soda into your mixture, as it’s known to help retain color stains on fabric.
This step can make all the difference in achieving vibrant, long-lasting results.
Step 2
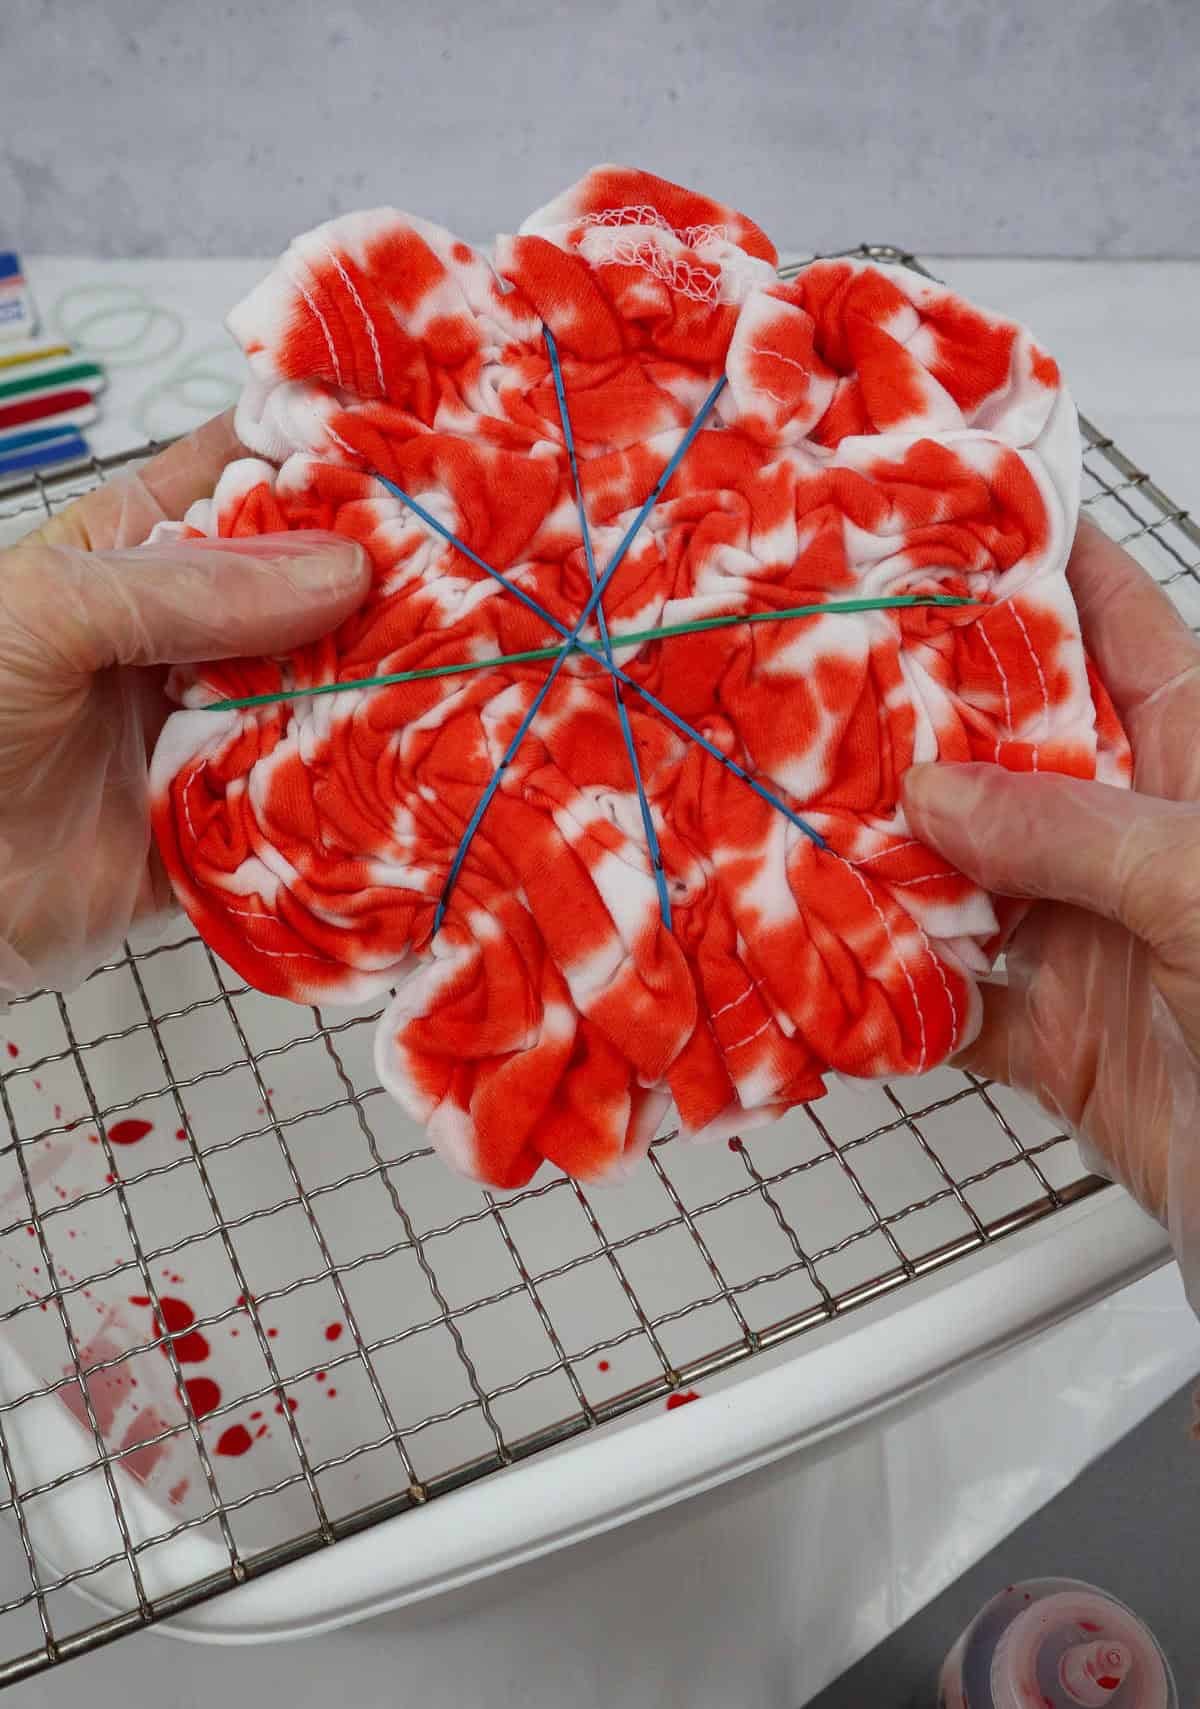
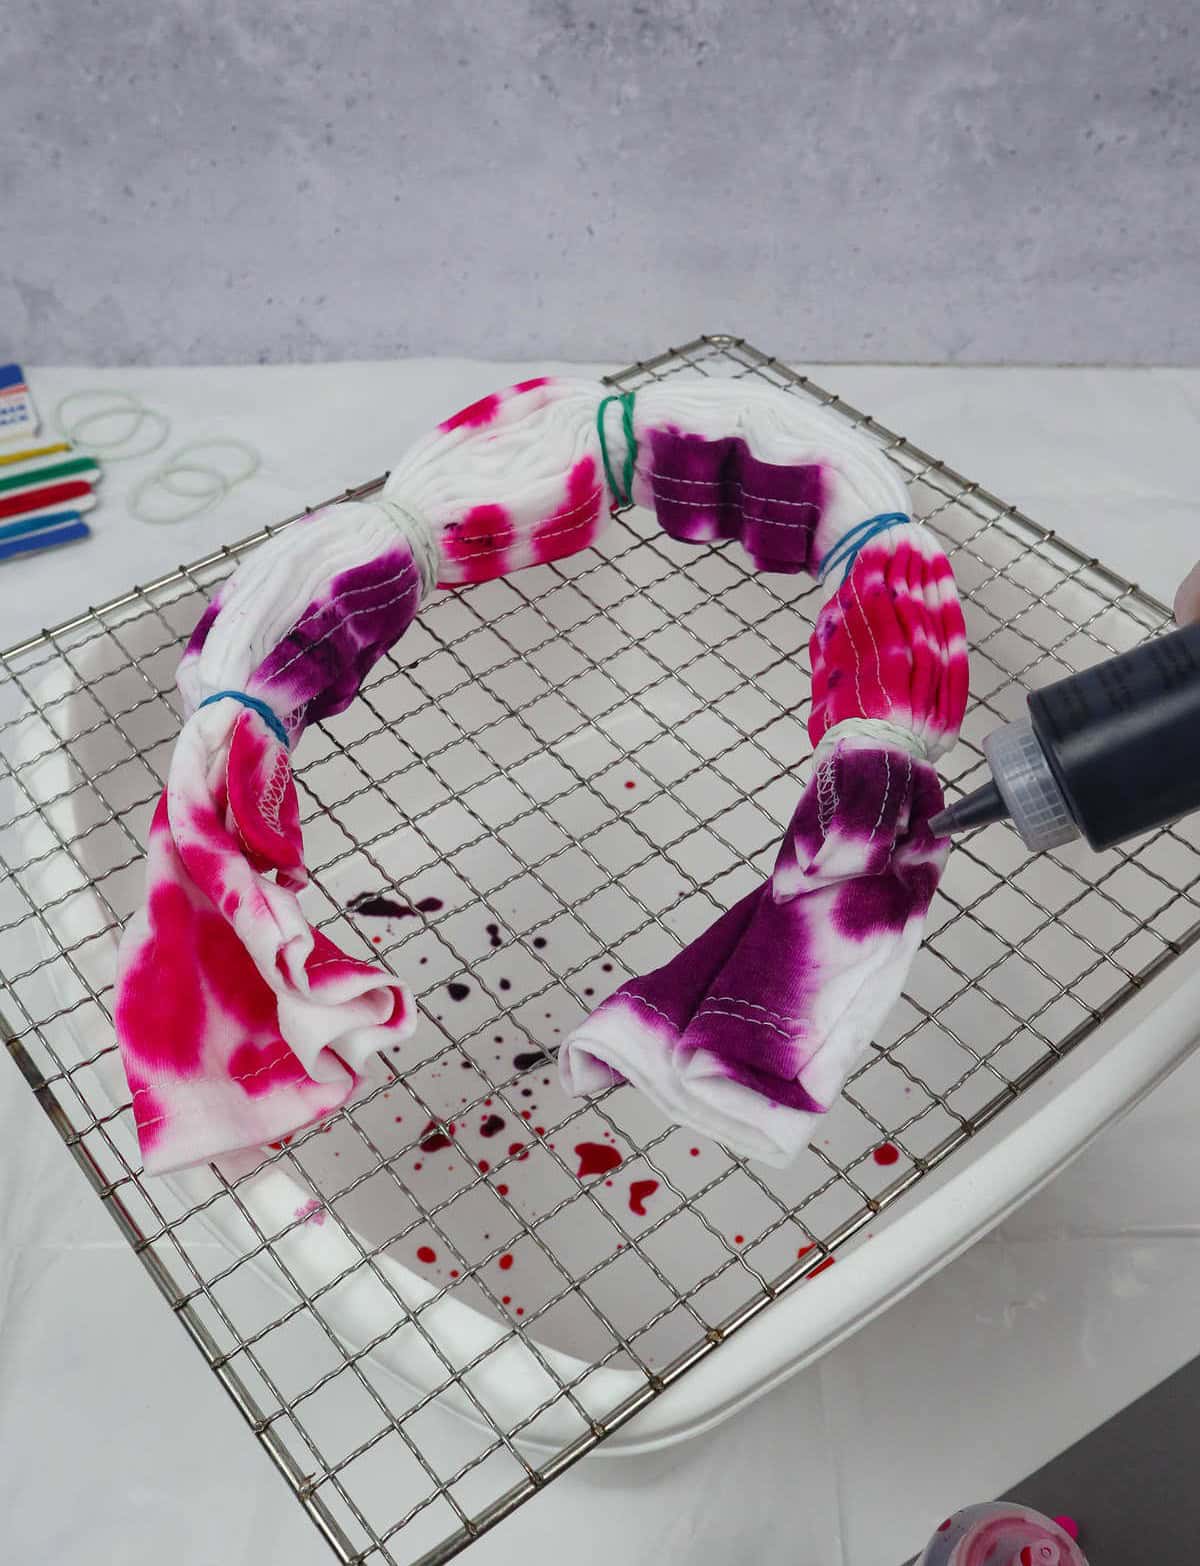
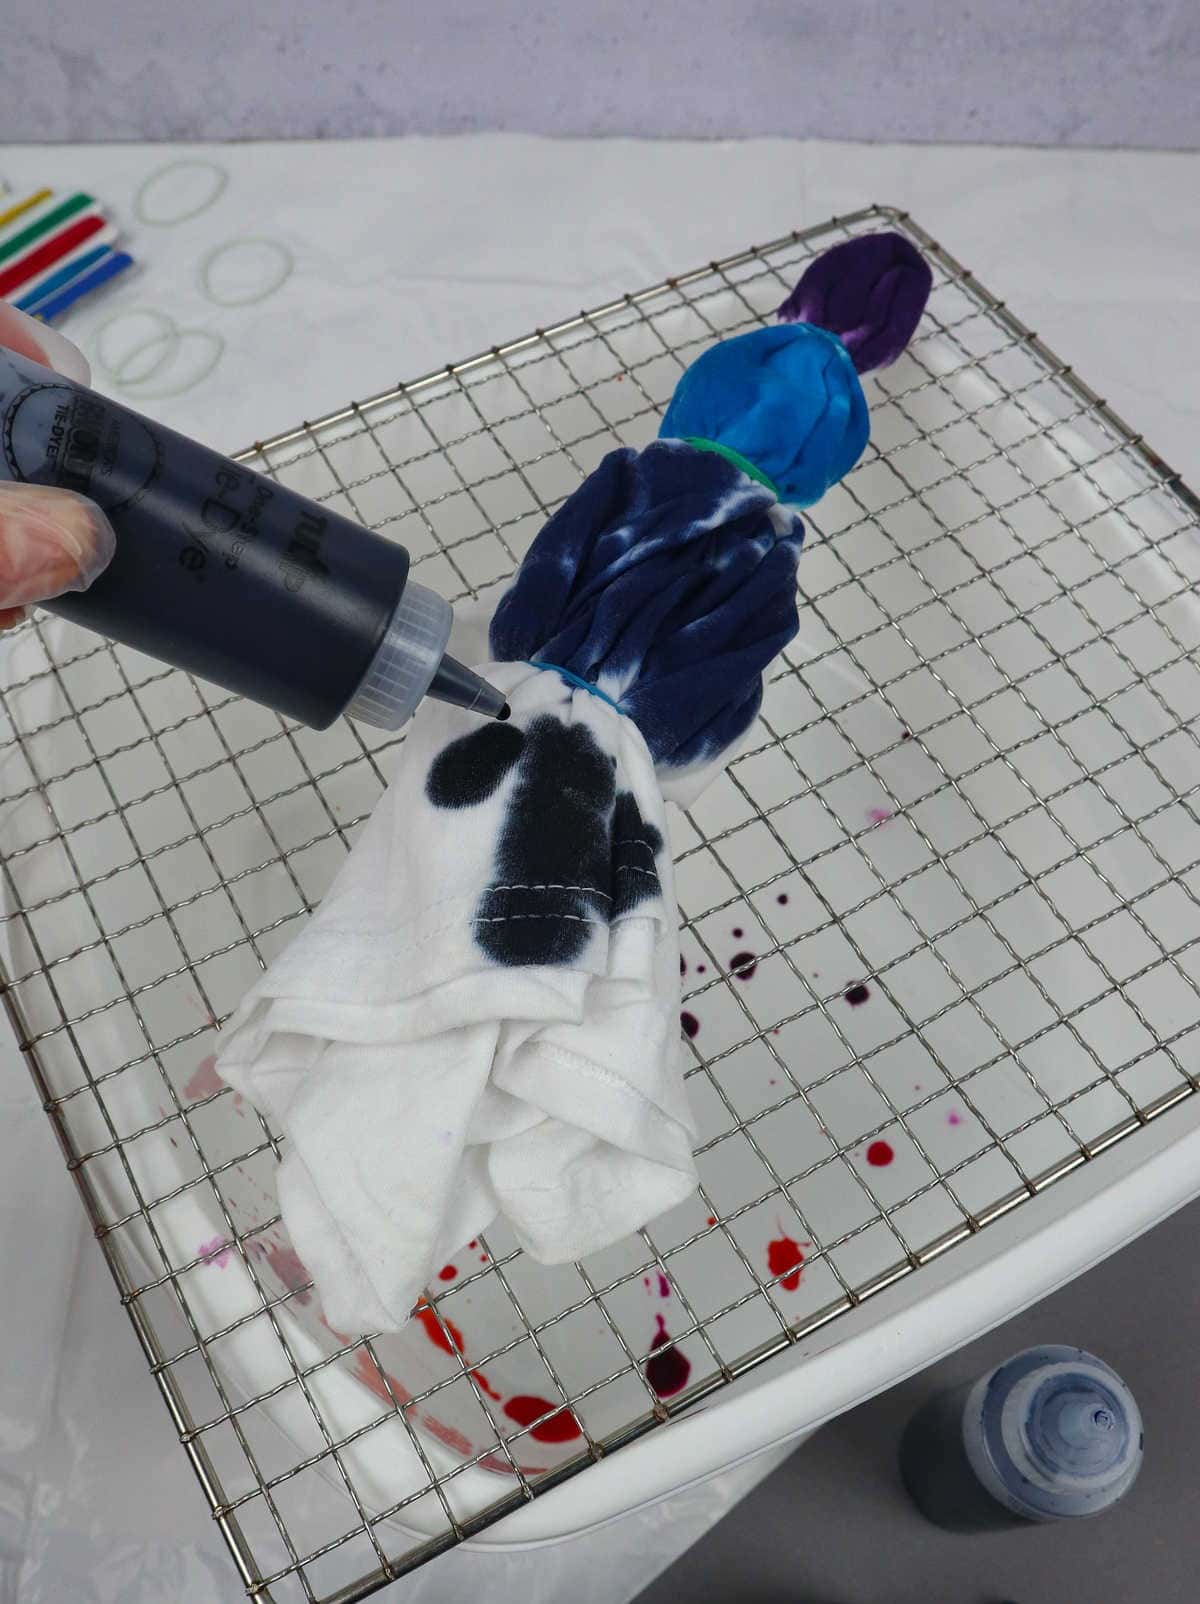
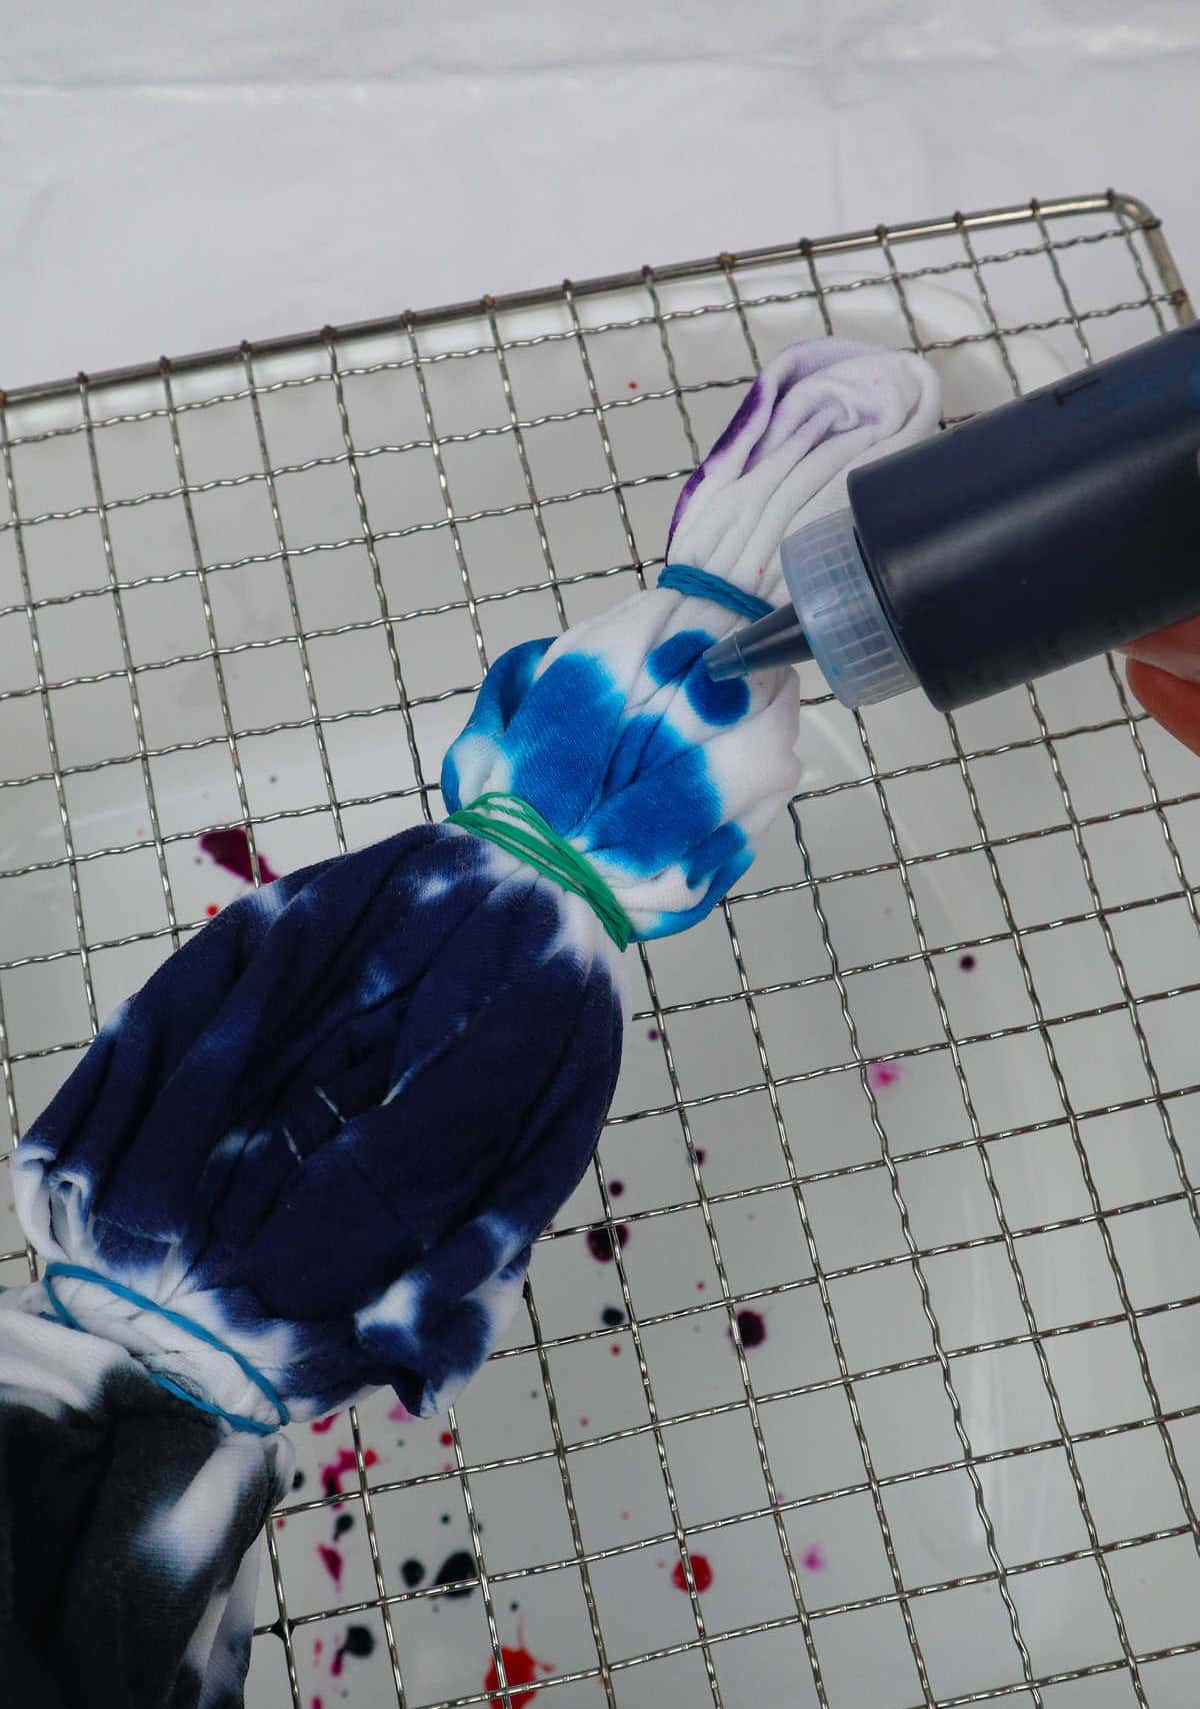
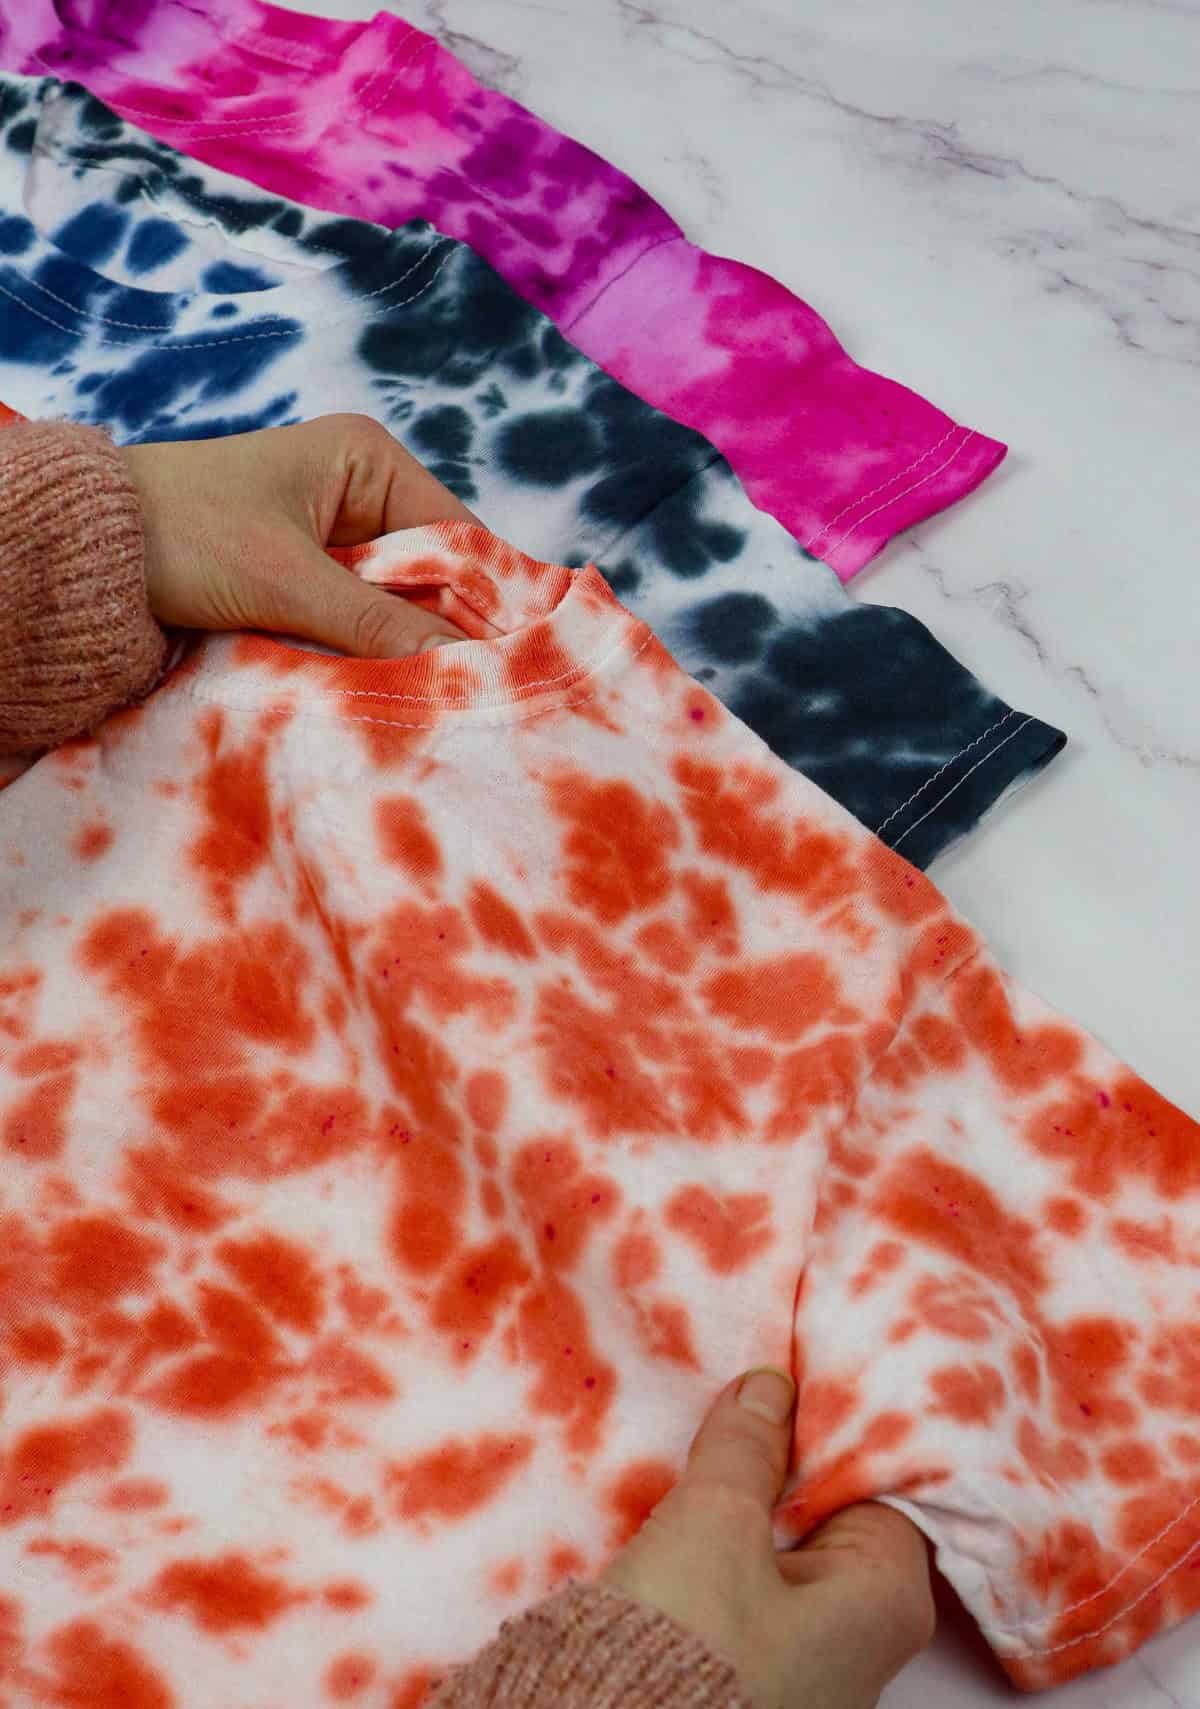
To begin with, place your first tee on a rack if you have one available. While not essential, utilizing a rack can facilitate the collection of any dye spills in a bowl positioned below. This setup ensures a tidy and controlled process. Next, grab your dye bottle and apply it to the top of the tee in a random pattern. Feel free to use multiple colors for added visual interest.
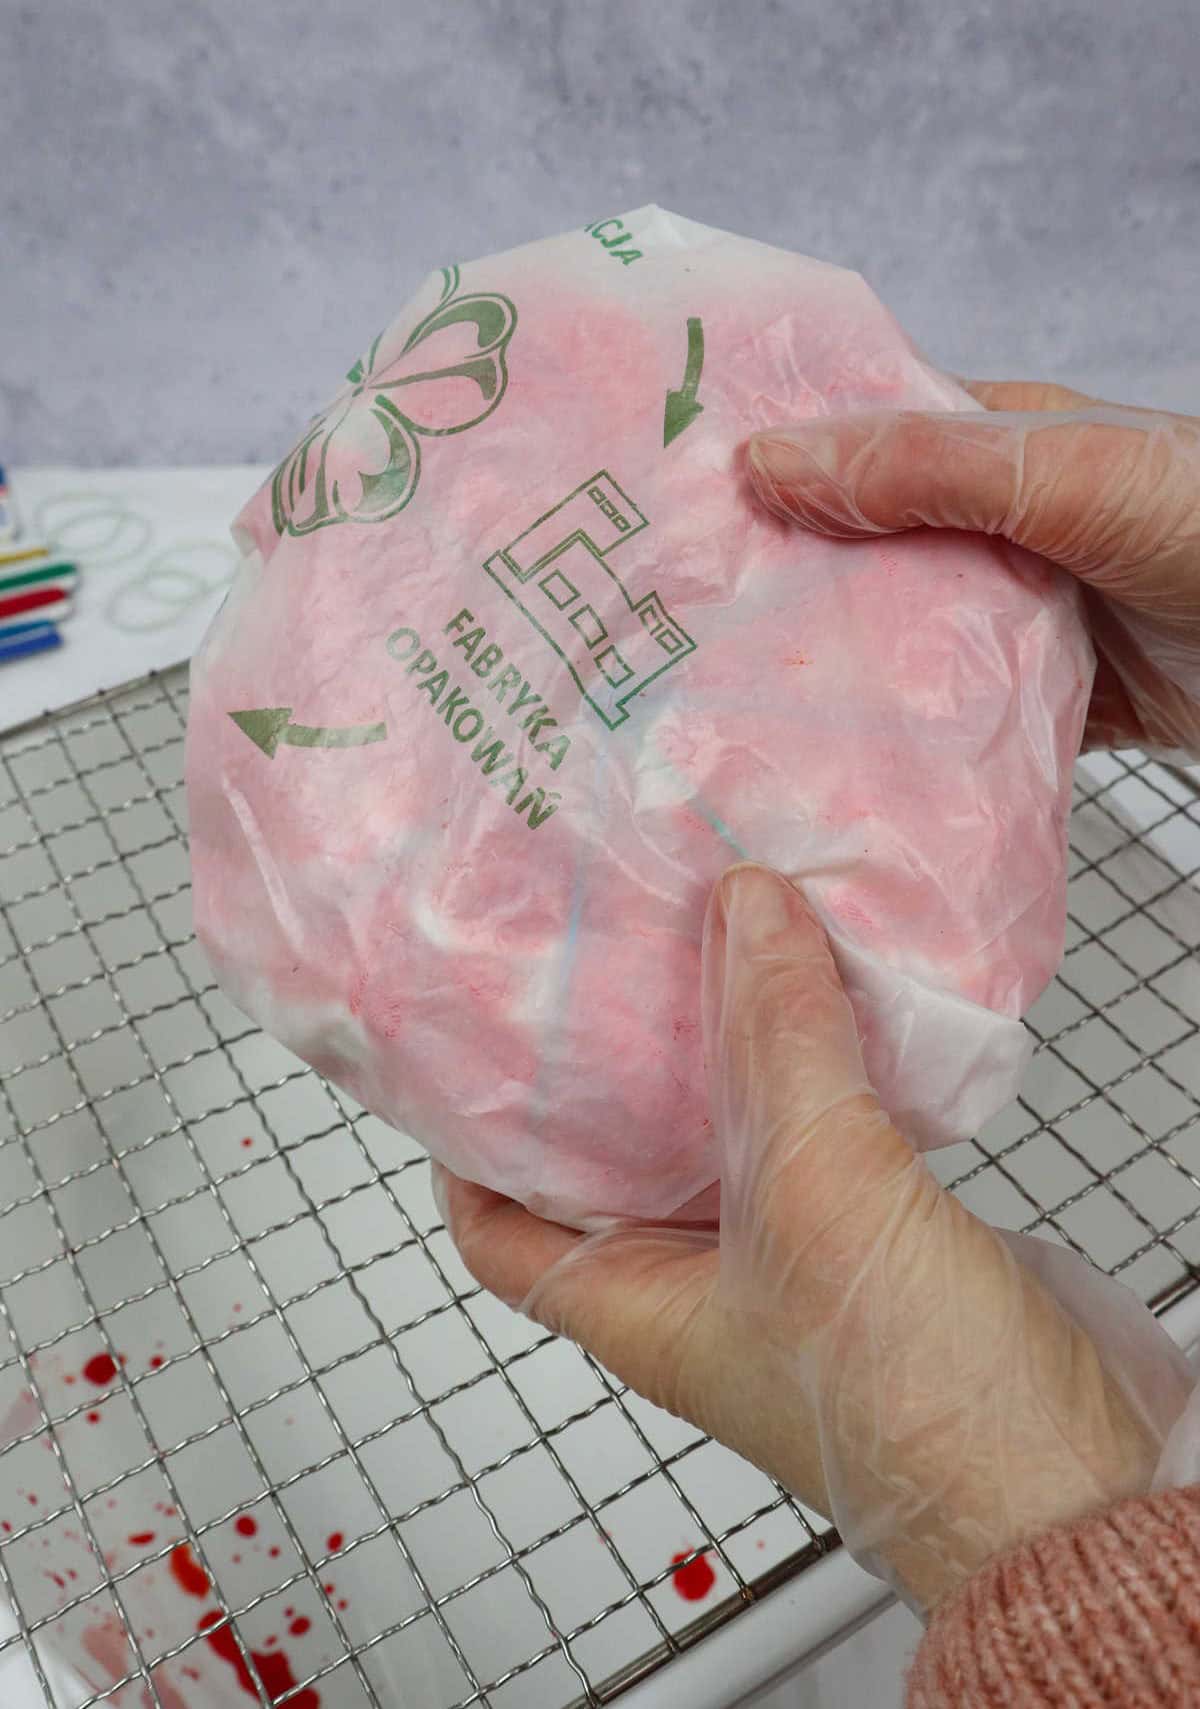
It’s crucial to remember that you’ll also need to dye the backside of the tee by rotating it and applying dye accordingly. Once the tee is dyed, place it into a plastic bag to maintain its dampness while the color sets. Set it aside temporarily before proceeding with the rest of the process.
Step 3

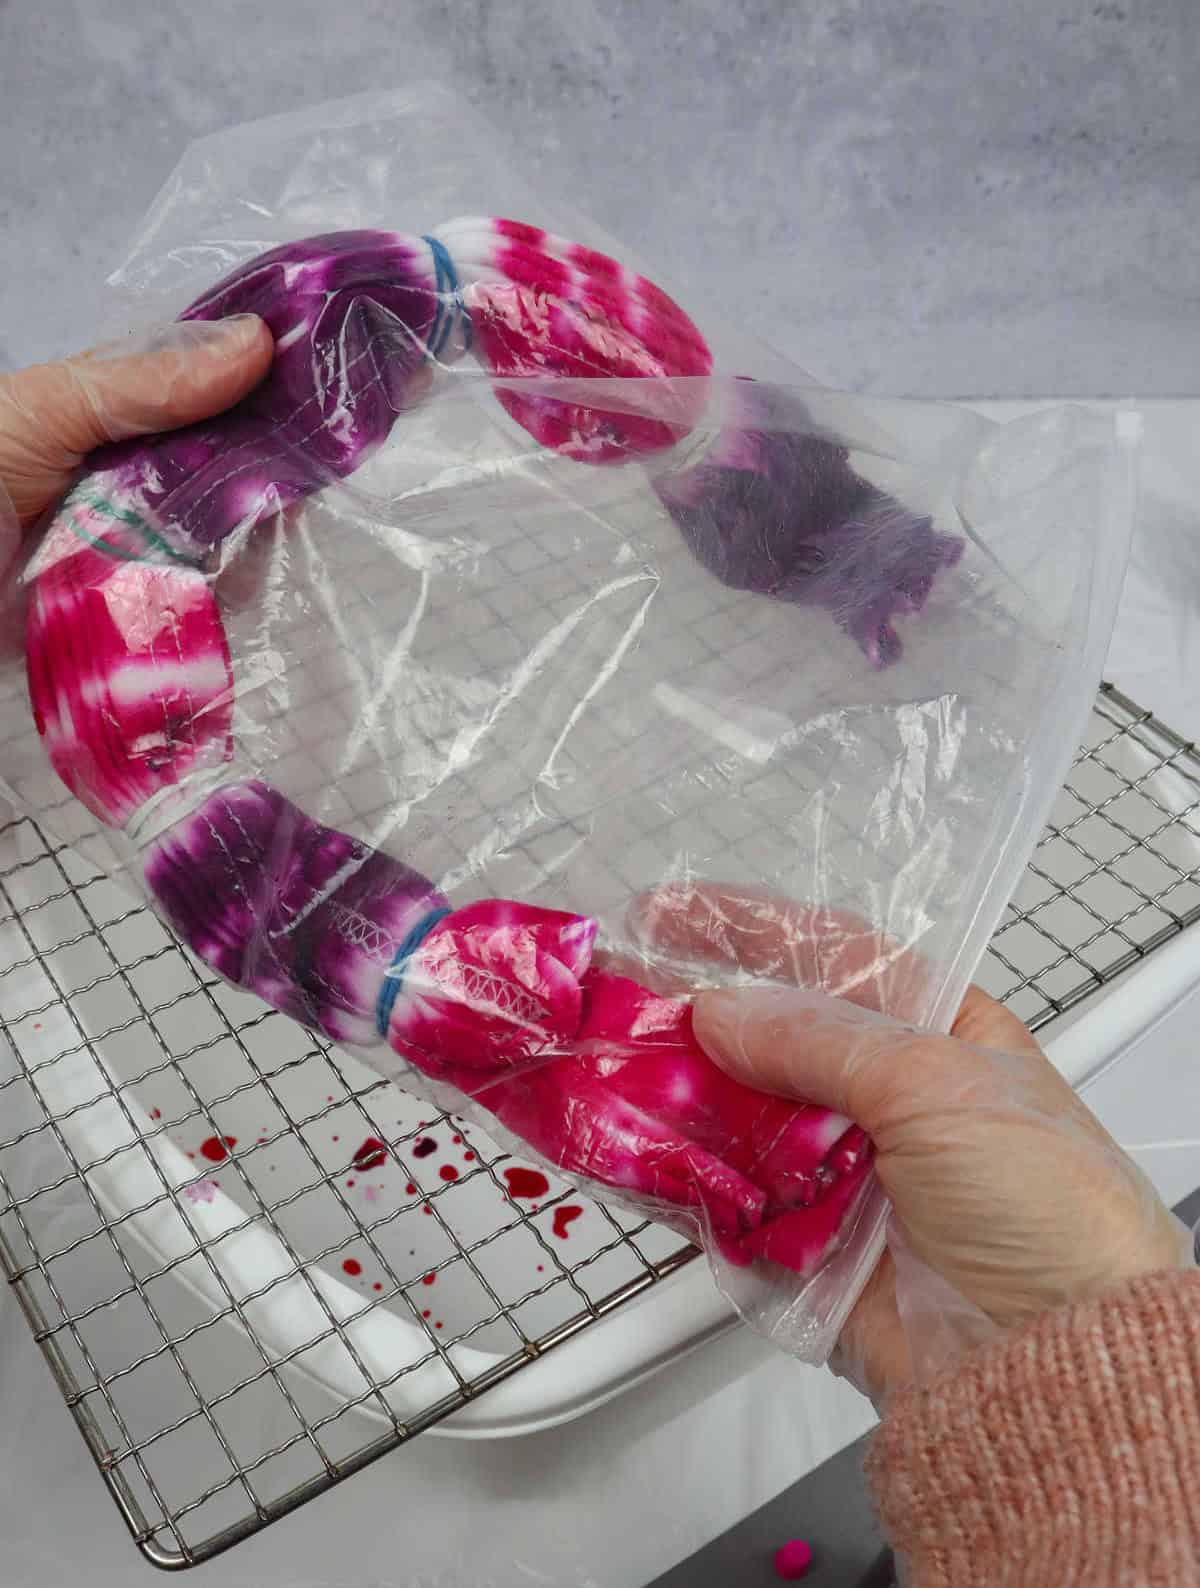
To achieve the striped look, start by placing the t-shirt on the rack and grab a bottle of dye. This method allows you to color each section between two bands with a unique shade, giving you the freedom to get creative and work in multiple hues depending on your desired level of quirkiness. Simply flip the tee over and dye the other side as well. Once both sides are dyed, place the t-shirt in a plastic bag and set it aside for processing.
Step 4
The ultimate moment in the dyeing process is just as enjoyable as the journey itself. Once you’ve reached this point, place the tee on your rack, gather your dye supplies, and get ready to unleash your creativity.
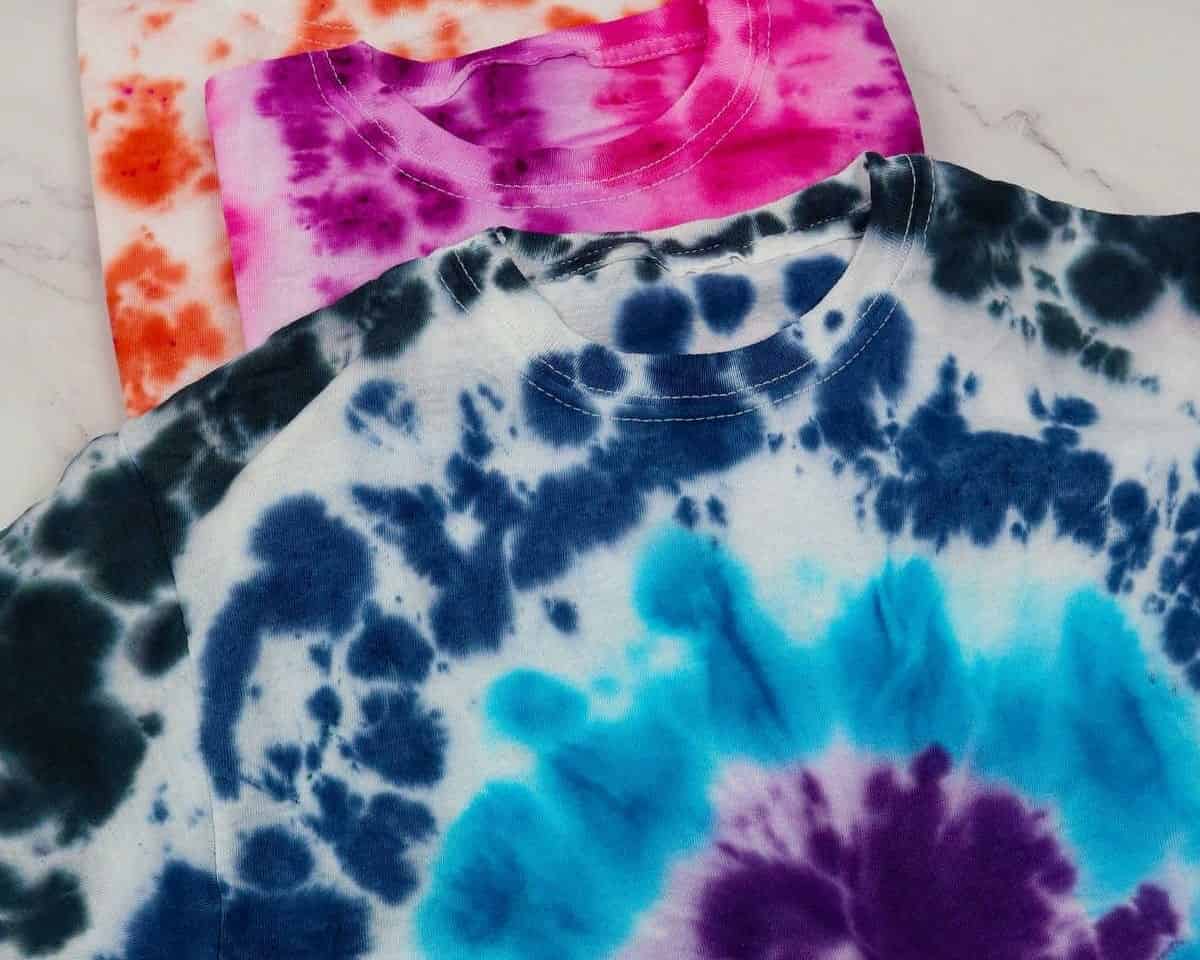
This tee design lends itself perfectly to gradient effects, with a rich blue core that seamlessly transitions into lighter shades of blue. You could also opt for a timeless rainbow color scheme – the possibilities are truly endless!
To complete the look, simply flip the tee over and dye the reverse side. Then, slip it into a plastic bag to allow the colors to meld together harmoniously.
Step 5
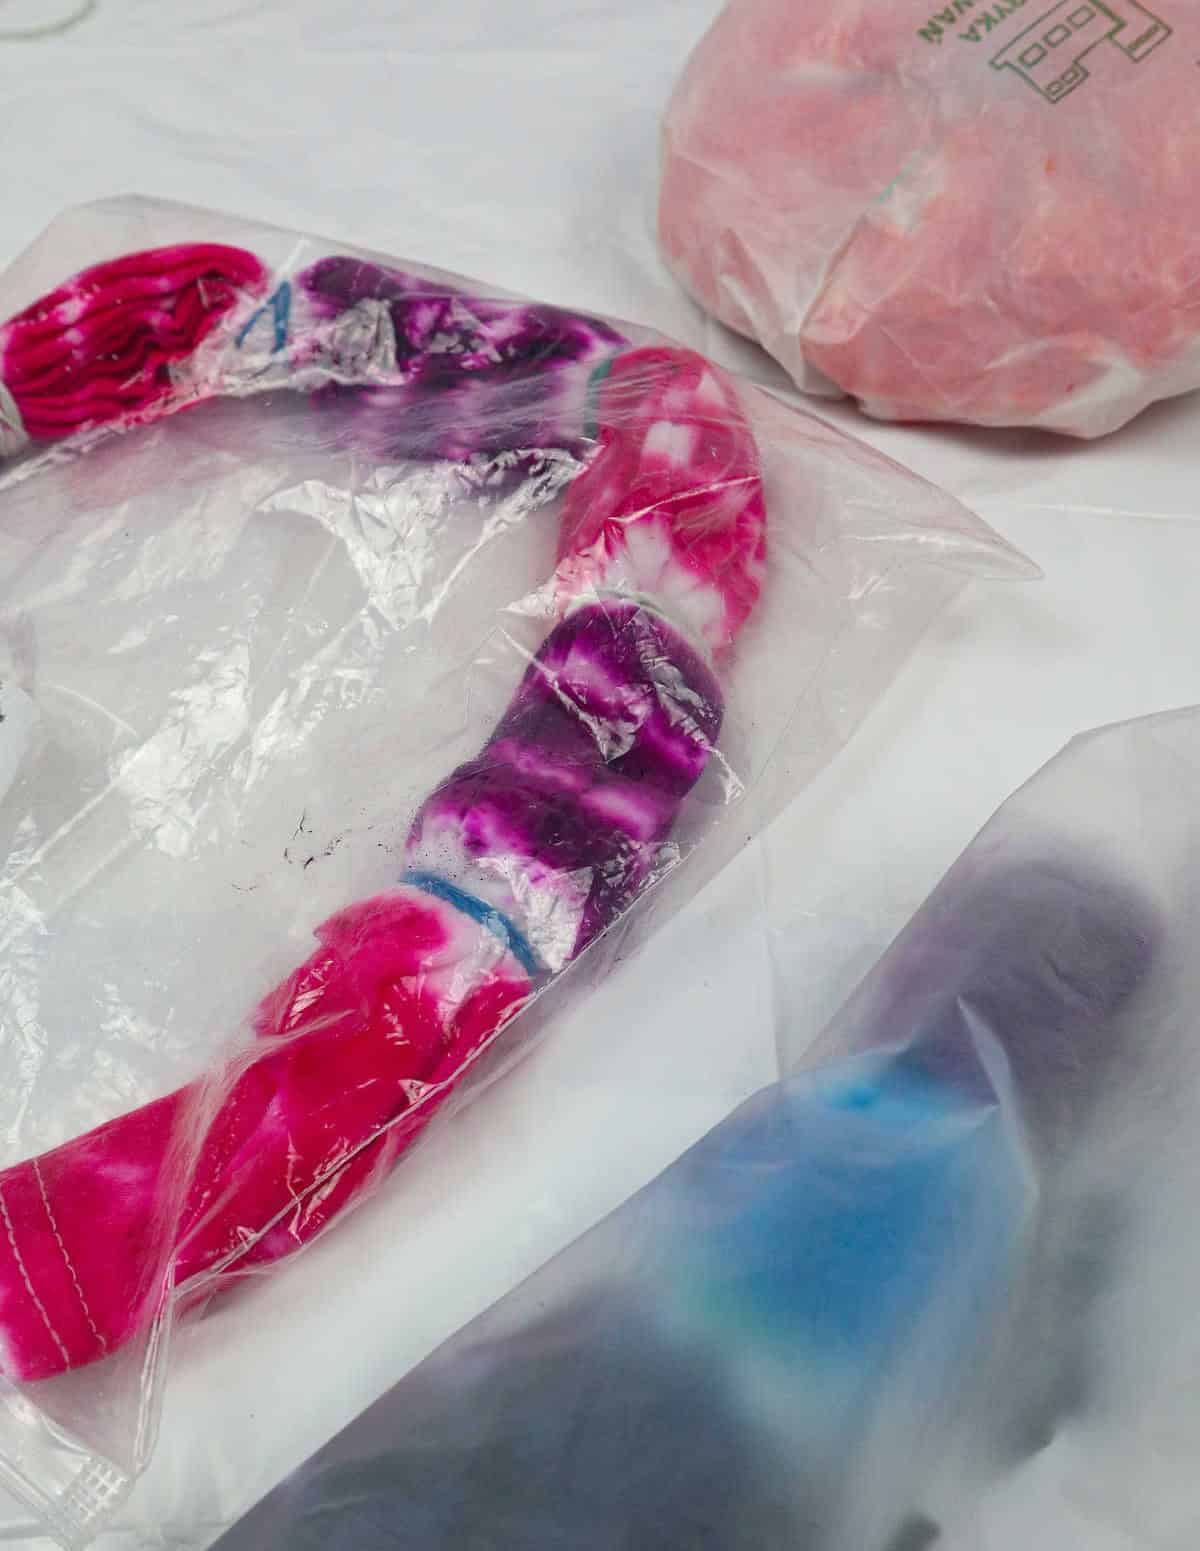
Allow the dye to penetrate the fabric thoroughly by letting it sit on the tees for an extended period of 8-12 hours. This prolonged exposure enables the dye molecules to form strong bonds with the fibers and fabric, resulting in a richer, more vibrant color intensity. The longer you leave it, the deeper and more saturated the hue will become.
Step 6
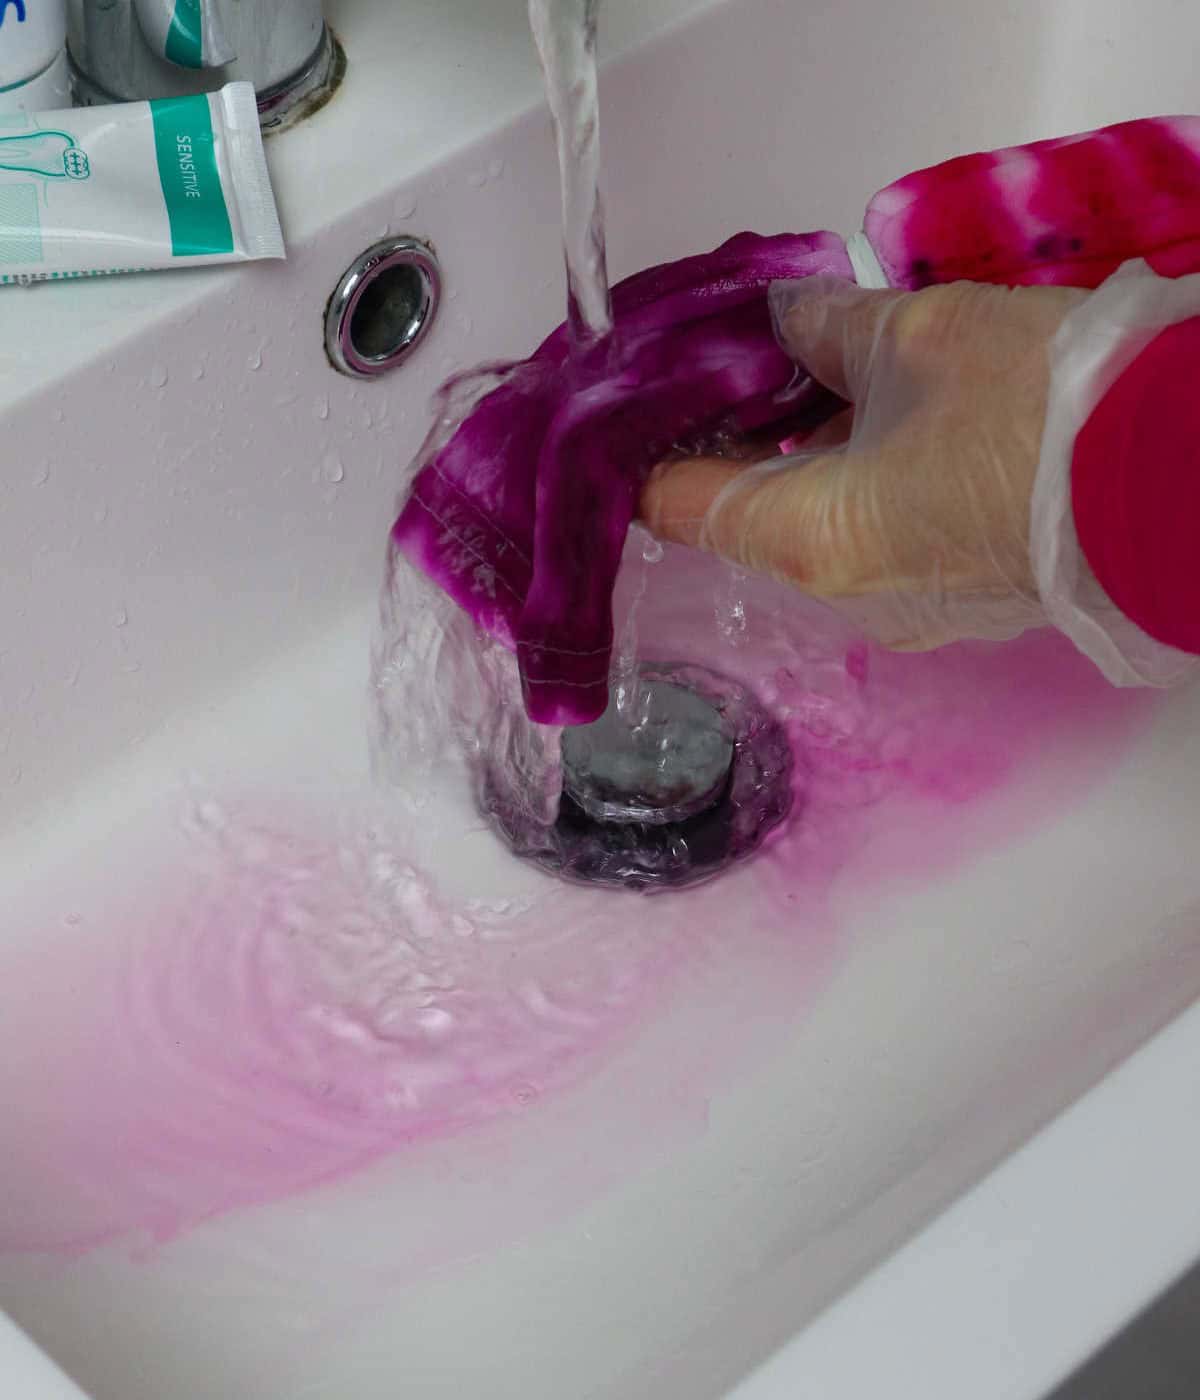
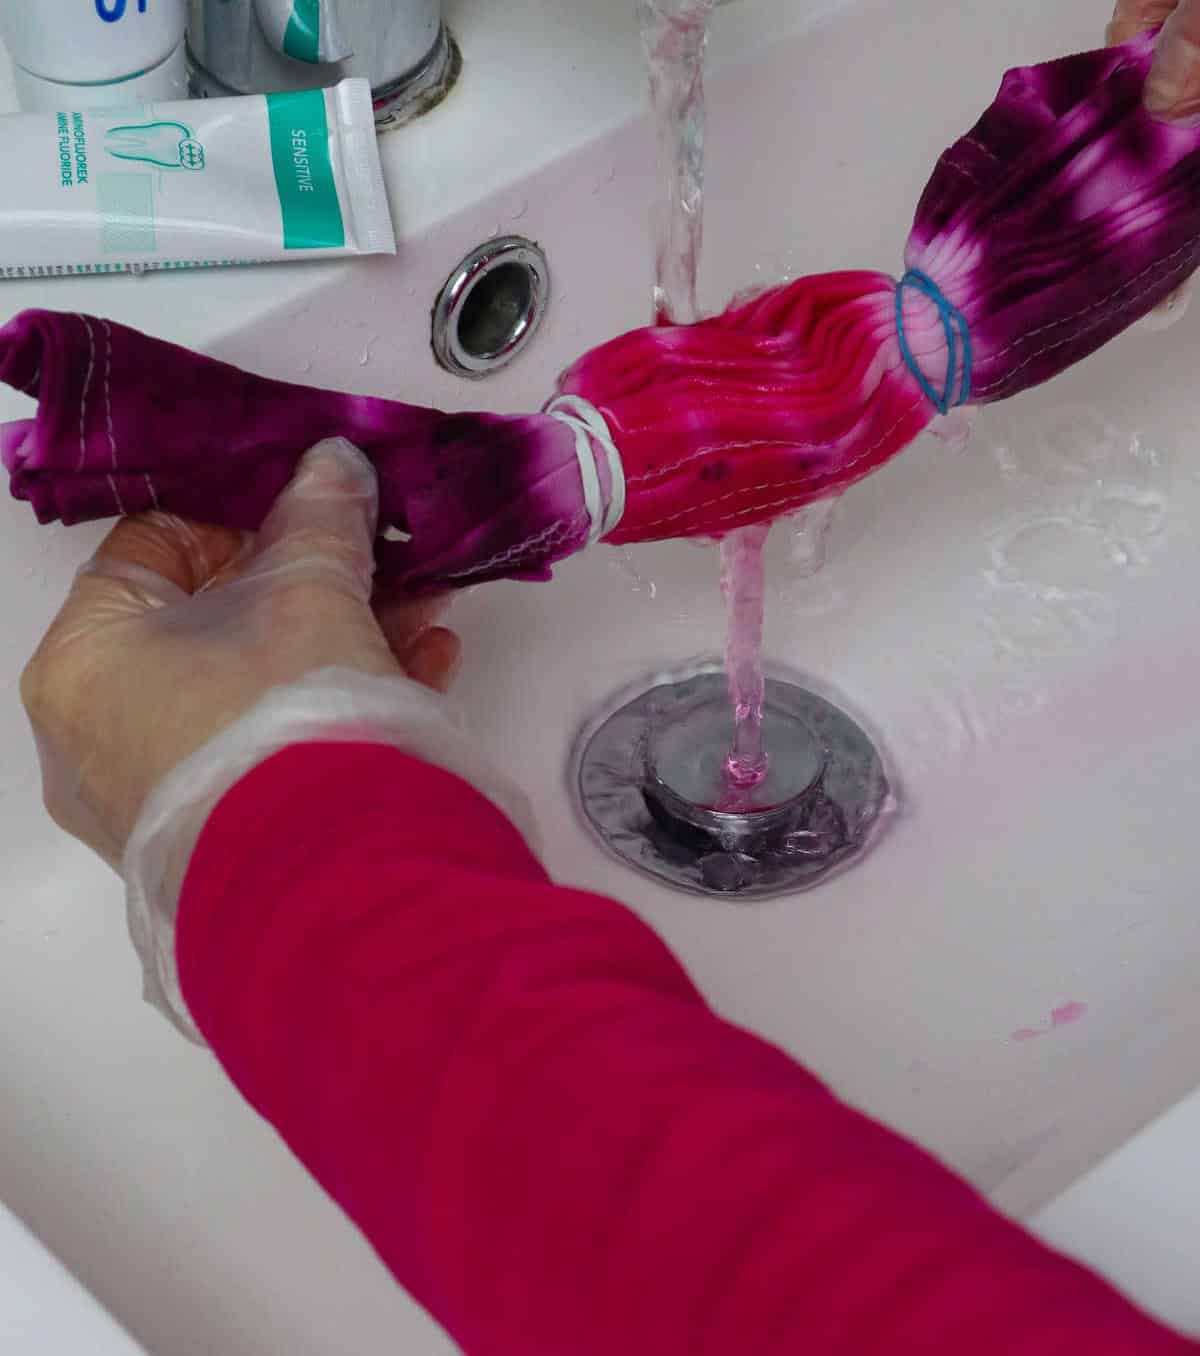
When rinsing the tops, be sure to submerge them in running water, but avoid letting them sit in the sink as the loosened dye could compromise the stain pattern. Since the dye is still quite vibrant, it’s best to rinse each tee individually under a gentle stream of tap water. To ensure a thorough job, don’t forget to slip on those gloves before you start!
Step 7
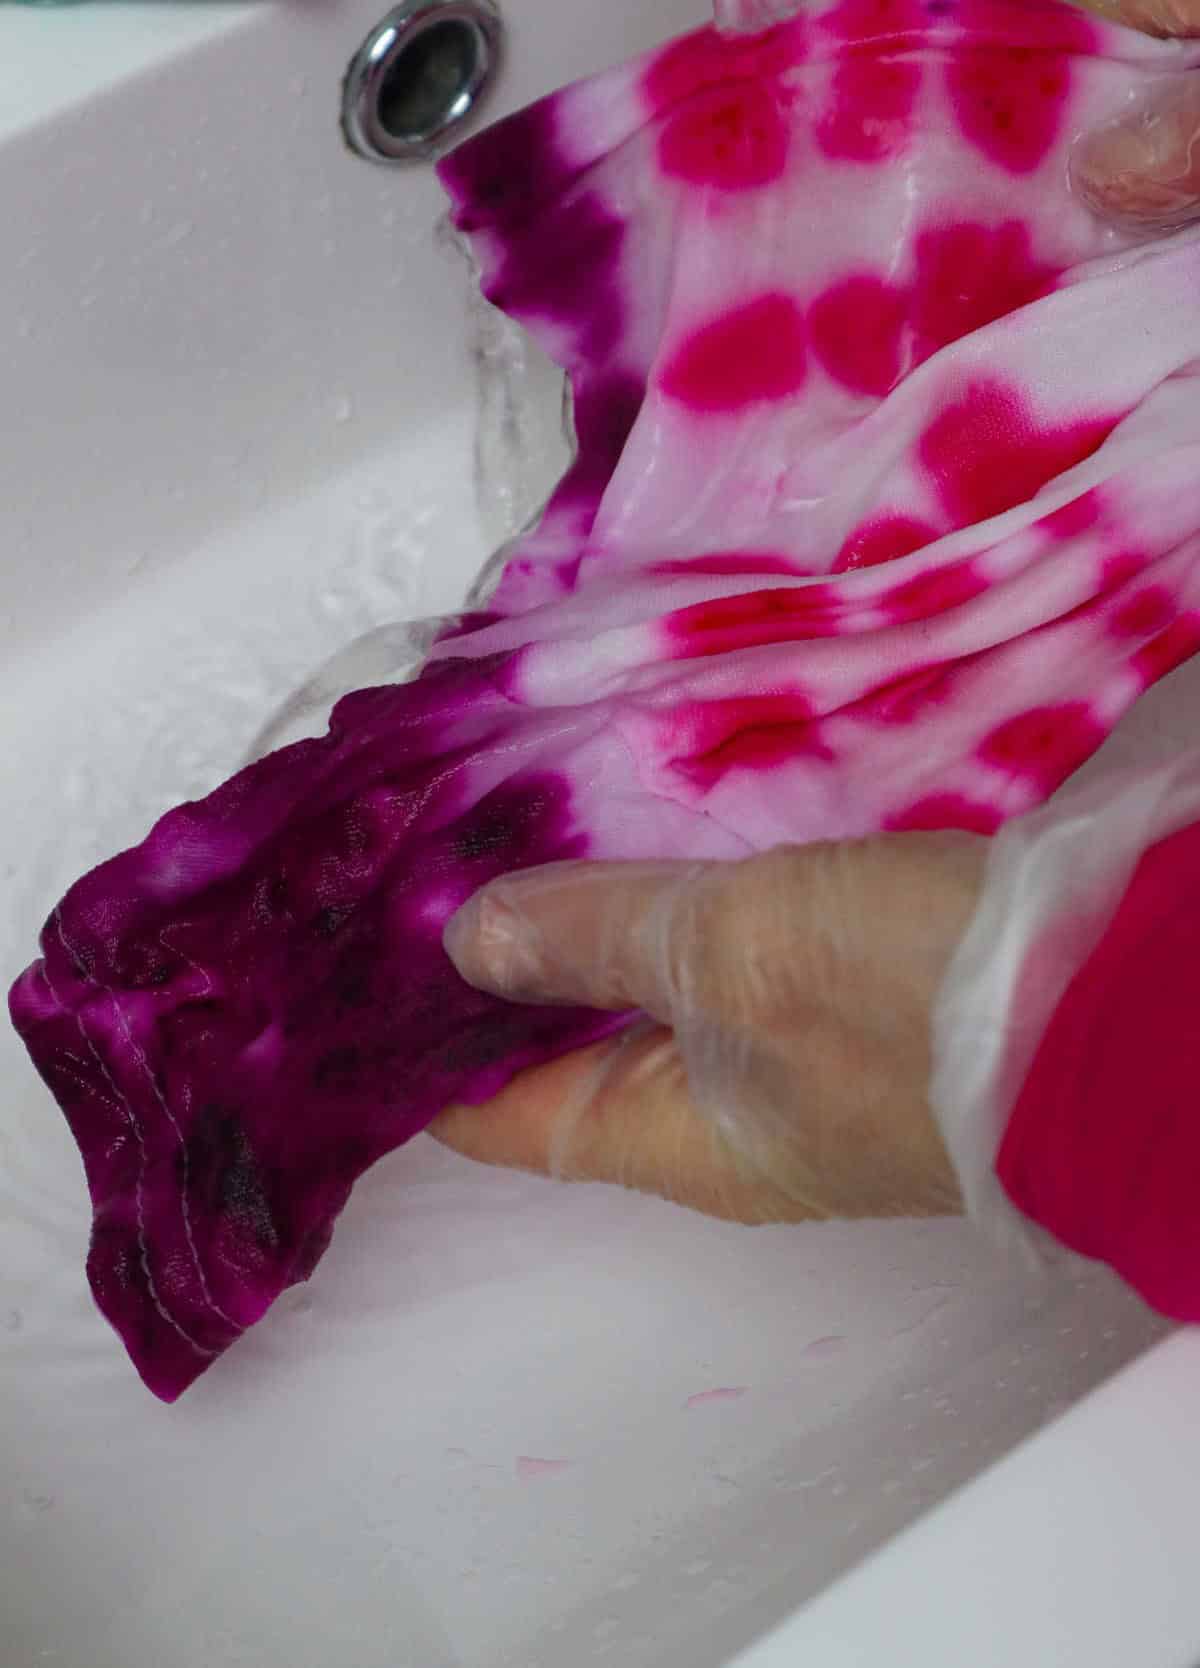
Unfold your t-shirts and tackle those stubborn folds by carefully removing any excess dye that may have seeped into the crevices. Repeat the rinsing process with warm water to ensure a thorough cleaning.
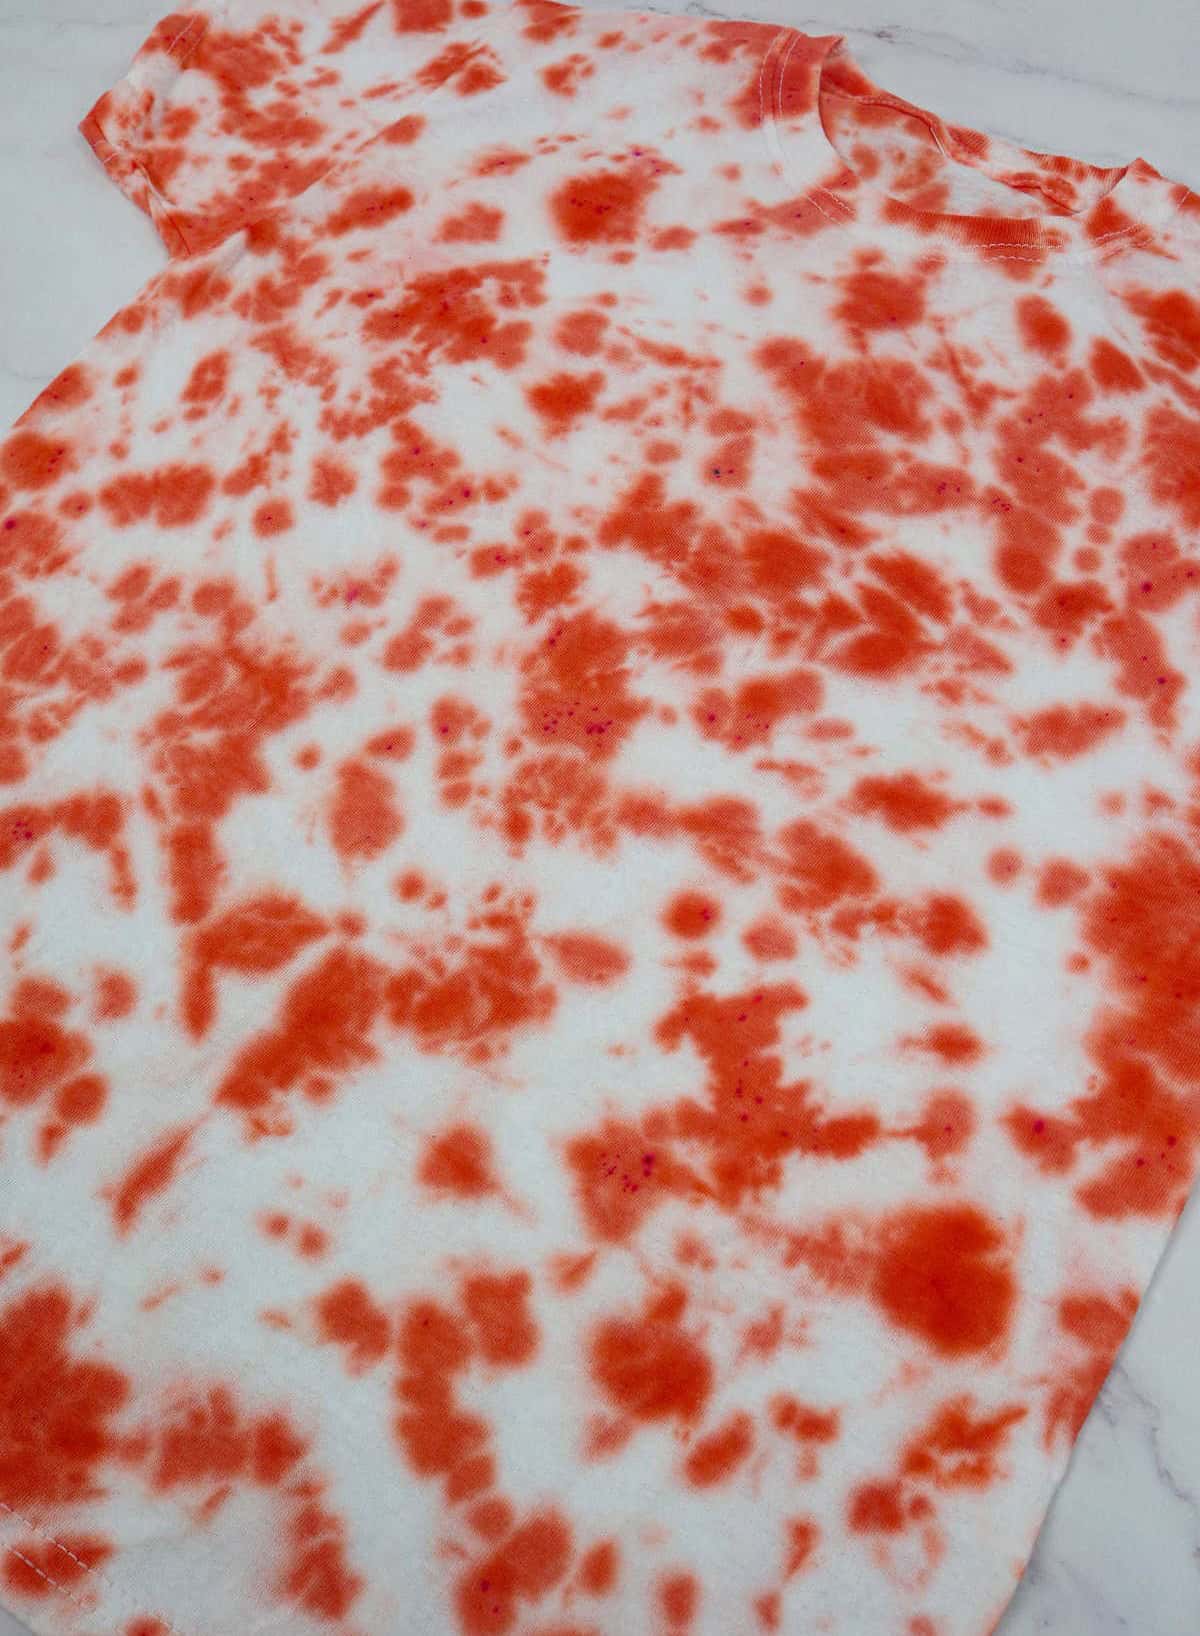
Once you’ve completed this step, your tees are ready to be worn once they’re dry. You can either pop them in the dryer or hang them out under the sun’s warm rays to air-dry them, whichever suits your style.
Is It Best to Tie Dye A Shirt Wet or Dry?
Dying a wet or damp t-shirt allows the colors to flow freely into the fabric, resulting in a beautiful watercolor finish. While this method provides a lovely outcome, it does reduce your control over the dye’s flow and staining of the fabric. However, this is often the preferred approach for beginners who want a straightforward tie-dyeing process.
On the other hand, working with a dry t-shirt enables you to demarcate colors more intensely and with greater precision.
This method provides relatively more control over how the dye flows and stains the fabric, making it an excellent choice if you’re looking for a more defined outcome.
How Do You Tie Dye a Shirt Without a Kit?
When it comes to natural color dyes, you’re spoiled for choice. Many common household items can be used as effective alternatives to commercial products. For instance, acrylic paints and food dyes are just two examples of the many options available. Even natural dyes like plants and spices can be used to create unique shades. However, it’s important to note that some of these methods may require a bit more trial and error to achieve the desired results.
To get the best out of your DIY dyeing experience, you’ll need to invest some time in researching how to fix and retain the color over time. Additionally, while many of the necessary materials can be found in a standard tie-dye kit, there may be a few extra items that you’ll need to source separately.
Other Crafts You Might Like
Embark on a creative journey with 47 exciting DIY scrap fabric crafts, ranging from functional pieces like aprons and hair bows to fashionable accessories such as scrunchies and headbands. These easy sewing projects are perfect for adults looking to express their creativity and produce unique items for personal use or gift-giving.
How to Tie Dye a Shirt (Step-by-Step)
Are you ready to unleash your creativity and transform your wardrobe with a unique DIY project? Look no further than the art of tie-dye! With just 10 minutes of prep time, an hour of active work, and 12 hours of waiting for the magic to happen, you can create one-of-a-kind shirts that reflect your personal style. Simply put on your favorite shirt, get creative with some dyes, and let the process unfold. The end result is a one-of-a-kind piece of clothing that’s perfect for expressing yourself.
Equipment
To ensure you can work comfortably without interruptions, consider having a few essential items nearby. These might include rubber bands for keeping small items organized, plastic dust sheets to protect surfaces from scratches and spills, as well as a washing up bowl (if needed) and an oven rack (should you be working on a baking-related project). Additionally, make sure to prevent your screen from going dark by adjusting the settings or using a screen saver.
Materials
For those looking to get creative and experiment with tie-dye, it’s essential to have the right materials.
A few basic items that are often overlooked but make all the difference in producing unique and vibrant results include latex gloves for protecting your skin from stains, plastic bags or containers for creating interesting folds and patterns, a white piece of clothing such as a shirt or scarf to serve as the canvas for your tie-dye masterpiece, and a tie dye kit which usually contains the essential chemicals and dyes needed to achieve the desired colors and effects.
Instructions
Before diving into the world of tie-dye, ensure you’re properly prepared. Cover your workspace with a plastic sheet and don your gloves and smock to protect yourself from stains. There are three ways to fold and bind your tees before dyeing: Scrunch, Bull’s-Eye, and Striped methods. The Scrunch method involves scrunching and gathering the tee in random folds, securing them with tight-fitting elastic bands. The tighter the bands, the more precise the stain pattern will be.
In the Bull’s-Eye method, find the center of the tee, pinch, fold, and pull it up, then bind it with a band. You can use multiple bands evenly spaced out. For the Striped method, lay the tee flat and create accordion folds from the bottom to just under the neck, securing them with elastic bands along the length. To prepare your dye, simply mix water and carbonated soda well. Apply the dye randomly to the first tee on both sides, using multiple colors if desired.
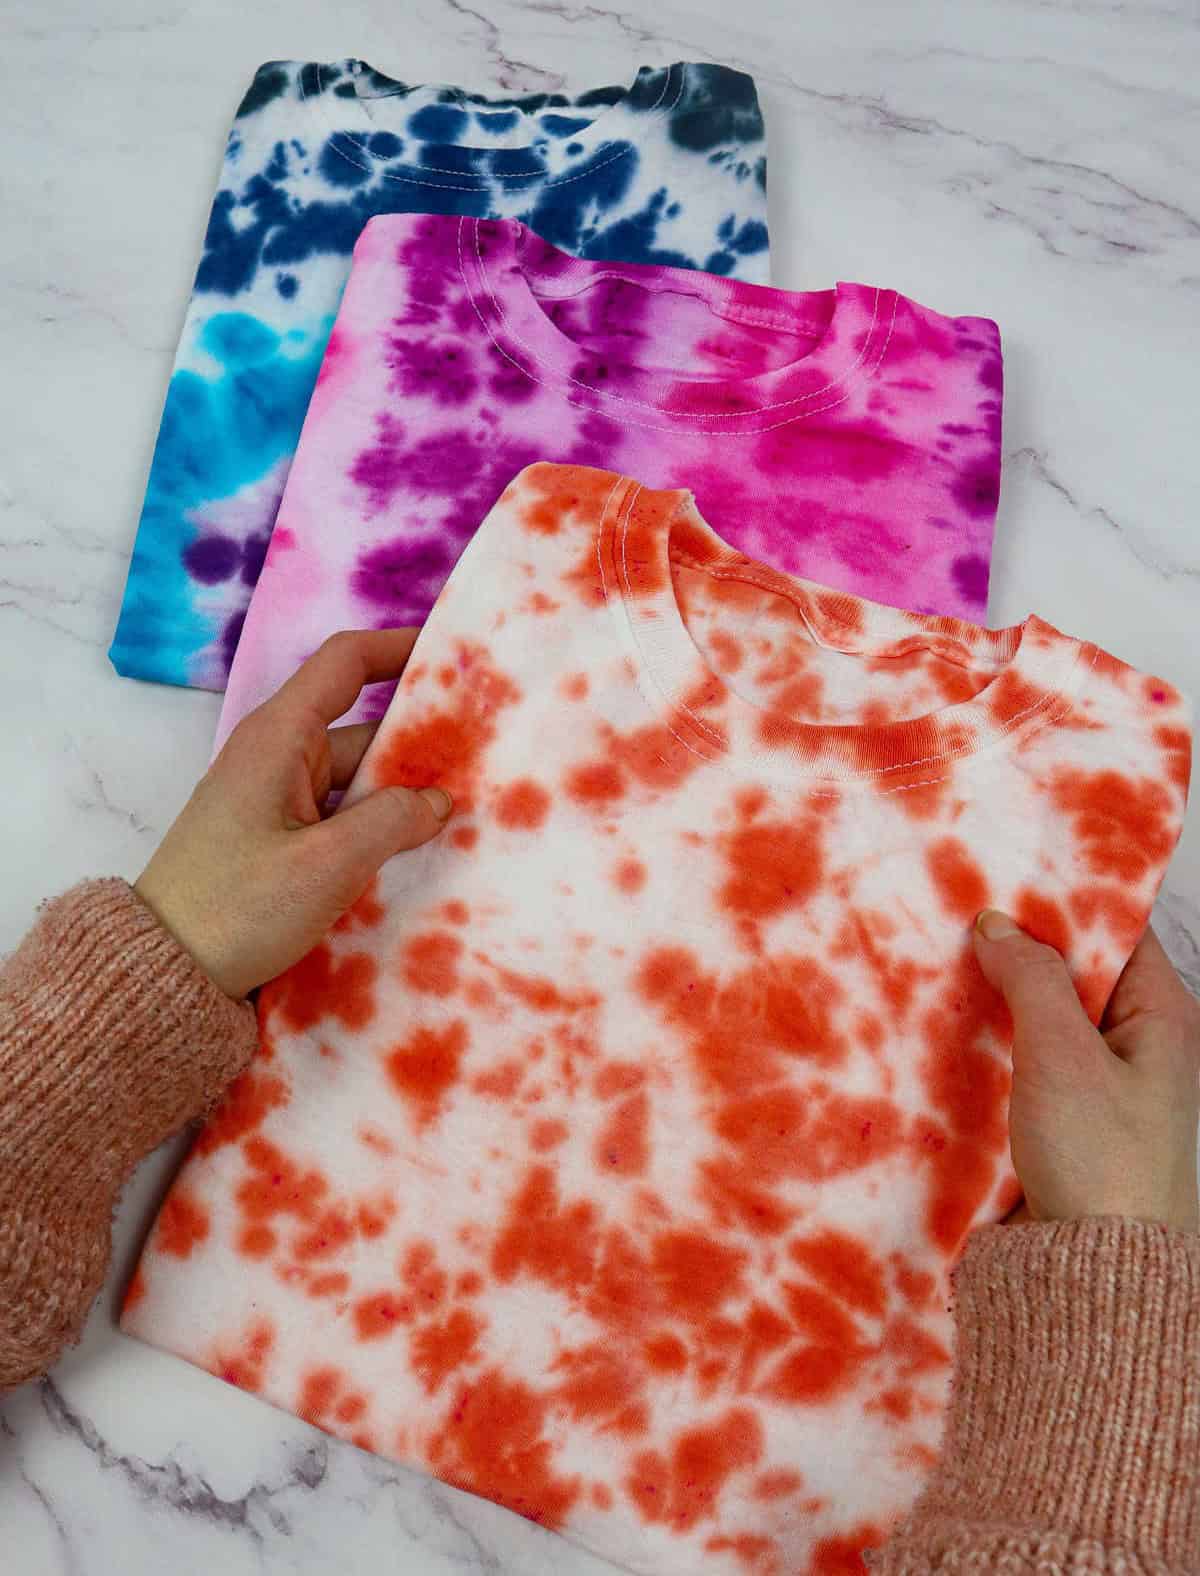
For the second tee, use a gradient technique to create a pattern that’s dark in the center and lighter as it fades out. The third tee can feature a simple striped multi-colored design. Feel free to experiment with different patterns – there are no hard and fast rules. Once you’ve dyed your tees, place them individually in plastic bags and allow the dye to set for 8-12 hours before rinsing under running water.
Avoid soaking or allowing the tee to sit in a pool of water as the dye is still strong and can stain the fabric or ruin the pattern. Rinse the tees in warm water, then dry them completely. Your tie-dye tees are now ready to take the world by storm!