Got a stash of wood scraps lying around? Why not put them to good use and craft something unique? These woodworking ideas offer a delightful array of DIY projects that anyone can tackle – and even sell for some extra cash! The possibilities are truly endless when it comes to woodsy crafts. From coasters and wooden trays to decorative accents, centerpieces, and more, the creative options are virtually limitless.
To get you started, I’ve rounded up 31 DIY wood craft ideas that you can whip up in the comfort of your own home.
DIY Wooden Serving Tray
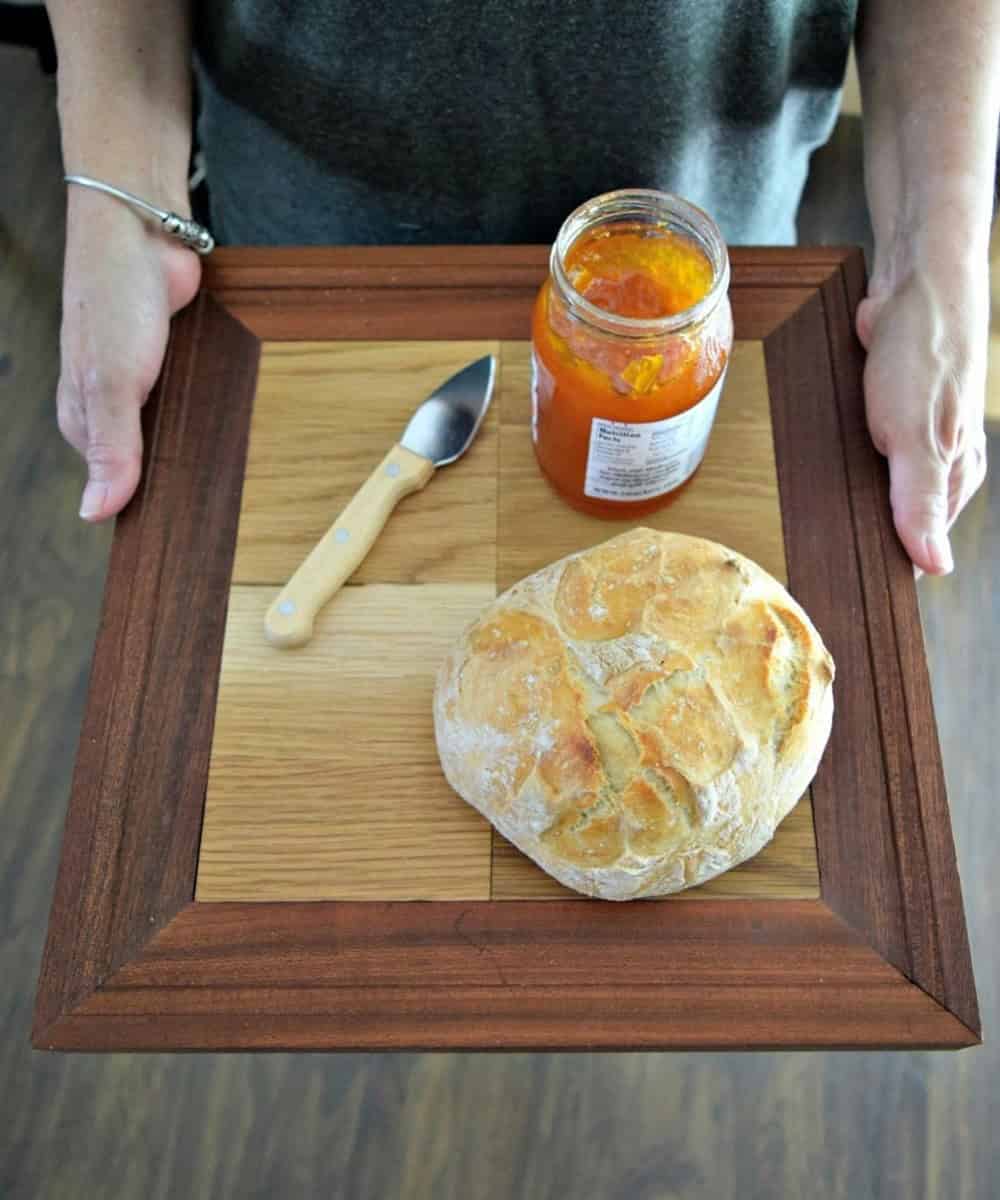
If you’re looking for a DIY project to get started, consider crafting a wooden serving tray. Having multiple trays on hand can be incredibly useful, especially if you frequently entertain guests. You can use them for a variety of purposes, such as serving bread and cheese, drinks, or even displaying decorative items. Once your tray is assembled, don’t forget the final crucial step: applying a protective coating.
Use food-grade mineral oil or butcher block oil to ensure your wooden serving tray remains safe for use with your favorite dishes. You can find these oils easily online.
Giant Jenga
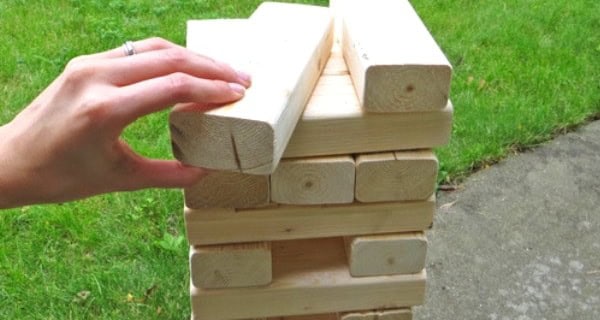
Who wouldn’t want to play giant Jenga? I’ve had it on my DIY bucket list for years, not just because it’s a breeze to create the blocks, but also because it’s an absolute blast to play. Imagine hosting a party and having a round of giant Jenga in your backyard – it’d be the perfect addition to your next BBQ or Sunday brunch. With your materials ready to go, you can start building right away.
Just make sure to gear up with some work gloves and protective eyewear before firing up that compound miter saw; safety first!
DIY Decorative Wooden Houses
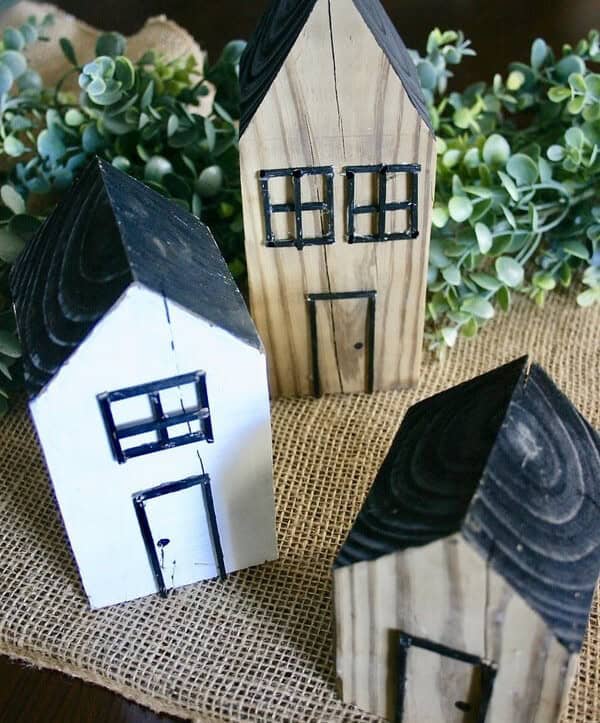
While you may have some leftover scrap wood from your previous DIY project, this decorative wooden house requires sturdy materials and some creative woodworking skills. Gather your supplies, which include craft sticks like those shown, a glue gun, sandpaper, and acrylic paint. The real fun begins when it’s time to paint the wooden house.
Feel free to keep things rustic and charming with a traditional barn house design or let your imagination run wild and create something truly unique – after all, that’s what DIY is all about!
Wooden Chest
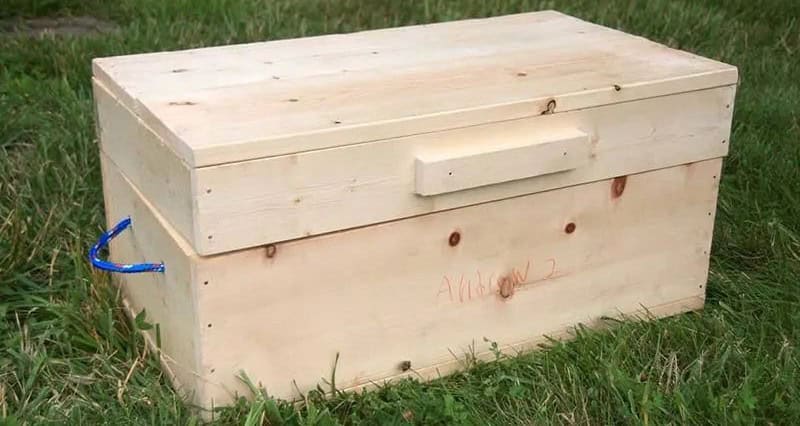
As children, many of us had a little wooden chest where we would store our favorite toys. The thrill of opening it up to reveal a treasure trove of playthings is a nostalgic memory for many. But what if you could recreate that same sense of excitement and wonder with your own child? With just a day’s worth of effort, you can build a beautiful wooden chest that will become a treasured keepsake for years to come.
And it’s not just limited to storing toys – these chests are perfect for stashing away happy memories from fun times spent together as a family.
Frozen Party Centerpieces
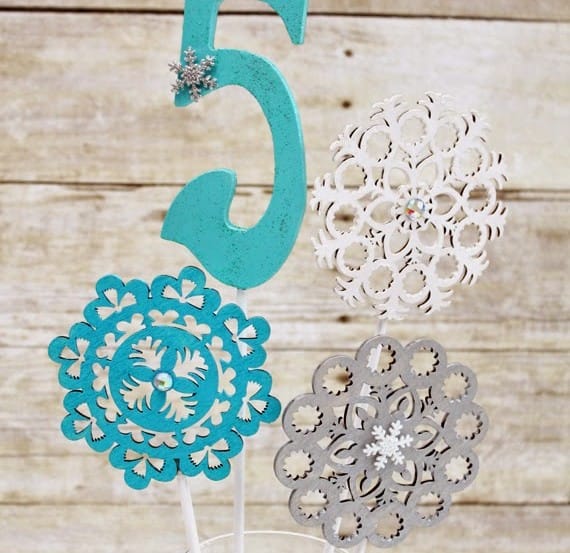
Frozen’s timeless appeal ensures that themed decor items will remain a staple for years to come. A Frozen-themed party centerpiece is an excellent addition to your table, serving as a versatile piece that can be easily stored away until Christmas and incorporated into your holiday decor. What’s more, the process of creating these centerpieces is enjoyable and inclusive, making it an ideal activity to share with your kids during a fun-filled afternoon craft session.
To get started, acquire wooden snowflake cutouts from online retailers or your local craft store. With some paint and embellishments, you’ll be able to create stunning snowflakes that add a touch of elegance to any setting.
Word Canvas Art Project

A creative DIY canvas board art project is an ideal gift idea for Mother’s Day or Father’s Day. This fun and customizable activity is perfect for kids to explore their artistic side. To get started, gather the following materials: wooden letters, paintbrushes, acrylic paint, a canvas board, and some glue. Your little ones can spend a delightful hour or two painting and decorating the board, unleashing their creativity.
Before you begin, spread out a few newspapers to protect your workspace from any potential mess that may arise when paint and kids come together!
DIY Desktop Essential Oil Display

I’m a big fan of essential oils. There’s something so calming about the sweet scent of vanilla or the peaceful aroma of lavender wafting through the air, thanks to a few drops in a diffuser. However, I’ve found that storing all those little bottles can be quite the challenge – it’s not uncommon for them to accumulate clutter on your countertop. That’s why I’m a fan of repurposing a wooden frame desktop display to keep my essential oils organized and within easy reach.
Not only does this solution help declutter my space, but it also adds a touch of rustic charm to my decor. The key is to find a sturdy linear picture frame that can support the weight of the bottles – once you’ve got that, you’re just a few simple steps away from having a beautiful and functional storage solution.
Easy Wood Ornaments to Make with Kids

Transform your Christmas tree with a personalized touch! If your unicorn-themed ornaments were a hit, or if you’re looking for a fun DIY project to make more, I’ve got a great idea for you. With the help of your kids, you can create a dozen custom wooden ornaments in no time. Imagine the joy on their faces when they find these special keepsakes years from now.
All you’ll need are some alphabet stickers, acrylic paint, and wood-shaped ornaments to get started.
Once you’re done, hang them up on your tree and admire your handiwork.
DIY Wooden Cats
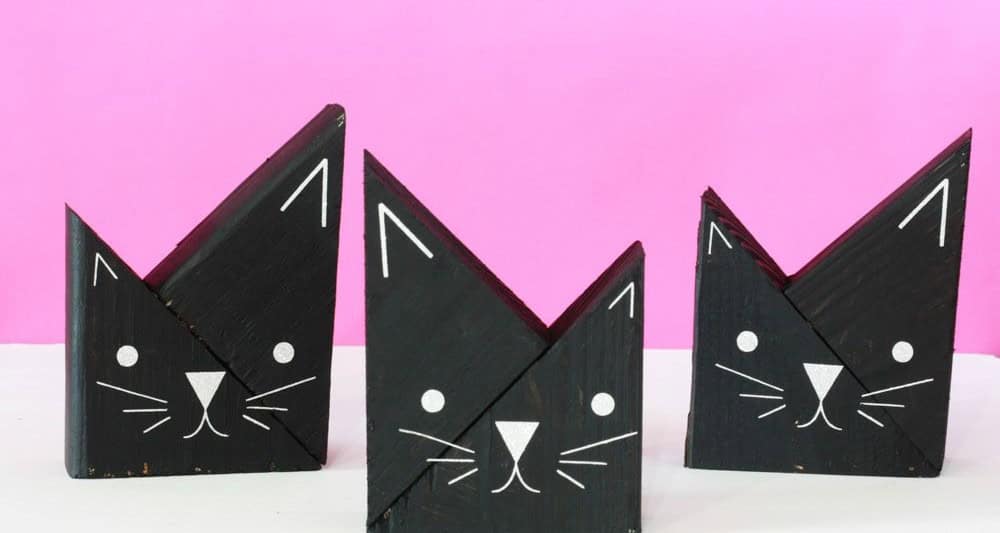
Whether you’re an animal lover or simply looking for unique home decor, this wooden craft project has got you covered. The intricate design and whimsical charm of a DIY wooden cat make it the perfect addition to any room. To bring this idea to life, you’ll need access to a Cricut machine, which can be found online. Additionally, a cat face blueprint will be necessary for precision.
By following the pattern and downloading the print, you’ll be well on your way to creating a one-of-a-kind decorative piece that’s sure to turn heads in just a few hours.
Wooden Bookmark
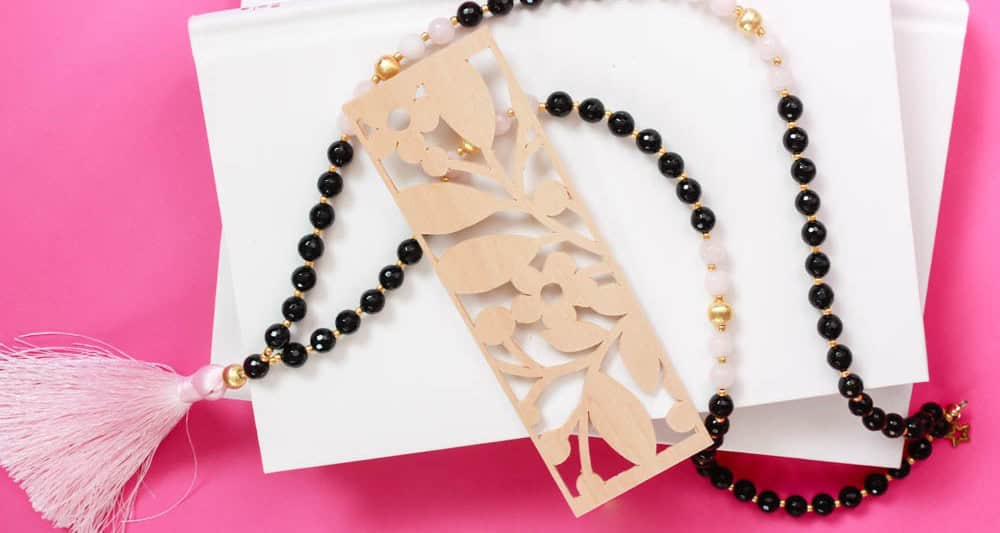
My affection for bookmarks has been unwavering, and I’m thrilled to introduce yet another creative iteration – this time, a wooden bookmark that exudes rustic charm. To bring this project to life, you’ll need to dust off your Cricut machine and prepare it for some precise cutting. Once you’ve selected the perfect wood plank and chosen a design to adorn it, you can proceed with the cutting process.
The final touch is adding a decorative tail featuring beads, twine, ribbon, or burlap – allowing you to personalize the bookmark to your heart’s content. For added inspiration, be sure to explore more DIY bookmark ideas!
DIY Cutting Board – Log Cabin
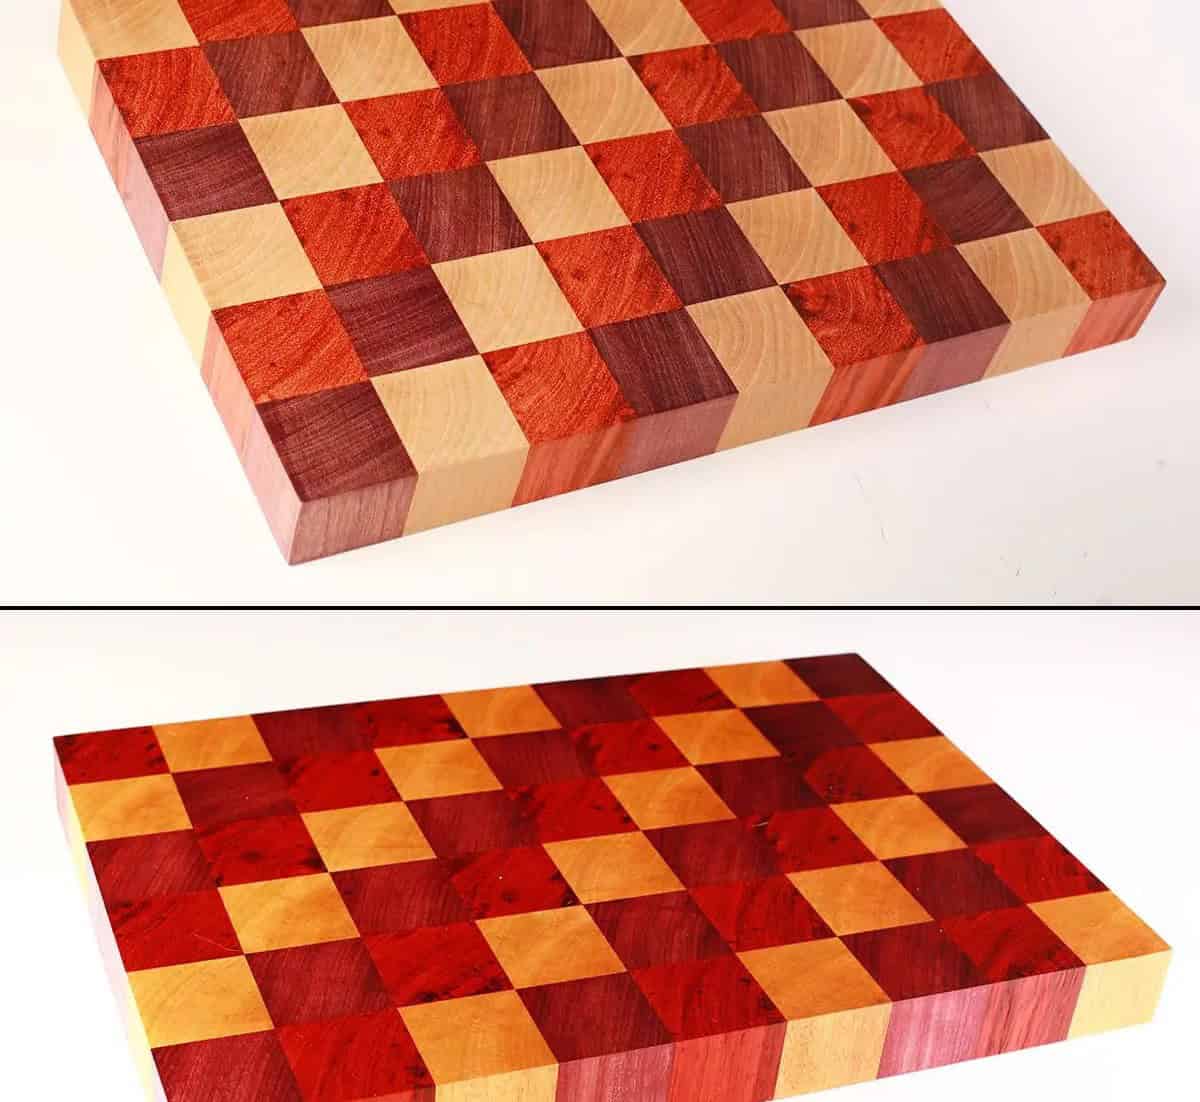
When I’m hosting guests, I like to bring out my trusty extra cutting board – it’s a game-changer for serving and entertaining. Not only can I use it as an everyday cutting board, but its versatility also makes it perfect for serving cheese and bread. In fact, since making your own cutting board is relatively straightforward, you can create another one specifically designed for serving purposes. To get the most out of it, just give it a quick rubdown with some butcher oil once it’s ready to use.
And if you’re looking for more creative projects that are perfect for men, be sure to check them out.
Pallet Wood Christmas Trees
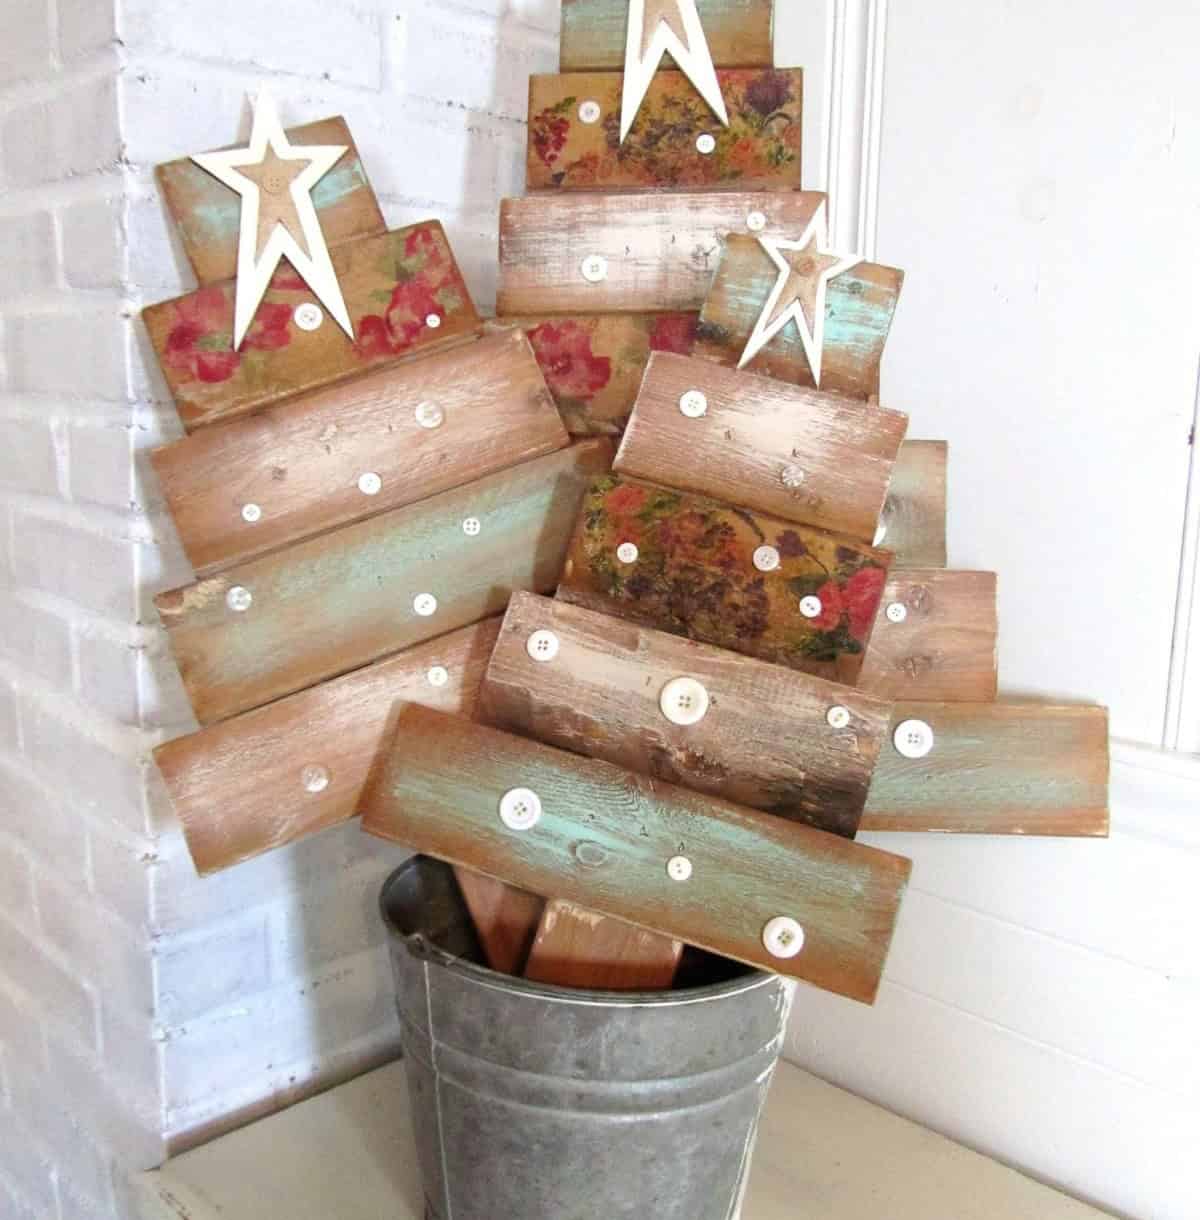
Crafting a unique and charming Christmas tree from reclaimed or repurposed wood is a truly personal experience. The process of designing and assembling the tree, carefully selecting and nailing each board into place, can be incredibly fulfilling. To add an extra layer of character to your creation, consider incorporating wood stains or paints in vibrant colors to bring out the natural beauty of the wood.
Whether you opt for a rustic finish or bold holiday hues, the end result is sure to be a one-of-a-kind masterpiece that reflects your personal style and adds warmth to any room.
DIY Quilt Ladder
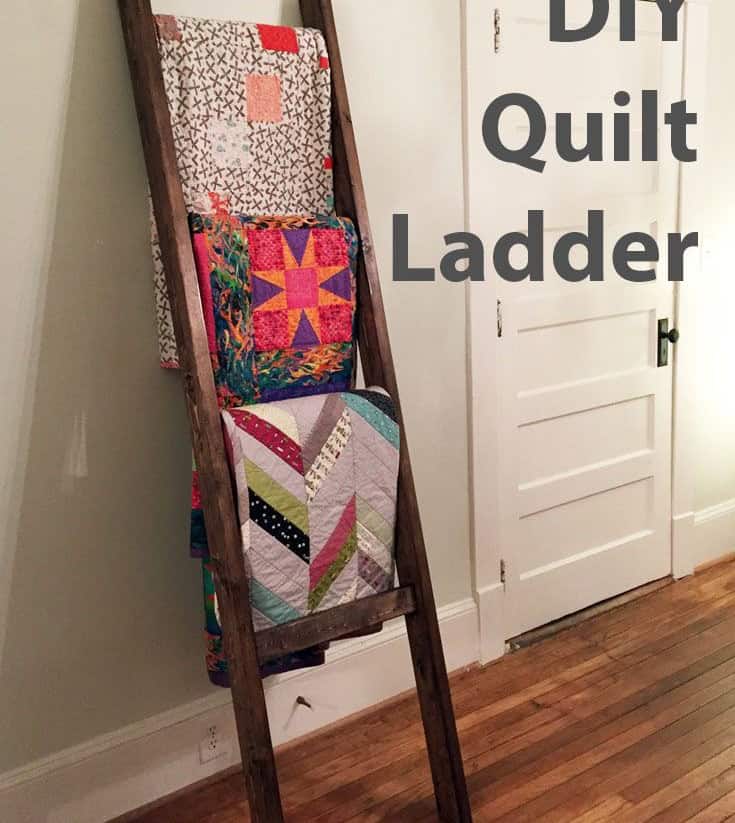
There’s a certain charm in elevating the humble quilt or blanket from a mere decorative piece to a statement-making fixture with a well-crafted ladder. Once you experience the convenience and aesthetic appeal of storing them on a ladder, there’s no turning back to the basket-folding days. The good news is that creating such a masterpiece is within reach for even the most novice woodworker.
With basic tools like saws, nails, screws, sandpaper, and some know-how, you can build your own quilt or blanket ladder from scratch. Just be sure to measure the wall space where you plan to place it before starting construction.
DIY Chicknic Table
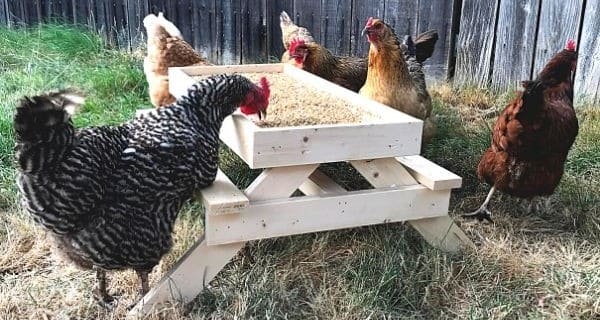
The notion of a ‘chicknic table’ – a picnic table designed specifically for chickens – may seem absurd at first, but bear with me. This innovative idea isn’t just a whimsical DIY project; it’s actually an ingenious way to create a chicken feeding station. So, how does one build such a contraption? The process begins by selecting the right lumber and designing the structure. Once constructed, you can give your chicknic table a fresh coat of paint.
And if you’re feeling extra adventurous, you might even find yourself adopting some feathered friends to populate your newly created chicken haven – no judgments here!
DIY Wood Coasters
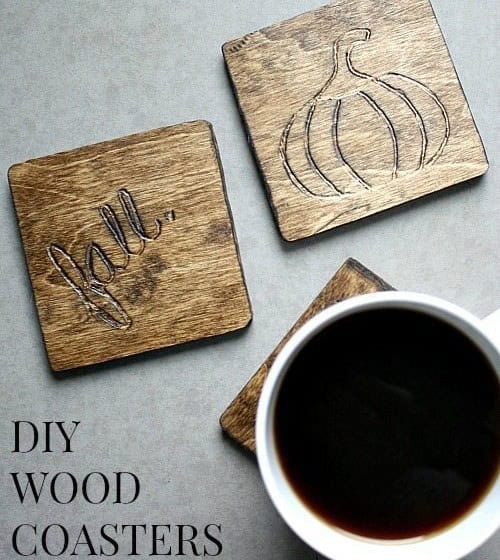
Consider upgrading from flimsy plastic coasters to sturdy wooden ones – they can add a delightful touch to any space. If you have wood slices leftover from previous projects, you can repurpose them as the base for your new coasters. Simply attach them to some jute twine or rope and store them away for future use. For inspiration, take a look at these creative DIY rope coaster tutorials!
Unicorn Christmas Ornament
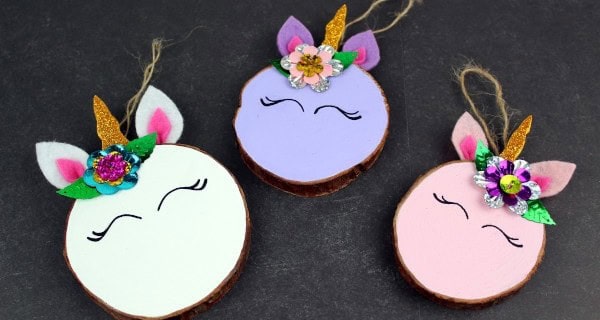
As you deck the halls with holly and decorate your Christmas tree, have you given thought to adorning it with unique ornaments? I’m excited to share a magical DIY project that’s sure to bring a touch of whimsy to your holiday decor: handmade unicorn Christmas ornaments! To get started, gather some essential materials – wood slices from [here](https://www. woodslice.
com/) will be the foundation of your creations, accompanied by felt scraps, glitter foam, and sequin confetti to transform them into majestic unicorns. Don’t forget the pièce de résistance: a sparkly horn that elevates these ornaments from mere horse-themed trinkets to truly magical keepsakes. If you’re hooked on all things unicorn and envisioning an enchanted celebration this year, be sure to explore [27 delightful unicorn crafts](https://www. google. com/search?
q=27+delightful+unicorn+crafts) for endless inspiration!
Rustic Wood Signs
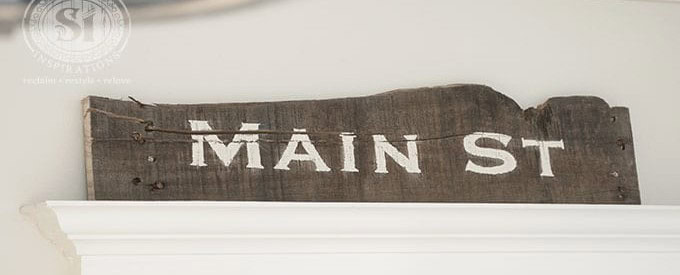
Perhaps you’ve collected a plank of wood from a sentimental source – a cherished boat that’s been retired, or an old barn that’s been dismantled. Whatever the origin, it’s likely held a special place in your heart. Why not take that piece of history and transform it into a beautiful, rustic wooden sign board to display proudly on your mantle? Not only will it add a touch of warmth and character to your home, but it’ll also serve as a poignant reminder of memories past.
It’s a unique way to repurpose something meaningful, turning it into a treasured keepsake that tells a story.
Stained Wood Tray
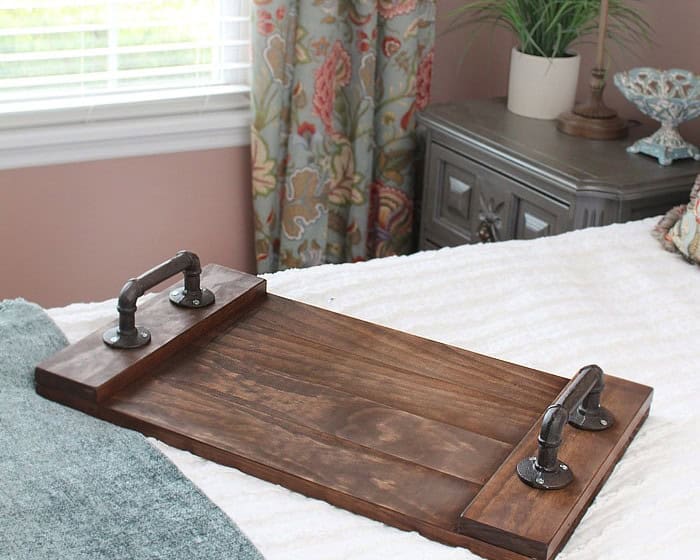
While store-bought wooden trays may come with a hefty price tag, making one yourself is not only a budget-friendly option but also a rewarding DIY project.
Creating a wooden tray or serving board is surprisingly straightforward and requires minimal materials. Once you’ve selected your wood of choice, the next step is to acquire some sturdy handle pulls from [insert link]. After applying a wood stain of your preference and allowing it to fully dry, secure the handles in place.
The best part? These trays make for fantastic gift ideas, offering a thoughtful and unique present for friends and loved ones.
Faux Barn Wood Christmas Wreath Sign
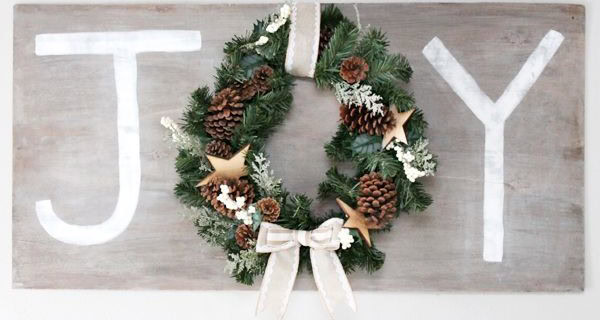
As the festive season approaches, it’s time to deck the halls with boughs of holly, but why not take it up a notch by creating a sign that spreads cheer? To get started, gather your essential supplies: a plywood board, wood wax, and sandpaper. You’ll also need your trusty decorating arsenal – ribbons, paint, and brushes. For inspiration, take a look at these 20 unique Christmas wreath ideas before crafting your own special creation.
Woodbox Centrepiece
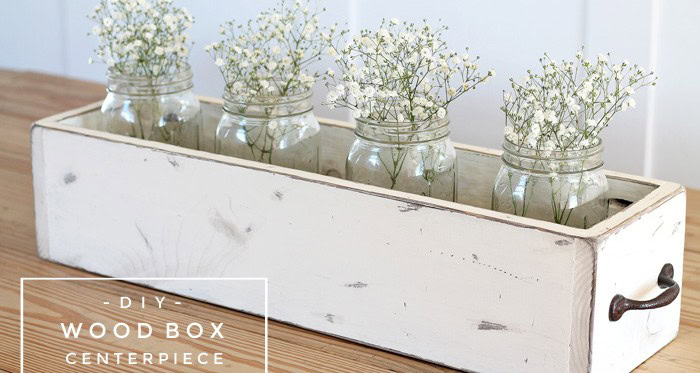
Transform your dining table with a stunning wooden box centerpiece that’s perfect for everyday elegance. You don’t need a special occasion to create a beautiful display. Simply gather a few essential items and get creative! Start by selecting a few mason jars, those versatile vessels that can be used for so many purposes. Here, they’ll serve as charming vases for your chosen blooms or greenery.
You can fill them with fresh flowers, ferns, reed, pampas grass, potpourri, or even pillar candles to create a warm ambiance. Once you’ve assembled the wooden box, place your mason jars inside and add your decorative elements. For added visual interest, consider layering different textures and heights to create a unique focal point on your dining table.
Wood slice clock
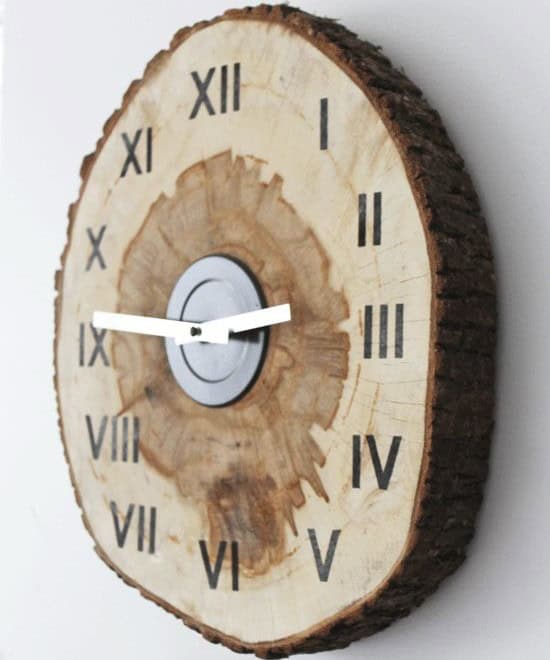
To bring this DIY project to life, start by gathering a few wood slices from your previous crafting endeavors. Once you have them at hand, it’s time to turn your attention to the clock mechanism. You can either purchase these online or repurpose components from an older clock that’s no longer in use. With the mechanism ready, proceed to hollow out the center of each wood slice, allowing the mechanism to fit snugly within.
With this crucial step complete, you’re now ready to craft the numbers that will appear on the clock face. After assembling all the pieces, take a moment to admire your handiwork and then proudly display your new wooden timepiece.
Wood snowflake
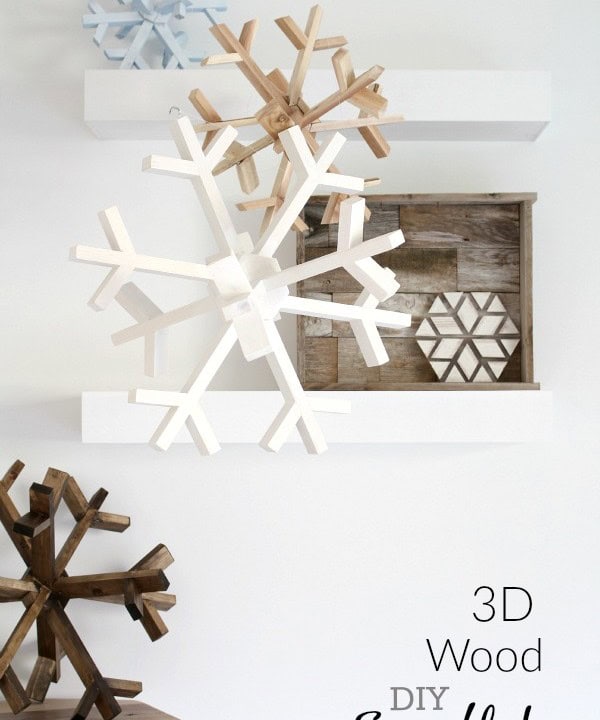
As you reminisce about those charming Frozen-themed placemats, get ready to add another delightful craft project to your Winterland decor. A 3D snowflake would be a stunning addition to your shelves or mantel, where its intricate details can be admired by all. To bring this design to life, simply create the snowflake’s template, determine its dimensions, and begin carving out time – as well as the wood itself, naturally.
For an extra touch of whimsy, consider staining the wood a warm hue or painting it a soft silvery blue before arranging the snowflake on your mantle for all to enjoy.
Log lamp
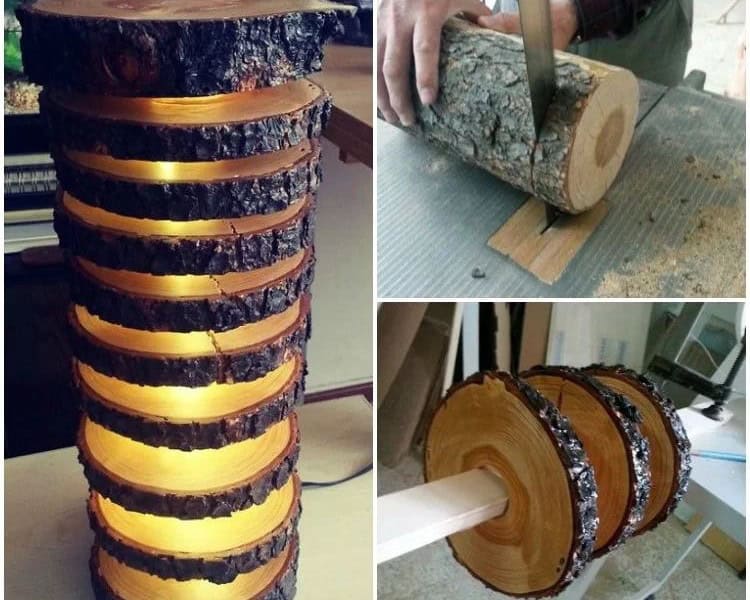
Create a show-stopping floor-length lamp in your living room without breaking the bank or sacrificing quality. Rather than settling for an ordinary store-bought option, why not craft one yourself over a relaxing weekend of DIY woodworking? Gather your trusty toolkit, select the perfect wooden materials and source a sturdy plexiglass tube from a reputable supplier.
Don your protective gear, and begin shaping your wood into the foundation of a stunning lamp that will undoubtedly become a focal point in your home.
DIY Rustic Scrap Wood Snowman
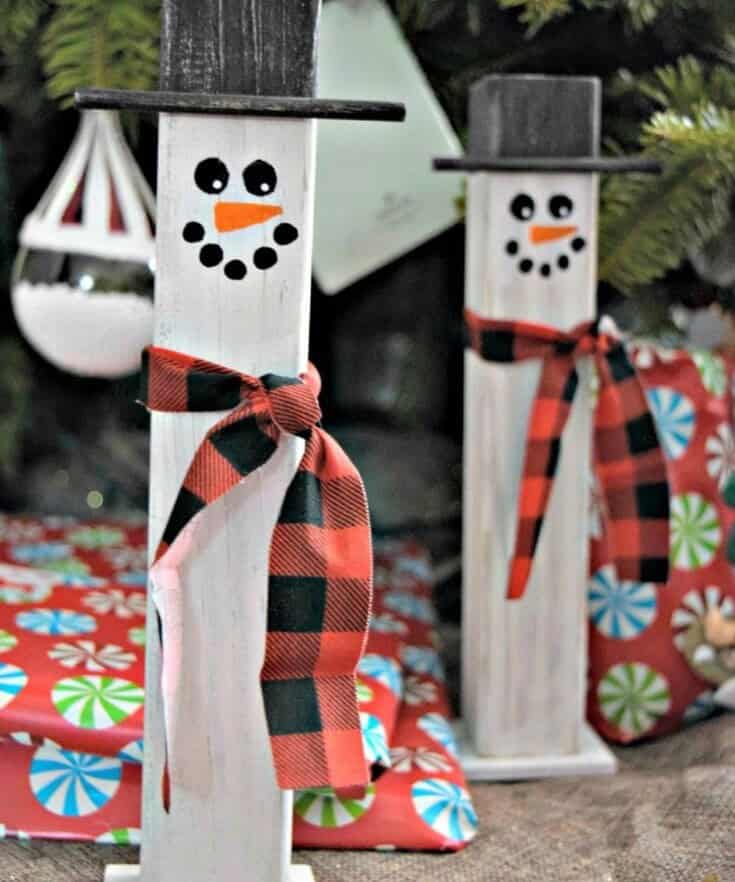
Transform your home into a winter wonderland all year round with a charming DIY wooden snowman decoration! Ditch the idea of waiting for snow to make a snowman and instead, get creative with some scrap wood from your local hardware store. The process is simple: design, paint, and embellish your wooden snowman to bring rustic charm and Christmas cheer to your home – even on balmy summer days. What’s not to love about this delightful project?
Picture frame
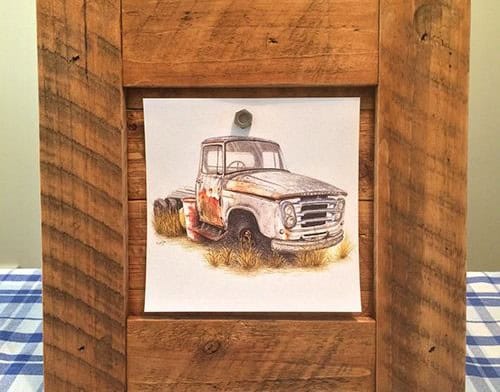
Throughout my living room alone, I have a collection of photo frames numbering over a dozen. It’s hard to estimate the total count, but it’s safe to say there are many more scattered throughout the rest of my house. Despite having an extensive DIY project like that floor log lamp under my belt, creating this easy and quick picture frame will be a breeze. As you’ve likely already gathered the necessary materials for this project, you can dive right in.
One of the best aspects of this DIY is its flexibility – you can use repurposed wood or scraps from previous projects, which not only reduces waste but also adds a touch of character to your finished piece.
Rustic Pencil Holder
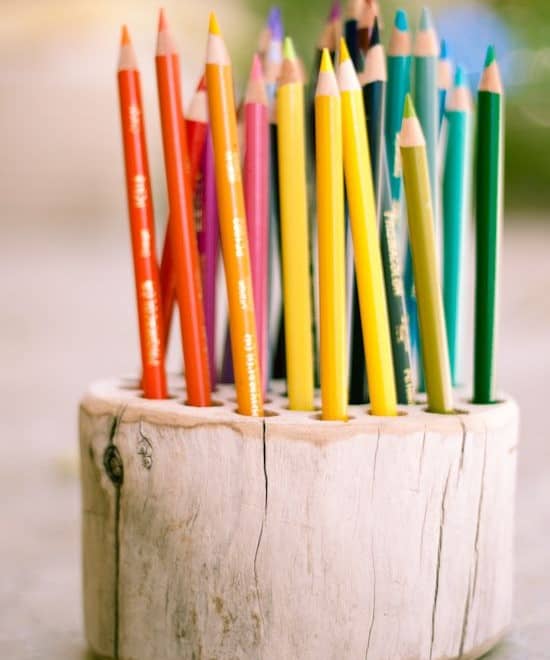
Transforming ordinary wood scraps into functional items is an art form that can bring joy to the most mundane spaces. A simple yet delightful project is creating a wooden pencil holder from a discarded block of wood. This charming DIY endeavour not only eliminates the need for chipped coffee mugs, but also adds a touch of rustic elegance to your workspace.
The process itself is remarkably straightforward: simply drill a few holes into the wood, taking care not to split it in two, and you’ll have a beautifully crafted pencil holder in no time. If you’re looking for more innovative ways to store your writing utensils, consider upcycling toilet rolls into a unique pencil case – the perfect combination of creativity and practicality.
Rustic Wood Cake stand

If rustic-themed weddings have caught your attention lately, you’ve probably noticed the abundance of wooden cake stands being used as a unique base for these sweet treats. While these artisanal creations can be quite pricey at specialty stores, there’s no reason why you can’t create one yourself with a little DIY know-how.
The key to building a successful wooden cake stand is in leveling your log, which requires more than just a gentle sanding session.
To get started, gather your toolkit and let the creative process begin.
DIY Word String Art Idea
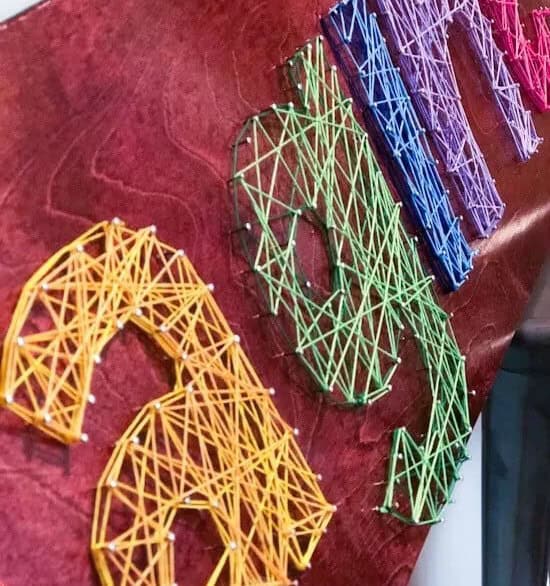
If you’ve been scrolling through social media, you may have come across string word art projects that showcase creative uses of text. But what’s often overlooked is just how accessible this craft is – requiring minimal supplies and effort to get started.
To begin with, gather some embroidery string from a reliable source. You’ll need a few dozen linoleum nails, which are readily available at most hardware stores or online marketplaces for a fraction of the cost.
Before long, you’ll also want to find a suitable piece of wooden board – and what better way to repurpose any leftover wood scraps lying around? Once you have these essentials in place, simply grab your hammer and start nailing down those letters!
Rustic Home State Art Blocks
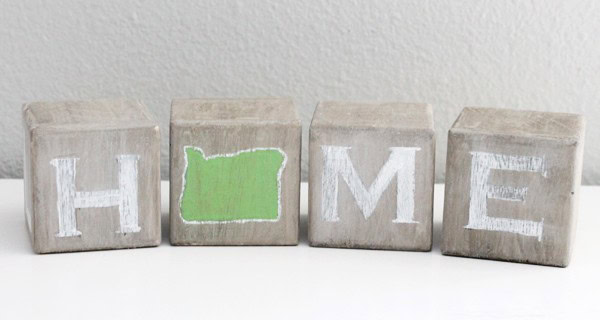
The notion that home is where the heart is has some truth to it. However, I believe that for many of us, our idea of home is closely tied to a particular object or piece of decor that holds sentimental value. In my case, that object is these rustic wooden blocks that double as a DIY project and accent decor piece. They can be placed proudly on your mantle, serving as a conversation starter and family heirloom in the making.
One of the best things about this project is its versatility – it can be tailored to fit any home’s aesthetic. To get started, head over to [insert link here] to acquire the wooden blocks themselves. If you’re feeling extra meticulous, consider using a fine-grit sanding sponge to smooth out any rough edges.
Once you’ve gathered your supplies, the fun part begins: painting!
DIY Wood Placemats
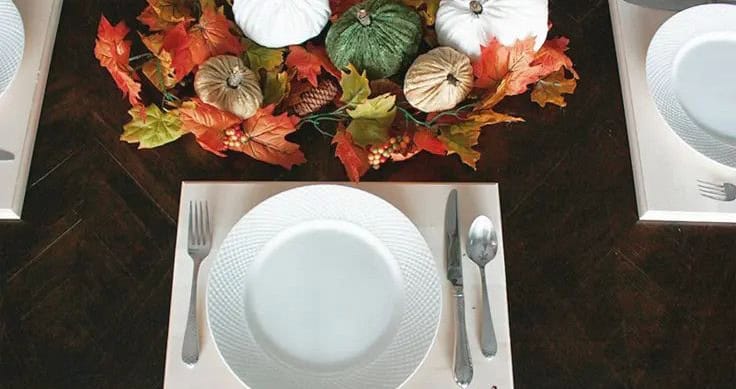
Placemats can significantly impact the ambiance of your dining table. Not only do they set the tone for the entire space, but they also provide an opportunity to incorporate a theme or accent piece. One particularly versatile option is wood placemats, which seamlessly blend in or serve as a striking focal point. This DIY project offers the added benefit of personalization through customizable words.
Imagine hosting a party and presenting your guests with not only a thoughtful place card but also a beautiful, unique placemat – all rolled into one stylish wooden package.